TeamPass is a collaborative password manager used for securely managing and sharing passwords among team members. Utilizing a MySQL/MariaDB database, TeamPass provides a robust tool to customize password access based on user roles. As free and open-source software, it offers organized password management with features like data encryption, personal folders, tree structures, user privileges, role definitions, and more.
In this tutorial, we’ll guide you through the installation of the TeamPass Password Manager on Ubuntu 20.04, including securing it with a Let’s Encrypt SSL certificate.
Prerequisites
- Ubuntu 20.04 server.
- A valid domain name pointed to your server’s IP.
- Root password configured on the server.
Install LAMP Server
First, ensure that your server has the LAMP stack installed. If not, you can set it up along with other necessary packages using:
apt-get install apache2 mariadb-server php7.4 php7.4-cli libapache2-mod-php7.4 php7.4-mysql php7.4-curl php7.4-mbstring php7.4-bcmath php7.4-common php7.4-gd php7.4-xml git wget -y
After installing the LAMP stack, proceed to modify the php.ini file to tweak some settings:
nano /etc/php/7.4/apache2/php.ini
Adjust the following lines accordingly:
memory_limit = 256M
upload_max_filesize = 100M
max_execution_time = 360
date.timezone = Asia/Kolkata
Once modifications are complete, proceed to the subsequent steps.
Create TeamPass Database
Now, create a database and user specifically for TeamPass. Begin by accessing the MariaDB shell:
mysql -u root
Create the database and the user with the following commands:
MariaDB [(none)]> create database teampass;
MariaDB [(none)]> grant all privileges on teampass.* to teampass@localhost identified by "password";
Flush privileges and exit MariaDB:
MariaDB [(none)]> flush privileges;
MariaDB [(none)]> exit;
With the database in place, proceed to the next stage.
Download TeamPass
Download the latest TeamPass version directly from the Git repository to your Apache web root:
cd /var/www/html
git clone https://github.com/nilsteampassnet/TeamPass.git
After downloading, adjust permissions and ownership:
chown -R www-data.www-data /var/www/html/TeamPass/
chmod -R 775 /var/www/html/TeamPass/
With these changes, proceed accordingly.
Configure Apache Web Server
Set up an Apache virtual host file for TeamPass:
nano /etc/apache2/sites-available/teampass.conf
Include these configurations:
<VirtualHost *:80>
    ServerAdmin admin@example.com
    DocumentRoot /var/www/html/TeamPass
    ServerName teampass.linuxbuz.com

    <Directory /var/www/html/TeamPass>
        Options FollowSymlinks
        AllowOverride All
        Require all granted
    </Directory>

    ErrorLog ${APACHE_LOG_DIR}/teampass_error.log
    CustomLog ${APACHE_LOG_DIR}/teampass_access.log combined

</VirtualHost>
Save your changes, then enable the virtual host and restart Apache:
a2ensite teampass
systemctl restart apache2
With Apache configured, advance to the next steps.
Secure TeamPass with Let’s Encrypt SSL
Begin by installing Certbot, the Let’s Encrypt client:
apt-get install python3-certbot-apache -y
Once installed, secure your domain with a Let’s Encrypt SSL certificate:
certbot --apache -d teampass.linuxbuz.com
Follow the provided prompts to complete the SSL setup:
Enter email address (used for urgent renewal and security notices) (Enter 'c' to cancel): hitjethva@gmail.com

Please read the Terms of Service at
https://letsencrypt.org/documents/LE-SA-v1.2-November-15-2017.pdf. You must agree to register with the ACME server at https://acme-v02.api.letsencrypt.org/directory
(A)gree/(C)ancel: A

Would you be willing to share your email address with the Electronic Frontier Foundation... (Y)es/(N)o: Y
Finally, choose whether to redirect all HTTP traffic to HTTPS:
Please choose whether or not to redirect HTTP traffic to HTTPS, removing HTTP access.
1: No redirect
2: Redirect
Select the appropriate number [1-2] then [enter] (press 'c' to cancel): 2
Upon successful setup, you’ll receive a confirmation message detailing the certificate path and its renewal steps.
Access TeamPass Web UI
Visit https://teampass.linuxbuz.com to access the TeamPass web interface. You will be greeted by the welcome screen:
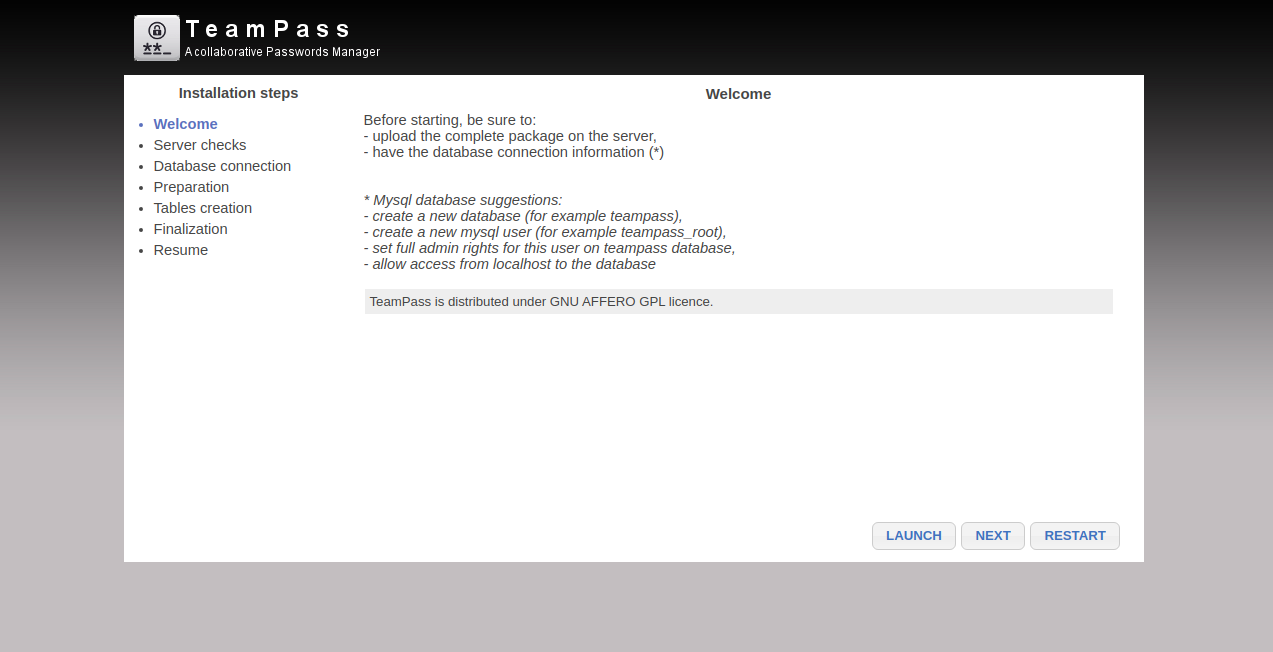
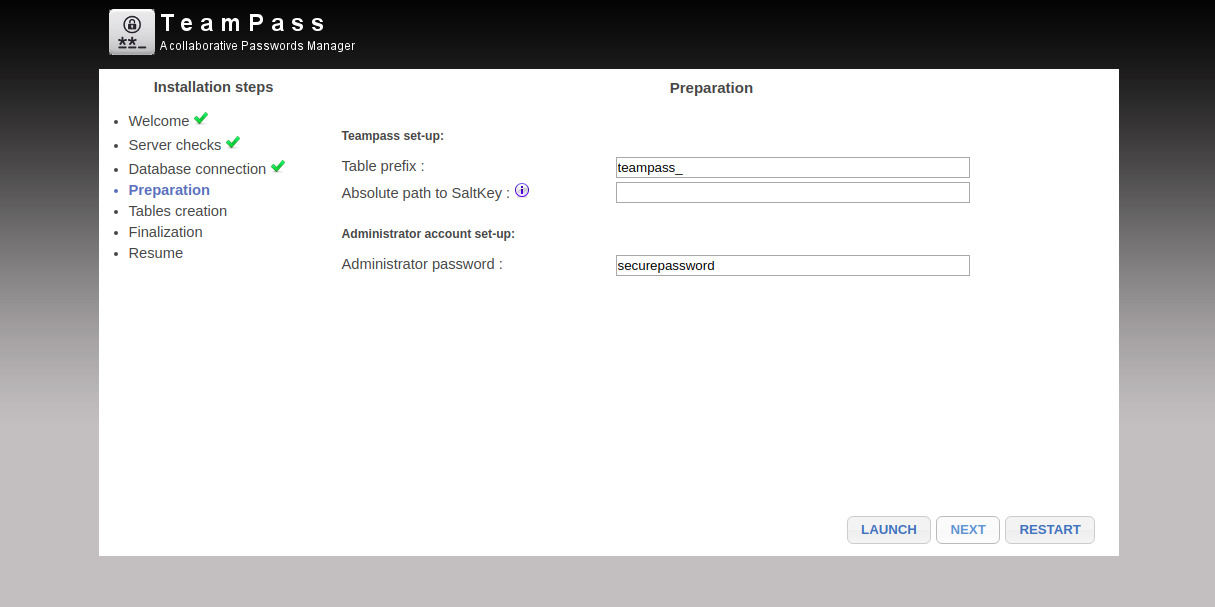
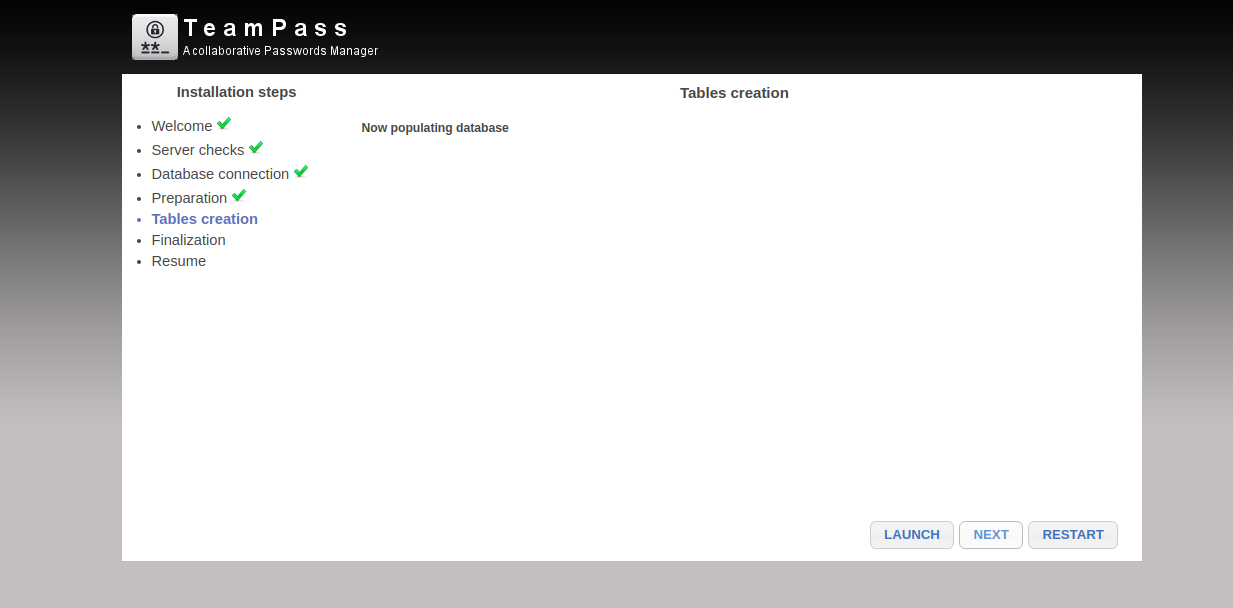
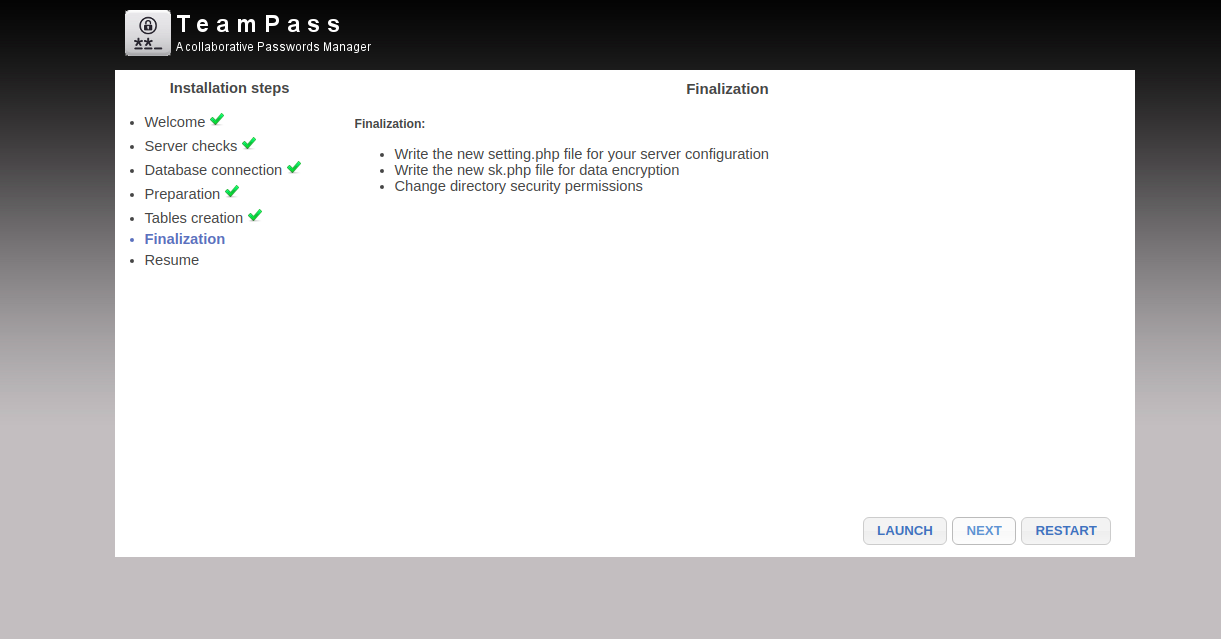
Follow the prompts shown in the images below to complete the installation:
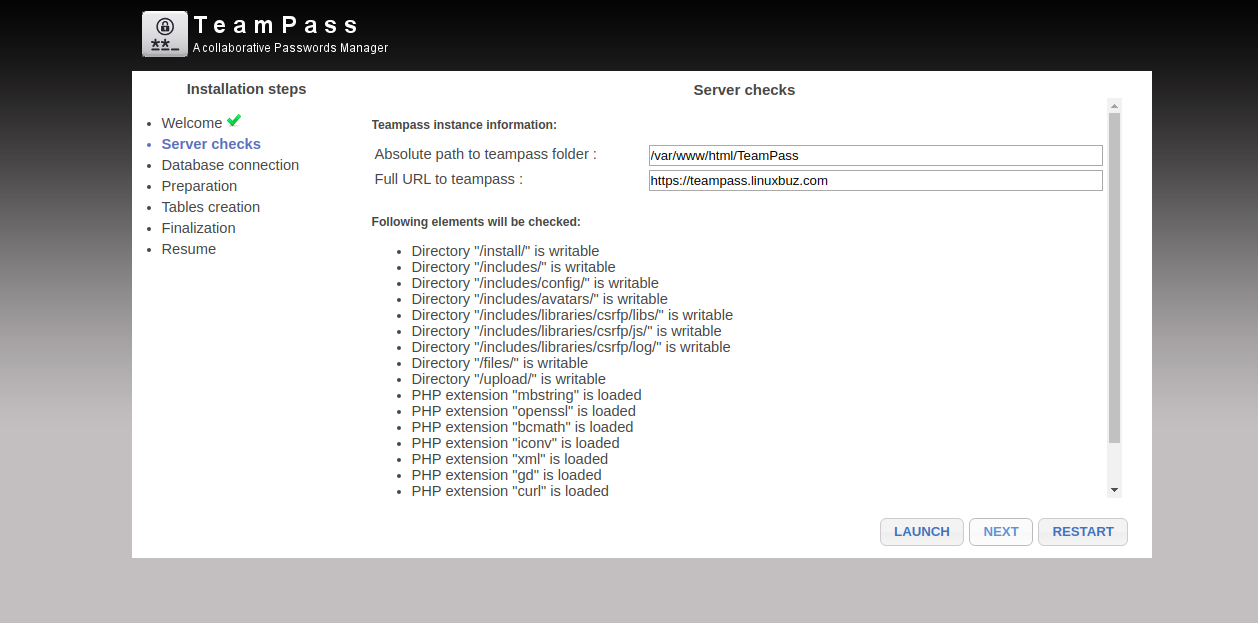
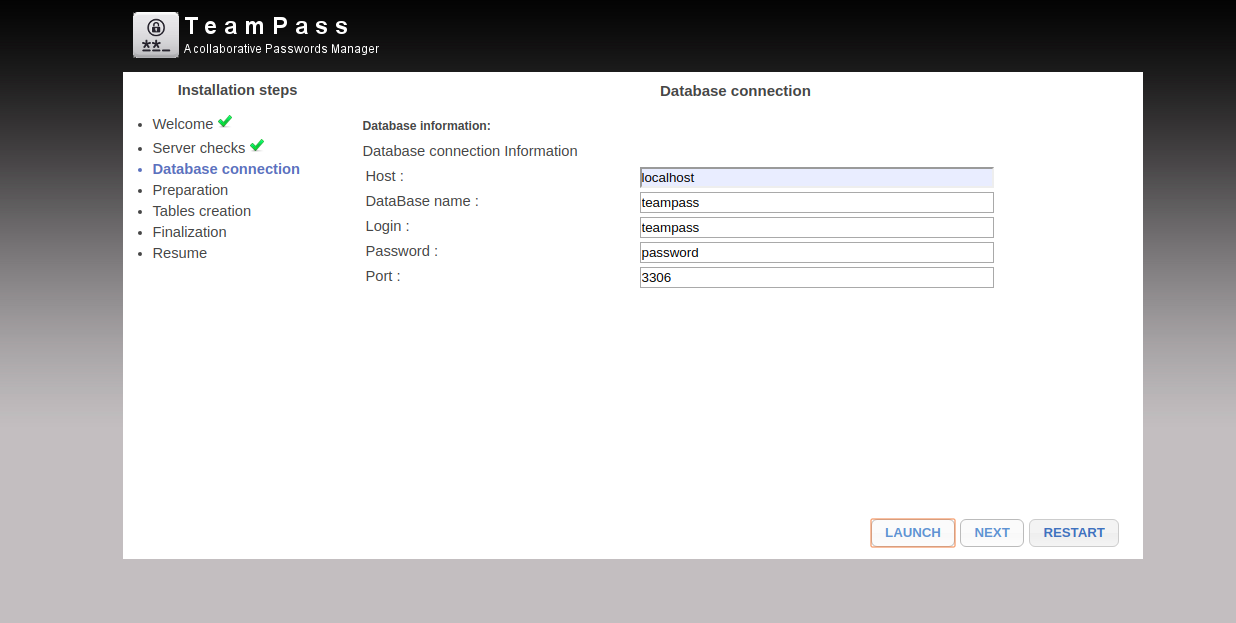
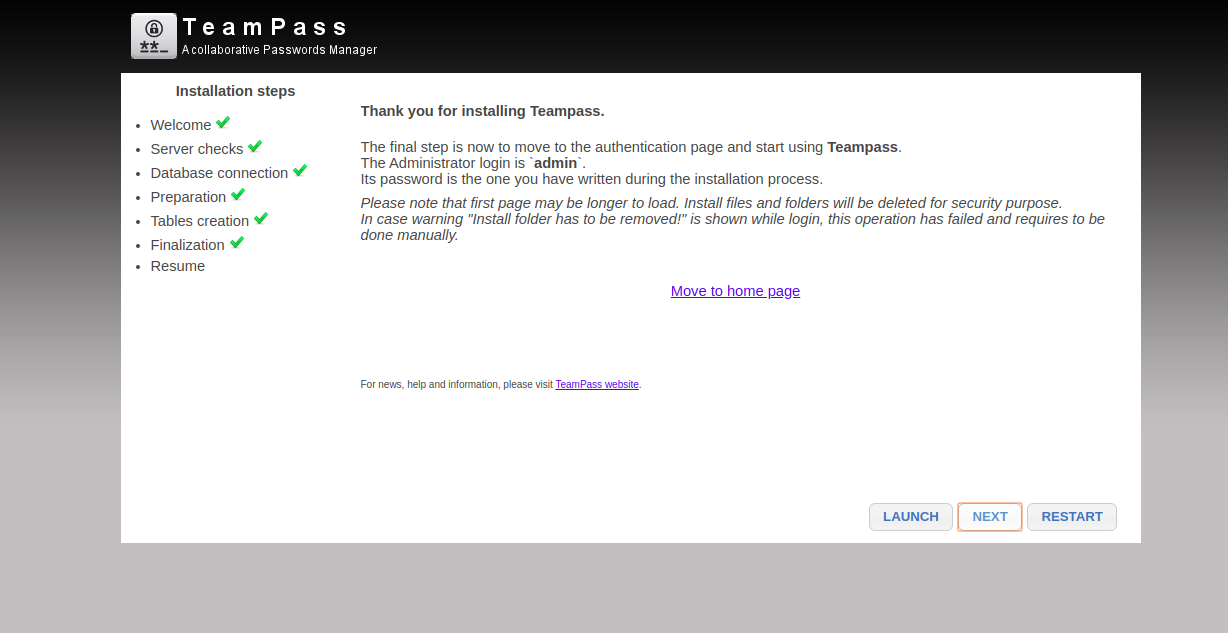
When prompted, click on the Move to home page button to access the TeamPass login screen:
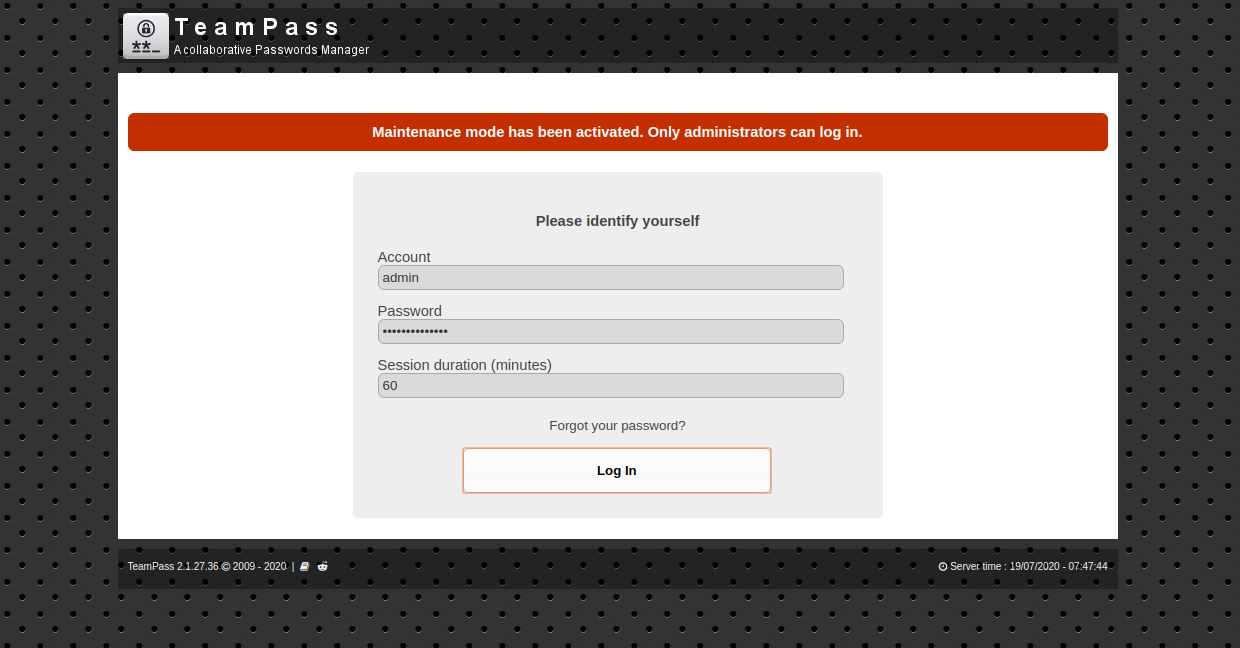
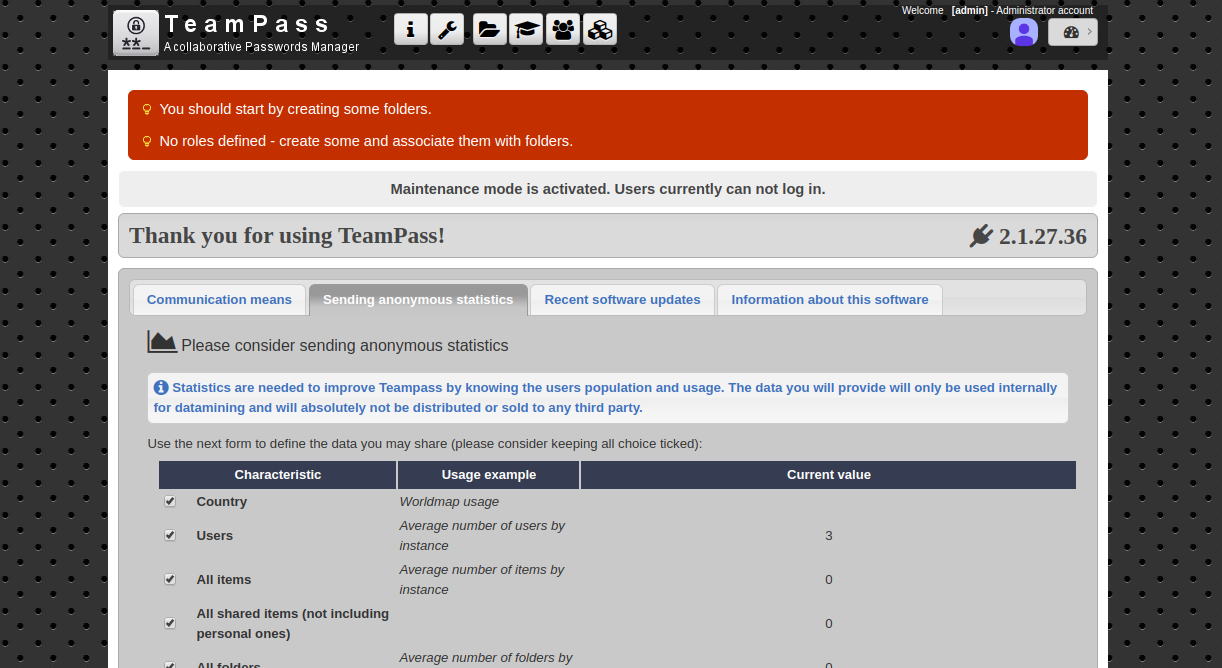
Log in using your admin username and password created during setup to access the TeamPass dashboard:
Conclusion
By following this guide, you’ve successfully installed the TeamPass password manager on Ubuntu 20.04 and secured it with Let’s Encrypt SSL. Explore TeamPass for deployment in your production environment. For detailed information, refer to the TeamPass documentation.
Frequently Asked Questions (FAQ)
What is TeamPass?
TeamPass is an open-source collaborative password manager designed for teams to share and manage passwords securely using customizable access rights.
Why use Let’s Encrypt?
Let’s Encrypt provides free SSL/TLS certificates, enhancing website security by enabling HTTPS, which encrypts data transferred between your site and users.
Is TeamPass suitable for production environments?
Yes, with the completion of necessary security measures like SSL certification and user role definitions, TeamPass can be a solid choice for production use.
How are passwords stored in TeamPass?
Passwords in TeamPass are stored securely using encryption within a MySQL or MariaDB database, ensuring protection against unauthorized access.
Where can I find more information?
You can find comprehensive details and guidance in the TeamPass official documentation.
