Puppet is a leading centralized configuration management and automation tool. Designed to aid DevOps teams with configuration management tasks, Puppet allows seamless deployment of servers and applications. All configurations are maintained on a centralized “Puppet Server,” from which “Agent” nodes pull and apply the defined state.
By default, all communications between the “Puppet Server” and “Agent” nodes are secured using SSL/TLS certificates. Puppet utilizes its Domain Specific Language (DSL) which closely mirrors Ruby syntax for system configuration descriptions.
This comprehensive guide walks you through installing Puppet Server and Agent on AlmaLinux servers. We’ll also cover the basics of deploying a LAMP Stack using Puppet.
Prerequisites
Ensure you meet the following prerequisites before you begin:
- Two AlmaLinux servers are required for this setup:
- hostname: pp-server – IP address: 192.168.10.20 – Role: Puppet Server
- hostname: agent1 – IP address: 192.168.10.21 – Role: Puppet Agent
- Access to a non-root user with sudo privileges.
Setup /etc/hosts File
Before proceeding with Puppet installation, it’s beneficial to use Fully Qualified Domain Names (FQDN) instead of IP addresses to set up your Puppet environment.
This example will guide you through configuring FQDNs for both the Puppet Server and Agent.
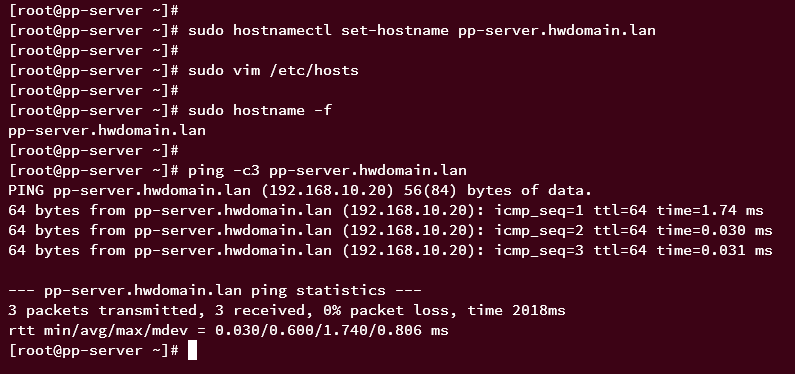
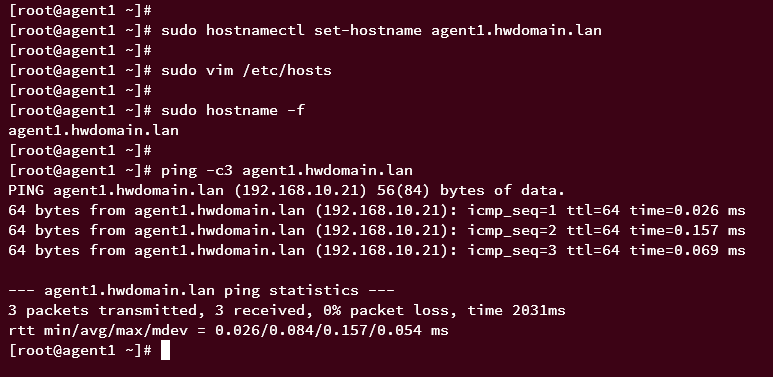
Start by configuring the FQDNs on each server using the following commands.
Execute this on the Puppet Server:
sudo hostnamectl set-hostname pp-server.hwdomain.lan
And on the Agent machine:
sudo hostnamectl set-hostname agent1.hwdomain.lan
Edit the /etc/hosts file with the command:
sudo nano /etc/hosts
Add these entries, replacing the examples with your specific IP addresses and FQDNs:
192.168.10.20 pp-server.hwdomain.lan pp-server
192.168.10.21 agent1.hwdomain.lan agent1
Close and save the file.
Ensure the FQDNs are set correctly by running:
sudo hostname -f
Use ping to verify the hostname addresses:
ping -c3 pp-server.hwdomain.lan
ping -c3 pp-server
ping -c3 agent1.hwdomain.lan
ping -c3 agent1
Configuration of the Puppet Server and Agent with hostnames and FQDNs is complete.
Installing Puppet
The next step is to install the Puppet Server and Agent. Here’s how to add the Puppet repository to both machines and install the appropriate packages.
Adding Puppet Repository
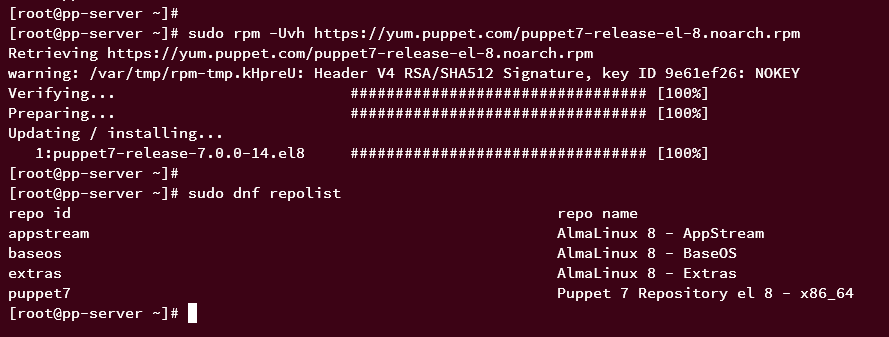
Execute the following command on both the Puppet Server and Agent to add the Puppet repository:
sudo rpm -Uvh https://yum.puppet.com/puppet7-release-el-8.noarch.rpm
Verify the repository addition as follows:
sudo dnf repolist
Installing and Configuring Puppet Server
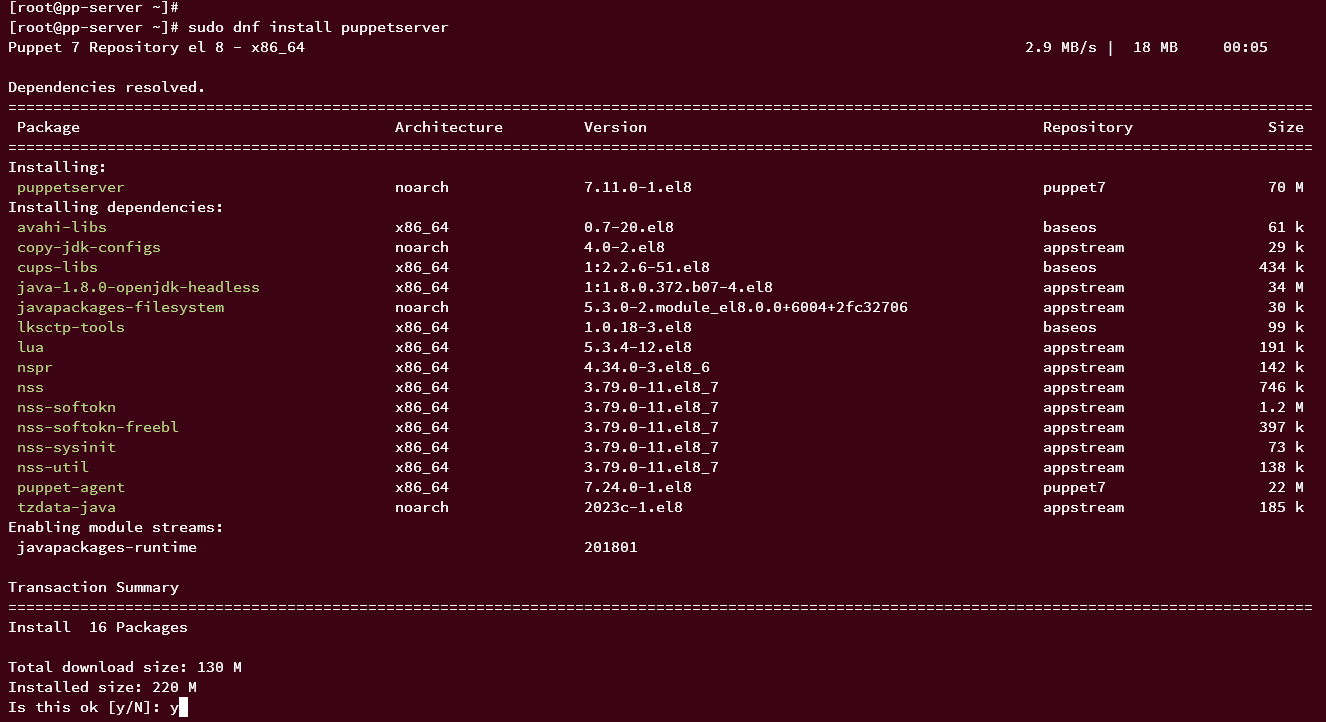
To install the Puppet Server, execute:
sudo dnf install puppetserver
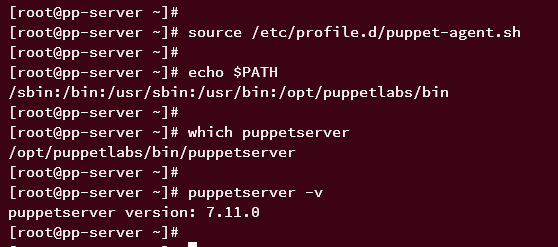
Following installation, reload the Puppet profile and confirm the environment path:
source /etc/profile.d/puppet-agent.sh
echo $PATH
Verify the Puppet Server path and version with:
which puppetserver
puppetserver -v
Installing Puppet Agent
Install the Puppet Agent by executing the following on the Agent machine:
sudo dnf install puppet-agent

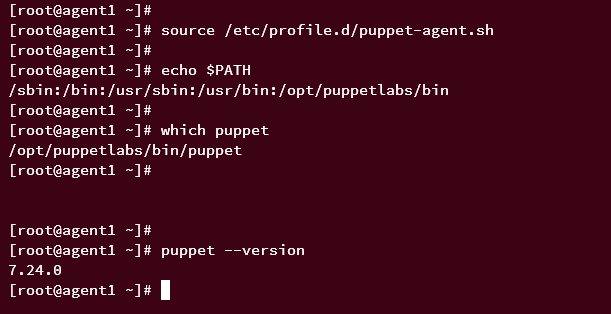
Load the Puppet profile and confirm the system path:
source /etc/profile.d/puppet-agent.sh
echo $PATH
Check the Puppet Agent path and version:
which puppet
puppet -v
Initialize and enable the Puppet service on the Agent machine:
sudo systemctl start puppet
sudo systemctl enable puppet
sudo systemctl status puppet

Configuring Puppet Server
With installations complete, configure Puppet Server by modifying settings in /etc/sysconfig/puppetserver:
sudo nano /etc/sysconfig/puppetserver
Ensure sufficient memory allocation:
# Modify this if you'd like to change the memory allocation, enable JMX, etc
JAVA_ARGS="-Xms2g -Xmx2g"
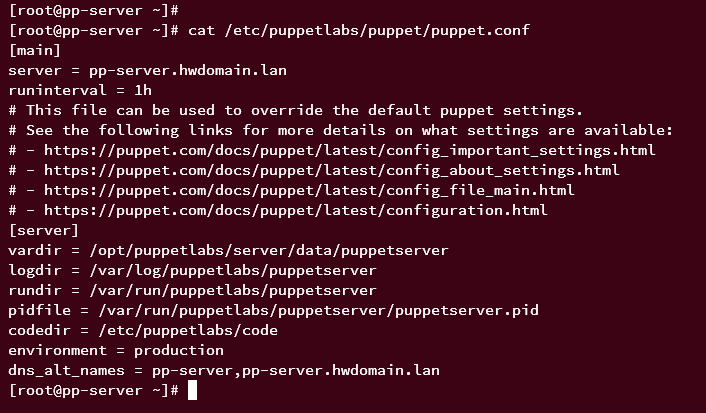
Set the server name and run interval:
puppet config set server pp-server.hwdomain.lan --section main
puppet config set runinterval 1h --section main
Define Puppet Server settings:
puppet config set environment production --section server
puppet config set dns_alt_names pp-server,pp-server.hwdomain.lan --section server

Display the Puppet configuration file:
cat /etc/puppetlabs/puppet/puppet.conf
To activate these changes, reload the daemon and start the service:
sudo systemctl daemon-reload
sudo systemctl start puppetserver
sudo systemctl enable puppetserver
Verify that the Puppet Server is running:
sudo systemctl status puppetserver

Configuring Firewalld on Puppet Server
Ensure Firewalld is configured to permit traffic on port 8140:
sudo firewall-cmd --add-source=192.168.10.0/24 --permanent
sudo firewall-cmd --add-port=8140/tcp --permanent
sudo firewall-cmd --reload
sudo firewall-cmd --list-all
Registering Puppet Agent to the Puppet Server
Follow these steps to register the Puppet Agent:
- Configure Puppet Server details on the agent.
- Restart the Puppet Agent service.
- Submit a certificate request from Puppet Agent.
- Approve the certificate from the Puppet Server.
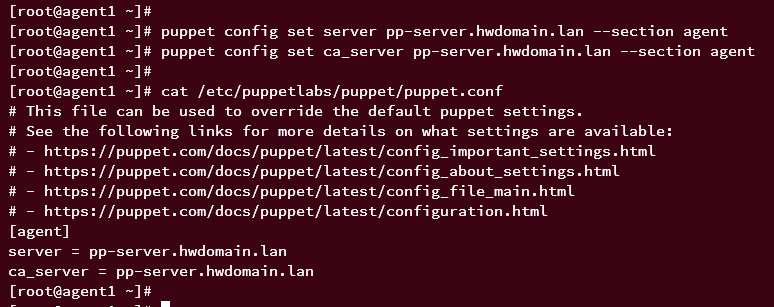
Set the Puppet Server and CA details:
puppet config set server pp-server.hwdomain.lan --section agent
puppet config set ca_server pp-server.hwdomain.lan --section agent
Validate the /etc/puppetlabs/puppet/puppet.conf file:
cat /etc/puppetlabs/puppet/puppet.conf
Restart the Puppet Agent:
sudo systemctl restart puppet
sudo systemctl status puppet

Initiate SSL configuration:
puppet ssl bootstrap

Approve the certificate for the Agent from the Server:
puppetserver ca list --all
puppetserver ca sign --certname agent1.hwdomain.lan

Verify signed certificates:
puppetserver ca list --all

Creating First Puppet Manifest
Begin automating application deployment by creating a Puppet manifest script for installing the LAMP stack on the Puppet Agent.
Create a project directory and manifest files on the Server:
cd /etc/puppetlabs/code/environments/production/
mkdir -p modules/lamp/{manifests,files}
Add your LAMP stack installation script to modules/lamp/manifests/init.pp:
class lamp {
Package { ensure => 'installed' }
$lamppackages = [ 'httpd', 'mariadb-server', 'php' ]
package { $lamppackages: }

Service { ensure => 'running', enable => 'true'}
$lampsvc = [ 'httpd', 'mariadb' ]
service { $lampsvc: }

file { '/var/www/html/index.html':
ensure  => file,
content => "<h1><center>Welcome to httpd - Managed by Puppet</center></h1>",
mode    => '0644',
}

file { '/var/www/html/info.php':
ensure  => file,
content => "<?php phpinfo(); ?>",
mode    => '0644',
}

}
Include your manifest in the Puppet site configuration by editing manifests/sites.pp:
node 'agent1.hwdomain.lan' {
    include lamp
}
Applying Puppet Manifests on Agent
On the Agent machine, execute:
puppet agent -t

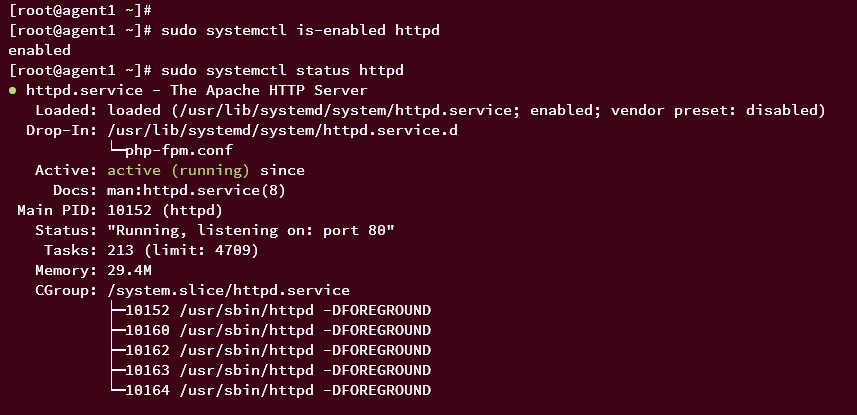
Verify that the services are running and enabled with:
sudo systemctl is-enabled httpd
sudo systemctl status httpd
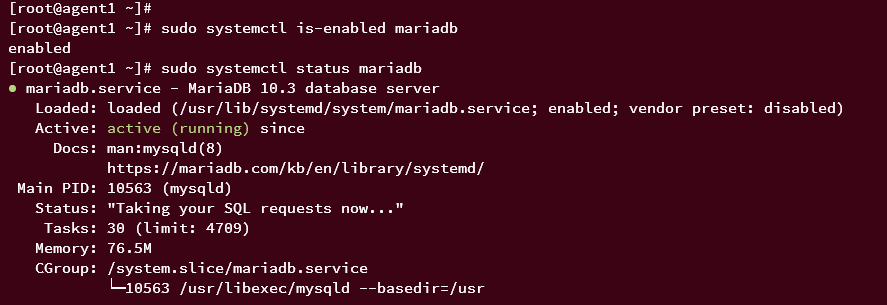
sudo systemctl is-enabled mariadb
sudo systemctl status mariadb
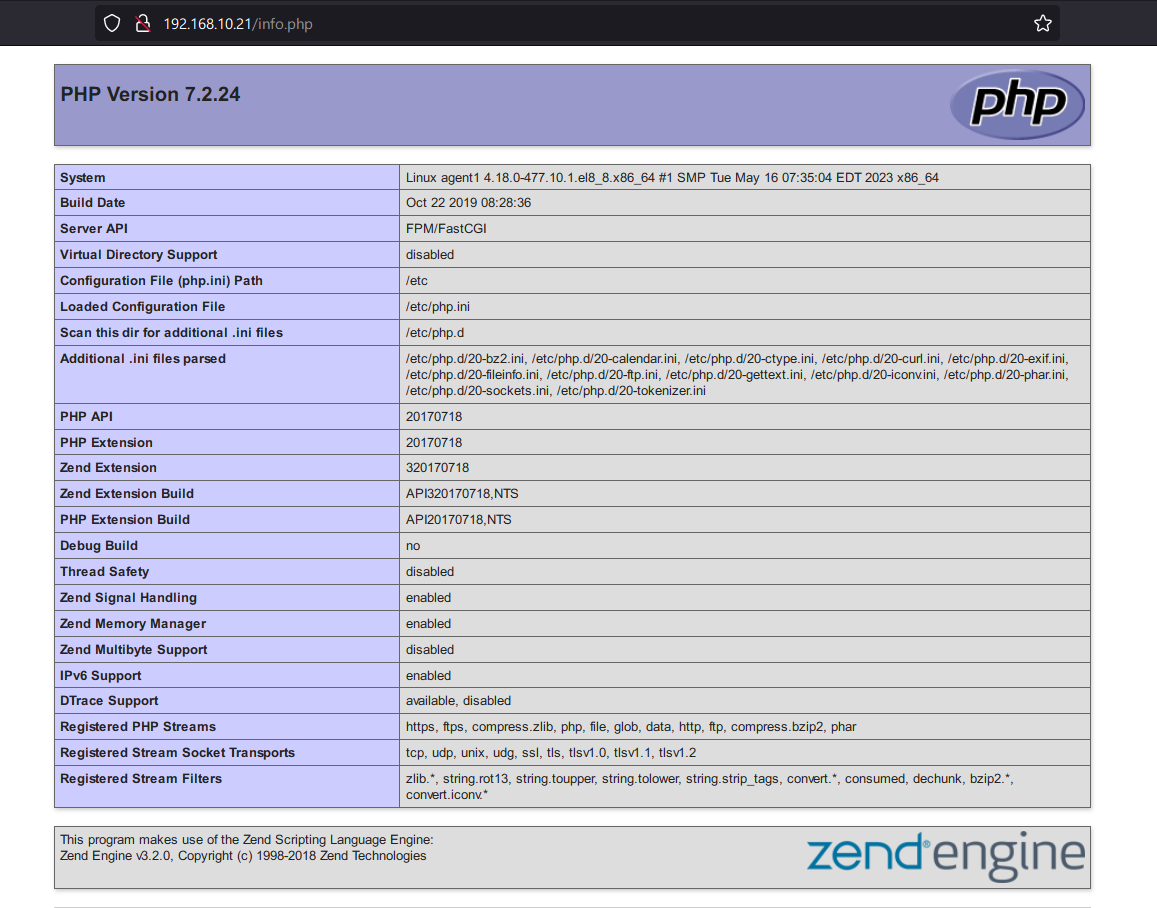
Launch a web browser to verify the deployment at the IP address of the Puppet Agent (e.g., http://192.168.10.21/) and access the PHP information page at http://192.168.10.21/info.php.

Conclusion
Congratulations! You have successfully installed and configured both Puppet Server and Agent on AlmaLinux servers. By deploying a LAMP stack, you’ve taken your first step into automating infrastructure with Puppet. Feel free to explore further Puppet manifests for more sophisticated deployments.
FAQ
Below are some frequently asked questions regarding Puppet installation and configuration.
- What is the required hardware for running a Puppet Server?
- At minimum, a Puppet Server requires 4GB of RAM, 2 CPU cores, and a reasonable disk space allocation to ensure smooth operation.
- Can Puppet work with other Linux distributions?
- Yes, Puppet can be installed on various Linux distributions such as Ubuntu, CentOS, and RedHat, among others.
- Is it possible to use DNS instead of modifying /etc/hosts?
- Absolutely. Using DNS is recommended for scalability. However, modifying the /etc/hosts file is a straightforward method for smaller setups and testing environments.
- How does Puppet handle security?
- Puppet communications are secured with SSL/TLS, ensuring data integrity and protection. The system uses certificates for agent-server authentication.
- Can I manage Windows nodes with Puppet?
- Yes, Puppet provides cross-platform support, allowing you to manage both Linux and Windows nodes through the same interface.
