Apache Maven is a robust software project management tool built on the POM (Project Object Model) concept. While it is primarily used for Java-based projects, Maven’s build automation capabilities extend to projects in C#, Ruby, Scala, and other languages.
This guide provides a comprehensive step-by-step method for installing and configuring Apache Maven on Ubuntu 18.04. Additionally, we’ll cover the installation of Java 8 via the PPA Repository.
Prerequisites
- Ubuntu 18.04 LTS
- Root privileges
Objectives
- Install Java on Ubuntu 18.04
- Download Apache Maven
- Configure the Apache Maven Environment
- Execute Testing
Step 1: Install Java on Ubuntu 18.04
We’ll begin by installing Java packages from the PPA repository. Initially, install the ‘software-properties-common’ package:
sudo apt install software-properties-common apt-transport-https -y
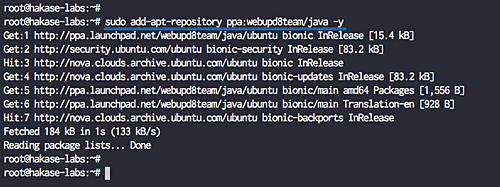
Next, add the ‘webupd8team’ PPA repository:
sudo add-apt-repository ppa:webupd8team/java -y

Note:
- On Ubuntu 18.04, running ‘add-apt-repository’ automatically updates the repository.
- Maven requires JDK 1.7 or newer; we’ll install JDK 1.8 for this tutorial.
To install the Java 8 Installer from the PPA repository:
sudo apt install oracle-java8-installer -y
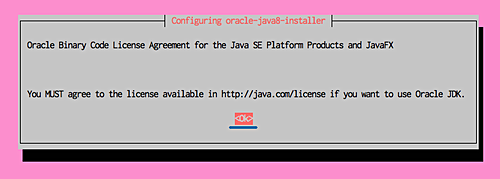
You’ll be prompted to accept the Oracle Binary License. Select ‘OK’.

Agree to the Oracle License by choosing ‘YES’.

Upon completion, verify the Java version by executing:
java -version
Expect an output similar to this:

Java is now successfully installed on your Ubuntu 18.04 server.
Step 2: Download Apache Maven
We’ll now download the Apache Maven binary using the wget command, with ‘/opt/apache-maven’ serving as the Maven home directory.
Navigate to the ‘/opt’ directory and download the Maven binaries:
cd /opt/
wget http://www-eu.apache.org/dist/maven/maven-3/3.5.3/binaries/apache-maven-3.5.3-bin.tar.gz
Extract the downloaded file and rename the directory to ‘apache-maven’:
tar -xf apache-maven-3.5.3-bin.tar.gz
mv apache-maven-3.5.3/ apache-maven/
Your ‘apache-maven’ directory now contains all necessary Maven binary files:

Step 3: Configure Apache Maven Environment
We’ll set up the necessary environment variables for Apache Maven, including ‘JAVA_HOME’, ‘M2_HOME’, and the PATH for Maven binaries.
Navigate to ‘/etc/profile.d’ and create a new configuration file named ‘maven.sh’:
cd /etc/profile.d/
vim maven.sh
Insert the following configurations:
# Apache Maven Environment Variables
# MAVEN_HOME for Maven 1 - M2_HOME for Maven 2
export JAVA_HOME=/usr/lib/jvm/java-8-oracle
export M2_HOME=/opt/apache-maven
export MAVEN_HOME=/opt/apache-maven
export PATH=${M2_HOME}/bin:${PATH}
Save and exit the file.
Make the script executable and apply the configuration using:
chmod +x maven.sh
source maven.sh
Your Apache Maven environment setup is now complete:

Step 4: Test Maven
To confirm the Maven installation, run:
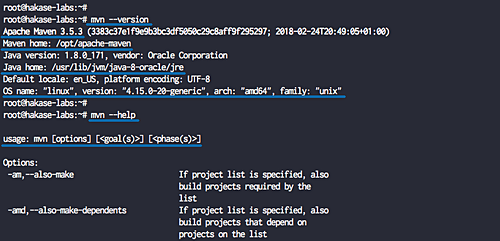
mvn --version
mvn --help
The output should resemble the following:

Apache Maven 3.5 is successfully installed on a 64-bit Linux system with Java 1.8, with the Maven home at ‘/opt/apache-maven’.
References
FAQ
- What is Apache Maven?
Maven is a software project management tool for Java projects, also applicable to other languages like C#, Ruby, and Scala. It provides build, reporting, and documentation features. - Why is JDK required for Maven?
Maven needs a JDK to compile Java programs as it performs tasks like code compilation, testing, and packaging. - Can I install a different version of Java?
Yes, Maven requires JDK 1.7 or above, so any compatible JDK version can be installed, but the guide is based on JDK 1.8. - Where are Maven binaries stored?
In this guide, Maven binaries are stored in the ‘/opt/apache-maven’ directory.