WordPress is one of the most widely used Content Management Systems (CMS) available, with millions of users globally. Launched in 2003 as a fork of the CMS “b2/cafelog,” WordPress comes with a GPLv2 license and is free and open-source software.
Currently, over 34% of websites on the internet utilize WordPress. Its popularity stems from its simplicity, ease of use, and flexibility. With countless plugins, WordPress can be tailored for various purposes, such as blogging, eCommerce, corporate profiles, and even online forums.
This guide will show you how to install WordPress CMS on Rocky Linux 8.4, using a LAMP stack (Linux, Apache2/httpd, MySQL/MariaDB, and PHP) as the underlying architecture.
Prerequisites
- A Rocky Linux server with all packages updated to the latest versions.
- A user with root privileges. This user will gain root privileges through the sudo command.
Installing Apache/Httpd Web Server
Begin by installing the Apache or httpd web server on the Rocky Linux server.
-
- Run the
dnfcommand below to install the httpd web server:
- Run the
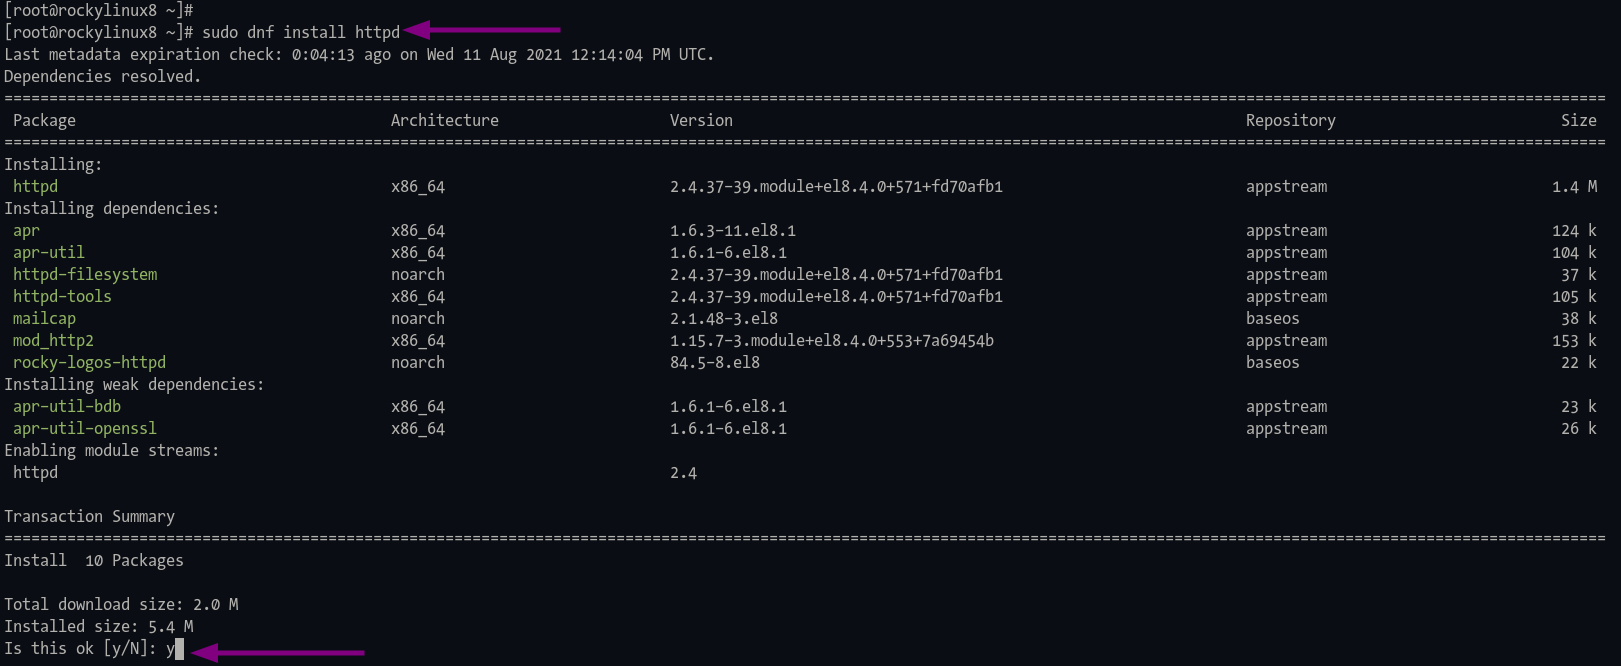
sudo dnf install httpd
Confirm the installation by typing “y” and pressing “Enter“.
-
- Enable and start the httpd service using the following commands:
sudo systemctl enable httpd
sudo systemctl start httpd
The “systemctl enable” command ensures the service starts at boot.
-
- Verify the httpd service:
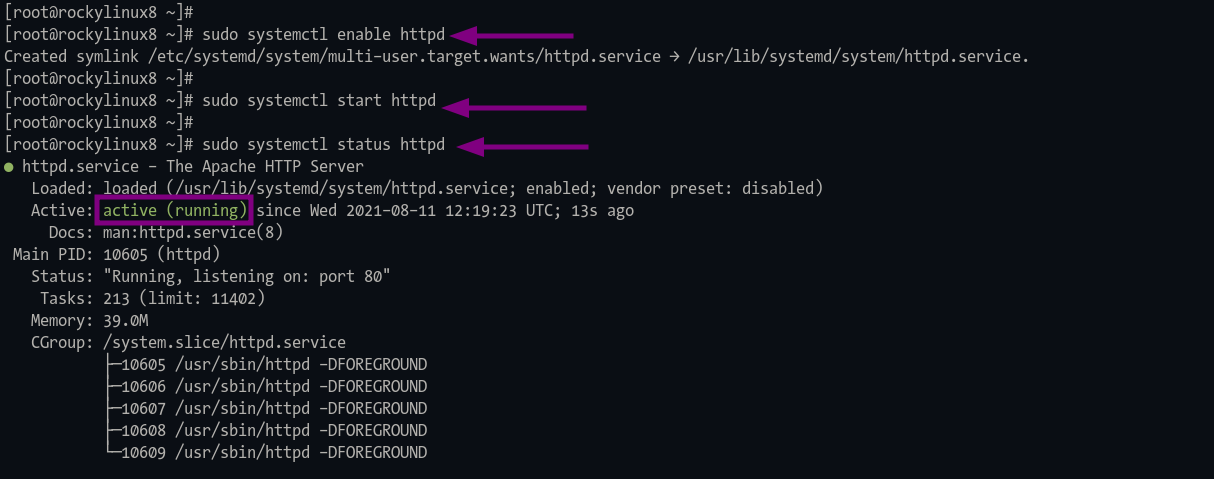
sudo systemctl status httpd
You should see results similar to the image below:
Installing PHP Packages
WordPress CMS requires PHP 7.4 or higher. Install it from the remi repository:
-
- Add the EPEL and remi repositories:
sudo dnf install https://dl.fedoraproject.org/pub/epel/epel-release-latest-8.noarch.rpm
sudo dnf install https://rpms.remirepo.net/enterprise/remi-release-8.rpm
Confirm by typing “y” and pressing “Enter”. Verify repositories with:
sudo dnf repolist
Ensure you see the “epel” and “remi” repositories listed.

-
- Reset the default PHP module and enable the one for PHP 7.4:
sudo dnf module reset php
During the process, add the GPG key for the remi repository by typing “y“.
Enable the PHP module:
sudo dnf module enable php:remi-7.4
Confirm by pressing “y”.

-
- Install PHP and required extensions:
sudo dnf install php php-common php-mysqlnd php-gd php-imagick php-bcmath
Installing and Configuring MariaDB Server
Next, install the MariaDB database server, secure the deployment, and create a new database and user for WordPress:
-
- Install the MariaDB server:
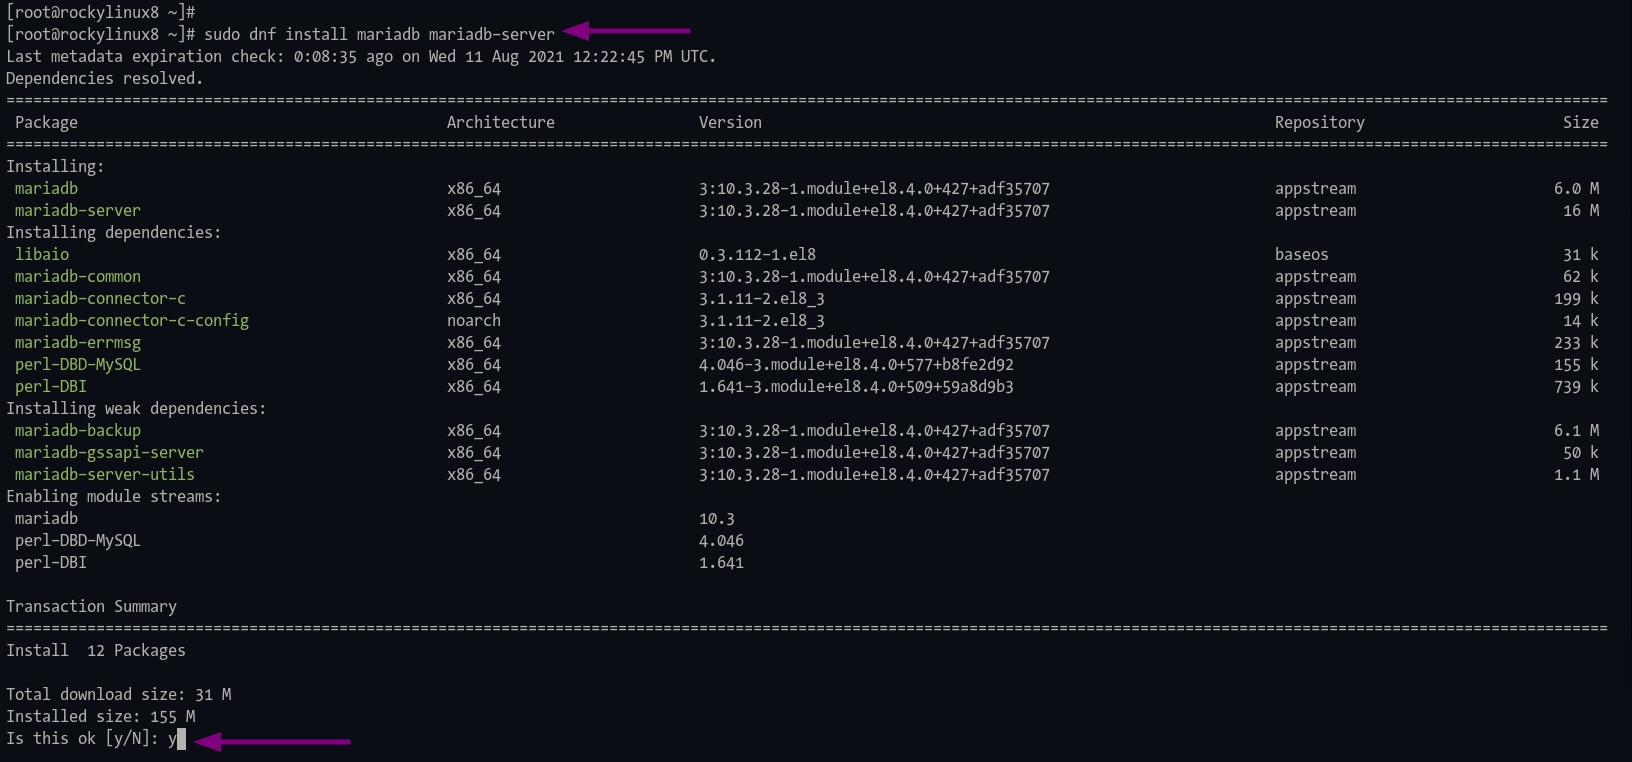
sudo dnf install mariadb mariadb-server
-
- Enable and start the MariaDB service:
sudo systemctl enable mariadb
sudo systemctl start mariadb
-
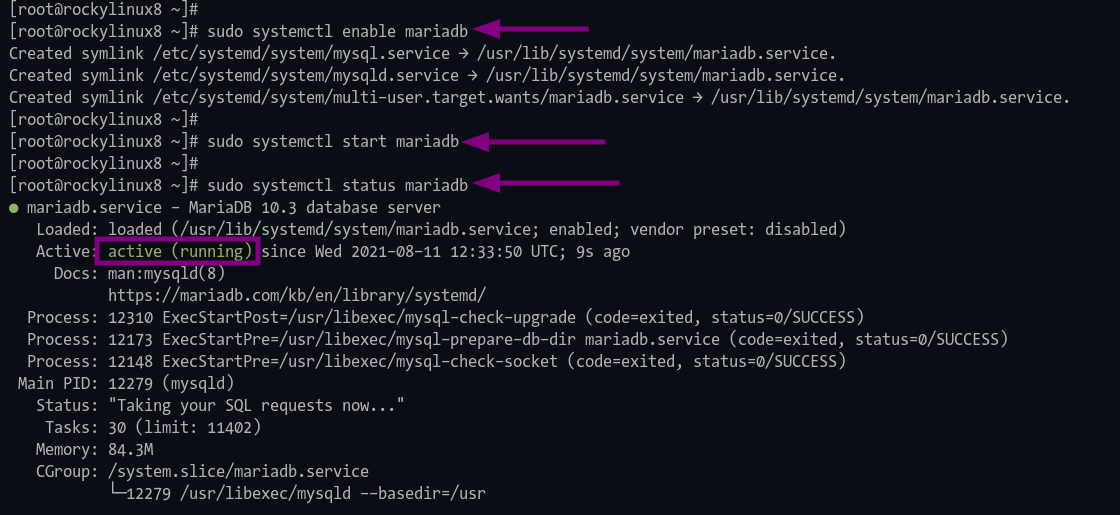
- Verify the service status:
sudo systemctl status mariadb
You should see MariaDB running:
-
- Secure your MariaDB deployment:
mysql_secure_installation
Follow the prompts to set a root password and secure the MariaDB installation. Answer “Y” to remove anonymous users, disallow root login remotely, remove the test database, and reload privilege tables.
Create Database and User for WordPress
-
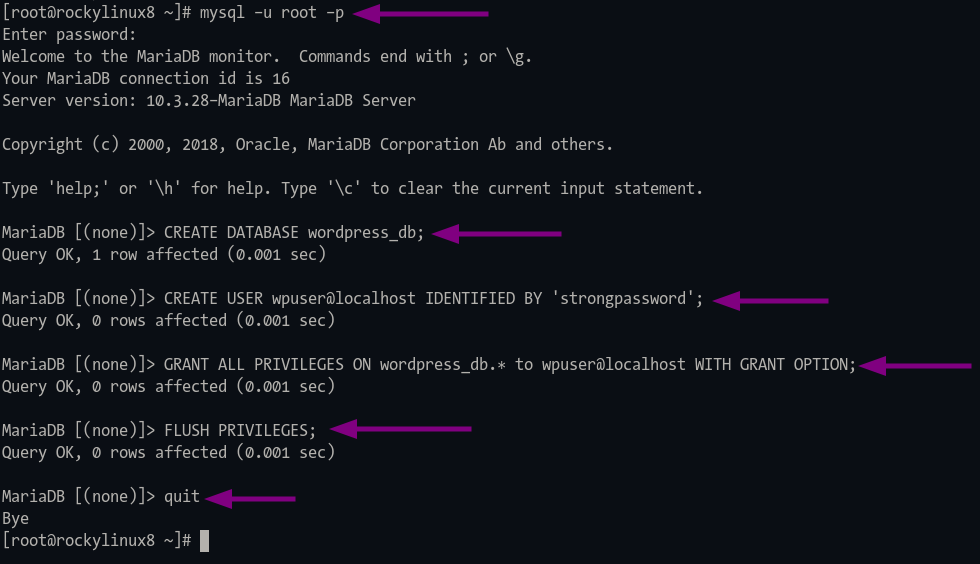
- Log in to the MariaDB shell:
mysql -u root -p
-
- Create a new database, user, and set permissions:
CREATE DATABASE wordpress_db;
CREATE USER wpuser@localhost IDENTIFIED BY 'strongpassword';
GRANT ALL PRIVILEGES ON wordpress_db.* to wpuser@localhost;
FLUSH PRIVILEGES;
Exit the MariaDB shell:
quit
Download WordPress
-
- Navigate to the “/var/www” directory and download WordPress:
cd /var/www/
wget https://wordpress.org/latest.tar.gz
-
- Extract the WordPress files and set permissions:
tar -xzvf latest.tar.gz
sudo chown -R apache:apache wordpress/
Setting Up WordPress
Edit the WordPress configuration file to set up database details and security keys:
-
- Navigate to the WordPress directory:
cd /var/www/wordpress/
-
- Copy and edit the configuration file:
cp wp-config-sample.php wp-config.php
nano wp-config.php
-
- Update database settings:
    // ** MySQL settings - You can get this info from your web host ** //
    /** The name of the database for WordPress */
    define( 'DB_NAME', 'wordpress_db' );

    /** MySQL database username */
    define( 'DB_USER', 'wpuser' );

    /** MySQL database password */
    define( 'DB_PASSWORD', 'strongpassword' );

    /** MySQL hostname */
    define( 'DB_HOST', 'localhost' );

    /** Database charset to use in creating database tables. */
    define( 'DB_CHARSET', 'utf8' );

    /** The database collate type. Don't change this if in doubt. */
    define( 'DB_COLLATE', '' );
-
- Generate and add authentication keys and salts:
/**#@+
 * Authentication unique keys and salts.
 *
 * Change these to different unique phrases! You can generate these using
 * the {@link https://api.wordpress.org/secret-key/1.1/salt/ WordPress.org secret-key service}.
 *
 * You can change these at any point in time to invalidate all existing cookies.
 * This will force all users to have to log in again.
 *
 * @since 2.6.0
 */
define('AUTH_KEY',         'v$4/xyGF7t!^(-Xr~lUKT,1oBxOpxzXPAs)kPE_C%Oc^~^%JN]C-y(k>~Wj+JZRM');
define('SECURE_AUTH_KEY',  'y<|#/jfYs,Y_l;{[`2uNp9SMNH8zNGK[eb&RYqb-+bd<a,Fi<9z9rj2_#=R(5O&s');
define('LOGGED_IN_KEY',    '&U8Z{I~,xV%D>FDq+Qx{7@?ZD|_GgYby)z,l5jZDVqLC#&#+]#/6zh1-JQf6n6+X');
define('NONCE_KEY',        'pQv#Z_;q$4E: `AV.0eu-L7JA_BN-dvHV#W|;#s7>PTA<Vfs13S|-pE7RYV8+LX)');
define('AUTH_SALT',        '?;-?bWr%zTbx7lphp&]=IQ-P8D?ItOzs?4rGtaNI,kypb4xj$&X|ueIDA}5v?sj|');
define('SECURE_AUTH_SALT', 'mn<t0DVAfMX*SpqKC7NE}xFNZ|4c_N{s7|s-iKR4Jvc#GPc.9H:aW9%k2r?nAe;Z');
define('LOGGED_IN_SALT',   'ni D0H;5wrM3NQLWe<R-Y$j-_{)4{v*abQ(kAbhNrmi&+EXFMW-Gv7SQb6ya[)!s');
define('NONCE_SALT',       '=BMV@@hmv:~G/<+_8fPvQ(m%oR.A)%ZPtp``sZWK! !G6C%UYPrKU{xQJD.<bd45');
/**#@-*/
Enable HTTPD mod_ssl on Rocky Linux
Install WordPress and secure it with SSL using Let’s Encrypt. Enable mod_ssl:
-
- Install the
mod_sslandmod_http2packages:
- Install the
sudo dnf install mod_ssl mod_http2
-
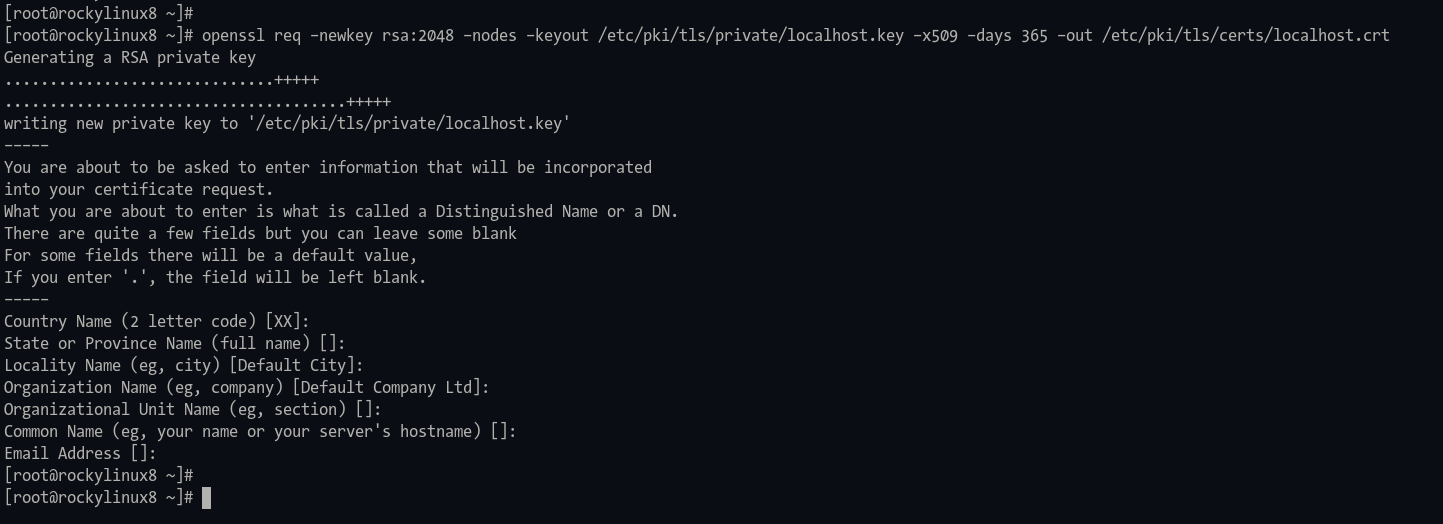
- Generate a default SSL certificate:
openssl req -newkey rsa:2048 -nodes -keyout /etc/pki/tls/private/localhost.key -x509 -days 365 -out /etc/pki/tls/certs/localhost.crt
Press enter for all questions as this certificate is for localhost.
-
- Verify mod_ssl is enabled:
apachectl -M | grep ssl
Look for “ssl” in the output.

Generate SSL Let’s Encrypt on Rocky Linux
Install the Certbot tool and generate SSL certificates for WordPress:
-
- Install Certbot:
sudo dnf install certbot
-
- Create a directory for Let’s Encrypt authorization:
sudo mkdir -p /var/lib/letsencrypt/.well-known
sudo chgrp apache /var/lib/letsencrypt
sudo chmod g+s /var/lib/letsencrypt
-
- Create a new configuration file for Let’s Encrypt:
cd /etc/httpd/conf.d/
nano well-known.conf
Add the following configuration:
Alias /.well-known/acme-challenge/ "/var/lib/letsencrypt/.well-known/acme-challenge/"
<Directory "/var/lib/letsencrypt/">
    AllowOverride None
    Options MultiViews Indexes SymLinksIfOwnerMatch IncludesNoExec
    Require method GET POST OPTIONS
</Directory>
Save and exit the file. Restart the Apache service:
apachectl configtest
sudo systemctl restart httpd
-
- Generate SSL certificates:
sudo certbot certonly --agree-tos --email user@email.com --webroot -w /var/lib/letsencrypt/ -d domain.com -d www.domain.com
Your certificates will be stored in the “/etc/letsencrypt/live/domain.com/” directory.
Setting Up a Virtual Host for WordPress
-
- Create a new Apache virtual host configuration:
cd /etc/httpd/conf.d/
nano wordpress.conf
Edit the details according to your domain and SSL path:
# httpd port 80
<VirtualHost *:80>
  ServerName domain.com
  ServerAlias www.domain.com
# automatic redirect http to https
Redirect permanent / https://domain.com/
</VirtualHost>

# httpd port 443/ssl
<VirtualHost *:443>
ServerName domain.com
ServerAlias www.domain.com

# WordPress path directory
DocumentRoot /var/www/wordpress

Protocols h2 http:/1.1

<If "%{HTTP_HOST} == 'www.domain.com'">
Redirect permanent / https://domain.com/
</If>

ErrorLog /var/log/httpd/domain.com-error.log
CustomLog /var/log/httpd/domain.com-access.log combined

SSLEngine On
SSLCertificateFile /etc/letsencrypt/live/domain.com/fullchain.pem
SSLCertificateKeyFile /etc/letsencrypt/live/domain.com/privkey.pem

SSLCipherSuite EECDH+AESGCM:EDH+AESGCM:AES256+EECDH:AES256+EDH
SSLProtocol All -SSLv2 -SSLv3 -TLSv1 -TLSv1.1
SSLCompression off

<Directory /var/www/wordpress/>
Options FollowSymlinks
AllowOverride All
Require all granted
</Directory>

<Directory /var/www/wordpress/>
RewriteEngine on
RewriteBase /
RewriteCond %{REQUEST_FILENAME} !-f
RewriteRule ^(.*) index.php [PT,L]
</Directory>
</VirtualHost>
Save and exit. Test the Apache configuration:
sudo apachectl configtest
-
- Restart Apache:
sudo systemctl restart httpd
Installing WordPress
-
- Access your WordPress site in a web browser:
http://domain.com
-
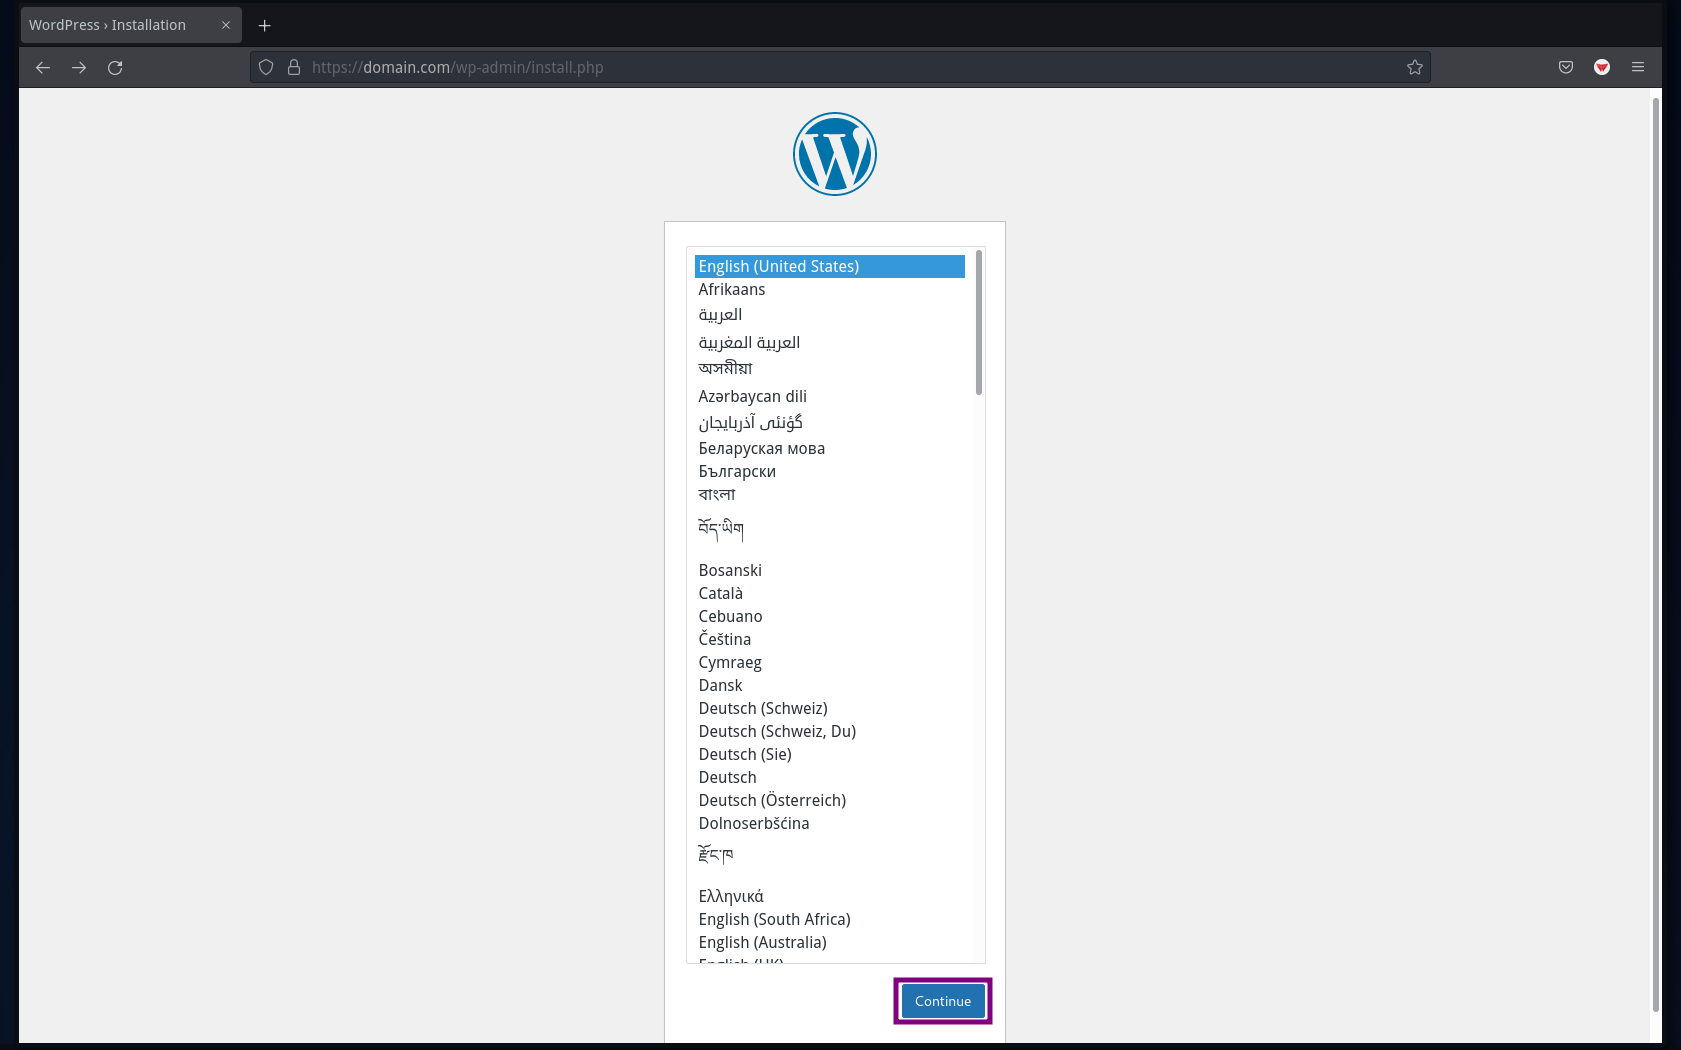
- Select your language and click “Continue“:
-
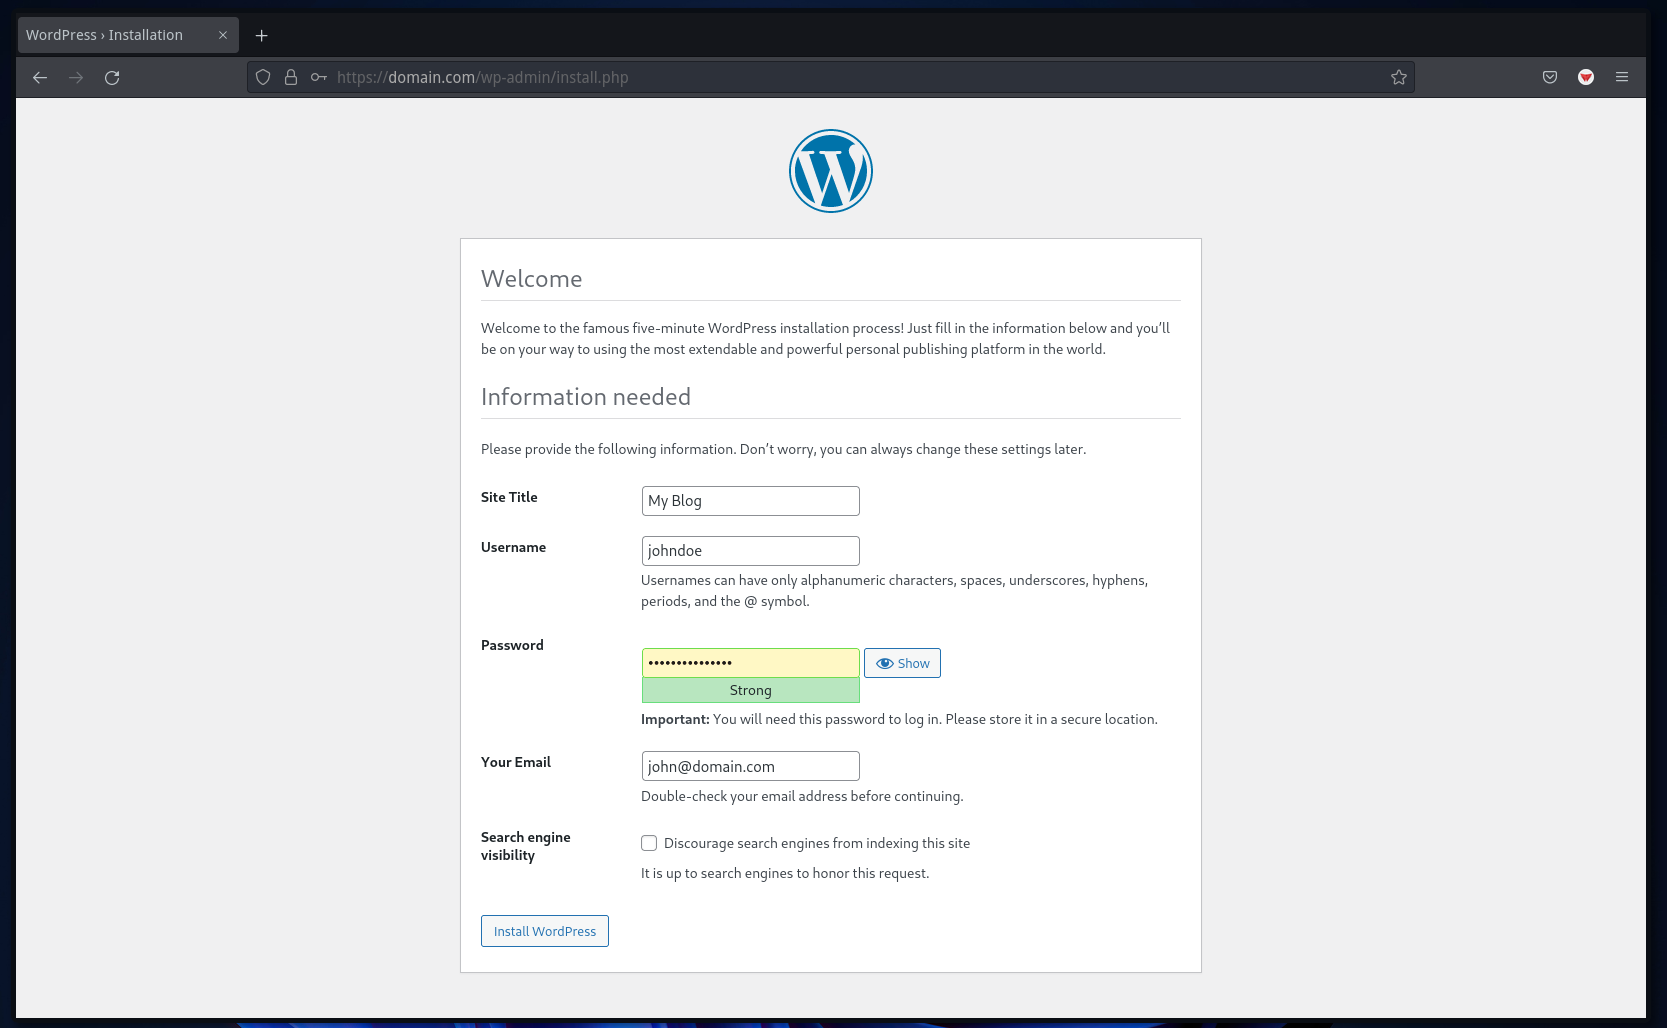
- Enter site details and click “Install WordPress“:
-
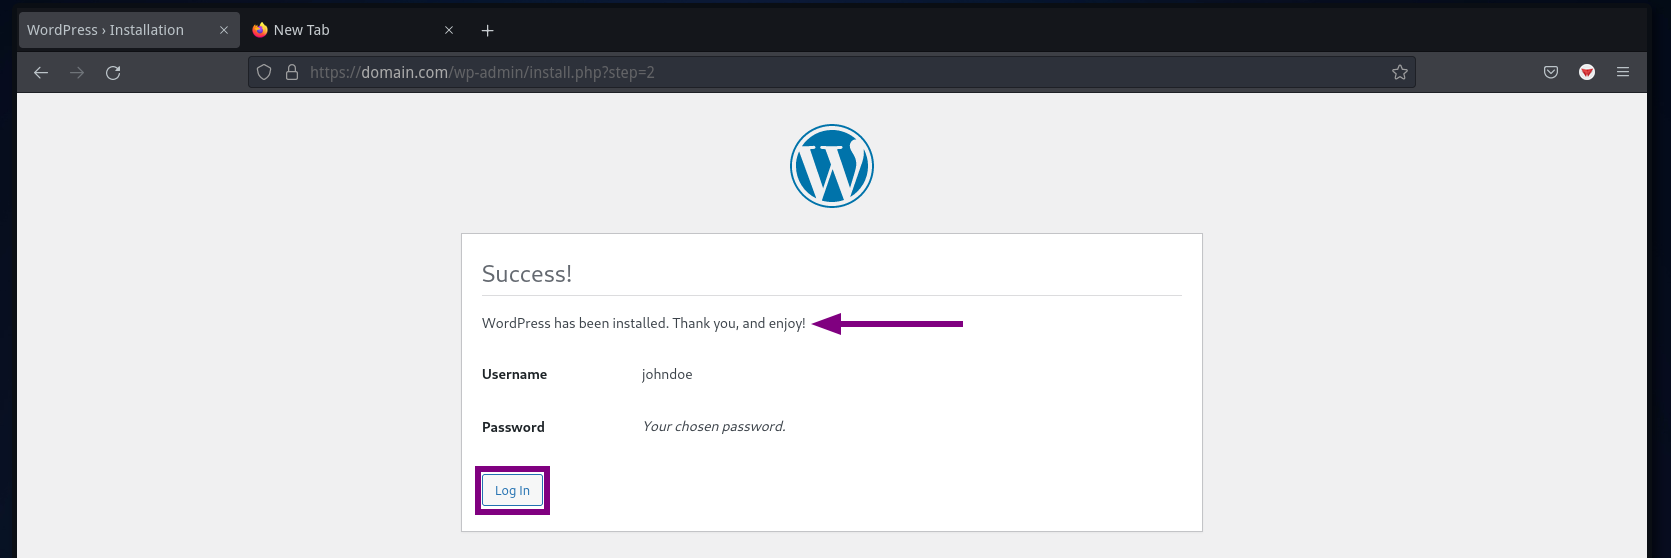
- Upon successful installation, click “Log In“:
-
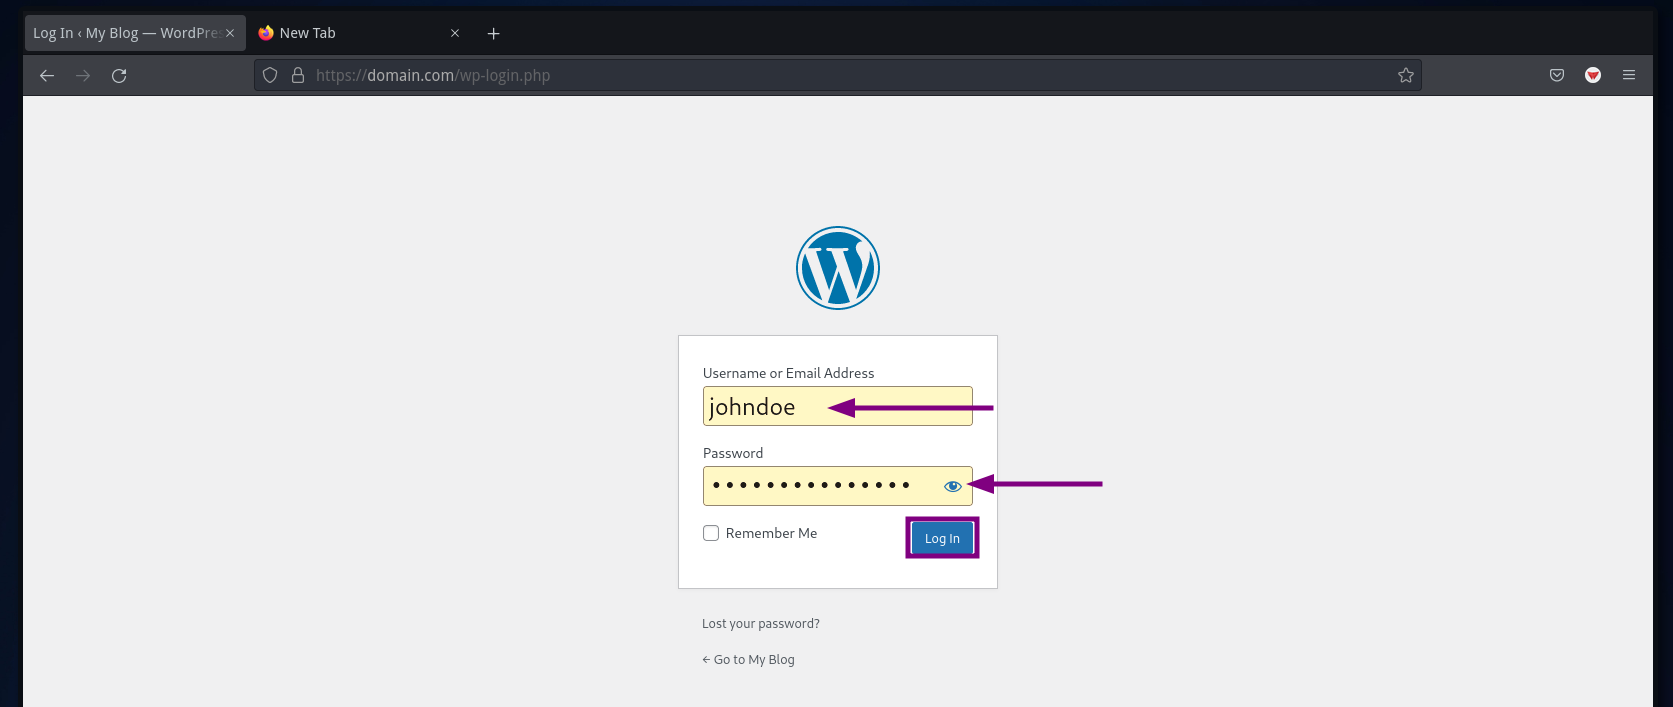
- Login to WordPress:
-
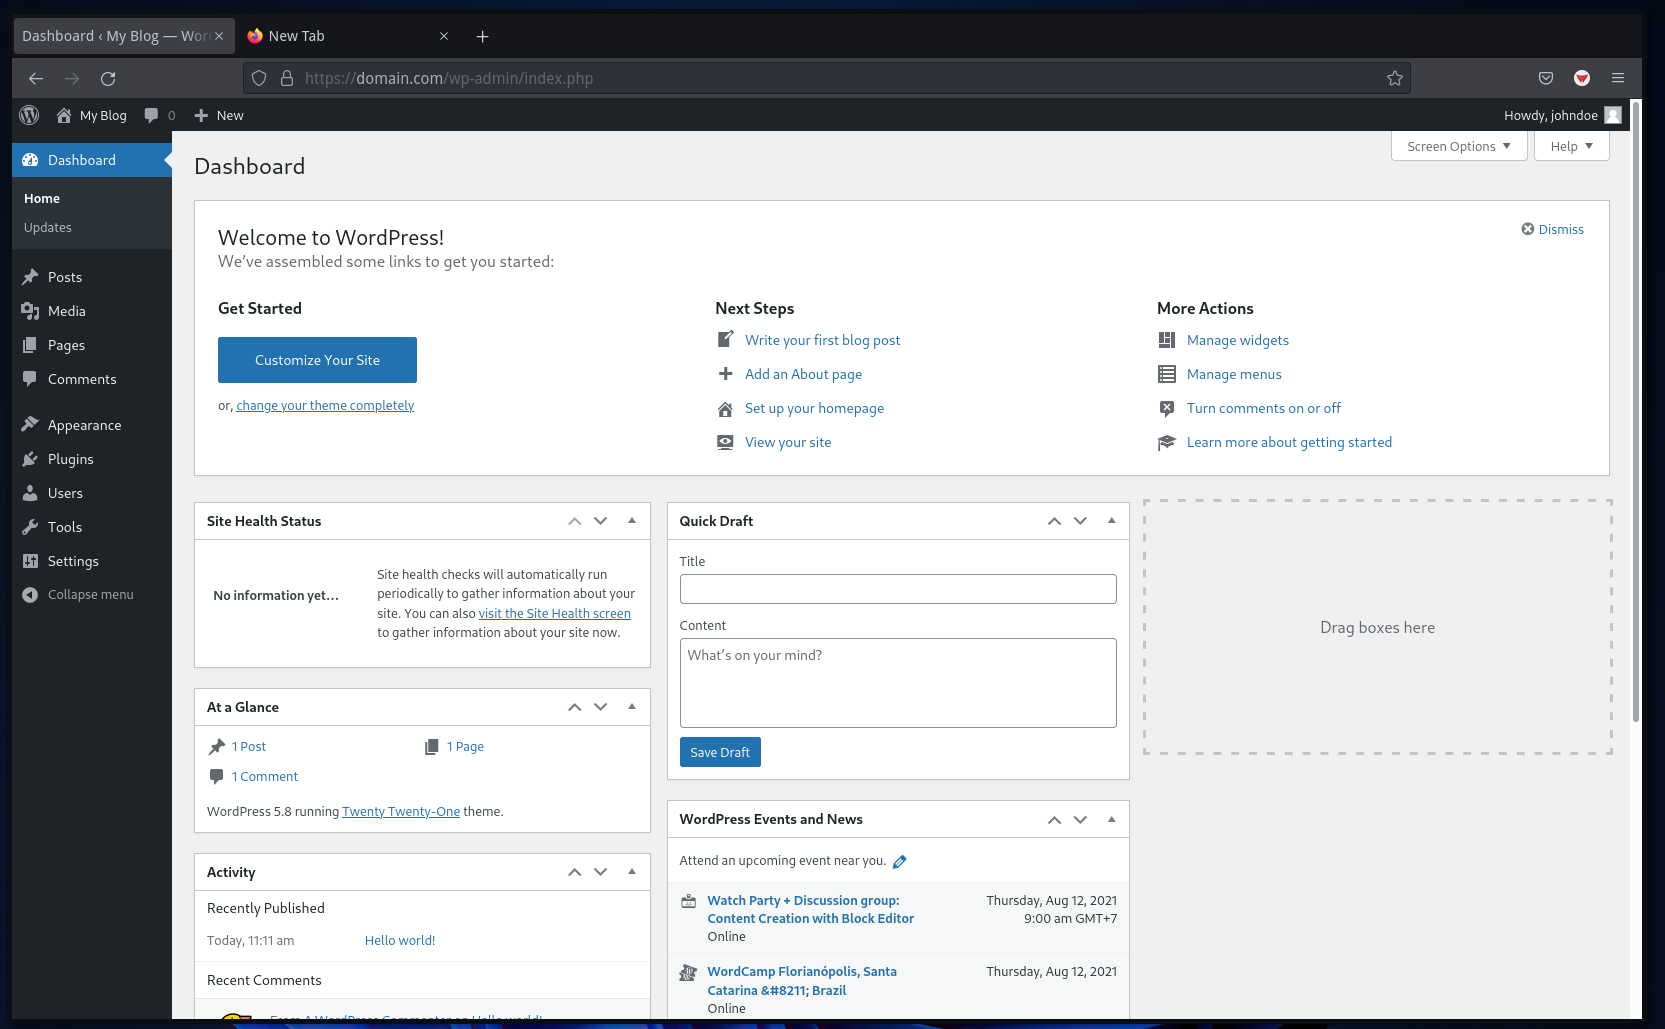
- Navigate to the WordPress dashboard:
-
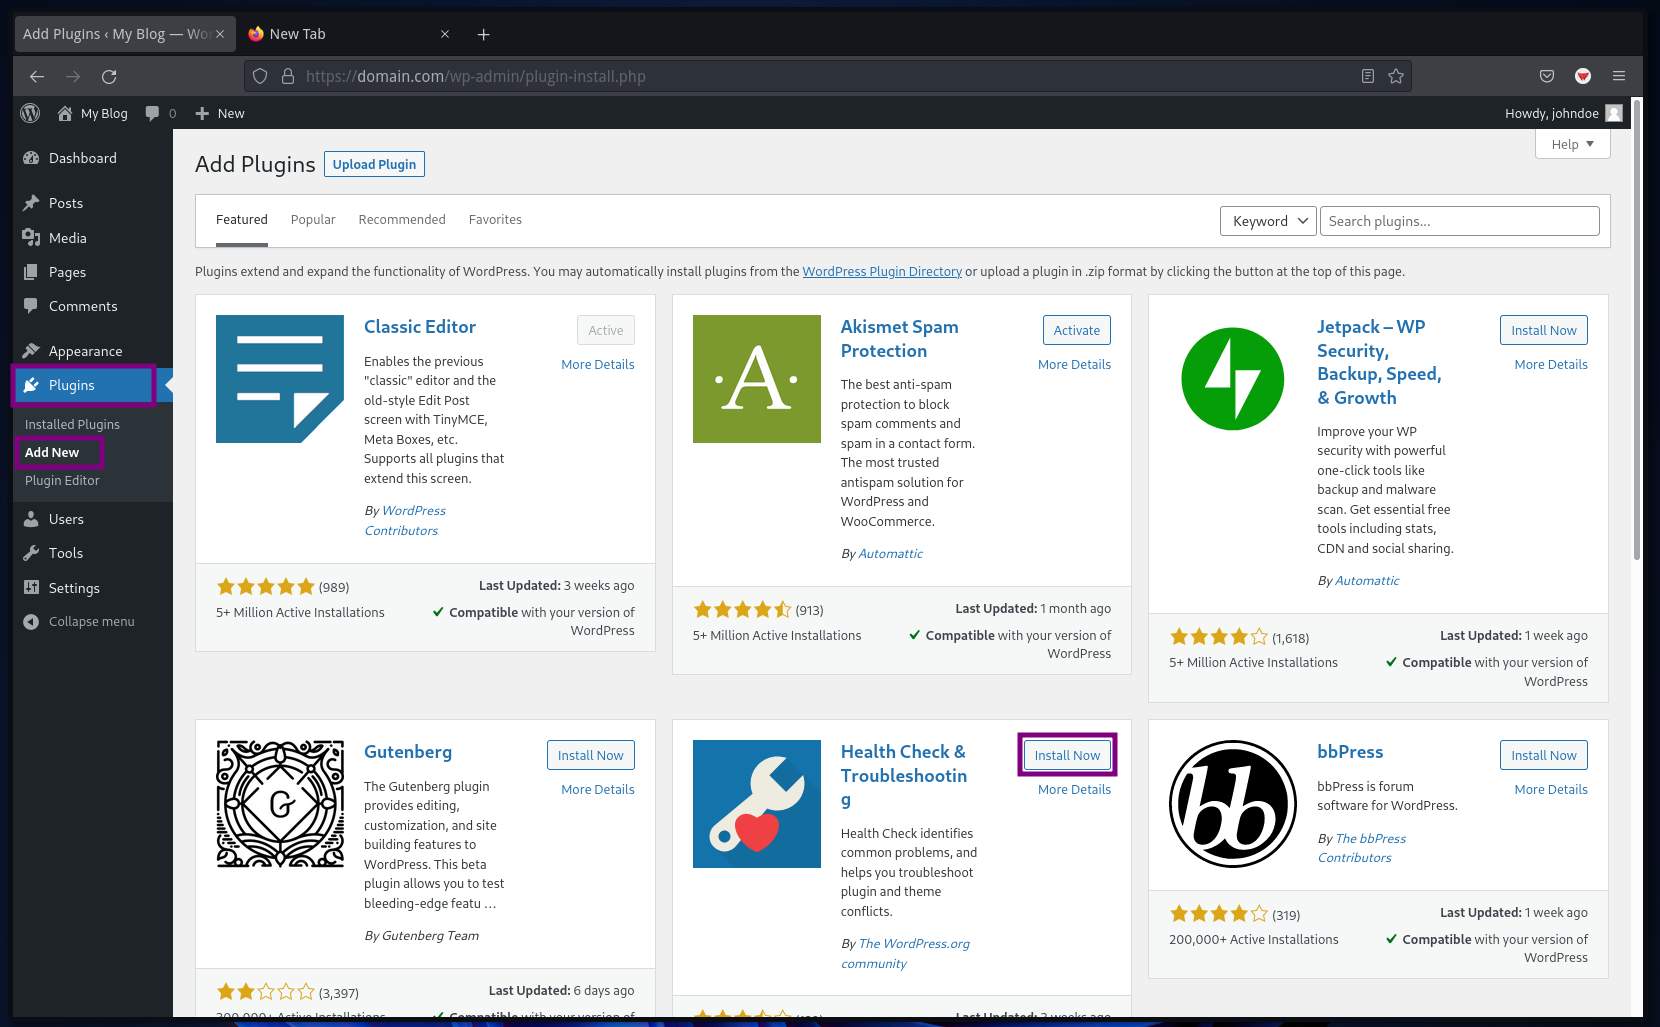
- Install plugins as desired:
Conclusion
Congratulations! You’ve successfully installed WordPress CMS with a LAMP Stack on a Rocky Linux server. Summary of steps you completed:
- Installing a LAMP Stack
- Securing MariaDB
- Creating MySQL database and user
- Setting up Apache for Certbot
- Generating SSL Let’s Encrypt
- WordPress installation
Now, explore or purchase themes to further customize your WordPress site.
Frequently Asked Questions (FAQ)
What is WordPress?
WordPress is a popular free and open-source Content Management System (CMS) used for building websites, blogs, and applications.
Why choose WordPress?
WordPress is known for its ease of use, flexibility, and extensive plugin ecosystem, allowing you to create complex websites without needing advanced programming skills.
What is a LAMP Stack?
A LAMP Stack is a set of open-source software used for web development that includes Linux (operating system), Apache (web server), MySQL/MariaDB (database), and PHP (programming language).
How do I secure my WordPress site after installation?
Secure your WordPress site by regularly updating WordPress, themes, and plugins, using strong passwords, implementing an SSL certificate, and using security plugins like Wordfence.
Can this guide be used for other Linux distributions?
This guide is specifically for Rocky Linux 8.4. However, with some modifications, the steps may be applicable to other Linux distributions.
