Etherpad is a free and open-source alternative to services like Google Docs and Zoho Writer. It serves as a versatile, collaborative, real-time text editor for teams, accessible from anywhere at any time due to its web-based nature.
Etherpad facilitates real-time document editing, supports versioning, and offers built-in formatting options. With a highly customizable interface, it allows integration of various plugins and supports modern document formats such as doc, pdf, odt, markdown, among others.
This guide outlines the steps to install Etherpad on an AlmaLinux 9 server, leveraging a MariaDB database server and an Nginx web server. You’ll also learn how to secure Etherpad using SSL certificates for safe access.
Prerequisites
Prior to beginning the installation, ensure you have the following:
- An AlmaLinux 9 server – This demonstration is based on an AlmaLinux server with the hostname
almalinux9. - A non-root user with sudo privileges.
- A domain name pointed to the server’s IP address.
- SSL certificates generated via LetsEncrypt and Certbot.
Installing Dependencies
Before installing Etherpad, it’s crucial to install several necessary dependencies, including:
- Development Tools
- Node.js and NPM (Node Package Manager)
- MariaDB database server
- Nginx web server
Follow the steps below to install the Etherpad dependencies.
Installing Development Tools
First, install “Development Tools” on your AlmaLinux server. Run the following dnf command, input y, and press ENTER to proceed.
sudo dnf group install "Development Tools"
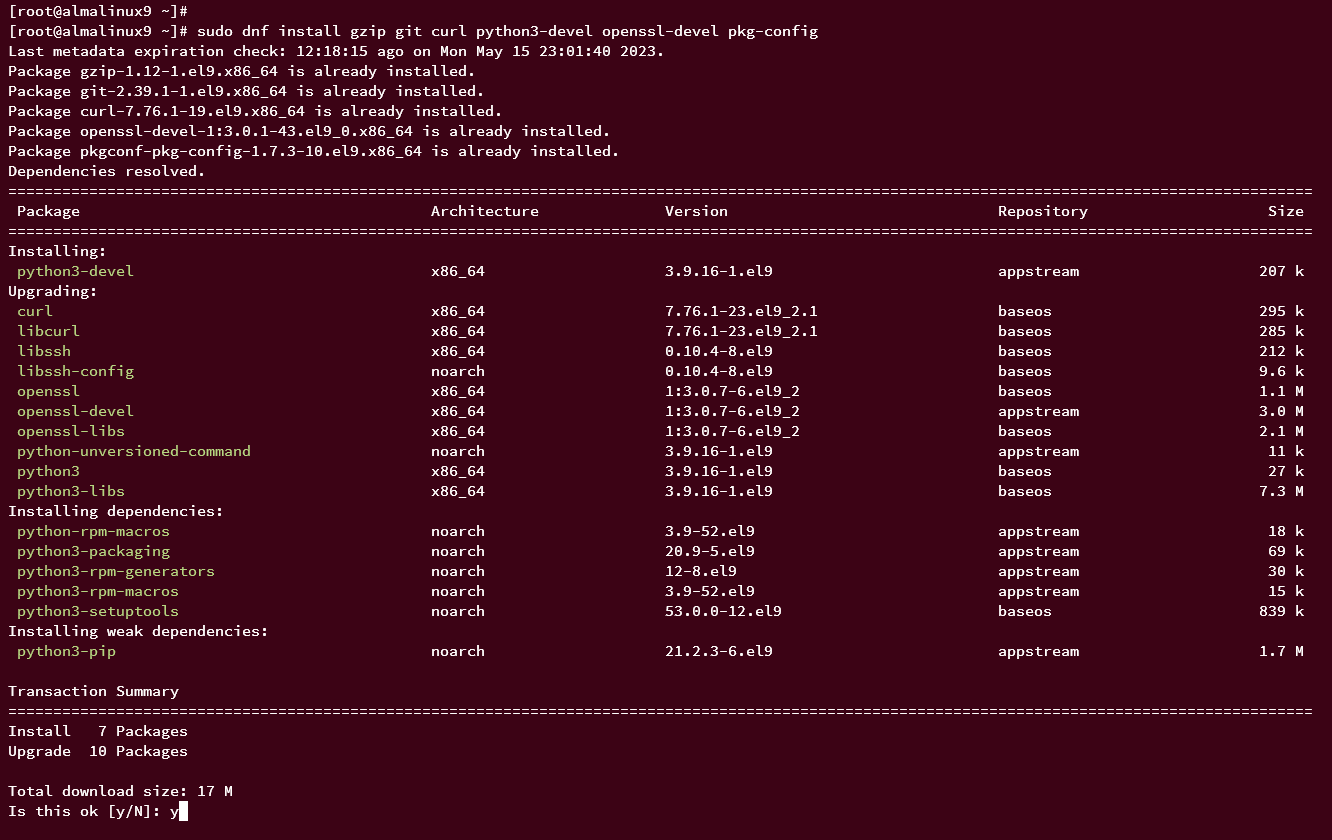
Then, execute the command below to install additional dependencies. When prompted, input y to confirm and press ENTER.
sudo dnf install gzip git curl python3-devel openssl-devel pkg-config
Installing Node.js and NPM
As Etherpad mainly uses Node.js, install Node.js JavaScript runtime and NPM (Node Package Manager). Currently, Etherpad requires at least Node.js v16, available by default in the AlmaLinux appstream repository, installable via DNF.
Execute the following command to install Node.js and NPM. Input y to confirm the installation and press ENTER.
sudo dnf install nodejs npm
Once installed, add the /usr/local/bin directory to the PATH environment variable to ensure some binary files installed via NPM can be executed on the server.
echo "export PATH=$PATH:/usr/local/bin" >> ~/.bashrc
source ~/.bashrc
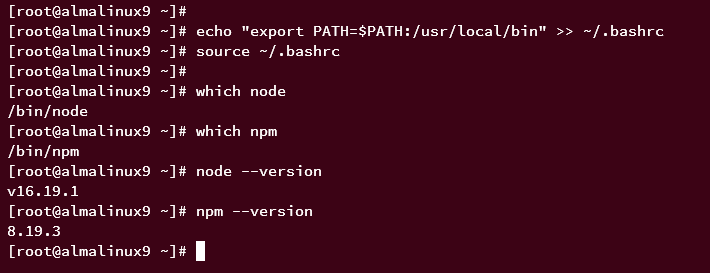
Then, run these commands to locate the Node.js and NPM binary files.
which node
which npm
Verify the Node.js and NPM versions using these commands.
node --version
npm --version
The output confirms Node.js v16 and NPM 8.x are installed, and both binaries are located in the /bin directory.
Installing MariaDB Server
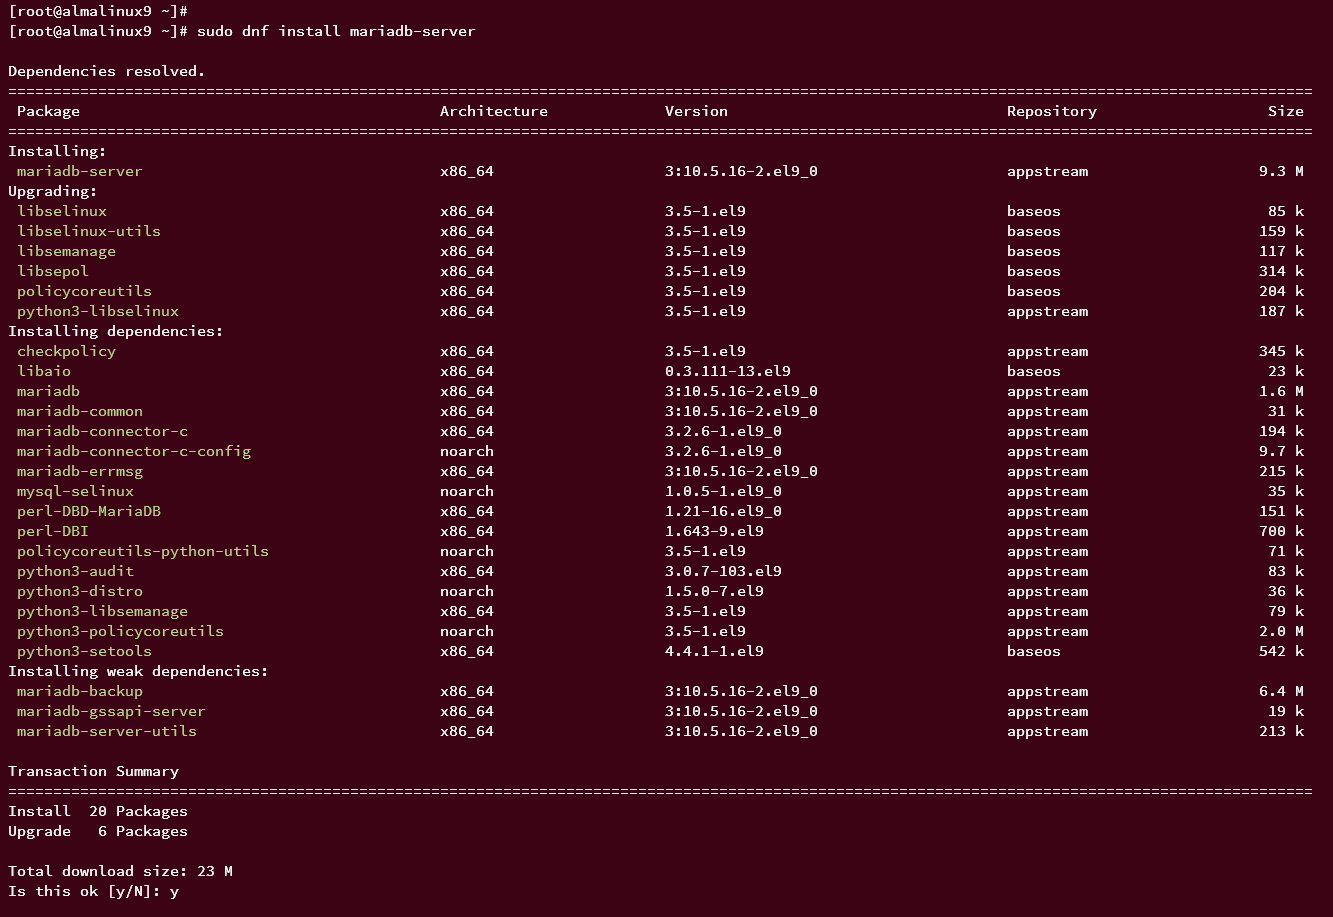
Though Etherpad uses SQLite by default, MariaDB/MySQL is preferred for large deployments. Install MariaDB Server using:
sudo dnf install mariadb-server
Start and enable the MariaDB service:
sudo systemctl start mariadb
sudo systemctl enable mariadb
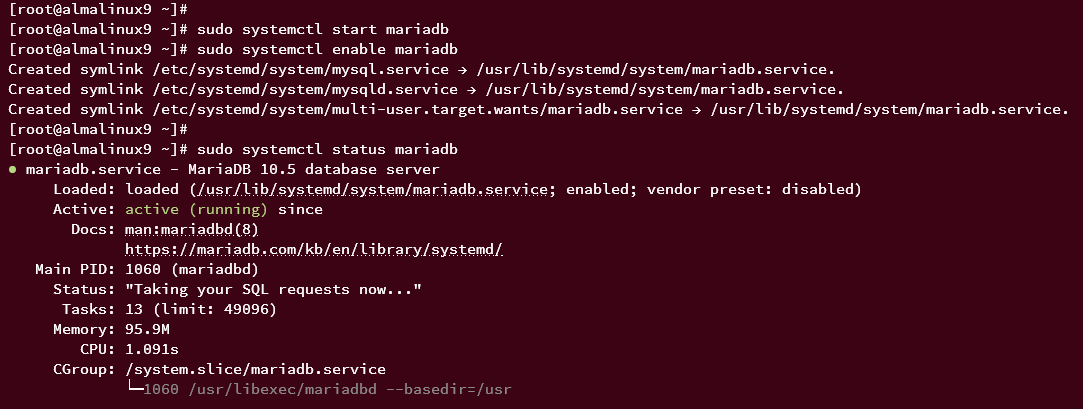
Check the MariaDB service status as follows:
sudo systemctl status mariadb
If successful, an output similar to the image should appear:
Installing Nginx Web Server
With MariaDB, proceed to install the Nginx web server as a reverse proxy for Etherpad. Ensure your domain name points to your server IP and SSL certificates from Letsencrypt and Certbot are generated.
Run the following command to install Nginx:
sudo dnf install nginx

Start and enable Nginx service:
sudo systemctl start nginx
sudo systemctl enable nginx
Verify the Nginx service is running:
sudo systemctl status nginx
The successful output should look like this:

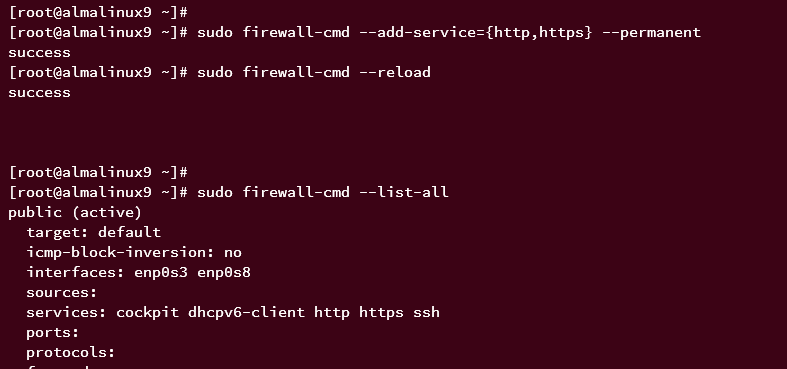
Open HTTP and HTTPS ports on your server:
sudo firewall-cmd --add-service={http,https} --permanent
sudo firewall-cmd --reload
Check the list of open ports and services:
sudo firewall-cmd --list-all
Configuring MariaDB Server
Secure MariaDB with mariadb-secure-installation utility, then create a database and user for Etherpad.
Secure MariaDB:
sudo mariadb-secure-installation
Respond to prompts as follows:
- Change authentication method for the root user to unix_socket: n for No.
- Set the MariaDB root password: y to confirm, then input a strong password.
- Disable root remote login: y to confirm.
- Remove the default test database: y.
- Remove anonymous users: y.
- Reload privileges: y.
Create a MariaDB database and user:
sudo mariadb -u root -p
Create a database and user for Etherpad with these commands:
CREATE DATABASE etherpad_lite_db CHARACTER SET utf8mb4;
CREATE USER etherpaduser@localhost IDENTIFIED BY 'StrongPasswordEtherpadDB';
GRANT CREATE,ALTER,SELECT,INSERT,UPDATE,DELETE on etherpad_lite_db.* to etherpaduser@localhost;
FLUSH PRIVILEGES;

Verify privileges:
SHOW GRANTS FOR etherpaduser@localhost;
quit
The output confirms privileges for the etherpaduser on the etherpad_lite_db database:

Exit MariaDB with quit.
Downloading and Installing Etherpad
The installation involves creating a system user, downloading Etherpad source code, installing dependencies, integrating it with MariaDB, then verifying the setup via the command line.
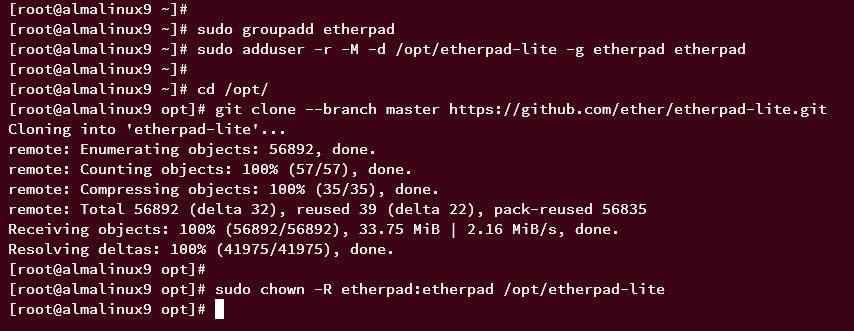
Create a system user and group etherpad:
sudo groupadd etherpad
sudo adduser -r -M -d /opt/etherpad-lite -g etherpad etherpad
Download the Etherpad source code via git:
git clone --branch master https://github.com/ether/etherpad-lite.git /opt/etherpad-lite
Change ownership of /opt/etherpad-lite:
sudo chown -R etherpad:etherpad /opt/etherpad-lite
Install Etherpad dependencies:
cd /opt/etherpad-lite
sudo su -s /bin/bash -c "./bin/installDeps.sh" etherpad
The installation process output should be similar to this:

Configure Etherpad settings in settings.json using the nano editor:
nano settings.json
Adjust the settings to configure the Etherpad application appropriately.
Save and exit when done.
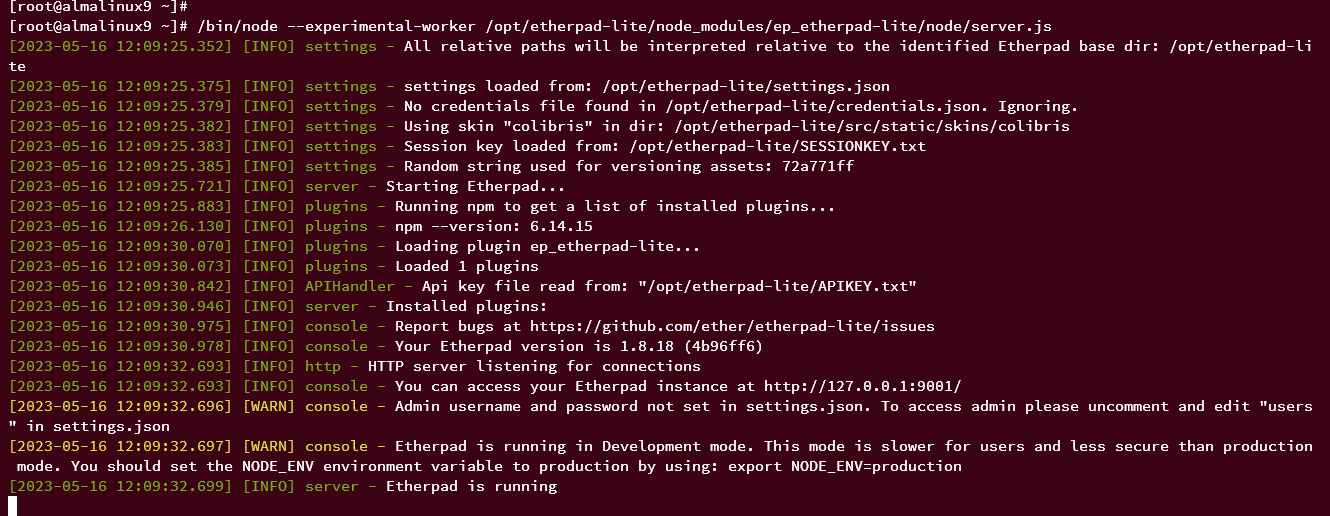
Verify and run Etherpad:
/bin/node --experimental-worker /opt/etherpad-lite/node_modules/ep_etherpad-lite/node/server.js
A successful installation yields the following output:
Terminate with Ctrl+c.
Running Etherpad as a Systemd Service
Configure Etherpad to run as a systemd service, which eases its management via systemctl commands.
Create a systemd service file:
sudo nano /lib/systemd/system/etherpad.service
Insert the configuration below:
[Unit]
Description=Etherpad-lite, the collaborative editor.
After=syslog.target network.target mariadb.service nginx.service

[Service]
Type=simple
User=etherpad
Group=etherpad
WorkingDirectory=/opt/etherpad-lite
Environment=NODE_ENV=production
ExecStart=/bin/node --experimental-worker /opt/etherpad-lite/node_modules/ep_etherpad-lite/node/server.js
# use mysql plus a complete settings.json to avoid Service hold-off time over, scheduling restart.
Restart=always

[Install]
WantedBy=multi-user.target
Save and close the file.
Reload the systemd manager:
sudo systemctl daemon-reload
Start and enable the Etherpad service:
sudo systemctl start etherpad
sudo systemctl enable etherpad
Check the Etherpad service status:
sudo systemctl status etherpad
If Etherpad is running correctly, the output will display ‘active (running)‘.

Verify Etherpad’s port is open:
ss -tulpn | grep 9001

Configuring Nginx as a Reverse Proxy
To expose Etherpad to end-users, configure Nginx as a reverse proxy. Ensure a domain name and SSL certificates are set up beforehand.
Create an Nginx server block configuration:
sudo nano /etc/nginx/conf.d/etherpad.conf
Use the template below, substituting your domain details and SSL certificate paths:
# enforce HTTPS
server {
    listen        80;
    server_name   etherpad.howtoforge.local;
    return 301    https://$host$request_uri;
}

# we're in the http context here
map $http_upgrade $connection_upgrade {
    default upgrade;
    ''      close;
}

server {
    listen        443 ssl http2;
    server_name   etherpad.howtoforge.local;

    access_log  /var/log/nginx/eplite.access.log;
    error_log   /var/log/nginx/eplite.error.log;

    ssl_certificate      /etc/letsencrypt/live/etherpad.howtoforge.local/fullchain.pem;
    ssl_certificate_key  /etc/letsencrypt/live/etherpad.howtoforge.local/privkey.pem;

    ssl_session_timeout  5m;

    ssl_protocols TLSv1.2;
    ssl_prefer_server_ciphers on;
    ssl_ciphers "EECDH+ECDSA+AESGCM EECDH+aRSA+AESGCM EECDH+ECDSA+SHA384 EECDH+ECDSA+SHA256 EECDH+aRSA+SHA384 EECDH+aRSA+SHA256 EECDH+aRSA+RC4 EECDH EDH+aRSA RC4 !aNULL !eNULL !LOW !3DES !MD5 !EXP !PSK !SRP !DSS";

    location / {
        proxy_pass          http://127.0.0.1:9001;
        proxy_buffering     off; # be careful, this line doesn't override any proxy_buffering on set in a conf.d/file.conf
        proxy_set_header    Host $host;
        proxy_pass_header   Server;

        # Note you might want to pass these headers etc too.
        proxy_set_header    X-Real-IP $remote_addr; # https://nginx.org/en/docs/http/ngx_http_proxy_module.html
        proxy_set_header    X-Forwarded-For $remote_addr; # EP logs to show the actual remote IP
        proxy_set_header    X-Forwarded-Proto $scheme; # for EP to set secure cookie flag when https is used
        proxy_http_version  1.1; # recommended with keepalive connections

        # WebSocket proxying - from https://nginx.org/en/docs/http/websocket.html
        proxy_set_header    Upgrade $http_upgrade;
        proxy_set_header    Connection $connection_upgrade;
    }
}
Save and close the file.
Test the Nginx configuration:
sudo nginx -t
Successful output should appear as “Syntax is ok – test is successful“.
Restart Nginx to apply changes:
sudo systemctl restart nginx

Visit your domain (e.g., https://etherpad.howtoforge.local/) to access Etherpad. Create a new pad by entering a pad name and clicking OK.
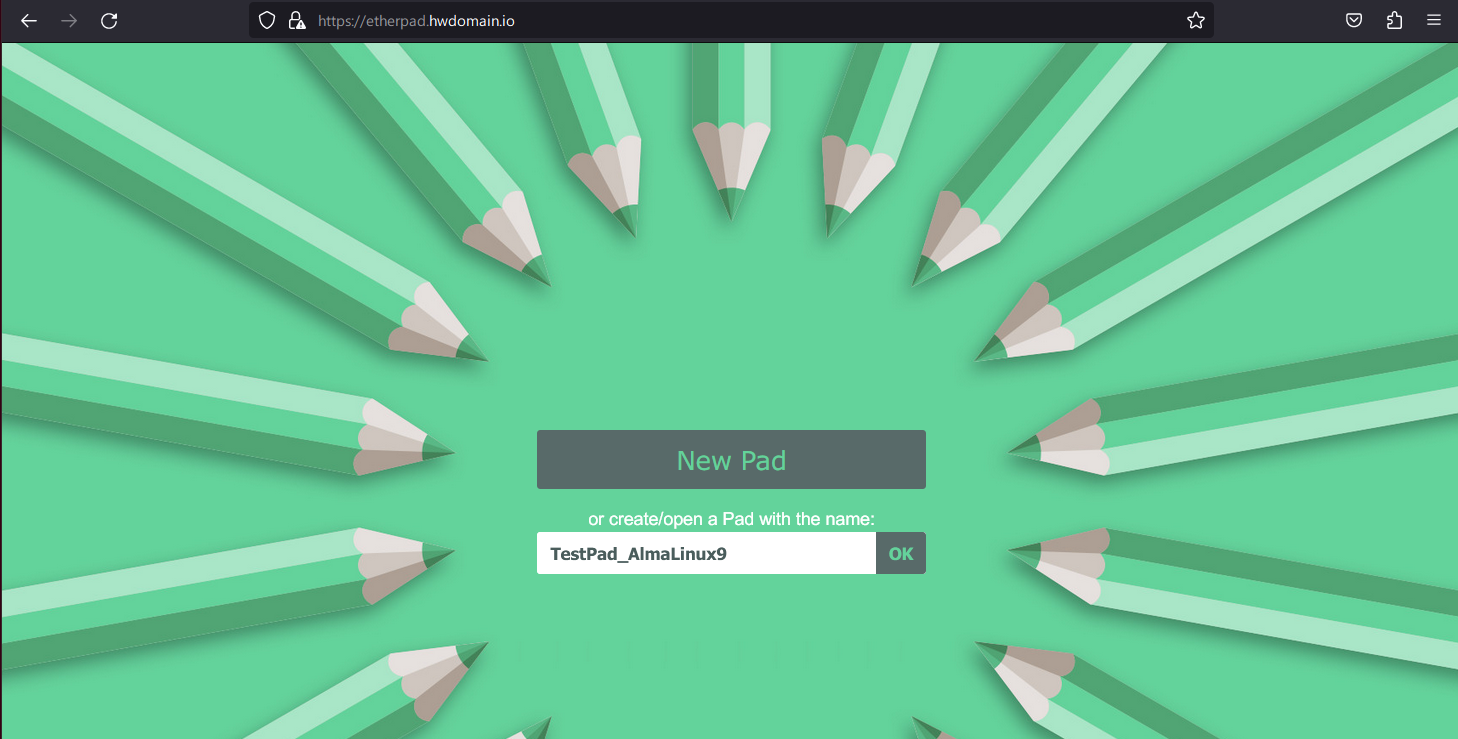
Start using Etherpad as a collaborative editor:

Conclusion
Congratulations, you have successfully installed Etherpad on AlmaLinux 9 with a MariaDB database and Nginx web server while securing it with SSL certificates. You can now use Etherpad as a collaborative editor with your team.
Frequently Asked Questions (FAQ)
- What is Etherpad?
- Etherpad is a web-based collaborative real-time editor for teams, offering version control and support for various document formats.
- Can I use Etherpad with MySQL instead of MariaDB?
- Yes, Etherpad can be configured to use either MySQL or MariaDB as its database backend.
- Why is Node.js required for Etherpad?
- Node.js is used because Etherpad is built on it, making it essential for Etherpad’s real-time collaboration functionalities.
- How can I secure my Etherpad installation?
- Securing Etherpad can be achieved by setting up SSL certificates via LetsEncrypt and configuring Nginx as a reverse proxy.
- Can I install other plugins for Etherpad?
- Yes, Etherpad supports various plugins that can extend and enhance its functionality.
