Enterprise Information Portals (EIP) have experienced significant growth, evolving from a trend to essential business tools. One of these powerful tools is Liferay, a web-based platform coded in Java. The Liferay Portal Community Edition is based on the Digital Experience Platform (DXP). In this tutorial, we will guide you through installing Liferay Portal 7.2 on CentOS 8 with MariaDB, Tomcat, and Elasticsearch.
Requirements
- Liferay Portal CE 7.2.0 GA1
- MariaDB 10.3
- Tomcat 9.0 Bundled
- Elasticsearch 6.8.4
- OpenJDK 8
- CentOS 8
For hardware requirements, refer to the Liferay Portal EE Reference Architecture & Hardware Requirements.
Application Server Setup
- Hostname: APPSRV
- Contents: Liferay Portal 7.2 + MariaDB
Preparing the Server (APPSRV)
Disable SELinux
sudo vi /etc/selinux/config
    # This file controls the state of SELinux on the system.
    # SELINUX= can take one of these three values:
    # enforcing - SELinux security policy is enforced.
    # permissive - SELinux prints warnings instead of enforcing.
    # disabled - No SELinux policy is loaded.
    SELINUX=enforcing
    # SELINUXTYPE= can take one of these three values:
    # targeted - Targeted processes are protected,
    # minimum - Modification of targeted policy. Only selected processes are protected.
    # mls - Multi Level Security protection.
    SELINUXTYPE=targeted
Change “enforcing” to “disabled”. This change takes effect after restarting the machine.
Check SELinux status:
getenforcing

Change Server Hostname
sudo hostnamectl set-hostname APPSRV
Verify the change:
hostnamectl

Add Firewall Exception for Port 8080
Check firewall status:
sudo firewall-cmd --state
![]()
sudo firewall-cmd --permanent --add-port=8080/tcp
    sudo firewall-cmd --reload

Verify the new firewall rules:
sudo firewall-cmd --list-all

Installing Liferay Portal and MariaDB on APPSRV
2-1 Installing MariaDB Database
Liferay Portal 7.2 supports multiple databases, but we will use MariaDB 10.3 in this tutorial.
sudo yum install mariadb mariadb-server
a. Start the MariaDB Service
sudo systemctl start mariadb
b. Enable the Service on Startup
sudo systemctl enable mariadb
c. Secure the Database Installation
sudo mysql_secure_installation
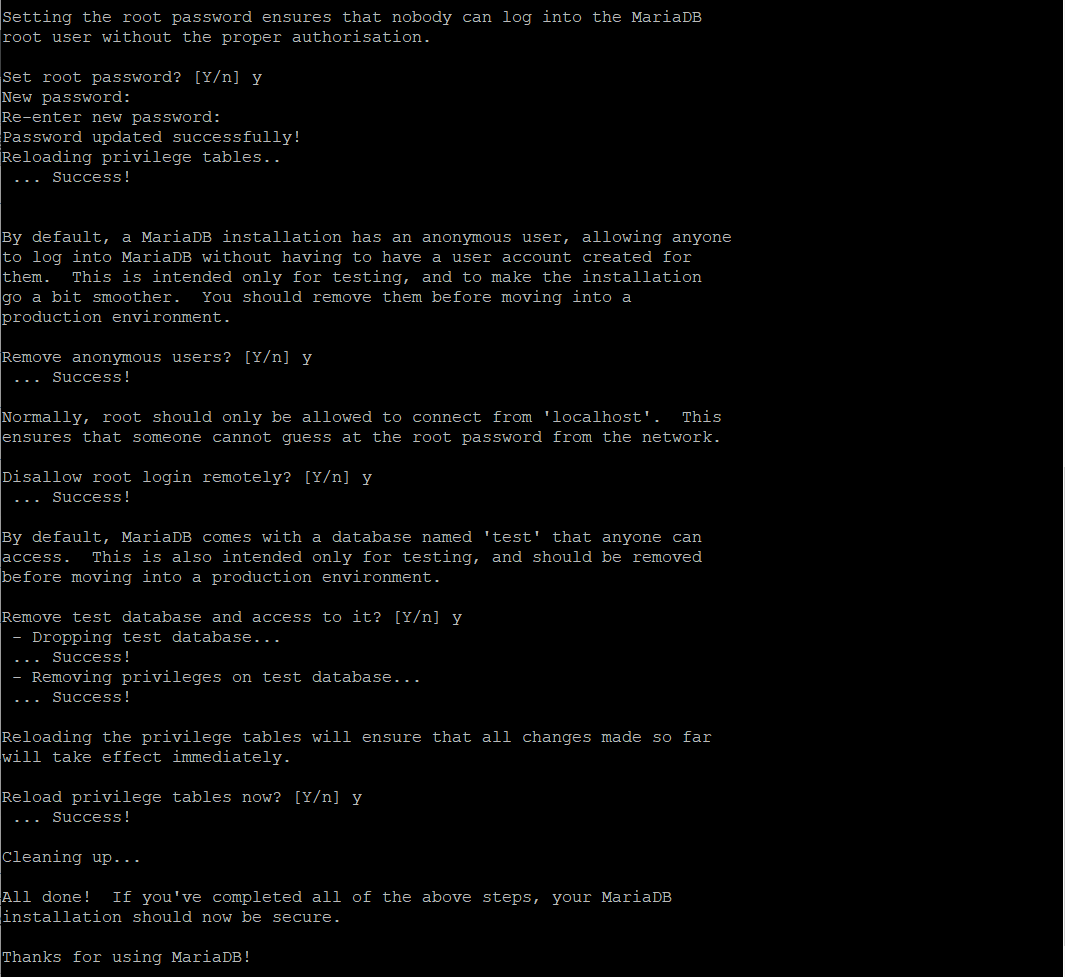
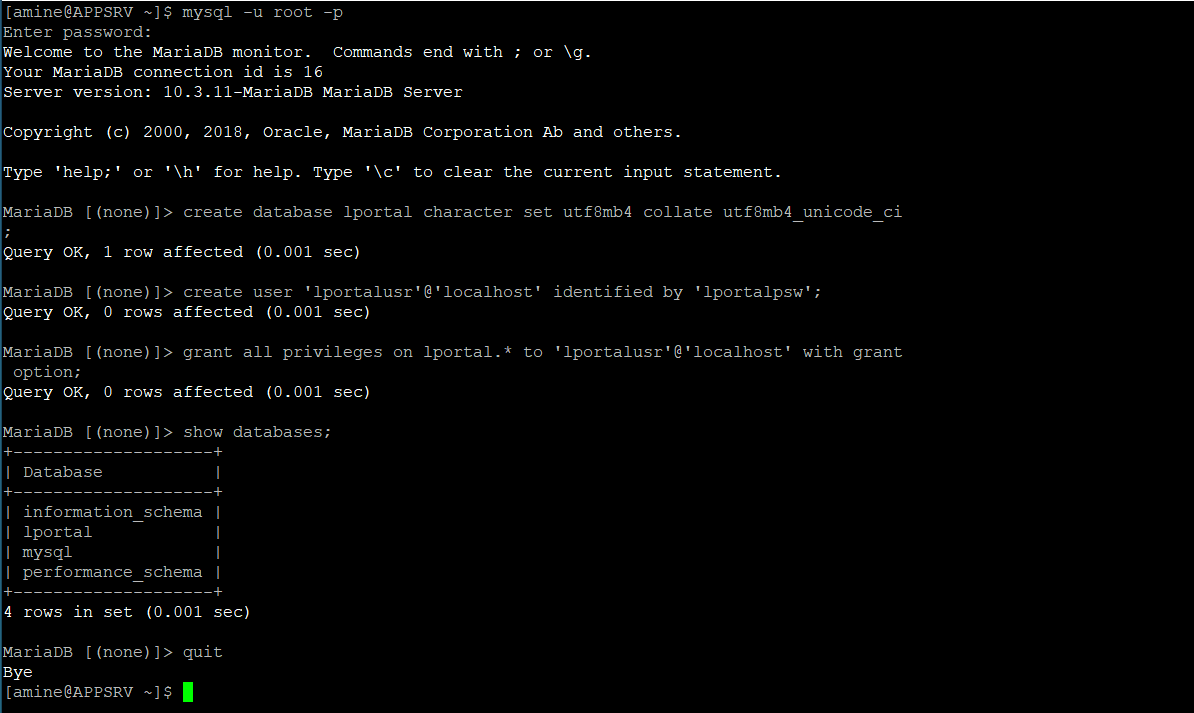
Now create a database named “lportal” and a user with full access:
mysql -u root -p
Enter the password set in step “c”.
    MariaDB [(none)]> create database lportal character set utf8mb4 collate utf8mb4_unicode_ci;
    MariaDB [(none)]> create user 'lportalusr'@'localhost' identified by 'lportalpsw';
    MariaDB [(none)]> grant all privileges on lportal.* to 'lportalusr'@'localhost' with grant option;
Verify the new database:
MariaDB [(none)]> show databases;
2-2 Install OpenJDK
For Liferay, Java 8 or 11 is compatible. We will install OpenJDK 8:
sudo yum install -y java-1.8.0-openjdk java-1.8.0-openjdk-devel
Check the Java environment variable: $JAVA_HOME
echo $JAVA_HOME
![]()
The variable is empty. Let’s set it:
    export JAVA_HOME=/usr/lib/jvm/java
    export JRE_HOME=$JAVA_HOME/jre
    export PATH=$PATH:$JAVA_HOME/bin:$JRE_HOME/bin
Verify the setup:
echo $JAVA_HOME
![]()
2-3 Install Liferay Portal
With MariaDB and Java installed and configured, we can proceed to install Liferay Portal. First, ensure wget is available, then use it to download the necessary files:
sudo yum -y install wget
Download Liferay Portal 7.2 CE:
wget https://github.com/liferay/liferay-portal/releases/download/7.2.0-ga1/liferay-ce-portal-tomcat-7.2.0-ga1-20190531153709761.tar.gz
ls

Move the file to the /opt/ directory:
sudo cp liferay-ce-portal-tomcat-7.2.0-ga1-20190531153709761.tar.gz /opt/
Extract the file:
sudo tar xvf liferay-ce-portal-tomcat-7.2.0-ga1-20190531153709761.tar.gz
ls
![]()
Rename the extracted Liferay folder to “liferay” (note the case sensitivity) and delete the downloaded tarball to save space:
sudo mv liferay-portal-7.2.0-ga1 liferay
sudo rm -f liferay-ce-portal-tomcat-7.2.0-ga1-20190531153709761.tar.gz
Configure Liferay
Create a configuration file named “portal-ext.properties” for the Liferay database in the directory /opt/liferay/tomcat-9.0.17/webapps/ROOT/WEB-INF/classes/:
sudo vi /opt/liferay/tomcat-9.0.17/webapps/ROOT/WEB-INF/classes/portal-ext.properties
    jdbc.default.driverClassName=org.mariadb.jdbc.Driver
    jdbc.default.url=jdbc:mariadb://localhost/lportal?useUnicode=true&characterEncoding=UTF-8&useFastDateParsing=false
    jdbc.default.username=lportalusr
    jdbc.default.password=lportalpsw
    schema.run.enabled=true
    schema.run.minimal=true
Ensure the username and password match those created during the MariaDB installation. Avoid using the root account for security reasons. Modify the following lines:
jdbc.default.username=lportalusr
jdbc.default.password=lportalpsw
If your database server is separate from the Liferay server (recommended for better performance), update the jdbc.default.url line with the IP address of the remote database server:
jdbc.default.url=jdbc:mariadb://192.168.1.1/lportal?useUnicode=true&characterEncoding=UTF-8&useFastDateParsing=false
Run a Configuration Check
cd /opt/liferay/tomcat-9.0.17/bin/
sudo chmod +x *.sh
sudo ./configtest.sh
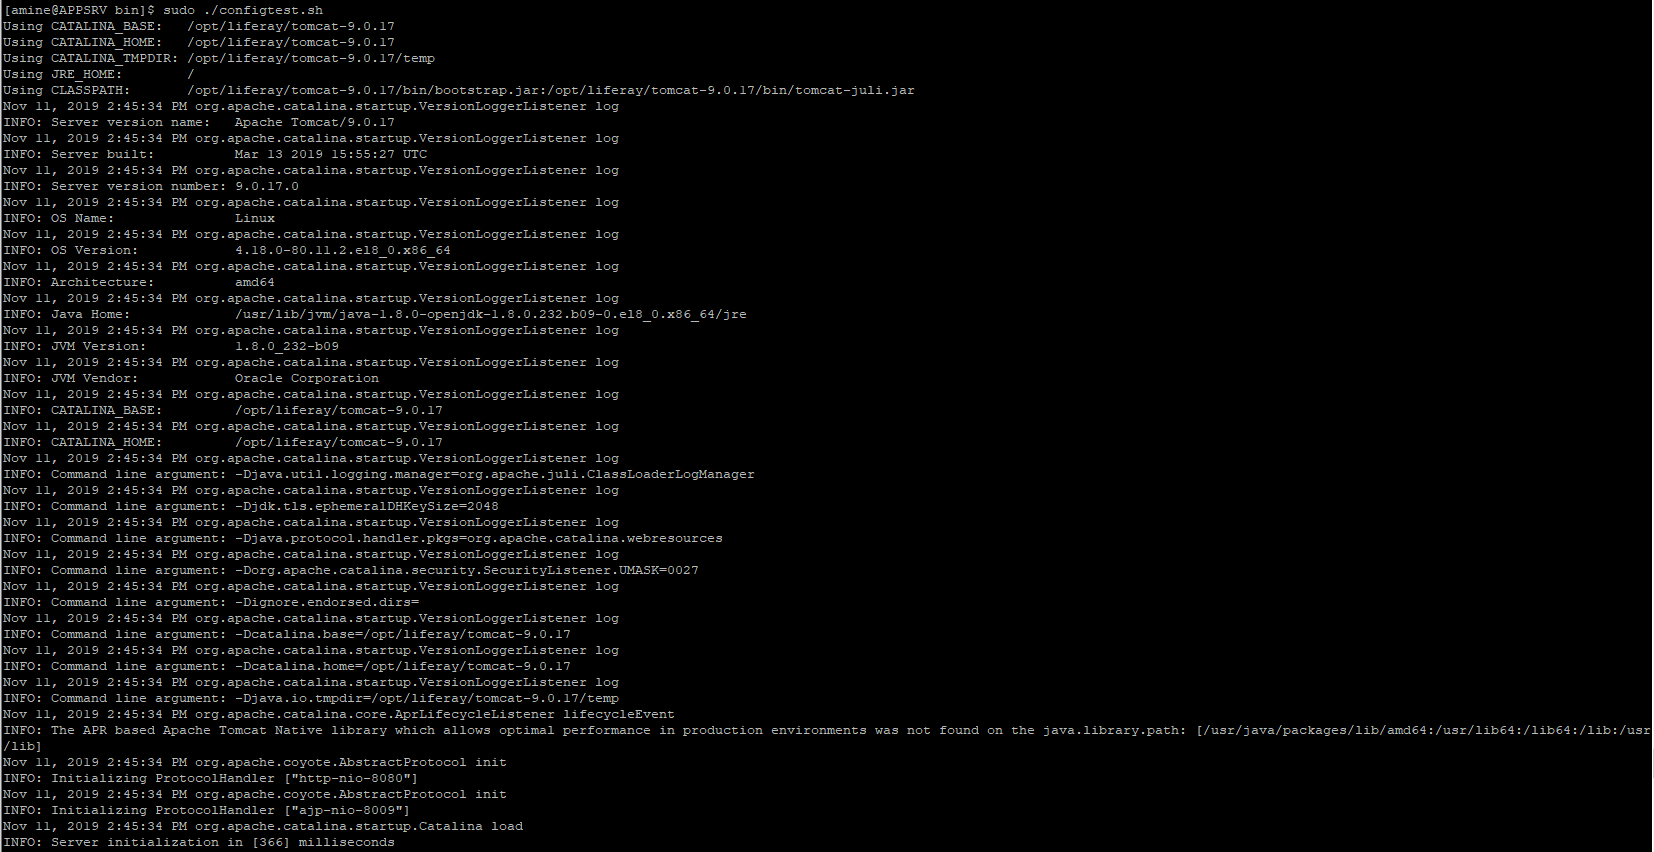
No errors should appear here.
Start Liferay
To initiate the startup process, navigate to the following directory:
cd /opt/liferay/tomcat-9.0.17/bin/
Ensure the scripts are executable:
sudo chmod +x *.sh
Run the startup script:
sudo ./startup.sh

You can monitor server startup and server messages as needed:
sudo tail -f /opt/liferay/tomcat-9.0.17/log/catalina.out
This log file is generated after starting the service. The initial startup log is extensive; subsequent restarts will have shorter logs.

The server is now up and running.
Access Liferay for the first time via http://YOUR_SERVER_IP:8080.
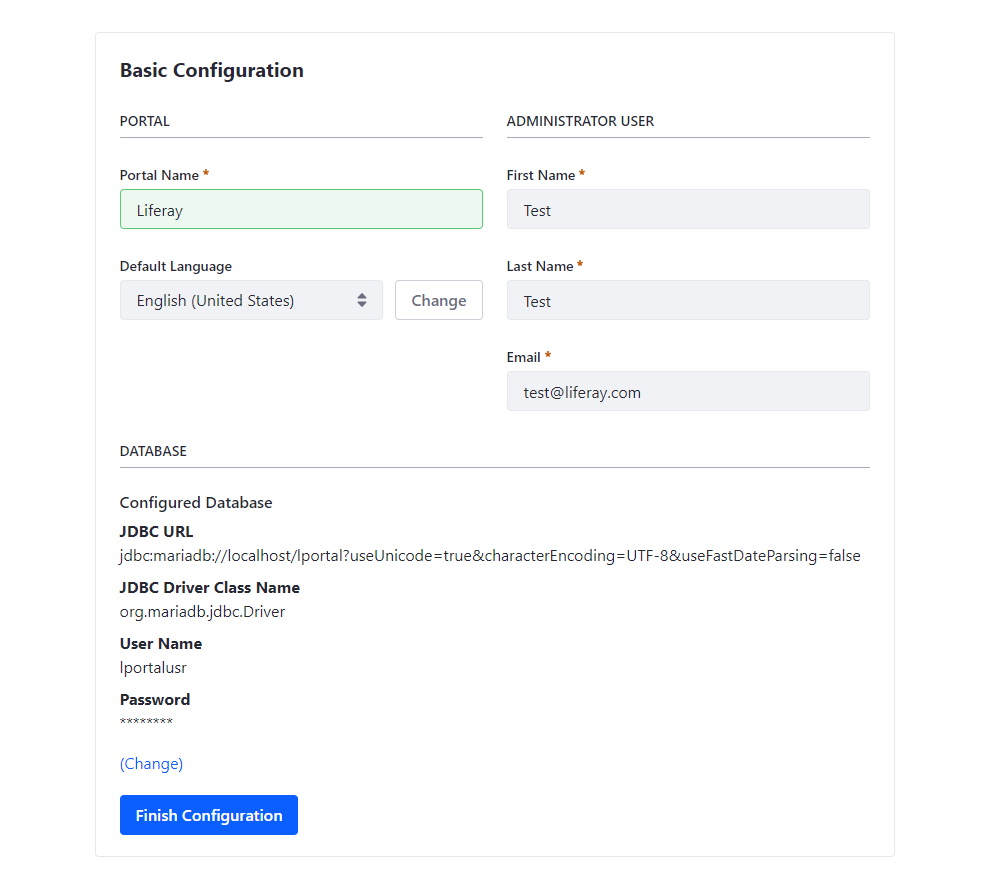
Ensure that the database configuration matches what is specified in the portal-ext.properties file. Choose your Portal Name, First Name, Last Name, and a login email address—be careful, as it serves as your login credential.
After filling in the necessary fields, click “Finish Configuration” and restart your Liferay server.
cd /opt/liferay/tomcat-9.0.17/bin/
sudo ./shutdown.sh
While the Liferay service is stopped, we will proceed to configure the Systemd service.
Configure Systemd Service
Create a Systemd service file “liferay.service” in /etc/systemd/system/:
sudo useradd -m -d /home/liferay -c 'Service Account for Liferay Portal' liferay
sudo vi /etc/systemd/system/liferay.service
Here is the content of the file:
    [Unit]
    Description=Liferay Portal CE
    After=network.target

    [Service]
    Type=forking
    User=liferay
    Group=liferay
    ExecStart=/opt/liferay/tomcat-9.0.17/bin/startup.sh
    ExecStop=/opt/liferay/tomcat-9.0.17/bin/shutdown.sh
    TimeoutStartSec=600
    TimeoutStopSec=200
    SuccessExitStatus=143

    [Install]
    WantedBy=multi-user.target
Adjust the permissions:
    sudo chmod 664 /etc/systemd/system/liferay.service
    sudo chown -R liferay:liferay /opt/liferay/
    sudo systemctl enable liferay
    sudo systemctl start liferay
Check the service status:
sudo systemctl status liferay

Finalize the Configuration
Complete the final configuration steps:
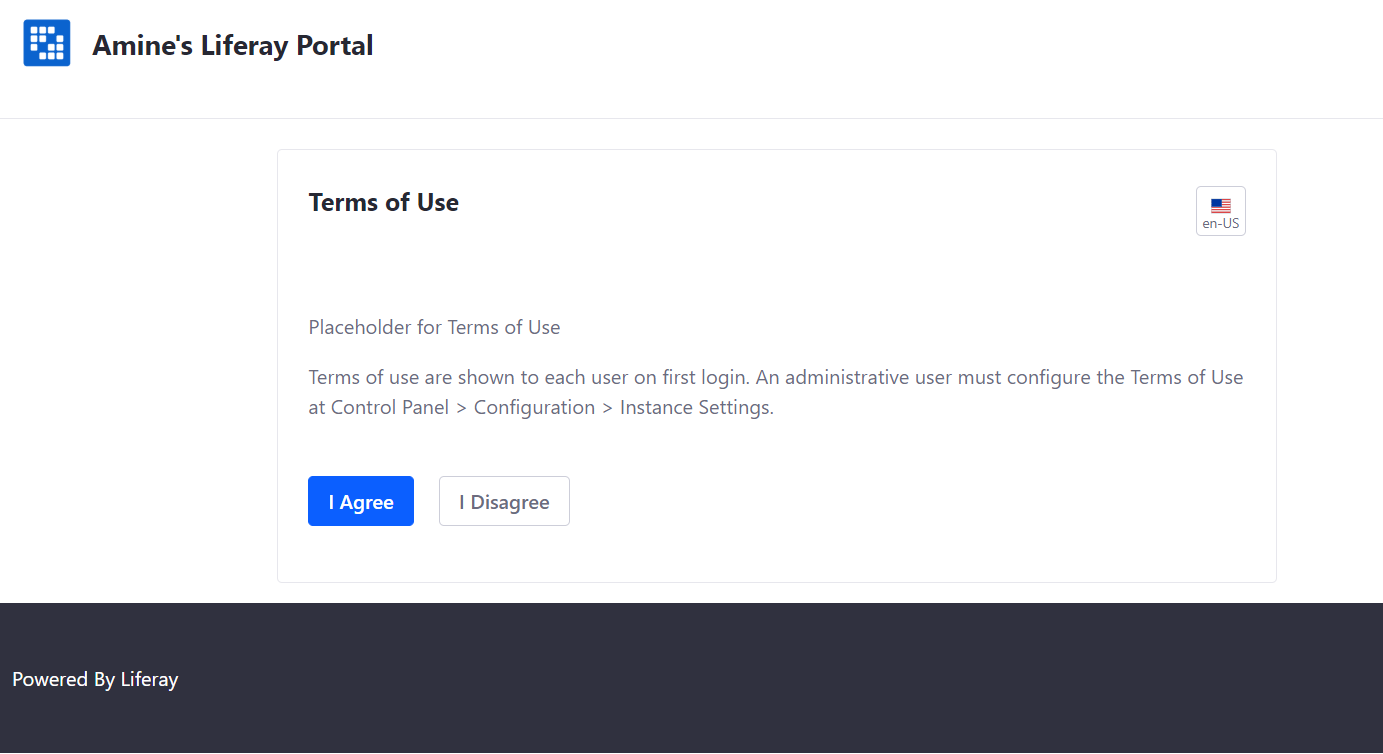
Once you accept the agreement, you will be required to set a password and select a security question.
Conclusion
Congratulations! Your Liferay Portal is now fully operational. For more customization options, visit the official Liferay documentation.
FAQ
- What is Liferay Portal?Liferay Portal is a web platform coded in Java, designed to help manage digital experiences on portals, websites, and dashboards.
- Why disable SELinux for Liferay installation?SELinux may interfere with Liferay operations. Disabling it simplifies installation, but ensure that your system’s security is addressed through alternative measures.
- Can I use other databases besides MariaDB?Yes, Liferay supports several databases. However, this tutorial focuses on MariaDB 10.3 due to its efficiency and ease of integration.
- Is it necessary to use OpenJDK 8?OpenJDK 8 is recommended for compatibility with Liferay 7.2, although OpenJDK 11 is also supported.