NTP, or Network Time Protocol, is a networking protocol for synchronizing clocks on a computer network.
Chrony is an implementation of NTP and serves as an alternative to other applications like ntpd. Compatible with Unix-like systems, Chrony is open-source software released under the GNU GPL v2 and is the default NTP server software for various Linux distributions.
This guide will demonstrate how to install Chrony on an AlmaLinux 9 server, setting it up both as an NTP server and client. Additionally, you’ll learn to use the chronyc command line for managing and monitoring Chrony.
Prerequisites
Before proceeding, ensure you have:
- An AlmaLinux 9 server, referred to here as alma9, with IP address 192.168.10.15.
- An AlmaLinux client machine, referred to as node1, with IP address 192.168.10.20.
- A non-root user with root privileges.
Setting Up System Timezone
Before installing the Chrony NTP server, configure your system timezone using the timedatectl utility. Start by listing available timezones:
sudo timedatectl list-timezones
Change the default timezone to Europe/Amsterdam with this command:
sudo timedatectl set-timezone Europe/Amsterdam
Verify your current timezone:
sudo timedatectl
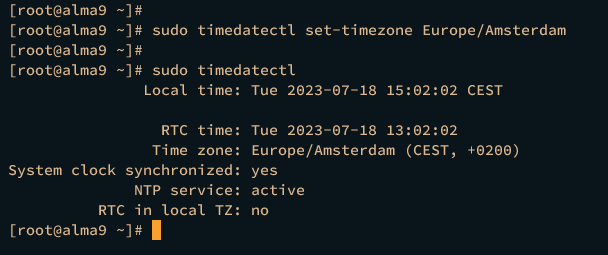
Alternatively, check the system timezone by verifying the /etc/localtime symlink:
ls -lah /etc/localtime
Installing Chrony
Chrony can be installed from the AlmaLinux repository using dnf. First, locate the Chrony package:
sudo dnf search chrony

Install the Chrony package:
sudo dnf install chrony

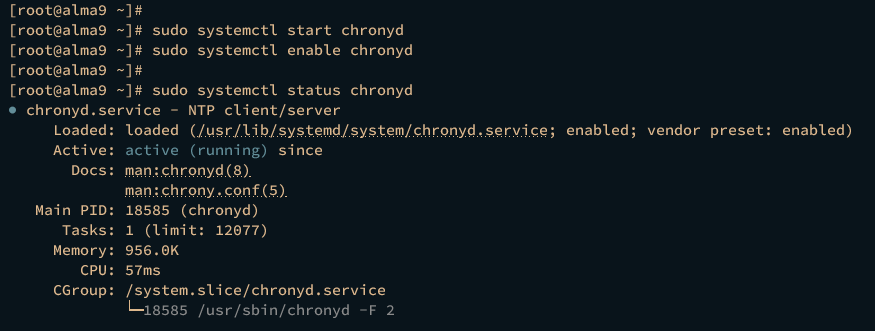
After installation, start and enable the chronyd service:
sudo systemctl start chronyd
sudo systemctl enable chronyd
Verify that chronyd is running:
sudo systemctl status chronyd
Configuring Firewalld
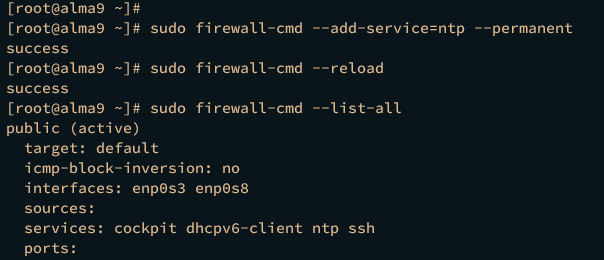
To allow NTP traffic through the firewall, add the NTP service to firewalld:
sudo firewall-cmd --add-service=ntp --permanent
sudo firewall-cmd --reload
For local networks, specify the subnet using a rich rule:
sudo firewall-cmd --permanent --add-rich-rule="rule family='ipv4' source address='192.168.5.0/24' service='ntp' accept"
sudo firewall-cmd --reload
Verify the firewalld rules:
sudo firewall-cmd --list-all
Setting Up Chrony as NTP Server
To configure Chrony as an NTP server, edit two main settings in the /etc/chrony.conf file:
- Add NTP pool servers from ntppool.org as sources.
- Allow specific network subnets to access your NTP server.
Edit the /etc/chrony.conf file:
sudo nano /etc/chrony.conf
Add the following server entries:
# list servers
server 0.nl.pool.ntp.org iburst
server 1.nl.pool.ntp.org iburst
server 2.nl.pool.ntp.org iburst
server 3.nl.pool.ntp.org iburst
Include this line to allow a subnet:
# allowed clients
allow 192.168.10.0/24
If necessary, adjust these options:
# Allow the system clock to be stepped in the first three updates if its offset is larger than 1 second.
makestep 1.0 3
# Enable hardware timestamping on all interfaces that support it.
#hwtimestamp *

# Specify the file containing keys for NTP authentication.
keyfile /etc/chrony.keys

# Get TAI-UTC offset and leap seconds from the system tz database.
leapsectz right/UTC
After saving, restart chronyd:
sudo systemctl restart chronyd
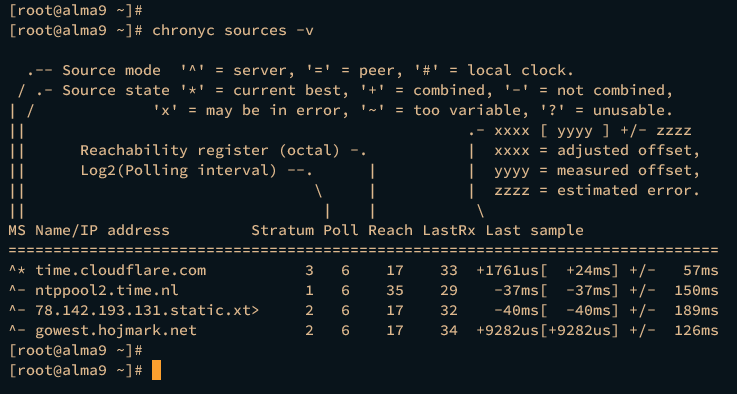
Verify NTP server sources with chronyc:
chronyc sources

For detailed information, add the -v flag:
chronyc sources -v
Setting Up Chrony as NTP Client
Here’s how to configure Chrony as an NTP client on the machine node1:
First, ensure the chronyd service is running on your client machine:
sudo systemctl status chronyd
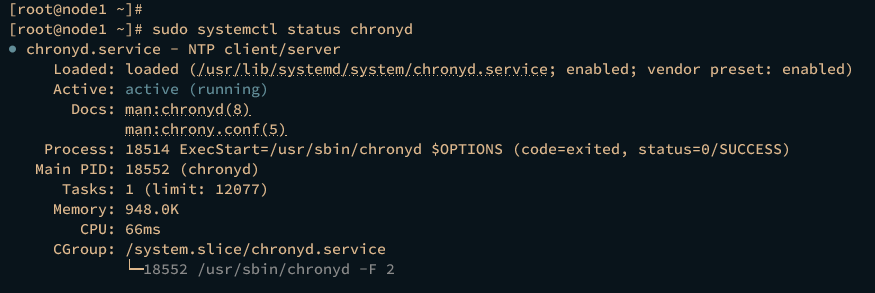
Edit the client’s /etc/chrony.conf file:
sudo nano /etc/chrony.conf
Add your NTP server to the server parameter:
server 192.168.10.15 iburst prefer
Restart and check the chronyd service:
sudo systemctl restart chronyd
sudo systemctl status chronyd
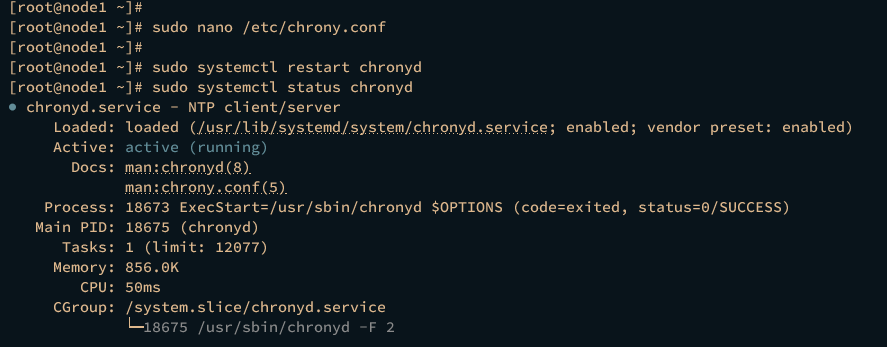
Verify NTP server sources:
chronyc sources
chronyc sources -v
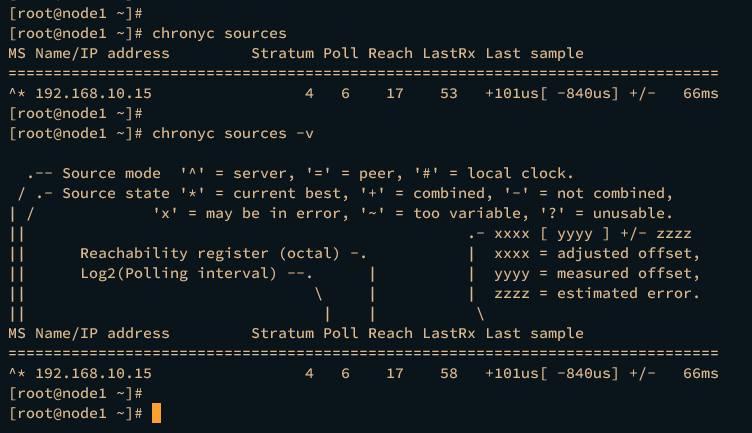
Basic Usage of Chronyc Command
Chronyc is Chrony’s command-line tool for managing NTP servers and clients. Here are some basic commands:
- Show system clock performance:
chronyc tracking
![]()
- Measure and check NTP source:
chronyc ntpdata
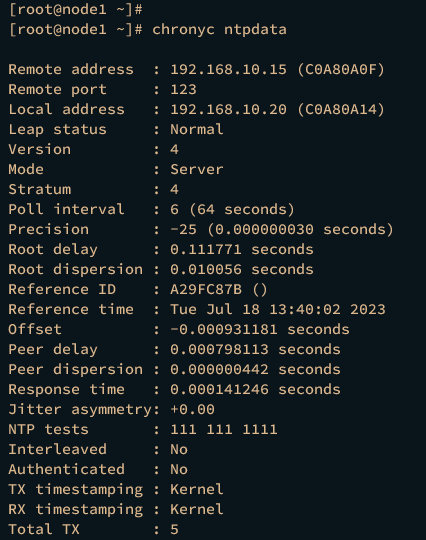
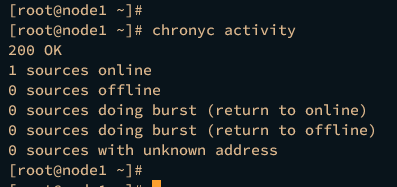
- Show number of NTP servers on the peer:
chronyc activity
- Allow subnets for accessing Chrony NTP server:
chronyc allow IP/subnet
- Deny subnets from accessing the server:
chronyc deny IP/subnet
Conclusion
Congratulations! You’ve successfully installed Chrony on an AlmaLinux 9 server, configured it as an NTP server and client, and learned to manage Chrony with the chronyc command-line tool, including setting the system timezone.
FAQ
- What is Chrony?
Chrony is an implementation of the NTP protocol for synchronizing clocks on computers and networks, providing an alternative to the traditional ntpd program. - Why should I use Chrony over NTPD?
Chrony provides advantages such as better accuracy in unstable networks, faster synchronization, and better handling of large clock adjustments. - Can Chrony serve both as an NTP client and server?
Yes, Chrony can act as both an NTP client and server on the same machine. - What is the purpose of the “iburst” option?
The “iburst” option speeds up the initial synchronization by sending requests more frequently on startup. - How do I verify that Chrony is synchronized with an NTP source?
Use the commandchronyc trackingto check the synchronization status and accuracy.
