Docker is an open-source platform that allows developers and sysadmins to build, package, and run applications in lightweight containers. Docker simplifies application deployment within software containers, making it ideal for consistent environments across different platforms.
Django is a Python-based web application framework that adheres to the Model-View-Controller (MVC) architecture. It is known for its speed and efficiency, enabling developers to launch applications swiftly.
This guide provides a step-by-step walkthrough on creating a Docker image for an existing Django application project on Ubuntu 16.04. We’ll explore how to dockerize a Python Django application and subsequently deploy it as a container using a Docker Compose script. Additionally, we’ll incorporate an Nginx Docker image for the web server and a PostgreSQL image for the database.
What Will We Do?
- Install Docker-CE
- Install Docker Compose
- Configure Project Environment
- Build and Run
- Testing
Step 1 – Install Docker-CE
We’ll install the Docker Community Edition (Docker-CE) from the Docker repository, ensuring support for Compose file version 3. Begin by installing the necessary Docker dependencies via the apt command.
sudo apt install -y \
    apt-transport-https \
    ca-certificates \
    curl \
    software-properties-common
Add the Docker key and repository with the following commands:
curl -fsSL https://download.docker.com/linux/ubuntu/gpg | sudo apt-key add -
    sudo add-apt-repository \
    "deb [arch=amd64] https://download.docker.com/linux/ubuntu \
    $(lsb_release -cs) \
    stable"

Update the repository and install Docker-CE with:
sudo apt update
    sudo apt install -y docker-ce
Once installation is complete, start and enable the Docker service to run at system startup:
systemctl start docker
    systemctl enable docker
Create a user named ‘omar’ and add it to the Docker group:
useradd -m -s /bin/bash omar
    usermod -a -G docker omar

Switch to the ‘omar’ user and verify the installation:
su - omar
    docker run hello-world
Seeing the hello-world message indicates success.
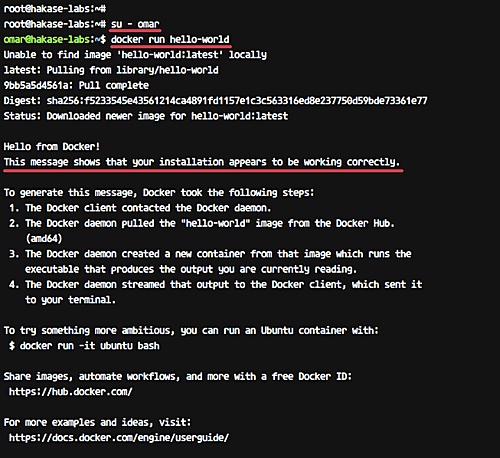
Docker-CE installation is now complete.
Step 2 – Install Docker Compose
This tutorial uses Docker Compose supporting version 3 files, which we will install manually.
Download the latest Docker Compose version and set its executable permissions:
sudo curl -L https://github.com/docker/compose/releases/download/1.21.0/docker-compose-$(uname -s)-$(uname -m) -o /usr/local/bin/docker-compose
    sudo chmod +x /usr/local/bin/docker-compose
Check the Docker Compose version:
docker-compose version
Ensure the version matches Docker Compose 1.21.

Docker Compose that supports version 3 files is successfully installed.
Step 3 – Configure Project Environment
Create the project environment for the Django application. This includes preparing the directory structure to house the project files, such as the Dockerfile, Django project, and Nginx configuration files.
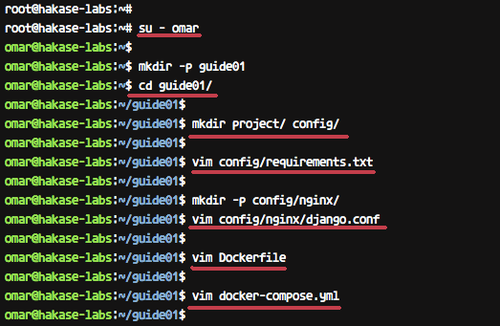
As the ‘omar’ user, create a new ‘guide01’ directory and navigate into it:
su - omar
    mkdir -p guide01
    cd guide01/
Within ‘guide01’, create ‘project’ and ‘config’ directories:
mkdir project/ config/
- Directory ‘project’: Contains all Django project files.
- Directory ‘config’: Stores configuration files such as Nginx config and Python dependencies.
Create requirements.txt
Inside ‘config’, create a new ‘requirements.txt’ file using a text editor:
vim config/requirements.txt
Add the following packages:
Django==2.0.4
    gunicorn==19.7.0
    psycopg2==2.7.4
Create Nginx Configuration File: django.conf
Create the ‘nginx’ directory under ‘config’ and add the Nginx virtual host configuration:
mkdir -p config/nginx/
    vim config/nginx/django.conf
Insert this configuration:
upstream web {
    ip_hash;
    server web:8000;
    }
    server {
    location / {
    proxy_pass http://web/;
    }
    listen 8000;
    server_name localhost;
    location /static {
    autoindex on;
    alias /src/static/;
    }
    }
Create Dockerfile
In ‘guide01’, create a new ‘Dockerfile’:
vim Dockerfile
Add the Dockerfile script:
FROM python:3.5-alpine
    ENV PYTHONUNBUFFERED 1
    RUN apk update && \
    apk add --virtual build-deps gcc python-dev musl-dev && \
    apk add postgresql-dev bash
    RUN mkdir /config
    ADD /config/requirements.txt /config/
    RUN pip install -r /config/requirements.txt
    RUN mkdir /src
    WORKDIR /src
Using Alpine Linux, our Docker setup ensures minimal overhead. The script installs Python 3.5 and PostgreSQL client before defining the project structure.
Create Docker Compose Script
Generate the ‘docker-compose.yml’ file inside ‘guide01’:
vim docker-compose.yml
Add the following configuration:
version: '3'
    services:
    db:
    image: postgres:10.3-alpine
    container_name: postgres01
    nginx:
    image: nginx:1.13-alpine
    container_name: nginx01
    ports:
    - "8000:8000"
    volumes:
    - ./project:/src
    - ./config/nginx:/etc/nginx/conf.d
    depends_on:
    - web
    web:
    build: .
    container_name: django01
    command: bash -c "python manage.py makemigrations && python manage.py migrate && python manage.py collectstatic --noinput && gunicorn hello_django.wsgi -b 0.0.0.0:8000"
    depends_on:
    - db
    volumes:
    - ./project:/src
    expose:
    - "8000"
    restart: always
This setup defines services for the database (PostgreSQL), the web server (Nginx), and the Django app, each leveraging an Alpine Linux base image.
Configure Django Project
Transfer your Django files to the ‘project’ directory:
cd ~/django
    cp -r * ~/guide01/project/
Navigate to the ‘project’ directory and adjust settings.py:
cd ~/guide01/project/
    vim hello_django/settings.py
Add ‘web’ to ALLOW_HOSTS, and configure the database settings and static directory:
ALLOW_HOSTS = ['web']
    DATABASES = {
    'default': {
    'ENGINE': 'django.db.backends.postgresql_psycopg2',
    'NAME': 'postgres',
    'USER': 'postgres',
    'HOST': 'db',
    'PORT': 5432,
    }
    }
    STATIC_ROOT = os.path.join(BASE_DIR, 'static/')
Finalize changes and prepare to build and run your Django project in a Docker container.
Step 4 – Build and Run the Docker Image
We’ll construct a Docker image for the Django project using the settings defined in the ‘guide01’ directory. First, navigate to the directory:
cd ~/guide01/
Build the Docker images using Docker Compose:
docker-compose build
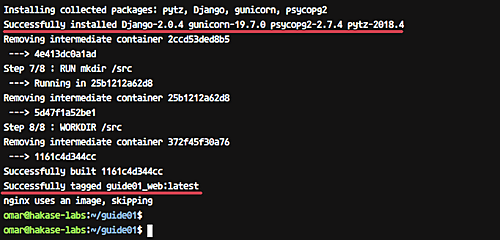
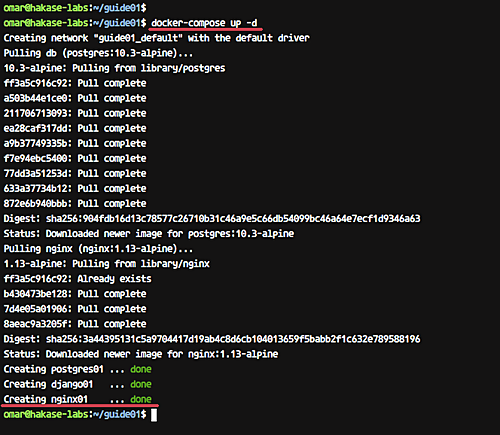
Launch all services described in the Docker Compose script:
docker-compose up -d
Docker will take a moment to compile our Python image and fetch the Nginx and PostgreSQL images.
Afterward, check for running containers and list available Docker images:
docker-compose ps
    docker-compose images
You should see three active containers and a list of Docker images as confirmation.
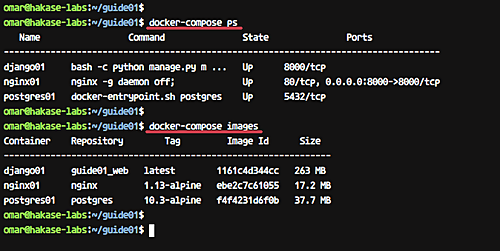
Your Django application is now running in a Docker container with Docker images successfully created for each service.
Step 5 – Testing
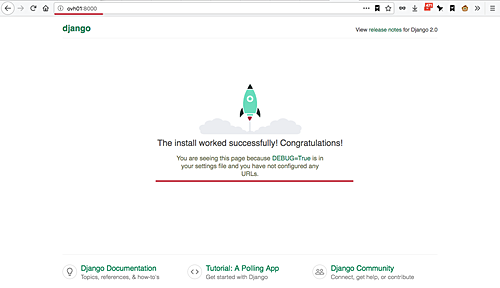
In your browser, enter the server address followed by port 8000, e.g., http://ovh01:8000/
This should display the default Django home page.
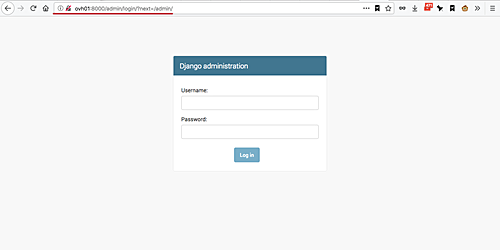
Go to the Django admin interface by appending ‘/admin’ to the URL:
http://ovh01:8000/admin/
The Django admin login page should be visible.
You’ve successfully Dockerized the Python Django Application!
Reference
FAQ
Why use Docker for Django applications?
Docker enables consistent development, testing, and production environments, reducing “it works on my machine” issues. It also simplifies the setup as dependencies and configurations are encapsulated in containers.
What is the advantage of using Docker Compose?
Docker Compose manages multiple containers and their configurations, making it easier to define and run complex applications involving multiple services, such as a web server, database, and application backend.
Why choose PostgreSQL over other databases for Django?
PostgreSQL is powerful, open-source, and supported natively by Django, providing robust features like complex queries, foreign keys, and full-text search.
How do I scale my application using Docker?
Docker provides tools to scale containers across clusters of machines. You can use Docker Swarm or Kubernetes to orchestrate and manage container scaling and deployment.
