Neos is a modern, free, and open-source content management system designed for easy website building and management. Built on its own PHP framework, Neos allows you to create a fully customized experience. More than just a CMS, it is a content application platform adaptable to the needs of any enterprise, with the convenience of content editing right in the browser.
This tutorial will guide you through the installation of Neos on an Ubuntu 18.04 server.
Requirements
- A server running Ubuntu 18.04.
- Root password configured on your server.
Getting Started
Begin by updating your server to the latest package versions. Execute the following commands:
apt-get update -y
apt-get upgrade -y
After the updates, restart your server to apply all changes.
Install LAMP Server
To set up Neos, you’ll need to install the Apache web server, MariaDB database server, PHP, and additional necessary packages. Run:
    apt-get install apache2 mariadb-server php7.2 libapache2-mod-php7.2 php7.2-common php7.2-mysql php7.2-gmp
    php7.2-curl php7.2-intl php7.2-mbstring php7.2-xmlrpc php7.2-gd php7.2-bcmath php7.2-xml php7.2-cli
    php7.2-zip curl unzip git -y
With the packages installed, start Apache and MariaDB services, and enable them to start at boot time:
    systemctl start apache2
systemctl start mariadb
systemctl enable apache2
systemctl enable mariadb
Modify the php.ini file with the following configurations:
nano /etc/php/7.2/apache2/php.ini
    short_open_tag = On
    memory_limit = 256M
    upload_max_filesize = 150M
    max_execution_time = 360
    date.timezone = Asia/Kolkata
Configure MariaDB Database
First, secure your MariaDB installation:
mysql_secure_installation
Respond to the prompts as shown below:
    Enter current password for root (enter for none):
    Set root password? [Y/n]: N
    Remove anonymous users? [Y/n]: Y
    Disallow root login remotely? [Y/n]: Y
    Remove test database and access to it? [Y/n]: Y
    Reload privilege tables now? [Y/n]: Y
With MariaDB secured, create a database and user for Neos:
mysql -u root -p
    CREATE DATABASE neosdb;
    CREATE USER 'neos'@'localhost' IDENTIFIED BY 'mypassword';
Grant privileges and set the character set to UTF8:
    GRANT ALL PRIVILEGES ON neosdb.* TO 'neos'@'localhost' IDENTIFIED BY 'mypassword' WITH GRANT OPTION;
    ALTER DATABASE neosdb charset=utf8;
    FLUSH PRIVILEGES;
    EXIT;
Edit the MariaDB configuration file:
nano /etc/mysql/mariadb.conf.d/50-server.cnf
    innodb_file_format = Barracuda
    innodb_large_prefix = 1
    innodb_file_per_table = 1
    innodb_default_row_format = dynamic
Restart MariaDB to apply changes:
systemctl restart mariadb
Verify service status with:
systemctl status mariadb
Install Neos CMS
Install Composer, a dependency manager for PHP:
    curl -sS https://getcomposer.org/installer | php
    sudo mv composer.phar /usr/local/bin/composer
Navigate to Apache’s web root and install Neos:
cd /var/www/html/
composer create-project --no-dev neos/neos-base-distribution neoscms
chown -R www-data:www-data /var/www/html/neoscms/
chmod -R 755 /var/www/html/neoscms/
Configure Apache for NeosCMS
Create an Apache virtual host configuration for Neos:
nano /etc/apache2/sites-available/neoscms.conf
    <VirtualHost *:80>
         ServerAdmin admin@example.com
         DocumentRoot /var/www/html/neoscms/Web
         ServerName example.com
         <Directory /var/www/html/neoscms/Web/>
              Options FollowSymlinks
              AllowOverride All
              Require all granted
         </Directory>

         ErrorLog ${APACHE_LOG_DIR}/neos_error.log
         CustomLog ${APACHE_LOG_DIR}/neos_access.log combined

         <Directory /var/www/html/neoscms/Web/>
            RewriteEngine on
            RewriteBase /
            RewriteCond %{REQUEST_FILENAME} !-f
            RewriteRule ^(.*) index.php [PT,L]
        </Directory>
    </VirtualHost>
Enable the Neos site and Apache rewrite module:
a2ensite neoscms.conf
a2enmod rewrite
Restart Apache to finalize the setup:
systemctl restart apache2
Check Apache’s status using:
systemctl status apache2
Access Neos Web Interface
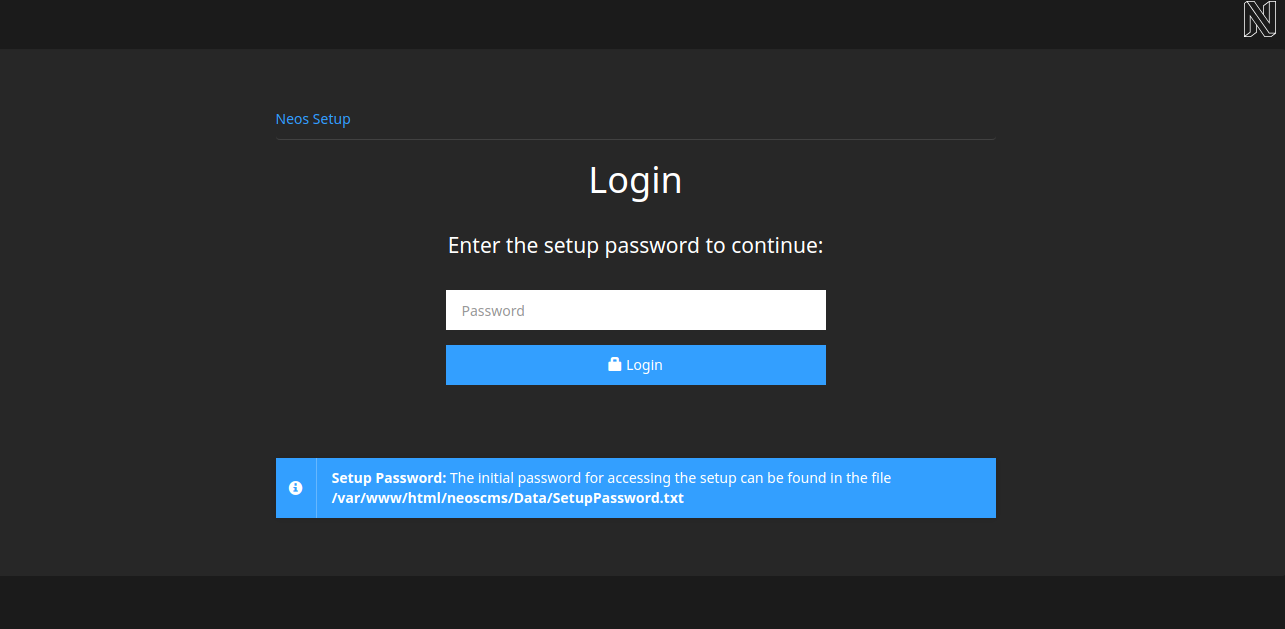
Launch a browser and access Neos at http://example.com/setup. You’ll see the setup page:

Enter the setup password found in the /var/www/html/neoscms/Data/SetupPassword.txt file and click Login. Continue following the setup steps, ensuring all required components are present, configuring the database, and setting up an administrator account.
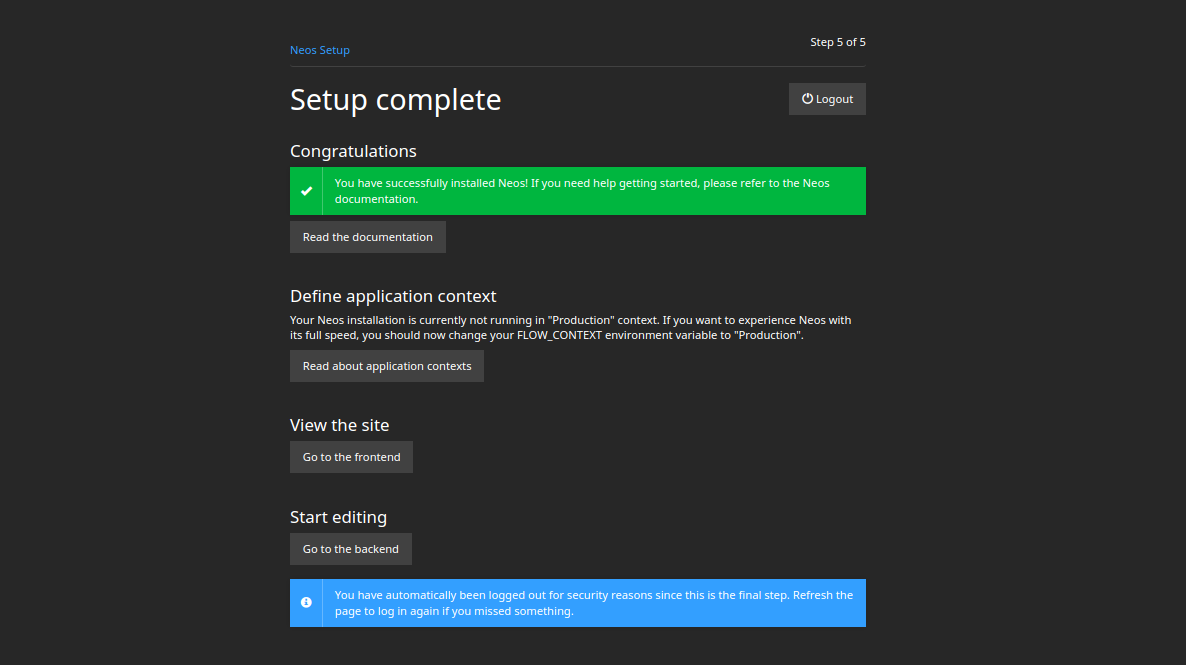
You can skip creating a new site for now if desired, and upon successful installation, you’ll reach the completion page.

Click on the Go to backend button, and you’ll be redirected to the Neos login page. Log in with your admin credentials to access the Neos admin interface.
Conclusion
Congratulations! You’ve successfully installed Neos CMS on an Ubuntu 18.04 server. Enjoy hosting your website or blog with Neos, and don’t hesitate to reach out for assistance if you have any questions.
FAQ
1. What is Neos CMS?
Neos is a content management system and content application platform, known for its flexibility and customization capabilities, ideal for creating personalized web experiences.
2. Can I install Neos on a different version of Ubuntu?
Yes, while this guide is for Ubuntu 18.04, Neos can be installed on other versions of Ubuntu or even different Linux distributions by adjusting some installation steps according to the system’s package manager and software compatibility.
3. How can I access my Neos installation?
Use a web browser to visit your server’s domain configured in the virtual host, e.g., http://example.com, to begin the setup process or access the Neos dashboard.
4. What should I do if I encounter errors during installation?
Ensure all dependencies are correctly installed, check server logs for detailed error reports, and verify configuration files. If the issues persist, consult the Neos documentation or community forums for further guidance.
