phpMyAdmin is a free and open-source tool designed for managing MySQL and MariaDB databases efficiently and effectively. With its user-friendly web interface, phpMyAdmin simplifies the administration of databases, allowing users to easily create, modify, and delete databases, as well as import and export database backups, run searches, and manage users and their permissions.
Features of phpMyAdmin
- Support for multiple languages.
- Ability to import data from CSV and SQL files.
- Live charts for monitoring server activity, including connections, processes, and CPU/memory usage.
- Perform global or specific database searches.
- User-friendly web interface.
- Export data in various formats, such as CSV, SQL, XML, PDF, Word, Excel, LaTeX, and more.
In this guide, we will walk through the steps to install and secure phpMyAdmin on an Ubuntu 18.04 server.
Requirements
- A server running Ubuntu 18.04
- A non-root user with sudo privileges
Installing phpMyAdmin
Prior to installing phpMyAdmin, you need Apache and MySQL on your server. Run the command below to install them:
sudo apt-get install apache2 mysql-server -y
Since phpMyAdmin is not included in the default Ubuntu 18.04 repository, you should add a third-party PHP repository:
sudo apt-get install software-properties-common -y
sudo add-apt-repository ppa:ondrej/php
After adding the repository, install phpMyAdmin using the following command:
sudo apt-get install phpmyadmin php-mbstring php-gettext -y
During installation, select the web server option as shown below:
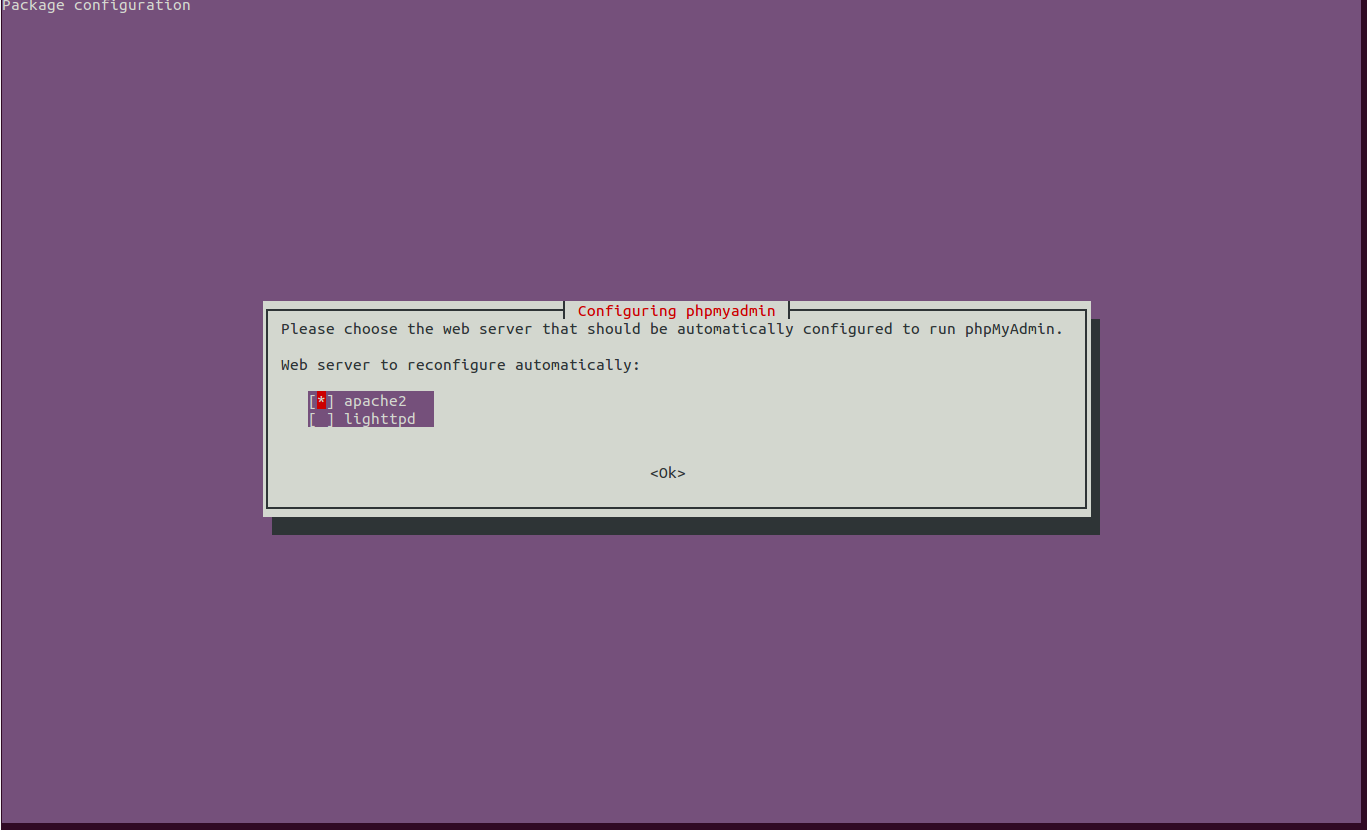
Select Apache and proceed by clicking on the OK button. Follow the instructions in the subsequent screens:
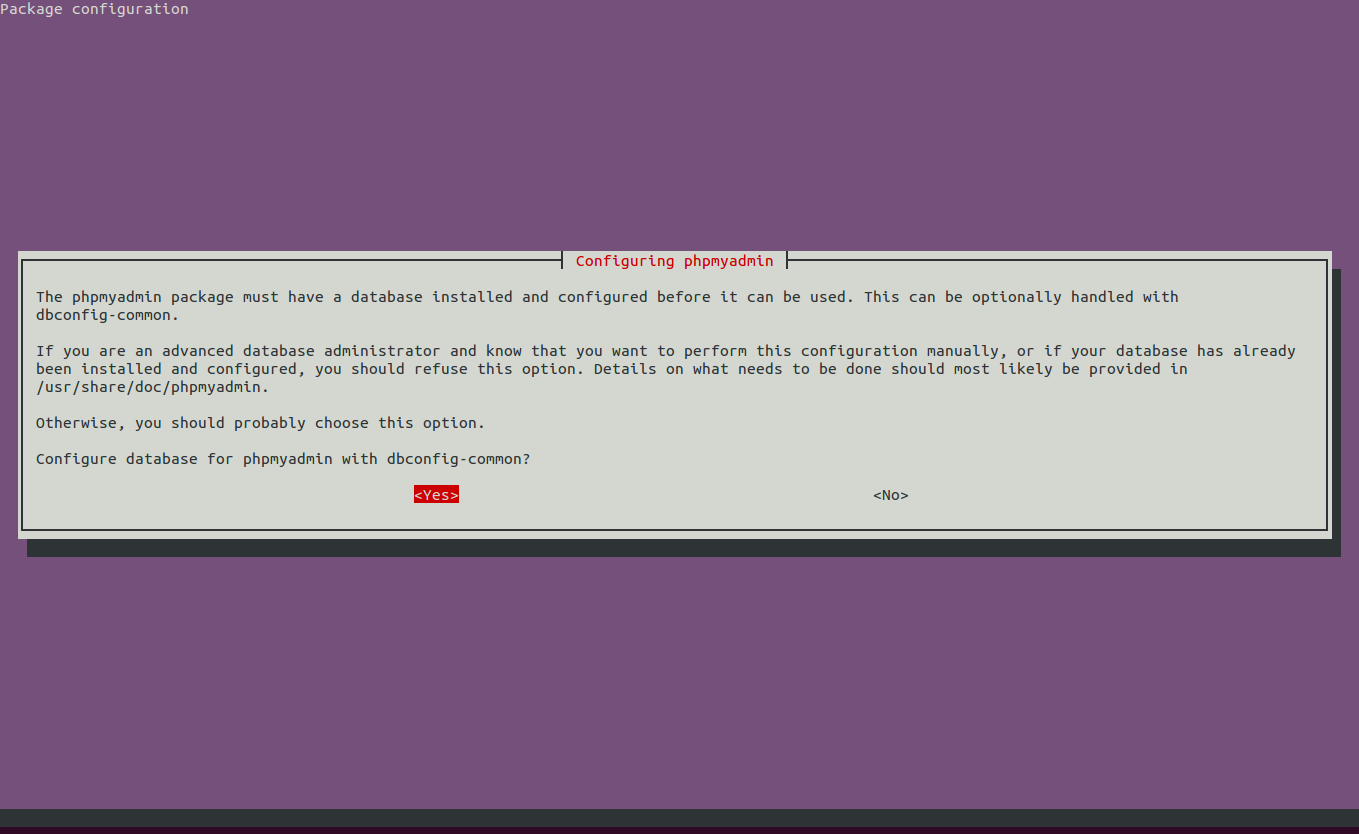
A prompt will appear, click Yes and continue as shown:
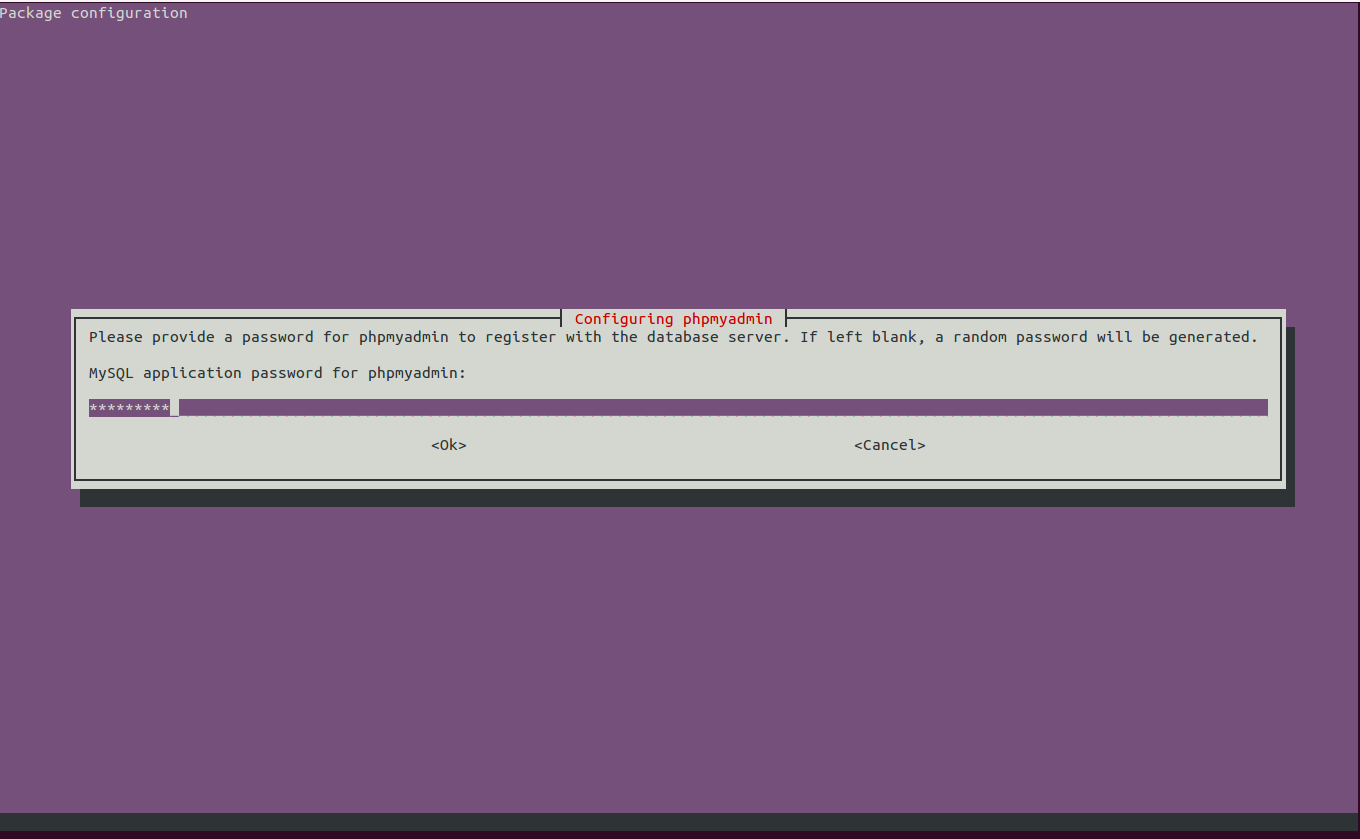
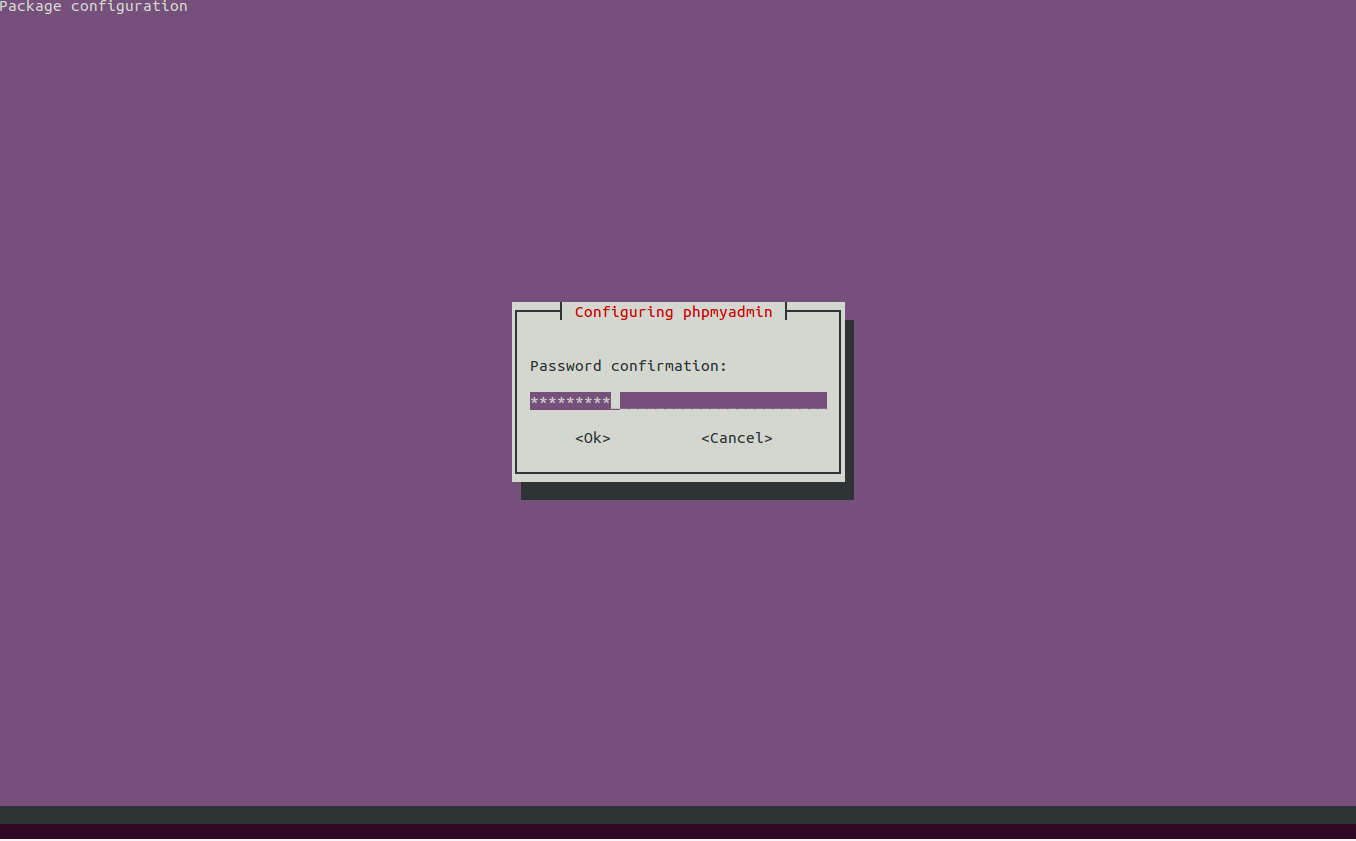
Enter your chosen MySQL application password for phpMyAdmin and click OK.
After installation, activate the mbstring PHP extension:
sudo phpenmod mbstring
Finally, restart Apache to apply the changes:
sudo systemctl restart apache2
Configuring User Authentication
While phpMyAdmin sets up a phpmyadmin user with the admin password that you selected during installation, it is advisable to create a dedicated user for database management through phpMyAdmin.
To log in as the MySQL root user, switch its authentication method from auth_socket to mysql_native_password:
sudo mysql
Inspect the authentication method:
mysql> SELECT user,authentication_string,plugin,host FROM mysql.user;
In this output, notice the root user uses auth_socket plugin:
+------------------+-------------------------------------------+-----------------------+-----------+
| user             | authentication_string                     | plugin                | host      |
+------------------+-------------------------------------------+-----------------------+-----------+
| root             |                                           | auth_socket           | localhost |
| mysql.session    | *THISISNOTAVALIDPASSWORDTHATCANBEUSEDHERE | mysql_native_password | localhost |
| mysql.sys        | *THISISNOTAVALIDPASSWORDTHATCANBEUSEDHERE | mysql_native_password | localhost |
| debian-sys-maint | *AC18DF5CAE34BF4796EF975702F038A566B48B42 | mysql_native_password | localhost |
+------------------+-------------------------------------------+-----------------------+-----------+
4 rows in set (0.01 sec)
Change the root account to mysql_native_password:
mysql> ALTER USER 'root'@'localhost' IDENTIFIED WITH mysql_native_password BY 'password';
Then, flush privileges:
mysql> FLUSH PRIVILEGES;
Verify authentication changes:
mysql> SELECT user,authentication_string,plugin,host FROM mysql.user;
The output should look like this:
+------------------+-------------------------------------------+-----------------------+-----------+
| user             | authentication_string                     | plugin                | host      |
+------------------+-------------------------------------------+-----------------------+-----------+
| root             | *2470C0C06DEE42FD1618BB99005ADCA2EC9D1E19 | mysql_native_password | localhost |
| mysql.session    | *THISISNOTAVALIDPASSWORDTHATCANBEUSEDHERE | mysql_native_password | localhost |
| mysql.sys        | *THISISNOTAVALIDPASSWORDTHATCANBEUSEDHERE | mysql_native_password | localhost |
| debian-sys-maint | *AC18DF5CAE34BF4796EF975702F038A566B48B42 | mysql_native_password | localhost |
+------------------+-------------------------------------------+-----------------------+-----------+
4 rows in set (0.01 sec)
Create a separate user named phpmyadminuser for phpMyAdmin login:
mysql -u root -p
Input the root password and proceed to create a user:
MariaDB [(none)]> CREATE USER 'phpmyadminuser'@'localhost' IDENTIFIED BY 'password';
Grant necessary permissions to the user:
MariaDB [(none)]> GRANT ALL PRIVILEGES ON *.* TO 'phpmyadminuser'@'localhost' WITH GRANT OPTION;
Exit from the MySQL shell:
MariaDB [(none)]> exit;
Access phpMyAdmin by entering http://your-server-ip/phpmyadmin in a web browser, which leads to the login page:
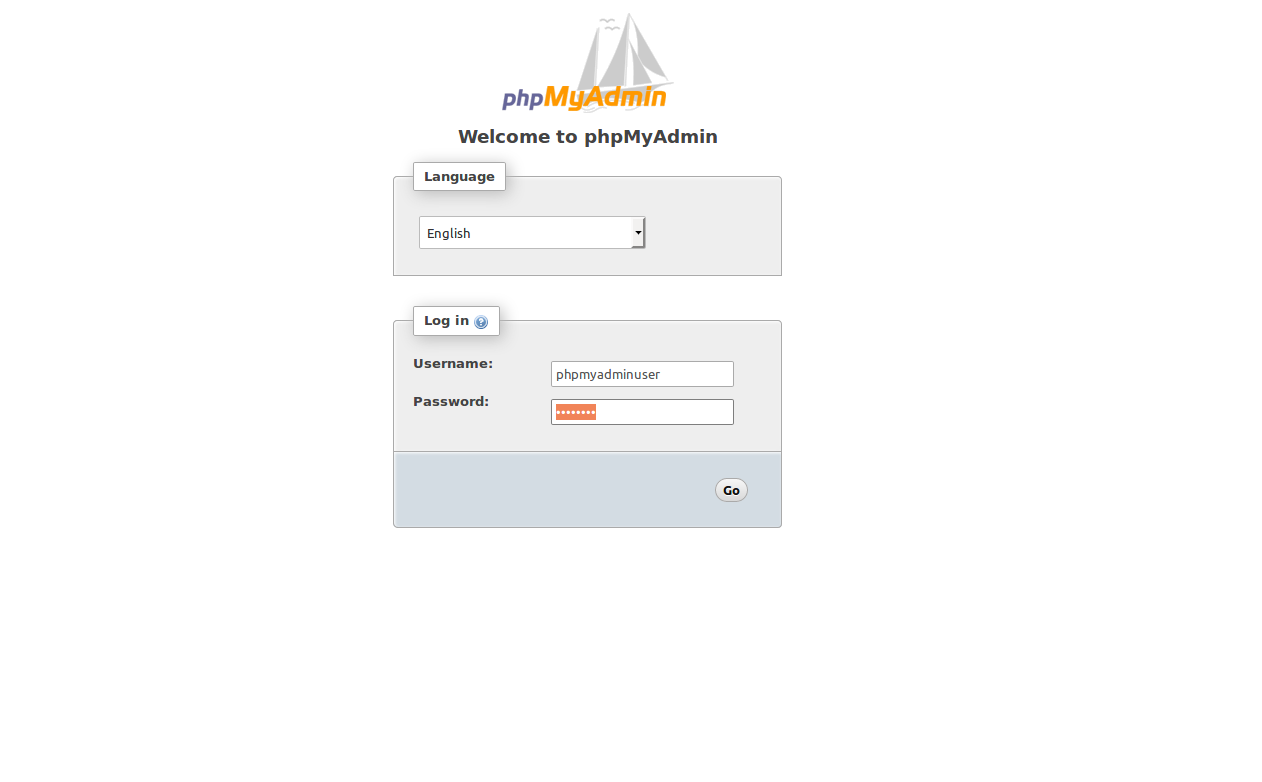
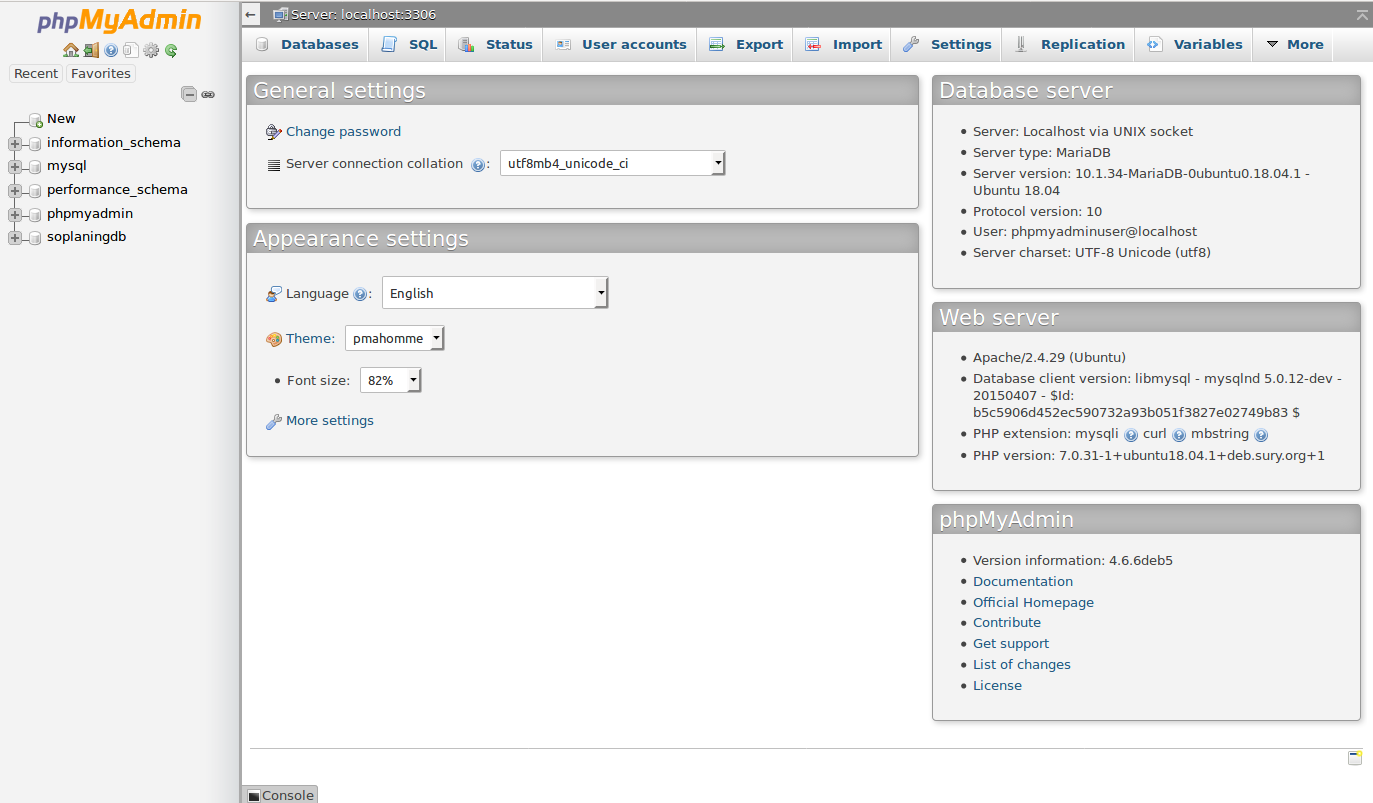
Login using your username and password, then hit Go to see the phpMyAdmin Dashboard:
Securing phpMyAdmin
Though phpMyAdmin is installed and set up, securing it against unauthorized access is crucial. Utilize Apache’s .htaccess for added security.
To begin, permit .htaccess override in phpmyadmin.conf:
sudo nano /etc/apache2/conf-available/phpmyadmin.conf
Modify as follows:
<Directory /usr/share/phpmyadmin>
    Options SymLinksIfOwnerMatch
    DirectoryIndex index.php
    AllowOverride All
Save, close the file, and restart Apache:
sudo systemctl restart apache2
Make a .htaccess file in the phpmyadmin directory:
sudo nano /usr/share/phpmyadmin/.htaccess
Include these lines:
AuthType Basic
AuthName "Restricted Files"
AuthUserFile /etc/phpmyadmin/.htpasswd
Require valid-user
Save, close, and add an admin user with htpasswd:
sudo htpasswd -c /etc/phpmyadmin/.htpasswd admin
You’ll see:
New password:
Re-type new password:
Adding password for user admin
Your phpMyAdmin has an enhanced authentication layer.
Navigate to http://your-server-ip/phpmyadmin and enter the credentials you’ve just established:

Log in by clicking on the Log In button to reach the phpMyAdmin authentication interface.
Helpful Links
FAQ
What is phpMyAdmin?
phpMyAdmin is a web-based administration tool designed to manage MySQL and MariaDB databases efficiently. It allows users to perform various database operations through a simple and easy-to-use interface.
Why should I secure phpMyAdmin?
Securing phpMyAdmin is crucial to prevent unauthorized access to your databases. By adding layers of security, you can safeguard sensitive data and ensure only authorized users can perform actions on your databases.
How can I access phpMyAdmin?
Access phpMyAdmin by typing http://your-server-ip/phpmyadmin in a web browser. Use your configured username and password to log in.
