OpenMRS, short for “Open Medical Record System,” is a free, open-source, and efficient electronic medical record (EMR) storage and retrieval system. It’s utilized for treating millions of HIV/AIDS and tuberculosis (TB) patients across developing countries. The primary aim of OpenMRS is to develop software solutions for healthcare delivery in these regions. Capable of exchanging patient data with other medical information systems, it is written in Java and provides a user-friendly web dashboard for managing electronic medical records via a browser.
This guide will walk you through the installation of the OpenMRS Medical Record System on Debian 11.
Prerequisites
- A server running Debian 11.
- A root password configured on the server.
Step 1: Install Java 8
Since OpenMRS is a Java-based application that only supports Java version 8, you need to manually install Java 8 on your server, as it is not included in the default Debian 11 repository. Follow these steps:
Create a directory for Java:
mkdir -p /usr/lib/jvm/
Extract the downloaded Java package:
tar -zxvf jdk-8u281-linux-x64.tar.gz -C /usr/lib/jvm/
Install Java 8:
update-alternatives --install /usr/bin/java java /usr/lib/jvm/jdk1.8.*/bin/java 1
Verify the Java installation:
java -version
You should see an output similar to:
java version "1.8.0_281"
Java(TM) SE Runtime Environment (build 1.8.0_281-b09)
Java HotSpot(TM) 64-Bit Server VM (build 25.281-b09, mixed mode)
Step 2: Install MySQL Server 5.6
OpenMRS supports MySQL version 5.6, not found in Debian 11’s default repository, requiring a manual source installation. Proceed with the following:
Create MySQL user and group:
groupadd mysql
useradd -g mysql mysql
Download MySQL 5.6 source:
wget https://dev.mysql.com/get/Downloads/MySQL-5.6/mysql-5.6.46-linux-glibc2.12-x86_64.tar.gz
Extract the MySQL package:
tar -xvf mysql-5.6.46-linux-glibc2.12-x86_64.tar.gz
Move to the appropriate directory:
mv mysql-5.6.46-linux-glibc2.12-x86_64 /usr/local/mysql
Set ownership:
cd /usr/local/mysql
chown -R mysql:mysql *
Install dependencies:
apt-get install libaio1 libncurses5 libnuma-dev -y
Initialize MySQL:
scripts/mysql_install_db --user=mysql
Set permissions:
chown -R root .
chown -R mysql data
Copy configuration files:
cp support-files/my-default.cnf /etc/my.cnf
cp support-files/mysql.server /etc/init.d/mysql.server
Start MySQL in safe mode:
bin/mysqld_safe --user=mysql &
Set MySQL root password:
bin/mysqladmin -u root password newpassword
Create a symbolic link:
ln -s /usr/local/mysql/bin/mysql /usr/local/bin/mysql
Restart the server:
reboot
After restarting, start MySQL service and enable it at boot:
/etc/init.d/mysql.server start
update-rc.d -f mysql.server defaults
Check MySQL status:
/etc/init.d/mysql.server status
Expect output similar to:
? mysql.server.service - LSB: start and stop MySQL
     Loaded: loaded (/etc/init.d/mysql.server; generated)
     Active: active (running) since Fri 2022-03-25 14:35:35 UTC; 5s ago
       Docs: man:systemd-sysv-generator(8)
    Process: 415 ExecStart=/etc/init.d/mysql.server start (code=exited, status=0/SUCCESS)
      Tasks: 22 (limit: 4679)
     Memory: 460.5M
        CPU: 826ms
     CGroup: /system.slice/mysql.server.service
             ??422 /bin/sh /usr/local/mysql/bin/mysqld_safe --datadir=/usr/local/mysql/data --pid-file=/usr/local/mysql/data/debian11.pid
             ??530 /usr/local/mysql/bin/mysqld --basedir=/usr/local/mysql --datadir=/usr/local/mysql/data --plugin-dir=/usr/local/mysql/lib/p?
Step 3: Install Tomcat 7
Tomcat is required to deploy OpenMRS. Follow these steps:
Create Tomcat user and group:
groupadd tomcat
useradd -s /bin/false -g tomcat -d /opt/tomcat tomcat
Download Tomcat 7:
wget https://archive.apache.org/dist/tomcat/tomcat-7/v7.0.109/bin/apache-tomcat-7.0.109.tar.gz
Create directory and extract Tomcat:
mkdir /opt/tomcat
tar -xvzf apache-tomcat-7.0.109.tar.gz -C /opt/tomcat/ --strip-components=1
Navigate to Tomcat directory and set permissions:
cd /opt/tomcat
chgrp -R tomcat /opt/tomcat
chmod -R g+r conf
chmod g+x conf
chown -R tomcat webapps/ work/ temp/ logs/
Step 4: Create a Systemd Service File for Tomcat
To manage Tomcat service, create a systemd service file:
nano /etc/systemd/system/tomcat.service
Insert the following content:
[Unit]
Description=Apache Tomcat Web Application Container
After=network.target

[Service]
Type=forking
Environment=JAVA_HOME=/usr/lib/jvm/jdk1.8.0_281
Environment=CATALINA_PID=/opt/tomcat/temp/tomcat.pid
Environment=CATALINA_HOME=/opt/tomcat
Environment=CATALINA_BASE=/opt/tomcat
Environment='CATALINA_OPTS=-Xms512M -Xmx1024M -server -XX:+UseParallelGC'
ExecStart=/opt/tomcat/bin/startup.sh
ExecStop=/opt/tomcat/bin/shutdown.sh
User=tomcat
Group=tomcat
UMask=0007
RestartSec=10
Restart=always

[Install]
WantedBy=multi-user.target
Save and close the file. Reload the systemd daemon:
systemctl daemon-reload
Start Tomcat service:
systemctl start tomcat
Check the status of the Tomcat service:
systemctl status tomcat
The output should state:
? tomcat.service - Apache Tomcat Web Application Container
     Loaded: loaded (/etc/systemd/system/tomcat.service; disabled; vendor preset: enabled)
     Active: active (running) since Fri 2022-03-25 14:38:45 UTC; 5s ago
    Process: 648 ExecStart=/opt/tomcat/bin/startup.sh (code=exited, status=0/SUCCESS)
   Main PID: 655 (java)
      Tasks: 28 (limit: 4679)
     Memory: 136.3M
        CPU: 4.124s
     CGroup: /system.slice/tomcat.service
             ??655 /usr/lib/jvm/jdk1.8.0_281/bin/java -Djava.util.logging.config.file=/opt/tomcat/conf/logging.properties -Djava.util.logging?
Tomcat is now running and listening on port 8080.
Step 5: Install OpenMRS
Create a directory for OpenMRS and set ownership:
mkdir /var/lib/OpenMRS
chown -R tomcat:tomcat /var/lib/OpenMRS
Download the OpenMRS WAR file:
wget https://sourceforge.net/projects/openmrs/files/releases/OpenMRS_Platform_2.5.0/openmrs.war
Copy the WAR file to the Tomcat webapps directory:
cp openmrs.war /opt/tomcat/webapps/
Change ownership of the WAR file:
chown -R tomcat:tomcat /opt/tomcat/webapps/openmrs.war
Step 6: Access OpenMRS Installation Wizard
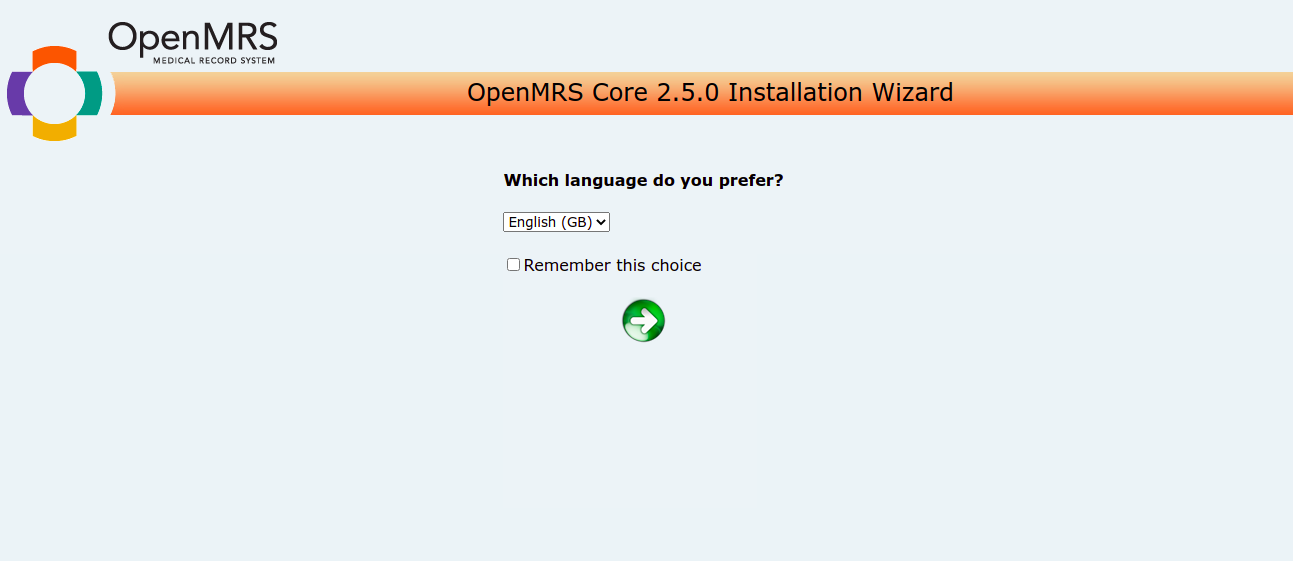
Open your browser and go to http://your-server-ip:8080/openmrs. You should see the language selection screen for OpenMRS:

Select your language and proceed:
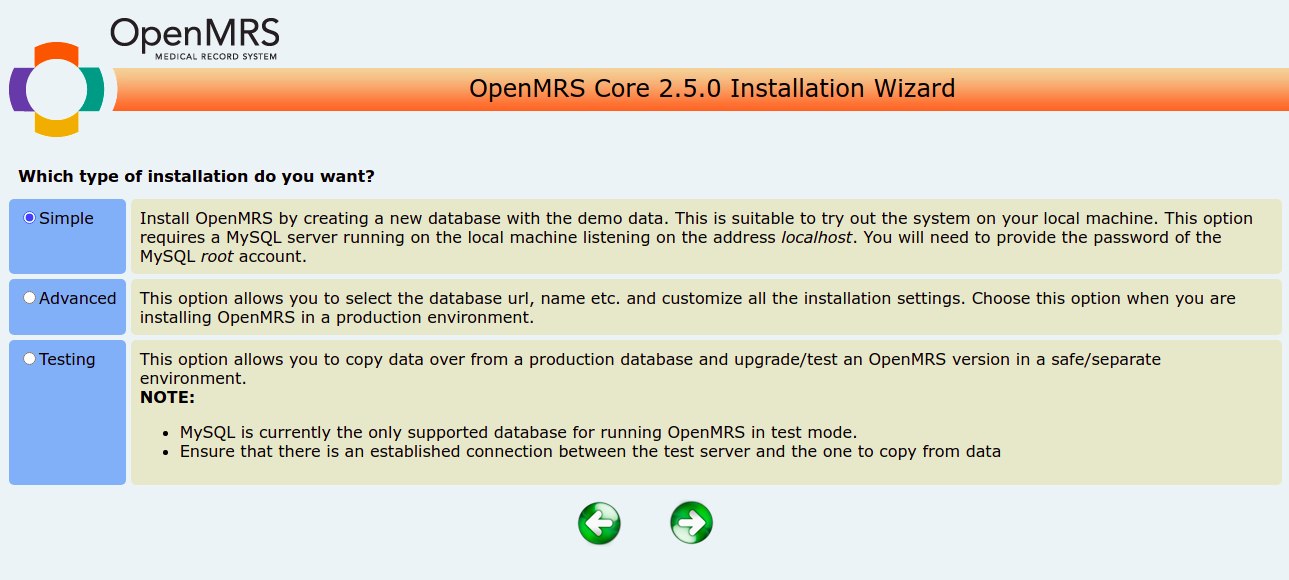
Follow the wizard through installation type and database configuration screens:

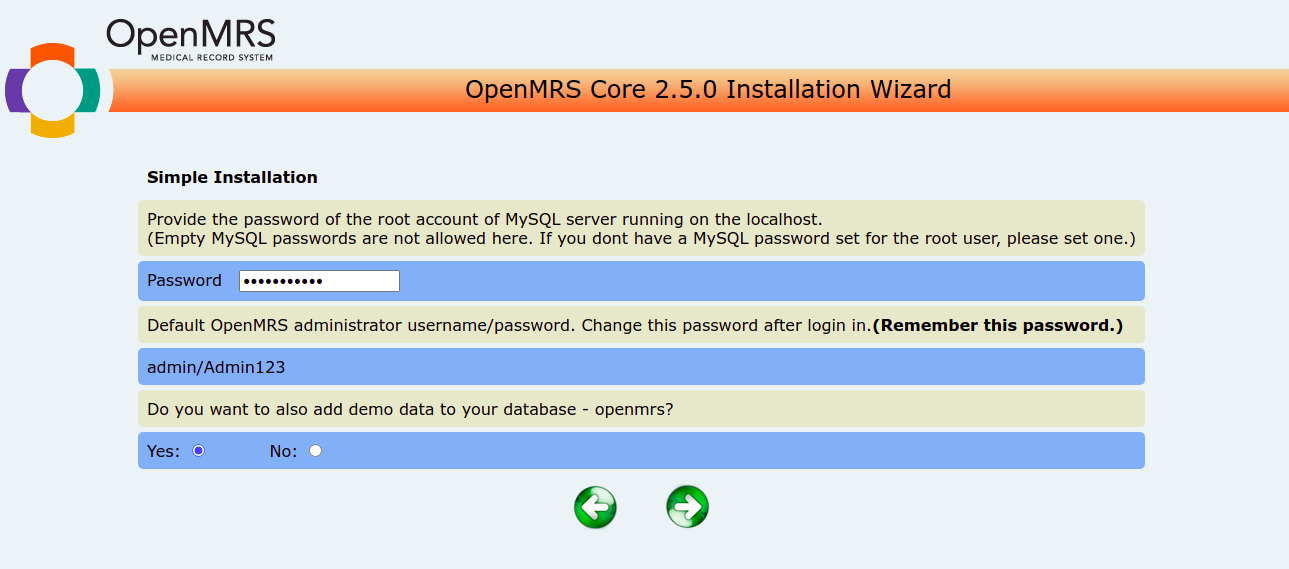
Enter your MySQL root password and take note of the admin password:

Conclusion
Congratulations! You have successfully installed OpenMRS on Debian 11. You now have the ability to manage electronic medical records via a web browser. Feel free to ask any questions.
FAQs
What is OpenMRS?
OpenMRS is an open-source platform designed to improve healthcare delivery in developing countries by managing electronic medical records.
Why do we need Java 8 for OpenMRS?
OpenMRS is built using Java technology, and it specifically supports Java version 8 for its operations.
Can I use a different version of MySQL?
No, OpenMRS is compatible with MySQL version 5.6, and using a different version may lead to compatibility issues.
How do I start using OpenMRS after installation?
After installation, access the OpenMRS Admin interface at http://your-server-ip:8080/openmrs using the default username “admin” and password “Admin123”.
