Podman is a Linux-native tool for deploying applications using Open Container Initiative (OCI) containers and container images. It supports multiple container image formats, including Docker images and OCI container images. Additionally, Podman supports managing pods and groups of containers.
Podman is a daemon-less tool, running as a single binary command line without a service. It provides a command line similar to Docker, allowing the use of an alias such as alias docker=podman.
In this guide, we’ll walk you through installing and using Podman as a replacement for Docker Engine on an AlmaLinux 9 server. You will learn the basics of using Podman for container application management. By the end, you will have a better understanding of using Podman for local development.
Prerequisites
To follow this guide, you’ll need the following:
- An AlmaLinux 9 server (this example uses a server with the hostname AlmaLinux9).
- A non-root user with sudo/root administrator privileges.
Installing Podman
Podman is a daemon-less, open-source container orchestration tool designed for rapid development. It’s a Linux-native application providing a command line interface similar to Docker.
With Podman, you can find, run, share, and deploy applications using OCI containers and container images.
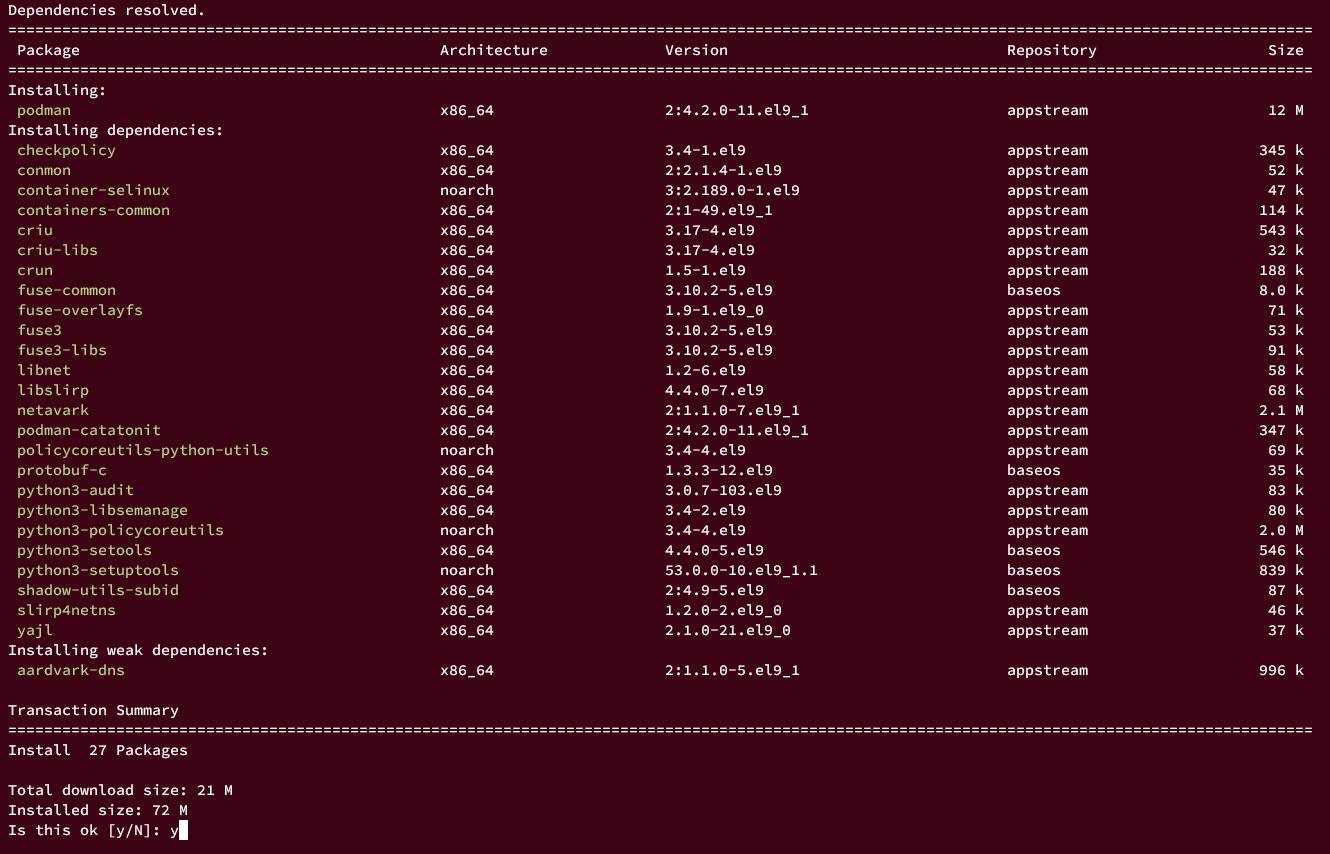
On AlmaLinux, Podman is available by default in the AppStream repository. You can install it using the DNF package manager:
sudo dnf install podman
Confirm the installation by typing y when prompted, and then press ENTER.
Since Podman is daemon-less, you can run it without starting any daemon. Check the Podman version and detailed information about your installation with:
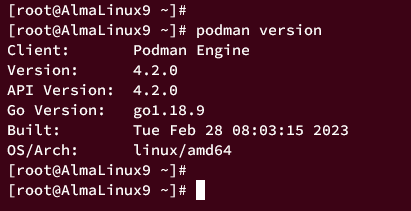
podman version
The current Podman version during this writing is shown below:
You can verify your Podman installation details using the following command:
podman info
Running Podman as a Non-root User
In this section, we’ll configure Podman for a non-root user. We’ll create a new user and ensure that this user can execute and run containers with Podman.
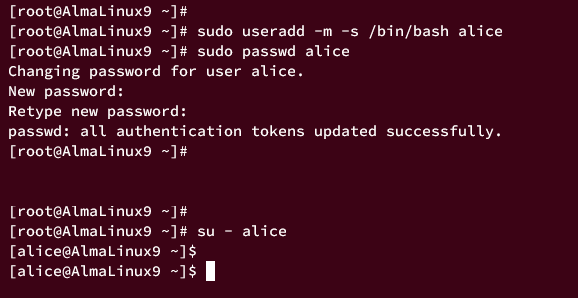
Create a new user named alice and set a password:
sudo useradd -m -s /bin/bash alice
sudo passwd alice
Add alice to the wheel group to grant sudo privileges:
sudo usermod -aG wheel alice
Enable lingering for alice, allowing the user to run container processes persistently:
sudo loginctl enable-linger alice
Log in as alice with:
su - alice
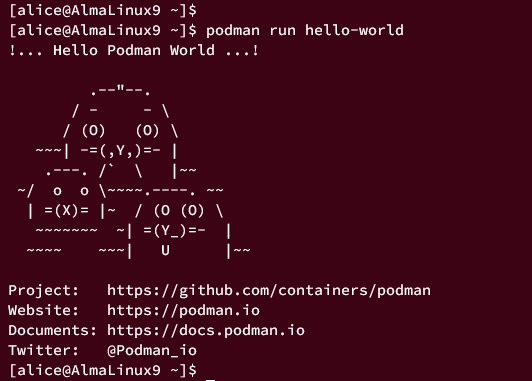
Run a new container with the hello-world image:
podman run hello-world
An example output will look like this:
To verify running and exited containers, use:
podman ps -a
The command should show the hello-world container with the status Exited.

Finding Container Images
By default, Podman retrieves images from image registries like Red Hat, Quay.io, and Docker Hub. Additional registries can be configured in /etc/containers/registries.conf.
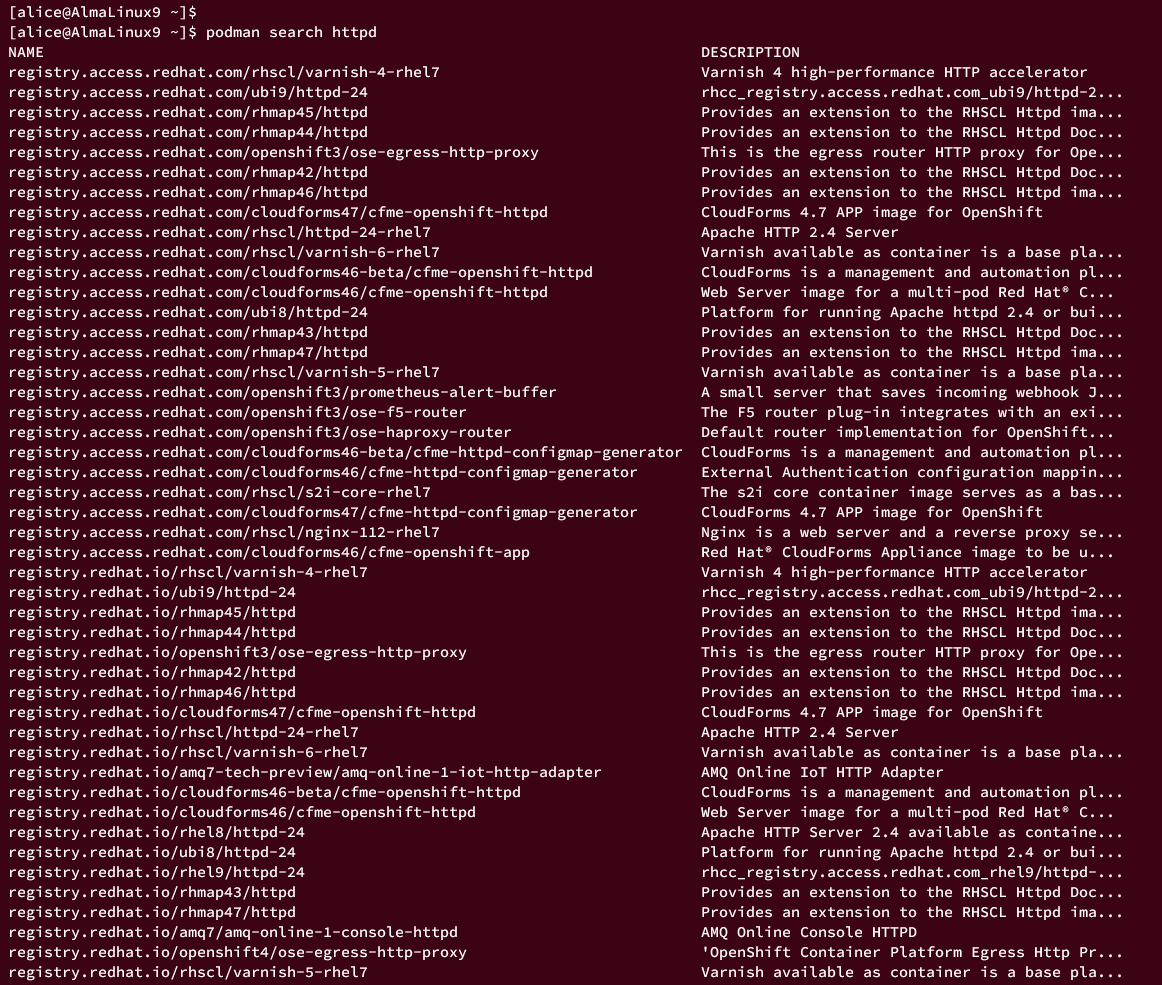
To search for images containing httpd on DockerHub, run:
podman search httpd
This will yield an output similar to this:
Limit the output with the --limit option:
podman search httpd --limit 3
This displays the top three container images from each registry.

To show only official container images, use the --filter option:
podman search httpd --filter=is-official

Downloading Images
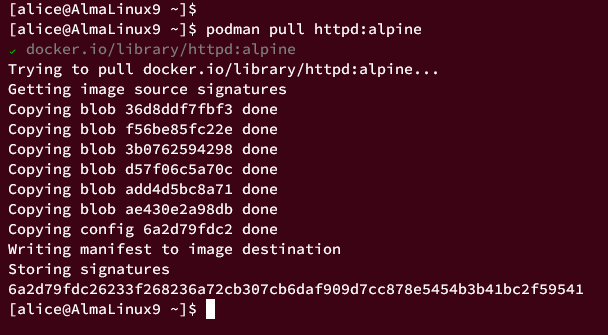
After finding the desired images, download them using Podman. For instance, download httpd with the alpine tag:
podman pull httpd:alpine
Select the image registry, in this example, DockerHub.

After selecting the source, the download will commence:
Check available images on your server:
podman images
You should now have the hello-world image from Quay.io and the httpd image from DockerHub.

Inspecting Images
The ‘inspect’ option in Podman is useful for retrieving details on how a container image operates.
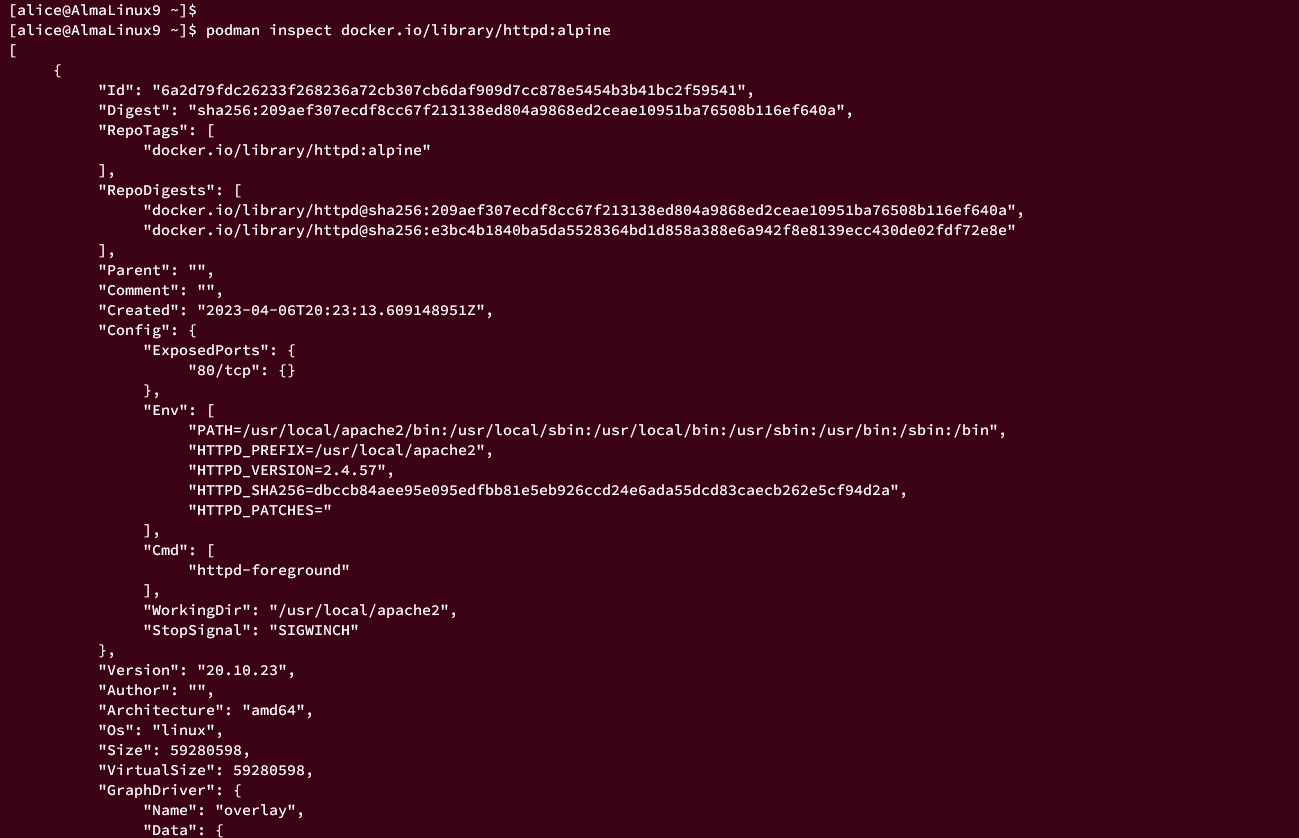
For detailed information about the httpd:alpine image, use:
podman inspect docker.io/library/httpd:alpine
This reveals details like creation date, size, working directory, start command, and exposed ports.
To view specific details, use additional parameters like these:
podman inspect --format "size: {{.Size}}" docker.io/library/httpd:alpine
podman inspect --format "ports: {{.Config.ExposedPorts}}" docker.io/library/httpd:alpine
podman inspect --format "workdir: {{.Config.WorkingDir}}" docker.io/library/httpd:alpine
This will show the image size, exposed ports, and working directory.

Running Container
Here, you’ll learn how to run a container using Podman. Run the following command to create a new container named ‘httpd’, exposing port 8080 on the host system, and use the httpd:alpine image:
podman run -it --rm -d -p 8080:80 --name httpd docker.io/library/httpd:alpine
Check the running containers:
podman ps
You should see the container httpd with the status Up using port 8080.

Test the running container using:
curl http://192.168.5.20:8080/
You should receive an output similar to this:

You can also access the httpd container through a web browser at http://192.168.5.20:8080/.

Checking Container Logs
Now let’s check the logs from the httpd container to assist in debugging:
podman logs httpd
An example log output is shown below:

To display the last 20 lines of log output, use:
podman logs --tail 20 httpd
Stopping Container
To stop the container httpd, execute:
podman stop httpd
Check the available containers on your system:
podman ps
podman ps -a
Since the container was started with the --rm option, it will automatically be removed upon stopping.

Running Container with Custom Volume
You can run a container with a custom volume, mounting a local directory on the host machine to the container.
Create a new data directory inside the user alice’s home directory. Then, edit the index.html file using:
mkdir -p ~/data/
nano ~/data/index.html
Add the following HTML content:
<!doctype html>
<html lang="en">
<head>
  <meta charset="utf-8">
  <title>Welcome to Container Nginx</title>
</head>
<body>
  <h2>Hello from httpd container - Managed with Podman</h2>
</body>
</html>
Save and close the file.
Run a new container ‘httpd’ with a custom volume:
podman run --privileged=true -it --rm -d -p 8080:80 --name httpd -v ~/data:/usr/local/apache2/htdocs docker.io/library/httpd:alpine
This command will mount the local directory to the container. Check the running container:
podman ps
If successful, the new container httpd will be up, with port 8080 exposed.

Access the container using:
curl http://192.168.5.21:8080/
Verify you get the HTML content from the index.html created earlier.
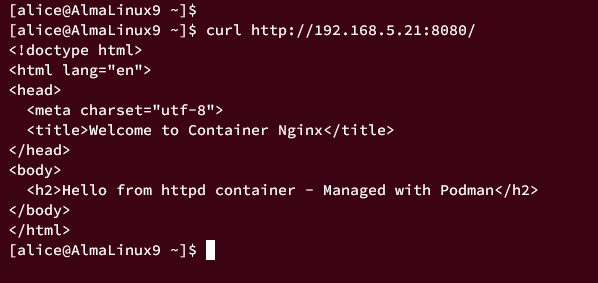
Viewing it in a web browser at http://192.168.5.21:8080/ displays a similar custom page:

Logging In to Container
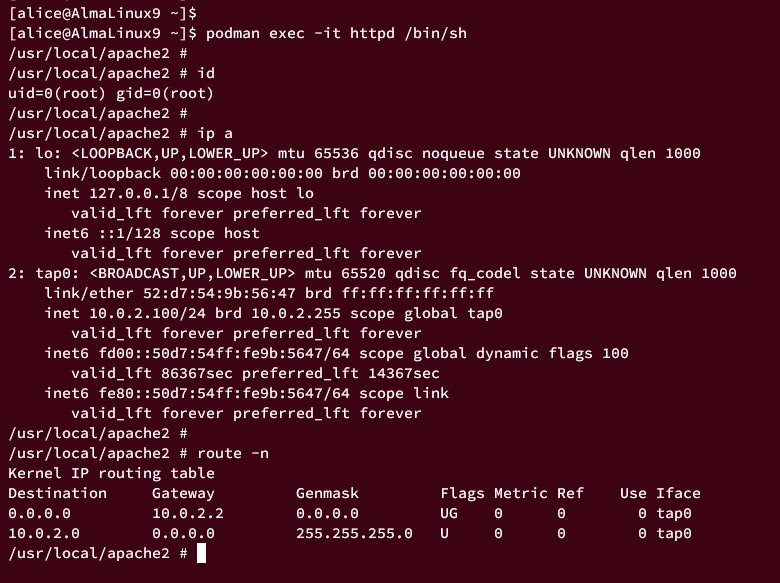
With the httpd container running, access it via the shell using podman exec.
Log in with the following command:
podman exec -it httpd /bin/sh
This connects you to the container system shell.
Run the following commands within the container to check the current user, IP, and routing info:
id
ip a
route -n
Your output will vary slightly, but should be similar:
Running and Managing Pod
Pods in Podman allow multiple containers to run together like Kubernetes.
Create a new pod named httpdTest with:
podman run -dt --pod new:httpdTest -p 9090:80 docker.io/library/httpd:alpine
Verify your pod by:
podman pod ls
You should see the httpdTest pod listed as running with 2 containers:

Use the inspect option for detailed information:
podman pod inspect httpdTest
To verify the number of containers and their names:
podman pod inspect --format="containers: {{.NumContainers}}" httpdTest
podman pod inspect --format "{{.Containers}}" httpdTest
An example of the output:

Access the pod on port 9090:
curl http://192.168.5.21:9090/
Conclusion
Congratulations! You have successfully installed Podman on AlmaLinux 9 and explored its basic functionality including managing images, containers, and creating pods.
FAQ
What is Podman?
Podman is a daemon-less, Linux-native tool for managing OCI containers and container images without requiring a service running in the background.
Can I use Podman as a Docker replacement?
Yes, Podman provides a Docker-compatible command line interface, allowing you to replace Docker with Podman using commands such as alias docker=podman.
Does Podman support running containers as a non-root user?
Yes, one of Podman’s strengths is its ability to run containers without root privileges, enhancing security and flexibility.
How can I manage image registries with Podman?
By default, Podman retrieves images from several registries, and additional registries can be added by modifying /etc/containers/registries.conf.
Can I utilize volumes and persistent storage with Podman?
Absolutely, Podman supports custom volumes, allowing you to mount host directories into containers for persistent storage solutions.
What is a pod in Podman?
A pod in Podman is a group of one or more containers. It replicates similar Kubernetes functionality, enabling multiple containers to run together under one Pod.
