In this comprehensive tutorial, you’ll learn how to incorporate hosts into Icinga2 using the ‘Icinga Director’ module, and how to configure both server and service monitoring effectively.
Prerequisites
Before starting, ensure that Icinga2 is correctly installed on your system and the Icinga Director module is enabled and configured. If you need assistance with the Icinga2 installation, refer to this installation guide.
Objective
- Create Service Templates
- Compile a ServiceSet with Service Templates
- Configure a Host Template and attach a ServiceSet
- Add Hosts to the Icinga2 Server
- Initiate the Client Host
- Conduct Testing
Step 1 – Create Service Templates
Begin by establishing templates that Icinga2 will use to monitor services and systems. You’ll define which services and system elements are monitored, including SSH, HTTP, APT check updates, System Load, and Disk Usage.
Login to the Icinga2 dashboard with your admin credentials and select the ‘Icinga Director‘ menu on the left.
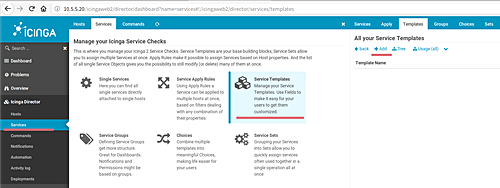
Proceed to ‘Services‘ and click ‘Service Templates‘. To create a new template, click ‘Add‘.
Input the service details. Below is an example for SSH monitoring:
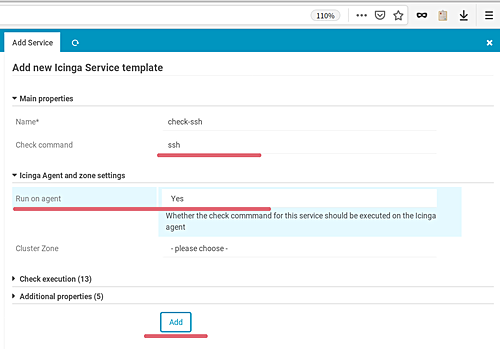
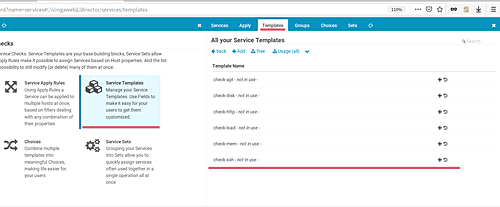
Click ‘Add‘ to save the SSH service template. Repeat for HTTP, APT updates, System Load, and Disk Usage services.
Step 2 – Create a ServiceSet and Add Service Templates
Next, group your service templates into a ServiceSet.
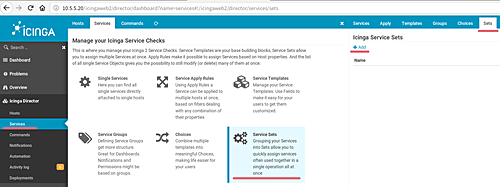
Within ‘Services‘, go to ‘ServiceSet‘ and select ‘Add‘.
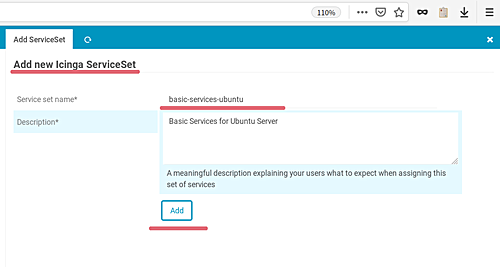
Enter a name and description for your ServiceSet, then click ‘Add‘ once more.
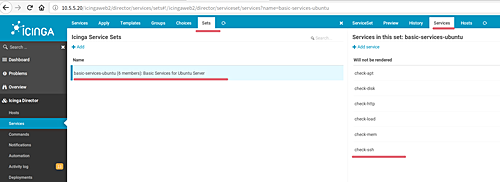
Once created, add your service templates to the ServiceSet by selecting it, opening the ‘Services‘ tab, and clicking ‘Add Service‘.

In the ‘Import‘ field, input the template names and click ‘Add‘. Repeat this step for all service templates.
Step 3 – Create a Host Template and Add ServiceSet
To add hosts to Icinga2 through the Director, you’ll need a host template integrated with your ServiceSet.
Under ‘Icinga Director’, navigate to ‘Hosts’ and ‘Host Templates’. Click ‘Add‘.
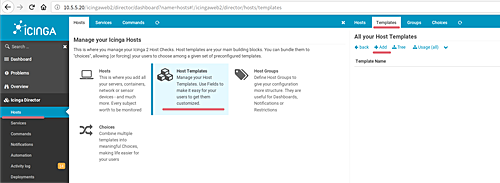
Provide host template details as shown below.
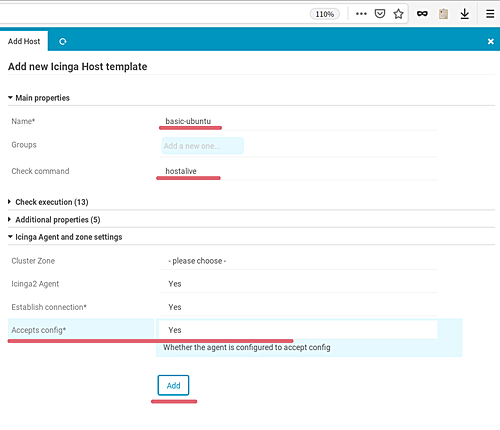
Click ‘Add‘ to save the template. Then, link the ‘basic-services-ubuntu’ ServiceSet to your host template by selecting it, proceeding to the ‘Service‘ tab, and clicking ‘Add Service Set‘.
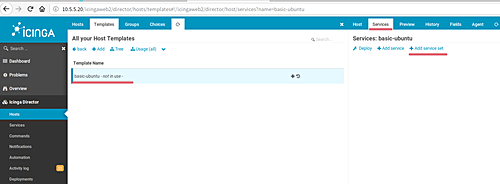
Select ‘basic-services-ubuntu’ and click ‘Add‘. Your host template is now configured for adding new hosts to Icinga2.
Step 4 – Add Host to Icinga2 Server
Proceed by adding ‘client1.hakase-labs.io’ (IP: 10.5.5.21) to your Icinga2 system.
On the dashboard, navigate to ‘Icinga Director’ and select ‘Hosts‘. Click ‘Add‘.
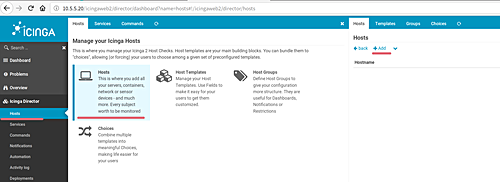
Select ‘basic-ubuntu‘ as the Host Template, input the host details, and click ‘Add‘. Deploy your setup by clicking ‘Activity Log‘, then ‘Deploy xx Pending Changes‘.
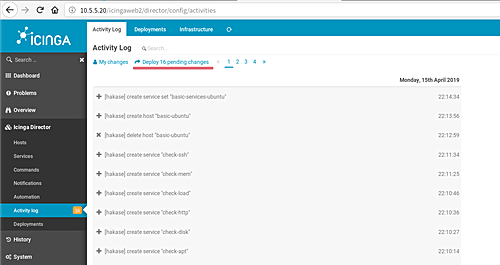
Your ‘client1’ host is now incorporated into Icinga2 utilizing the ‘basic-ubuntu’ template.
Step 5 – Client Host Initialization
Initialize ‘client1’ by installing Icinga2 packages and setting up the remote Agent.
Connect to ‘client1’ via SSH:
ssh root@client1
Edit the ‘/etc/hosts’ file with vim and add configurations:
10.5.5.20  icinga2.hakase-labs.io  icinga2
10.5.5.21  client1.hakase-labs.io  client1
Save, and then add the Icinga2 key:
curl https://packages.icinga.com/icinga.key | apt-key add -
In ‘/etc/sources.list.d’, create ‘icinga2.list’:
cd /etc/apt/sources.list.d/
 vim icinga2.list
Add the repository lines:
deb http://packages.icinga.com/ubuntu icinga-bionic main
deb-src http://packages.icinga.com/ubuntu icinga-bionic main
Save the file, then update the repository and install packages:
sudo apt update
 sudo apt install icinga2 monitoring-plugins
Return to the Icinga2 dashboard, select the ‘client1’ host, and open the ‘Agent‘ tab. Copy the Linux script for agent deployment.
Create ‘deploy-agent.sh’ on ‘client1’:
vim deploy-agent.sh
Paste and run the script:
chmod +x deploy-agent.sh
 ./deploy-agent.sh
Upon completion, restart Icinga2:
systemctl restart icinga2
The Client Host initialization is complete.
Step 6 – Testing
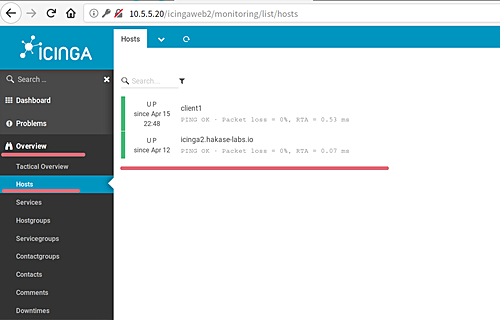
Access ‘Overview‘ and ‘Hosts‘ on the Icinga2 Dashboard. Confirm both the Icinga2 server and ‘client1’ are operational.
Select ‘client1‘ for detailed insights and to view monitored services, switch to the ‘Services‘ tab.
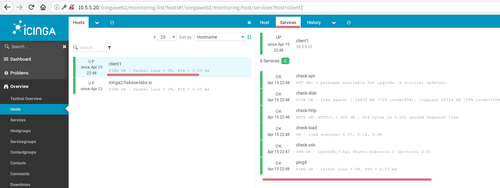
You’ve now successfully integrated a Linux host into Icinga2 using the Icinga Director module.
References
FAQ
What is Icinga2?
Icinga2 is an open-source monitoring system used to oversee availability and performance of systems and networks.
Why use the Icinga Director module?
The Icinga Director module provides a user-friendly interface for managing configurations directly from the Icinga Web interface.
Can I automate the deployment of configurations?
Yes, Icinga Director allows for automation of configurations via the interface or API, simplifying complex setups.
What if my host does not appear in the Overview section?
Ensure that the deployment script ran successfully on the client and that your Icinga2 configuration has been correctly applied and deployed.
