Load Balancers are a key component of the AWS EC2 service. Specifically, a Network Load Balancer operates at the fourth layer of the Open Systems Interconnection (OSI) model: the Transport Layer. It establishes a TCP connection to the chosen target on the port defined in the listener configuration. When targets become unhealthy, the Network Load Balancer ceases routing requests to them and redirects traffic to healthy instances, whether in the same or a different Availability Zone. Supporting static IP addresses and scalable to handle millions of requests per second, this load balancer also allows target registration by IP address—enabling the inclusion of systems outside its VPC. These features underscore its benefits. Also known as a TCP Load Balancer, it exclusively utilizes the TCP protocol.
For more details on Network Load Balancers, click here.
AWS pricing is based on usage. To view detailed pricing, click here.
This guide covers the process of creating a Network Load Balancer, registering instances, and accessing it via its DNS.
Pre-requisites
- An AWS Account (Create if you haven’t one yet).
- One or more EC2 instances with Apache server running.
What We Will Do
- Log into AWS.
- Create a Network Load Balancer and access the Apache application using its DNS.
Log Into AWS
- Go to the AWS Login Page.
Upon visiting the link, you will encounter the login page. Enter your AWS credentials to proceed.

Once successfully logged in, the AWS main console appears with all services displayed.
Create a Network Load Balancer and Access Apache Application
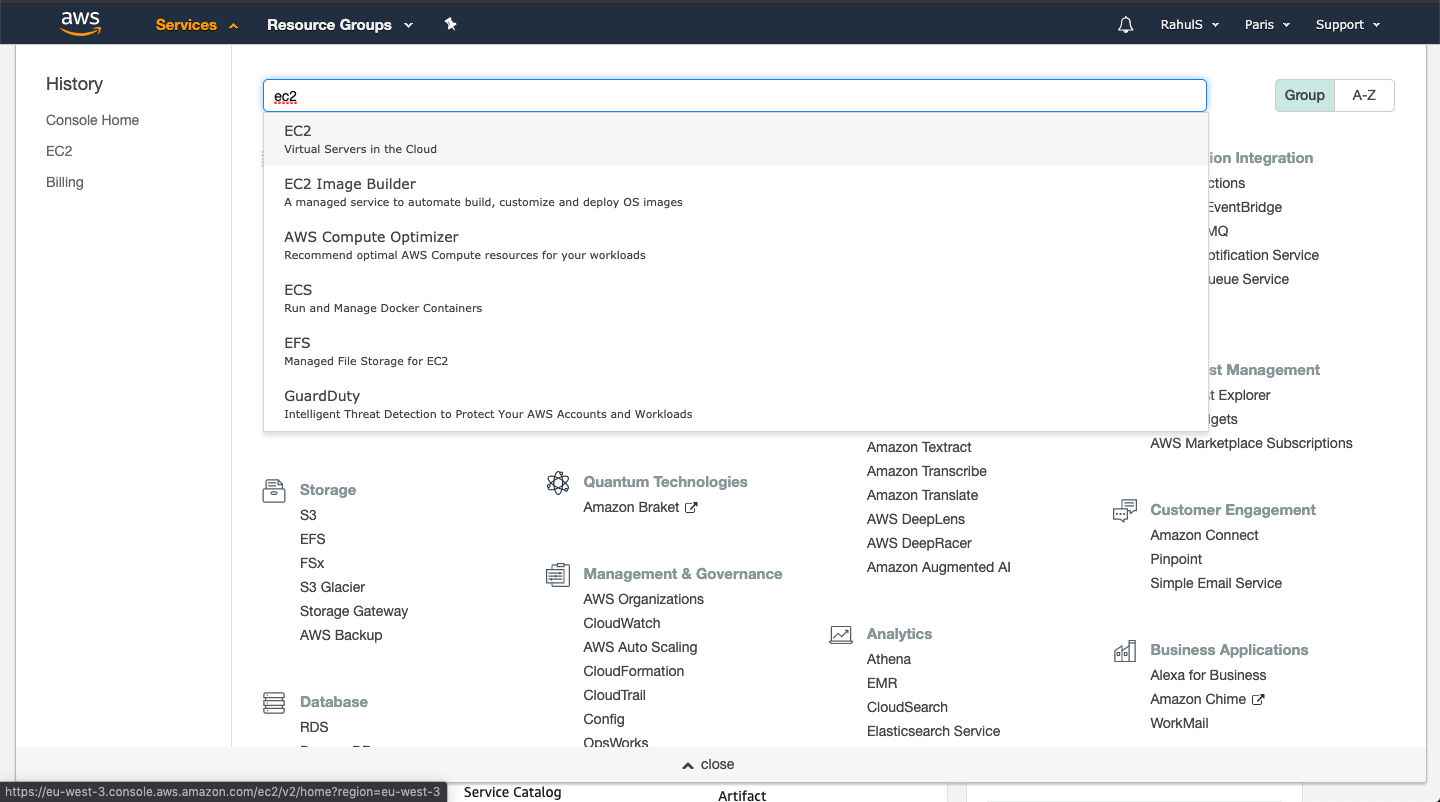
To set up a Network Load Balancer, start by searching for “EC2” under the Services section on the top left.
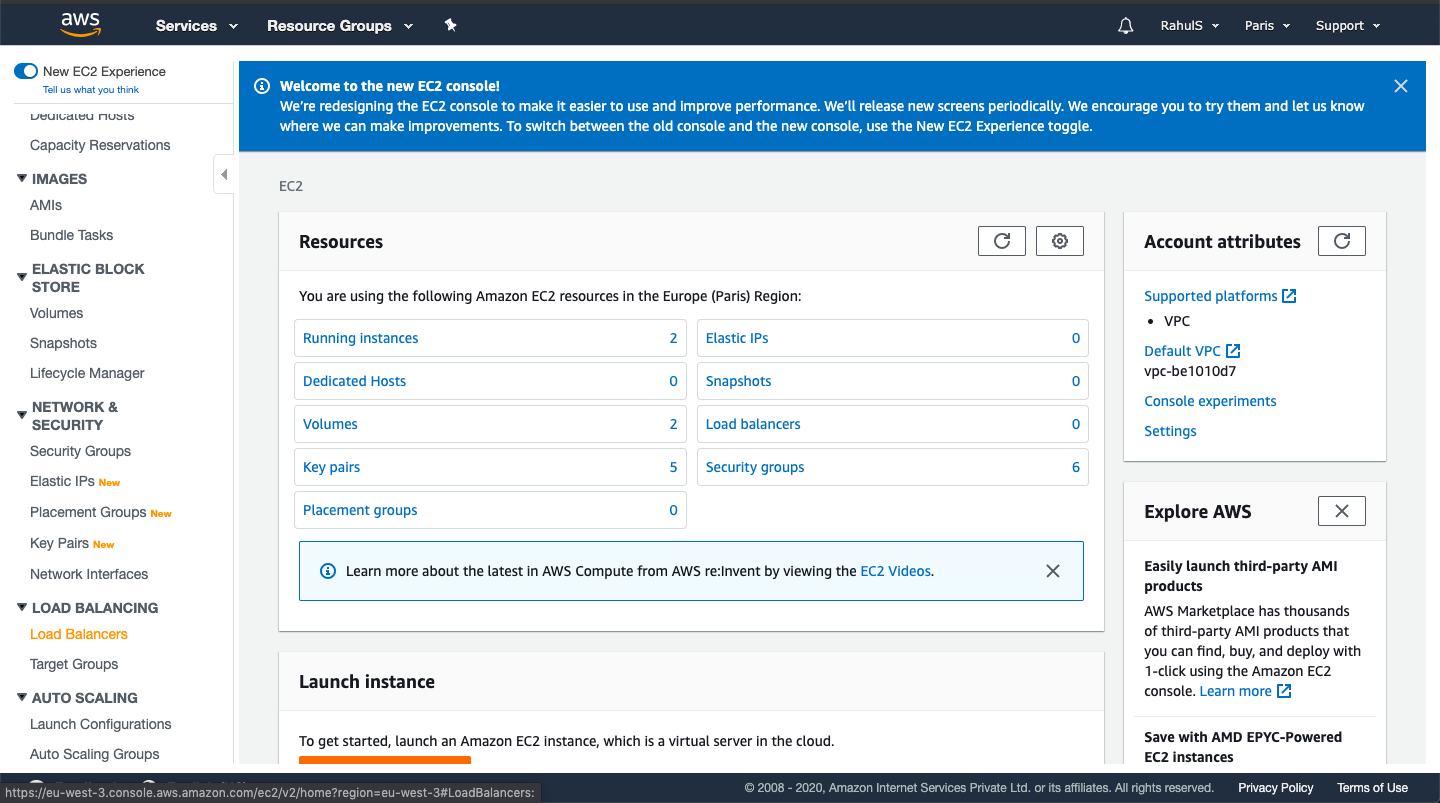
The EC2 Dashboard will open next. It provides an overview of the EC2 service. Scroll down and click on “Load Balancers” to proceed with creating a Load Balancer.
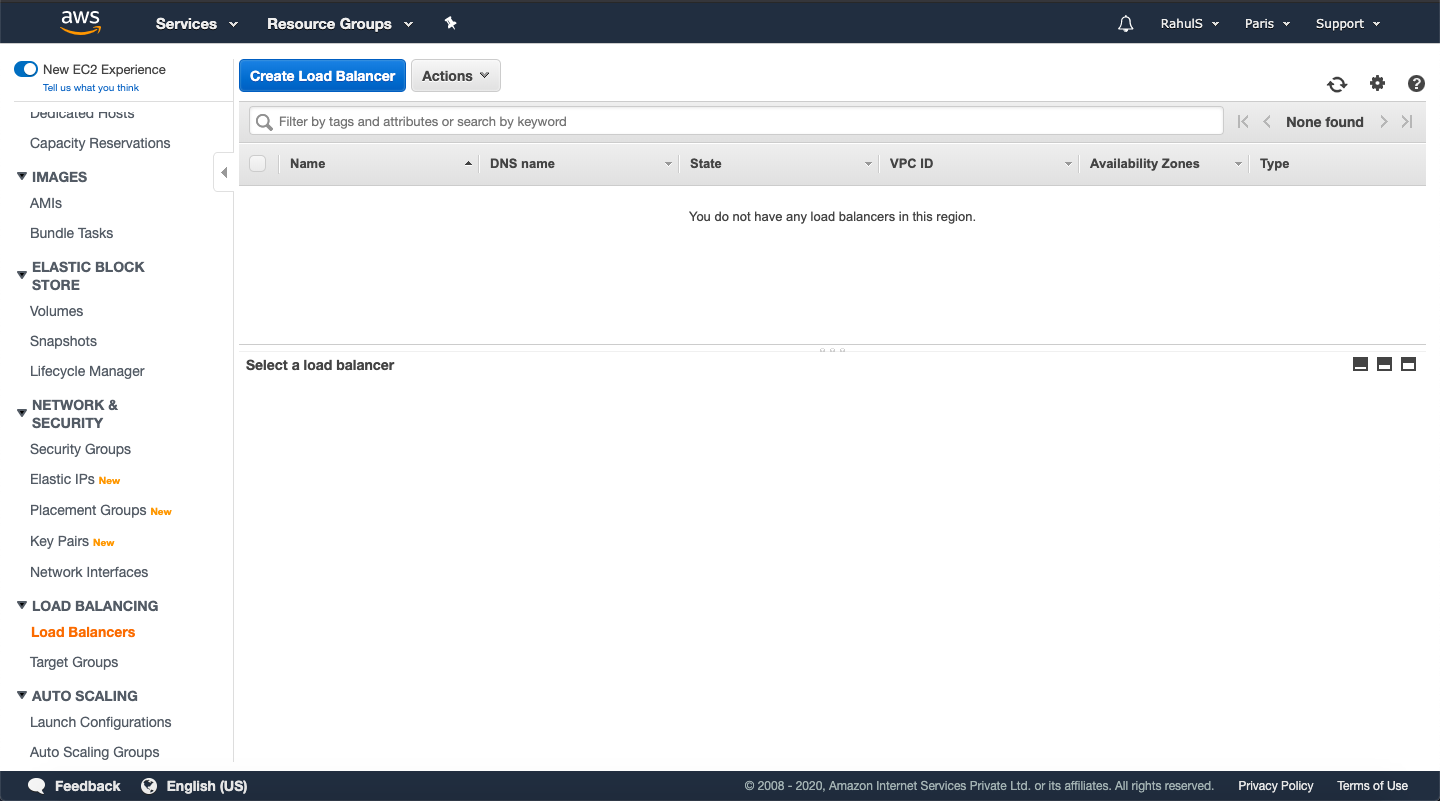
Select the “Create Load Balancer” option to access the configuration page.
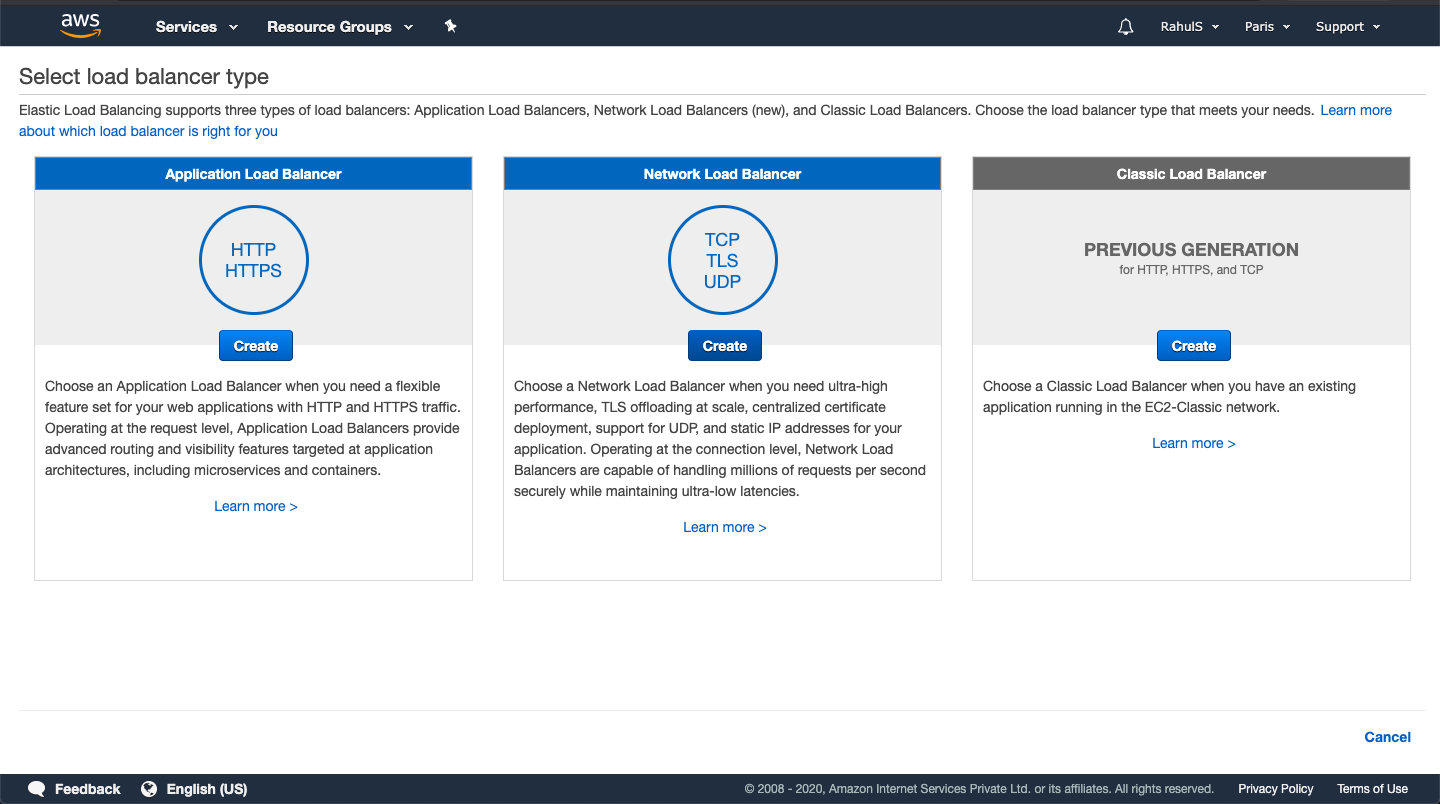
Choose the “Create” option under “Network Load Balancer”. We will focus solely on this type of load balancer in this guide.
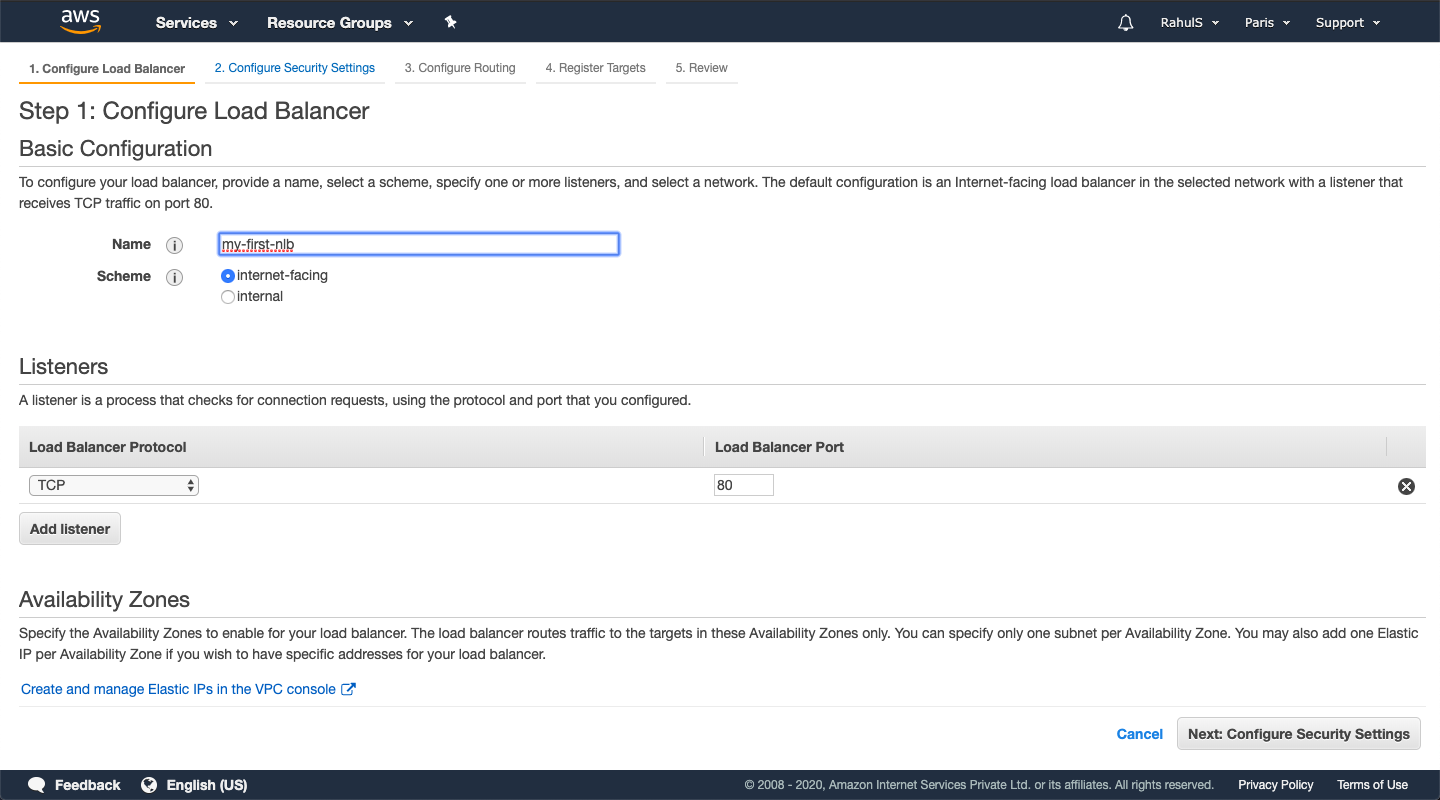
Name your new load balancer. Opt for the “internet-facing” scheme to allow traffic from the internet. If an “internal” scheme is chosen, it restricts access to only within the VPC it is deployed. Subsequently, scroll down to select Availability Zones.
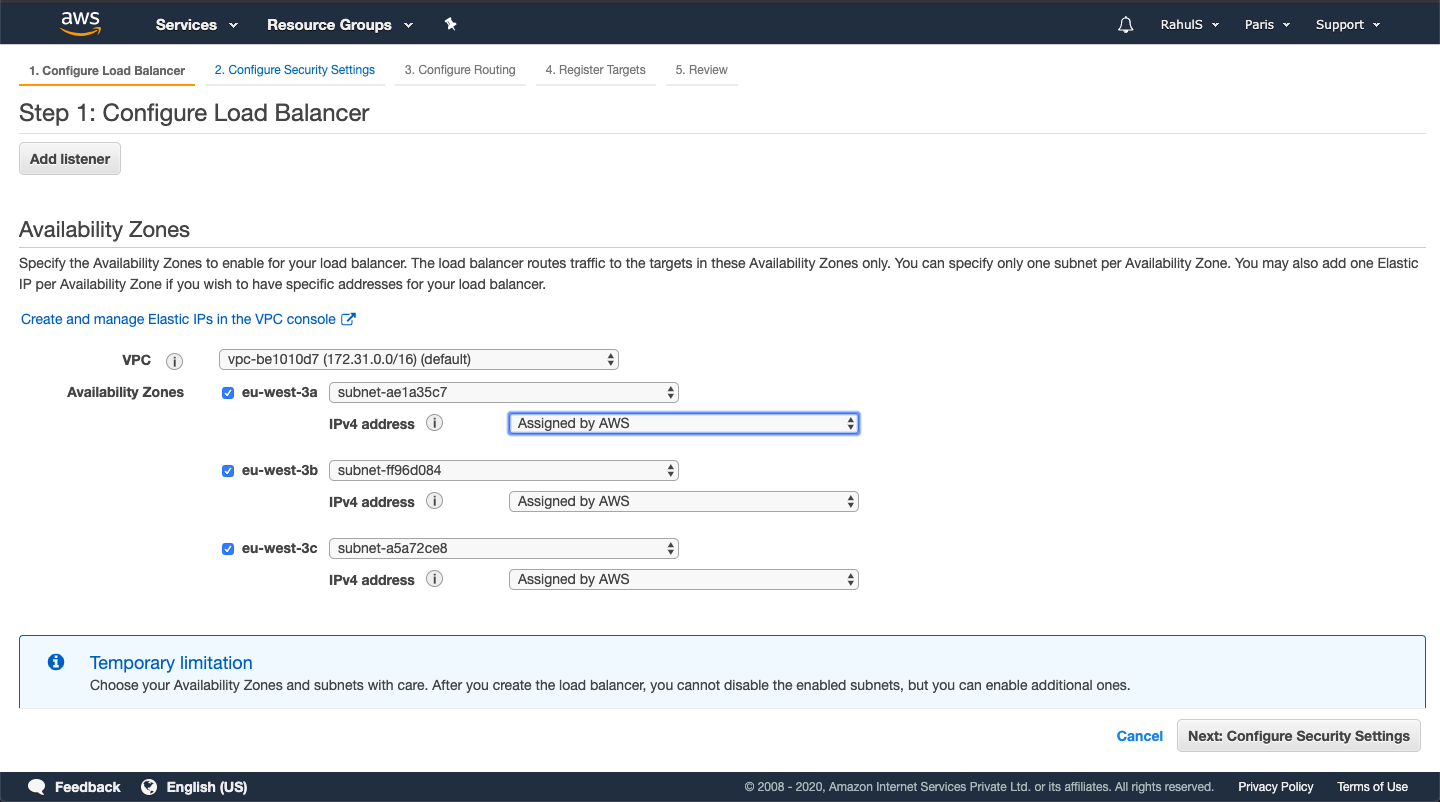
Pick two or more Availability Zones; three are selected here. Then, proceed by clicking “Next: Configure Security Settings”.
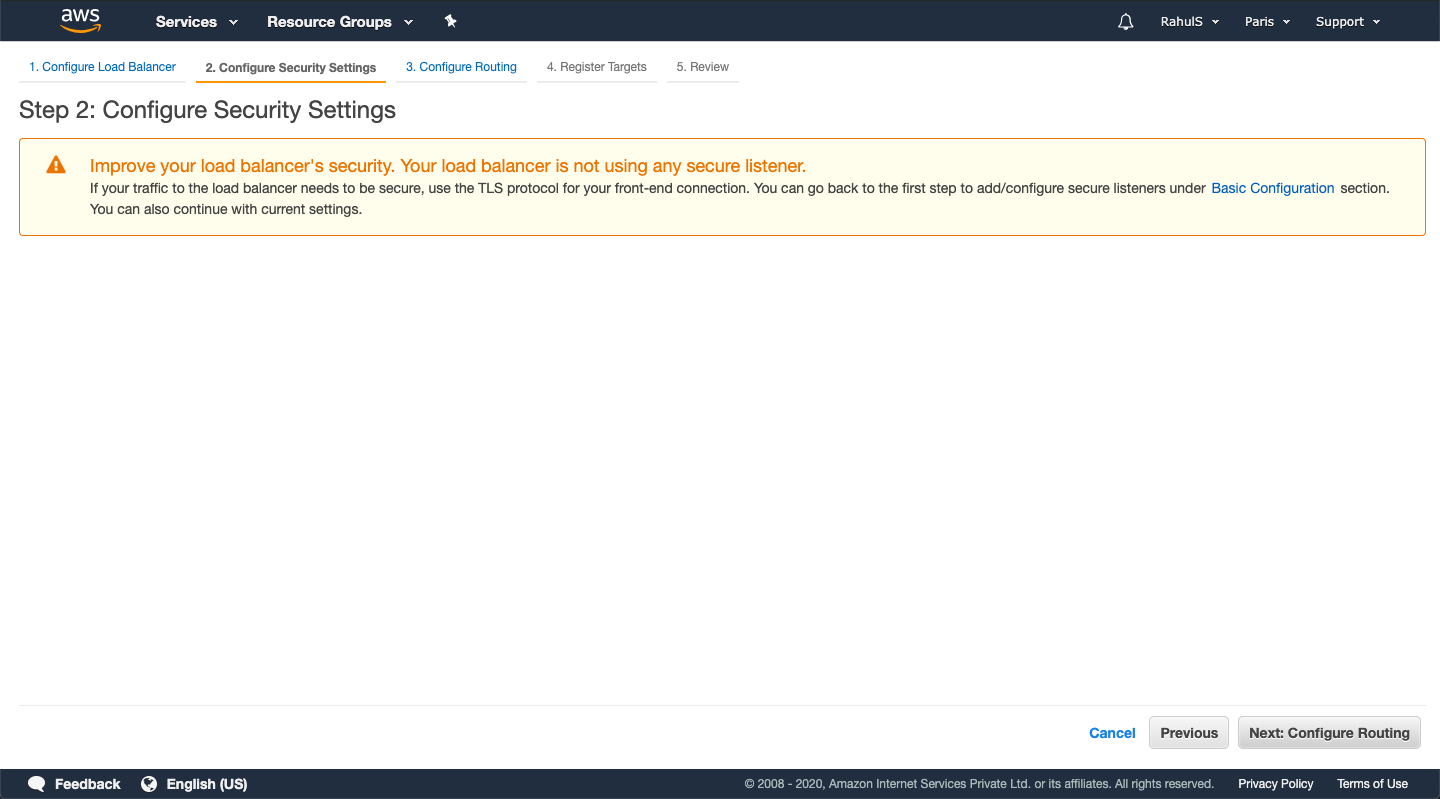
For a Test Environment, disregard the warning shown. However, in a Production Environment, implementing TLS Protocol is essential and will prevent this warning. Now click “Next: Configure Routing”.
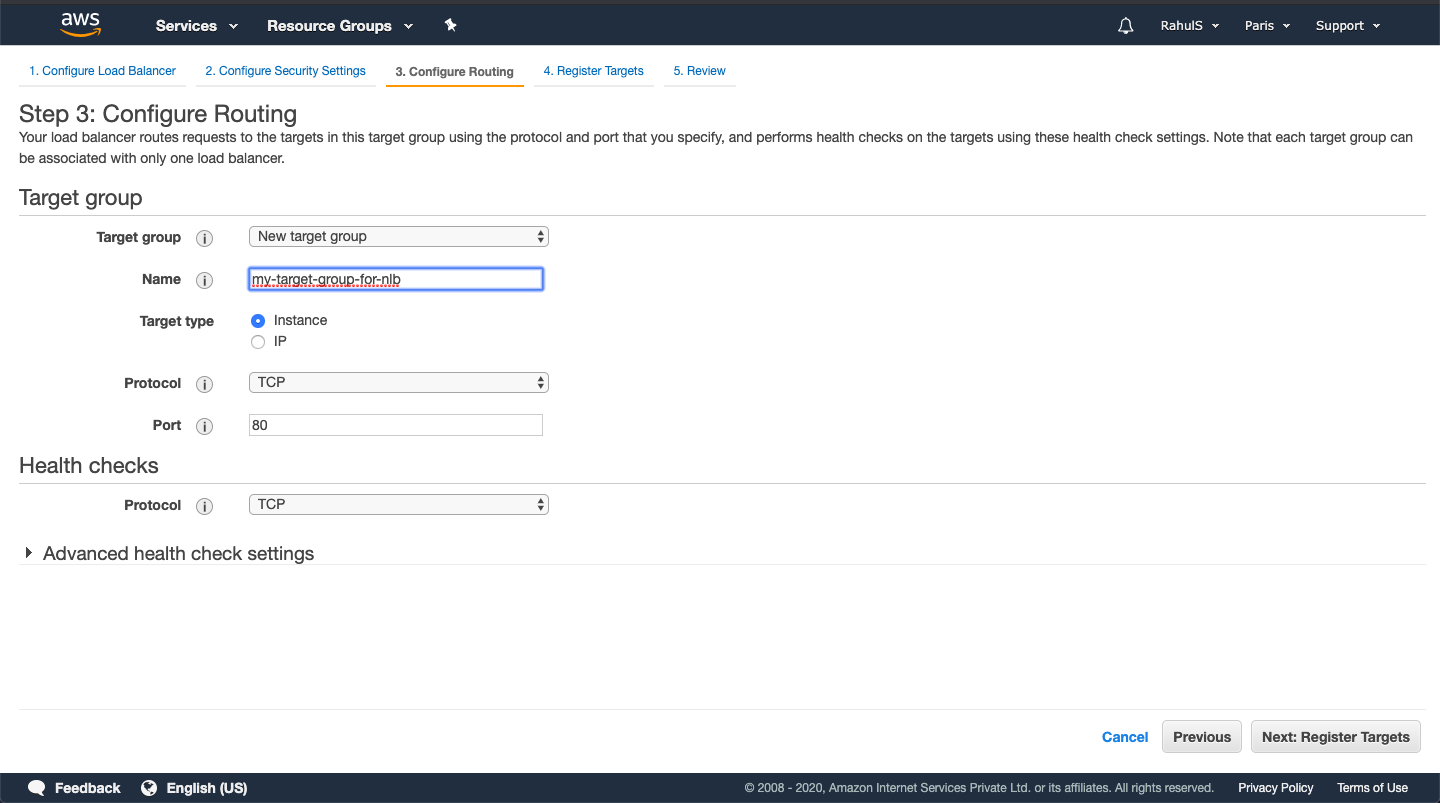
Assign a distinct target name, ensuring no duplication within the region. Keep other defaults and advance with “Next: Register Targets”. Optionally, instances can be added via “IP” under Target Type.
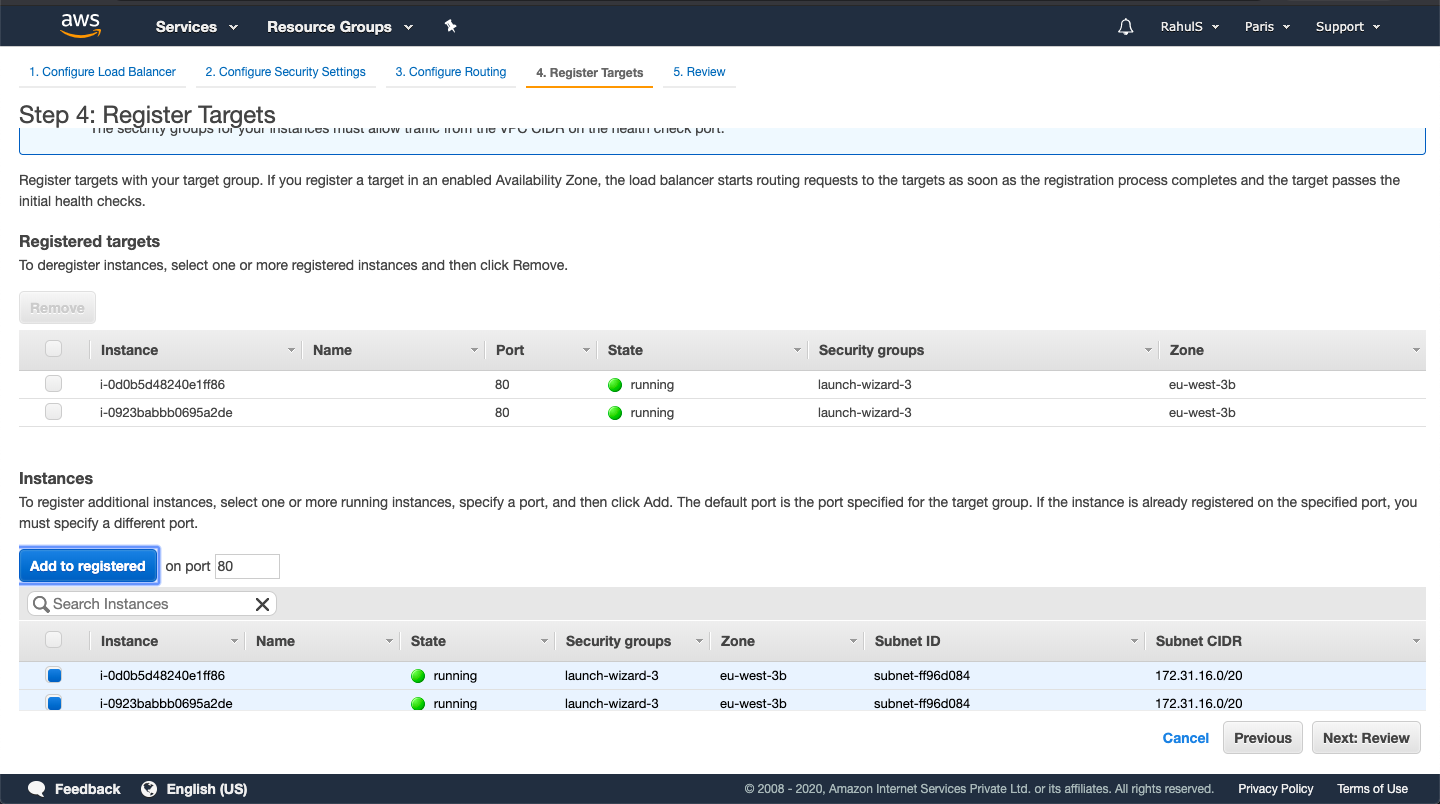
Select your Apache Application instances from the list, click “Add to registered”, then proceed with “Next: Review”.
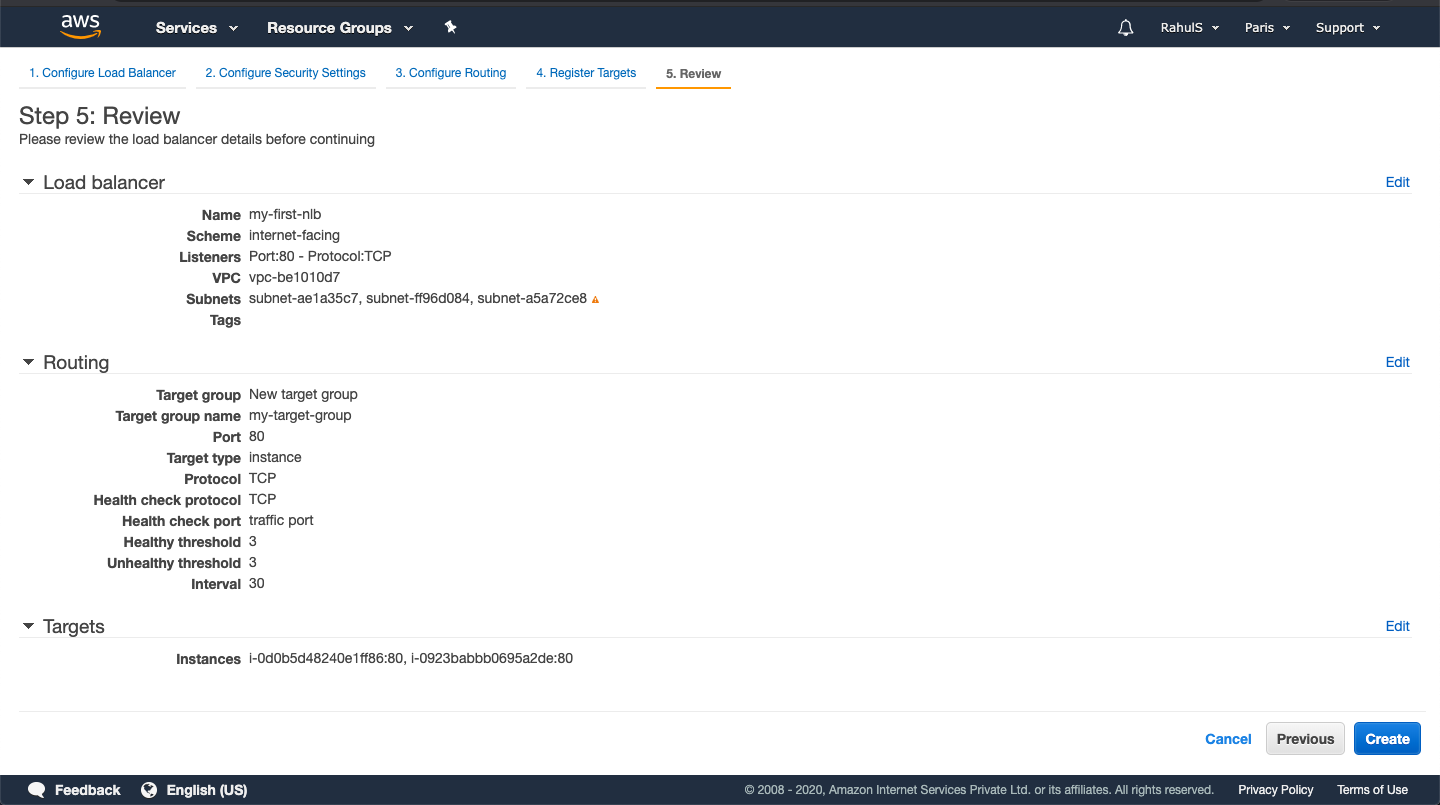
Review all configurations thoroughly, then complete the process by selecting “Create” for the Network Load Balancer.
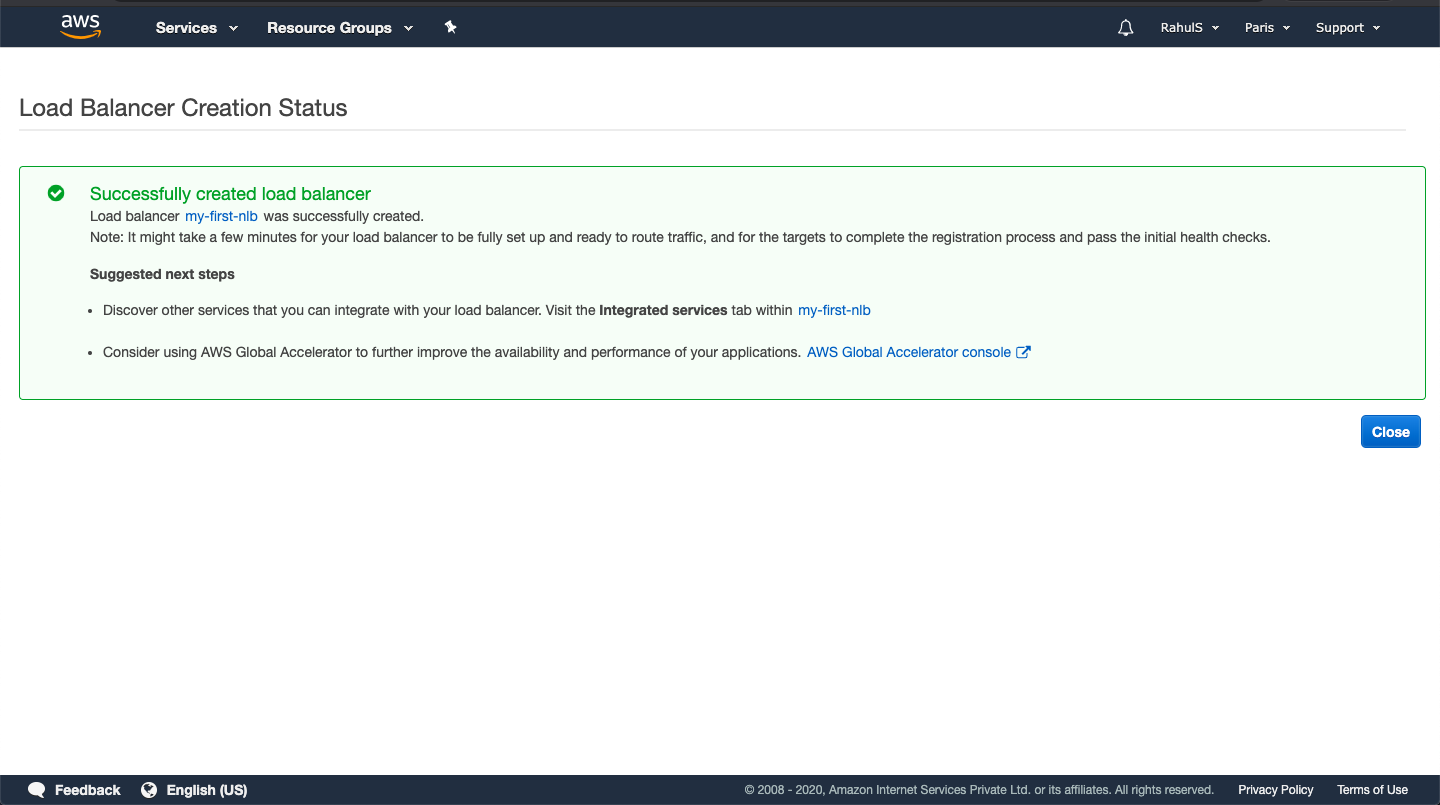
To finish, click “Close” to return to the Load Balancers dashboard.
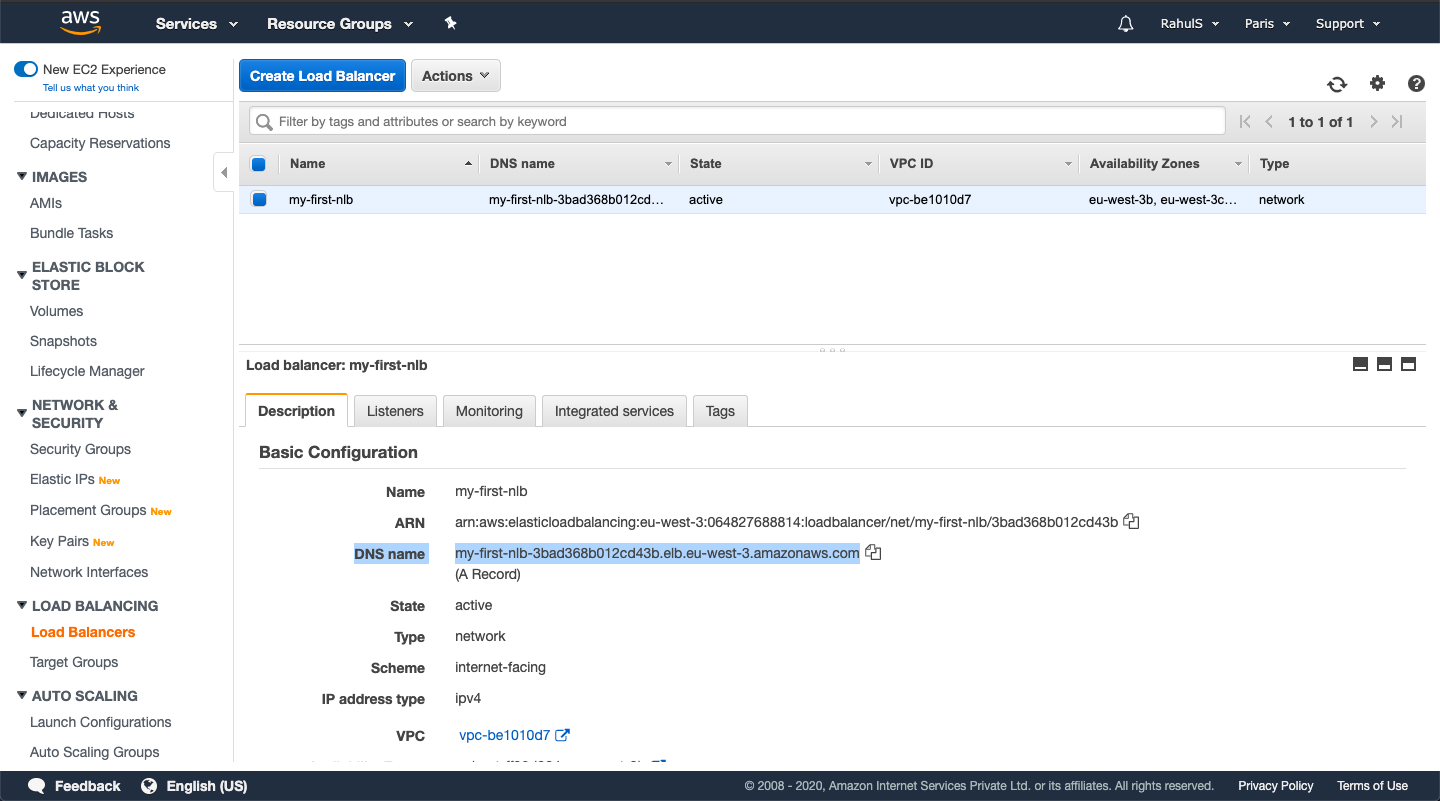
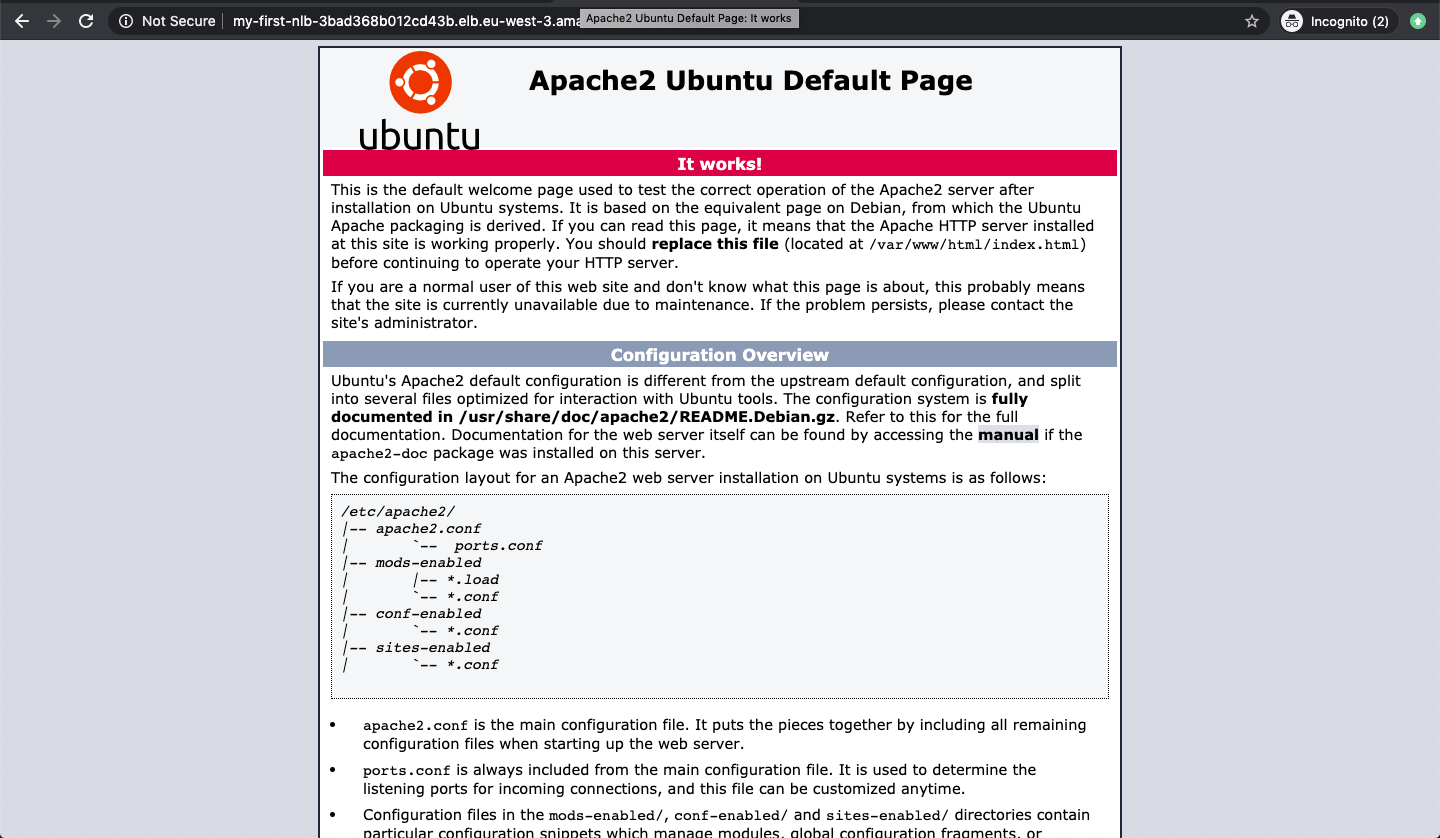
Once the load balancer’s status is “active,” check target settings in Target Group. When targets turn healthy, acquire the DNS from the Description tab and access it in your browser.
The Apache Application is now successfully served via the Network Load Balancer.
Conclusion
This guide explained how to create a Network Load Balancer, register targets, and access it using its DNS.
FAQ
What is the difference between a Network Load Balancer and other types of load balancers?
Network Load Balancers operate at the transport layer and use TCP protocol, suitable for handling millions of requests per second. Other load balancers, like Application Load Balancers, operate at the application layer and support more advanced routing features.
What happens if a target becomes unhealthy?
The Network Load Balancer automatically stops routing requests to that target and redirects traffic to healthy instances.
Can I add targets from outside the VPC?
Yes, the load balancer allows you to register targets by IP address, thereby including systems outside its VPC.
How can I check if the load balancer is functioning correctly?
Once configured, ensure the load balancer’s state is “active,” and the targets are healthy before accessing the application using its DNS.
