GitLab is an open-source DevOps lifecycle tool designed to host and manage Git repositories. Written in Ruby, it offers a wide range of features including wikis, issue management, code review, monitoring, and continuous integration and deployment. You can host GitLab within your own infrastructure and set up an internal repository for your development team. GitLab is available in three editions: Community Edition (CE), Enterprise Edition (EE), and a GitLab-hosted version.
This tutorial will guide you through the installation of GitLab CE on an Ubuntu 20.04 server.
Prerequisites
- A server running Ubuntu 20.04.
- A valid domain name pointed to your VPS.
- Root access or sudo privileges on your server.
Getting Started
First, you need to update your system packages to the latest version. Run the following commands:
    apt-get update -y
    apt-get upgrade -y
After updating your system, install the required packages with this command:
apt-get install apt-transport-https gnupg2 curl -y
With the necessary packages installed, you can move on to the next step.
Install GitLab CE
GitLab is not included in the default Ubuntu 20.04 repository, so you’ll need to add the official GitLab repository to your system.
First, download and add the GitLab GPG key using this command:
curl -sL https://packages.gitlab.com/gitlab/gitlab-ce/gpgkey | apt-key add -
Next, add the GitLab repository to APT with the following command:
nano /etc/apt/sources.list.d/gitlab.list
Insert the following lines:
    deb https://packages.gitlab.com/gitlab/gitlab-ce/ubuntu/ bionic main
    deb-src https://packages.gitlab.com/gitlab/gitlab-ce/ubuntu/ bionic main
Save and close the file. Then, update the repository and install GitLab CE using:
    apt-get update -y
    apt-get install gitlab-ce -y
Once the installation is complete, you should see output similar to the following:
    It looks like GitLab has not been configured yet; skipping the upgrade script.
    ...[truncated]
    gitlab Reconfigured!
GitLab is now installed on your system, and you can move to the configuration step.
Configure GitLab
You’ll need to specify the URL for GitLab in the configuration file:
nano /etc/gitlab/gitlab.rb
Modify the following line with your valid hostname or domain name:
external_url 'http://gitlab.yourdomain.com'
Save and close the file, then reconfigure GitLab:
gitlab-ctl reconfigure
You should see similar output to:
    Recipe: gitlab::puma
    ...[truncated]...
    gitlab Reconfigured!
Verify GitLab’s status with:
gitlab-ctl status
You should receive output indicating the running status of GitLab components.
Secure GitLab with Let’s Encrypt
Securing your GitLab instance with Let’s Encrypt SSL is highly recommended. First, install the Let’s Encrypt client:
apt-get install letsencrypt -y
Edit the configuration file to enable Let’s Encrypt:
nano /etc/gitlab/gitlab.rb
Adjust the following lines:
    external_url 'https://gitlab.yourdomain.com'
    letsencrypt['enable'] = true
    letsencrypt['contact_emails'] = ['admin@yourdomain.com']
    letsencrypt['auto_renew'] = true
Save and close the file, then reconfigure GitLab:
gitlab-ctl reconfigure
You can now continue to access the GitLab interface.
Access GitLab Interface
Open your web browser and visit https://gitlab.yourdomain.com. You’ll be prompted to set a new password:
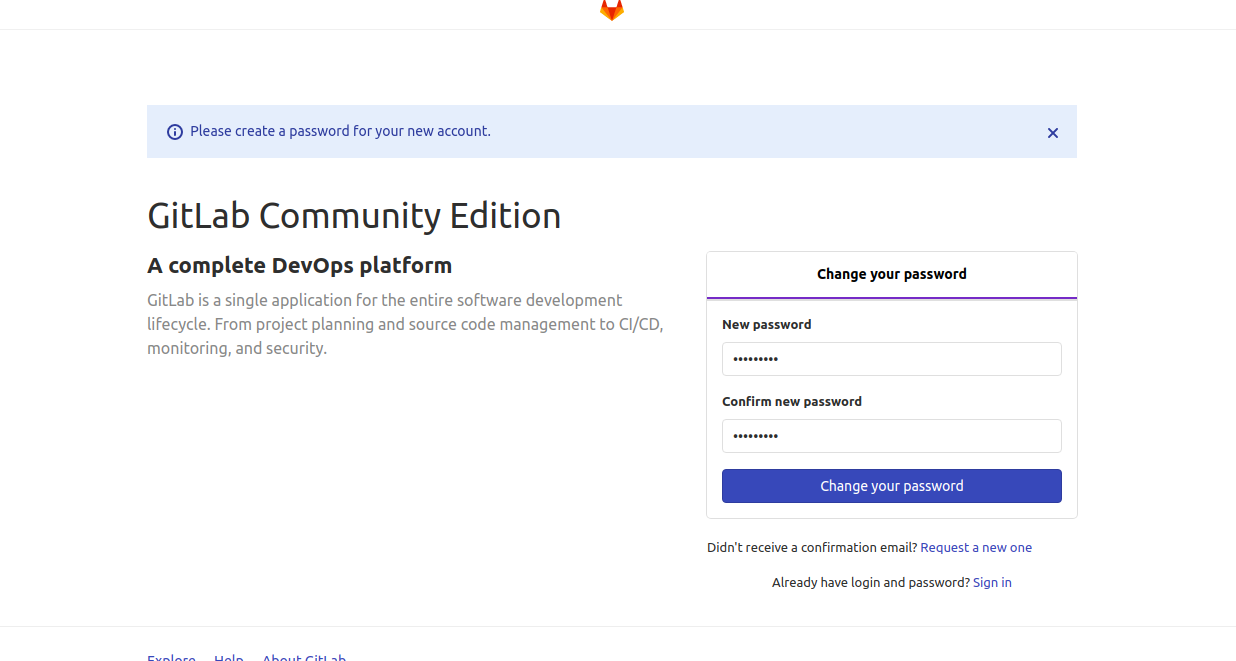
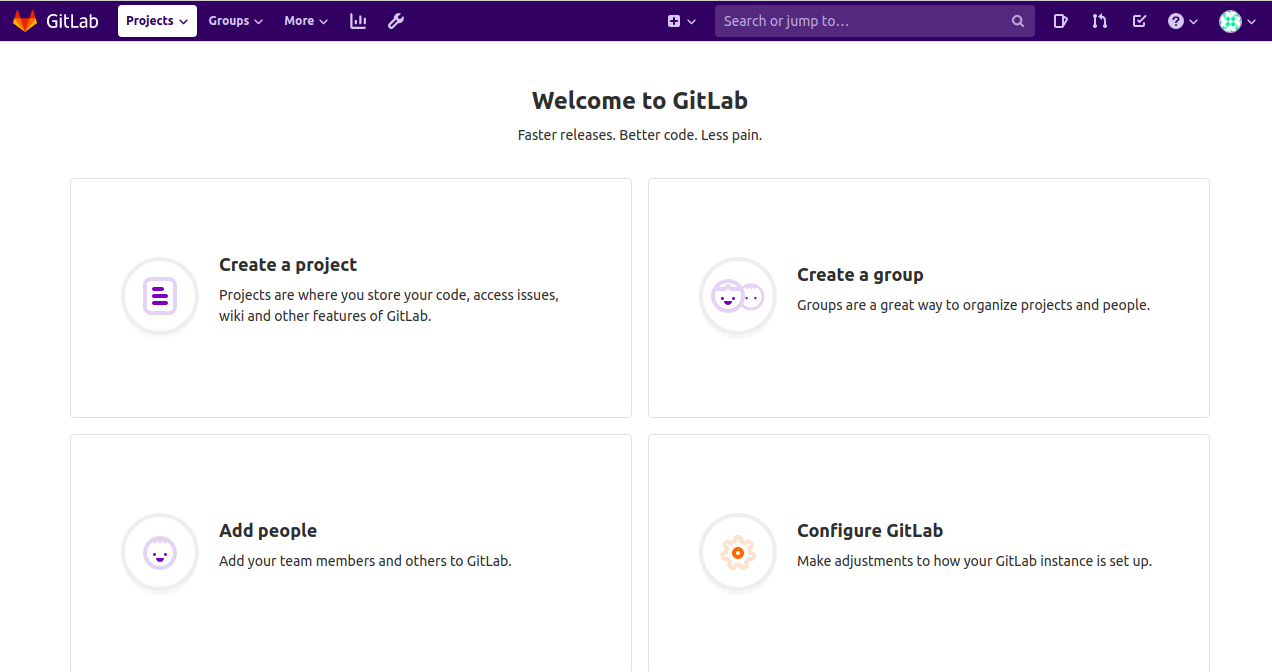
Enter a new password and click Change your password. Sign in with your root username and password on the following screen:
Disable Public Sign-up
If you wish to host a private GitLab instance, it’s advisable to disable public sign-up. From the GitLab dashboard, access the admin area:
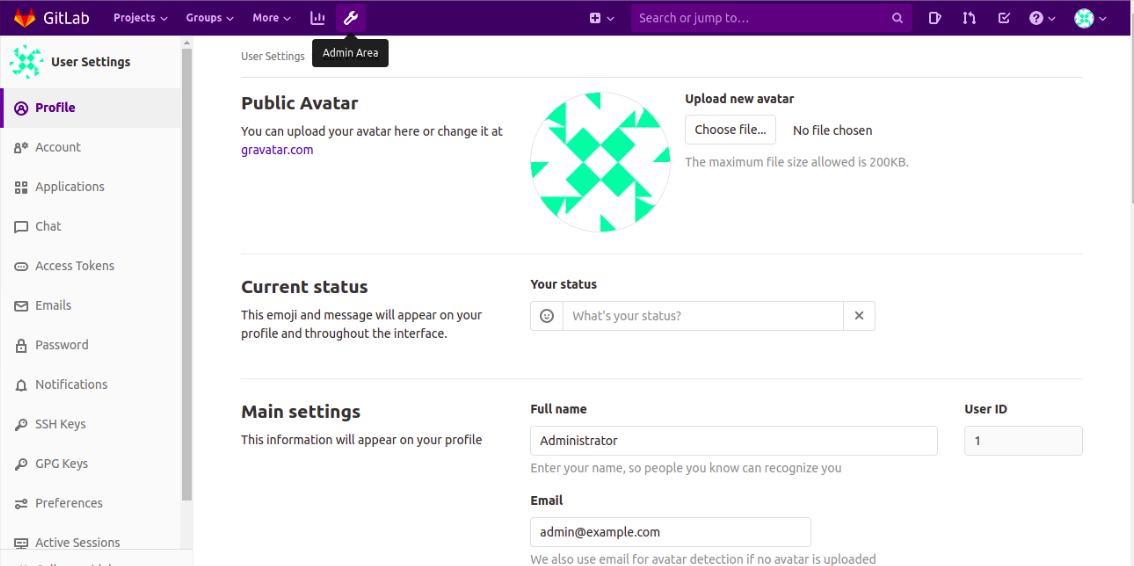
Click the Settings tab and adjust the sign-up restrictions:
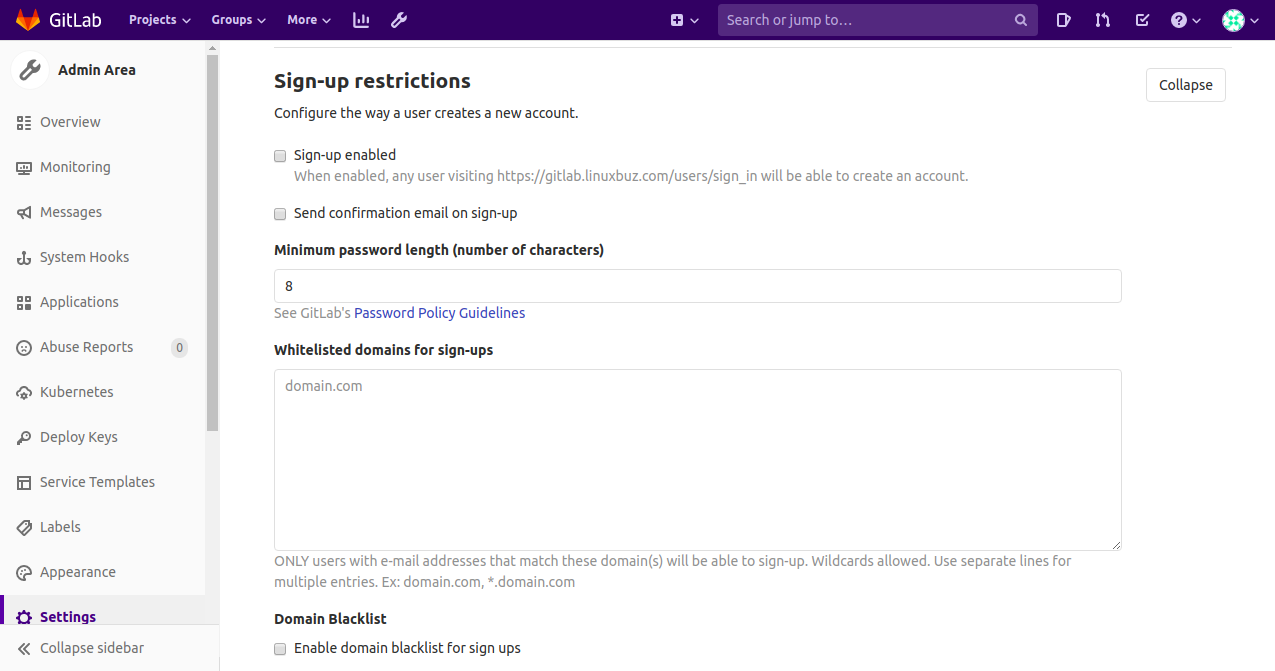
Disable the public sign-up by unchecking Sign-up enabled and save changes.
Verify GitLab Functionality
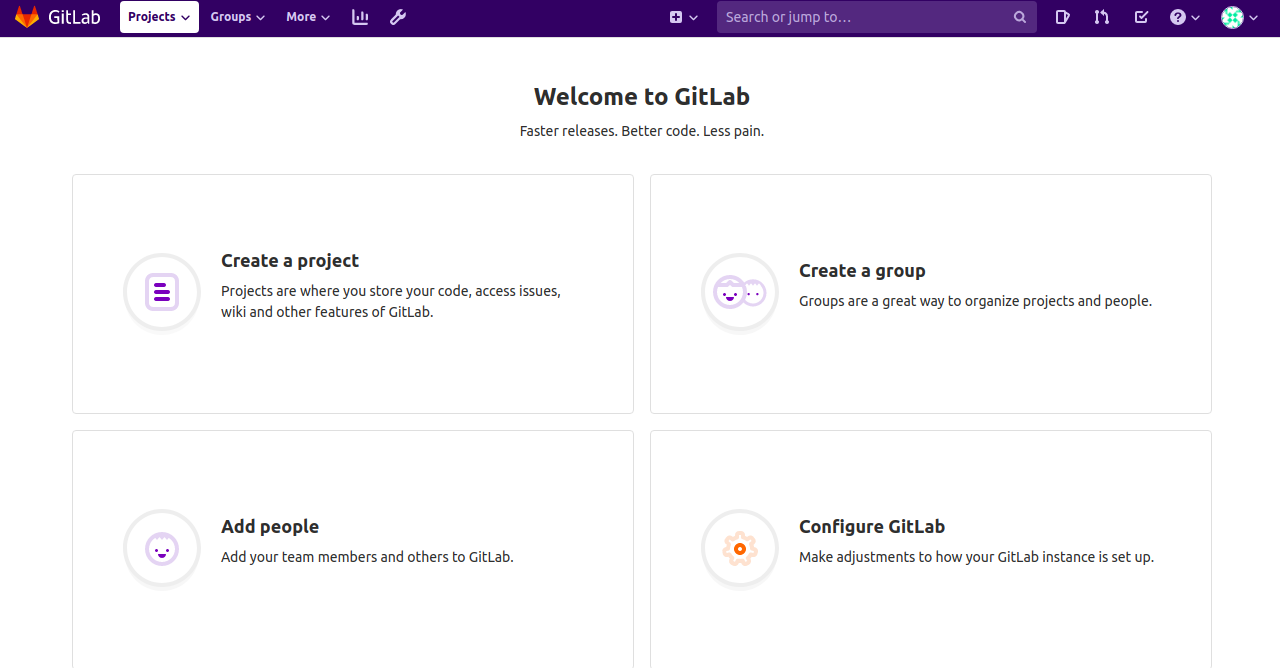
Create a new project from the GitLab dashboard:
Name your project and define its visibility level:
    git config --global user.name "Your Name"
    git config --global user.email "youremail@example.com"
    git clone https://gitlab.yourdomain.com/username/project.git
    cd project
    echo "This is my first file" > README.md
    git add README.md
    git commit -m "add README"
    git push -u origin master
Return to your GitLab dashboard to view your newly added project files.
Conclusion
This guide covered installing and securing GitLab CE with Let’s Encrypt on Ubuntu 20.04. You also learned to execute basic Git operations with GitLab. Feel free to reach out with any questions you might have.
FAQ
- Q: Can I install GitLab on a different Linux distribution?
A: Yes, GitLab can be installed on various Linux distributions, though the steps may vary slightly. - Q: Is it necessary to use a domain name for GitLab?
A: While not strictly necessary, using a domain name simplifies access and configuration, especially when securing your server with SSL. - Q: Can I upgrade from the Community Edition to the Enterprise Edition?
A: Yes, upgrading from GitLab CE to EE is possible and generally involves installing the EE package over the CE instance. - Q: Does Let’s Encrypt SSL renew automatically?
A: Yes, by enabling auto renew in your GitLab configuration, Let’s Encrypt certificates will renew automatically.