phpMyAdmin is a robust, web-based tool designed to simplify the management of MySQL and MariaDB databases, especially on Debian Linux systems. As a vital component of the LAMP stack (Linux, Apache, MySQL/MariaDB, PHP), phpMyAdmin offers an intuitive interface for database administration.
Prerequisites
- Debian 12 system with root access.
- Root password configured on the server.
Step 1: Update System Packages
Ensure your Debian system is up to date by running the following command:
apt update -y
Step 2: Install LAMP Stack
Install the necessary LAMP stack components with the command below:
apt install apache2 mariadb-server libapache2-mod-php php-cli php-mysql php-zip php-curl php-xml php-mbstring php-zip php-gd unzip -y
Step 3: Install and Configure phpMyAdmin
Download phpMyAdmin:
wget https://files.phpmyadmin.net/phpMyAdmin/5.2.1/phpMyAdmin-5.2.1-all-languages.zip
Unzip the package:
unzip phpMyAdmin-5.2.1-all-languages.zip
Move and configure phpMyAdmin:
mv phpMyAdmin-5.2.1-all-languages /usr/share/phpmyadmin
mkdir -p /var/lib/phpmyadmin/tmp
chown -R www-data:www-data /var/lib/phpmyadmin
Copy and edit the configuration file:
cp /usr/share/phpmyadmin/config.sample.inc.php /usr/share/phpmyadmin/config.inc.php
Install pwgen and generate a secret key:
apt-get install pwgen -y
pwgen -s 32 1
Edit the config file:
nano /usr/share/phpmyadmin/config.inc.php
Insert the blowfish secret and other details:
$cfg['blowfish_secret'] = 'pau9t1SG6lmaeCFxKqeeaY5N4erIa25K'; /* YOU MUST FILL IN THIS FOR COOKIE AUTH! */
$cfg['Servers'][$i]['controluser'] = 'pma';
$cfg['Servers'][$i]['controlpass'] = 'password';

$cfg['Servers'][$i]['pmadb'] = 'phpmyadmin';
$cfg['Servers'][$i]['bookmarktable'] = 'pma__bookmark';
$cfg['Servers'][$i]['relation'] = 'pma__relation';
$cfg['Servers'][$i]['table_info'] = 'pma__table_info';
$cfg['Servers'][$i]['table_coords'] = 'pma__table_coords';
$cfg['Servers'][$i]['pdf_pages'] = 'pma__pdf_pages';
$cfg['Servers'][$i]['column_info'] = 'pma__column_info';
$cfg['Servers'][$i]['history'] = 'pma__history';
$cfg['Servers'][$i]['table_uiprefs'] = 'pma__table_uiprefs';
$cfg['Servers'][$i]['tracking'] = 'pma__tracking';
$cfg['Servers'][$i]['userconfig'] = 'pma__userconfig';
$cfg['Servers'][$i]['recent'] = 'pma__recent';
$cfg['Servers'][$i]['favorite'] = 'pma__favorite';
$cfg['Servers'][$i]['users'] = 'pma__users';
$cfg['Servers'][$i]['usergroups'] = 'pma__usergroups';
$cfg['Servers'][$i]['navigationhiding'] = 'pma__navigationhiding';
$cfg['Servers'][$i]['savedsearches'] = 'pma__savedsearches';
$cfg['Servers'][$i]['central_columns'] = 'pma__central_columns';
$cfg['Servers'][$i]['designer_settings'] = 'pma__designer_settings';
$cfg['Servers'][$i]['export_templates'] = 'pma__export_templates';

$cfg['TempDir'] = '/var/lib/phpmyadmin/tmp';
Step 4: Create phpMyAdmin Admin User
Import necessary tables and create users:
mysql < /usr/share/phpmyadmin/sql/create_tables.sql
mysql
GRANT SELECT, INSERT, UPDATE, DELETE ON phpmyadmin.* TO 'pma'@'localhost' IDENTIFIED BY 'password';
    CREATE USER myadmin IDENTIFIED BY 'password';
    GRANT ALL PRIVILEGES ON *.* TO 'myadmin'@'localhost' WITH GRANT OPTION;
    FLUSH PRIVILEGES;
    EXIT;
Step 5: Configure Apache for phpMyAdmin
Create the Apache configuration file:
nano /etc/apache2/conf-available/phpmyadmin.conf
Add the following content:
Alias /phpmyadmin /usr/share/phpmyadmin

<Directory /usr/share/phpmyadmin>
    Options SymLinksIfOwnerMatch
    DirectoryIndex index.php

    <IfModule mod_php5.c>
        <IfModule mod_mime.c>
            AddType application/x-httpd-php .php
        </IfModule>
        <FilesMatch ".+\.php$">
            SetHandler application/x-httpd-php
        </FilesMatch>

        php_value include_path .
        php_admin_value upload_tmp_dir /var/lib/phpmyadmin/tmp
        php_admin_value open_basedir /usr/share/phpmyadmin/:/etc/phpmyadmin/:/var/lib/phpmyadmin/:/usr/share/php/php-gettext/:/usr/share/php/php-php-gettext/:/usr/share/javascript/:/usr/share/php/tcpdf/:/usr/share/doc/phpmyadmin/:/usr/share/php/phpseclib/
        php_admin_value mbstring.func_overload 0
    </IfModule>
    <IfModule mod_php.c>
        <IfModule mod_mime.c>
            AddType application/x-httpd-php .php
        </IfModule>
        <FilesMatch ".+\.php$">
            SetHandler application/x-httpd-php
        </FilesMatch>

        php_value include_path .
        php_admin_value upload_tmp_dir /var/lib/phpmyadmin/tmp
        php_admin_value open_basedir /usr/share/phpmyadmin/:/etc/phpmyadmin/:/var/lib/phpmyadmin/:/usr/share/php/php-gettext/:/usr/share/php/php-php-gettext/:/usr/share/javascript/:/usr/share/php/tcpdf/:/usr/share/doc/phpmyadmin/:/usr/share/php/phpseclib/
        php_admin_value mbstring.func_overload 0
    </IfModule>

</Directory>

# Authorize for setup
<Directory /usr/share/phpmyadmin/setup>
    <IfModule mod_authz_core.c>
        <IfModule mod_authn_file.c>
            AuthType Basic
            AuthName "phpMyAdmin Setup"
            AuthUserFile /etc/phpmyadmin/htpasswd.setup
        </IfModule>
        Require valid-user
    </IfModule>
</Directory>

# Disallow web access to directories that don't need it
<Directory /usr/share/phpmyadmin/templates>
    Require all denied
</Directory>
<Directory /usr/share/phpmyadmin/libraries>
    Require all denied
</Directory>
<Directory /usr/share/phpmyadmin/setup/lib>
    Require all denied
</Directory>
Enable the configuration and reload Apache:
a2enconf phpmyadmin.conf
systemctl reload apache2
Step 6: Access phpMyAdmin
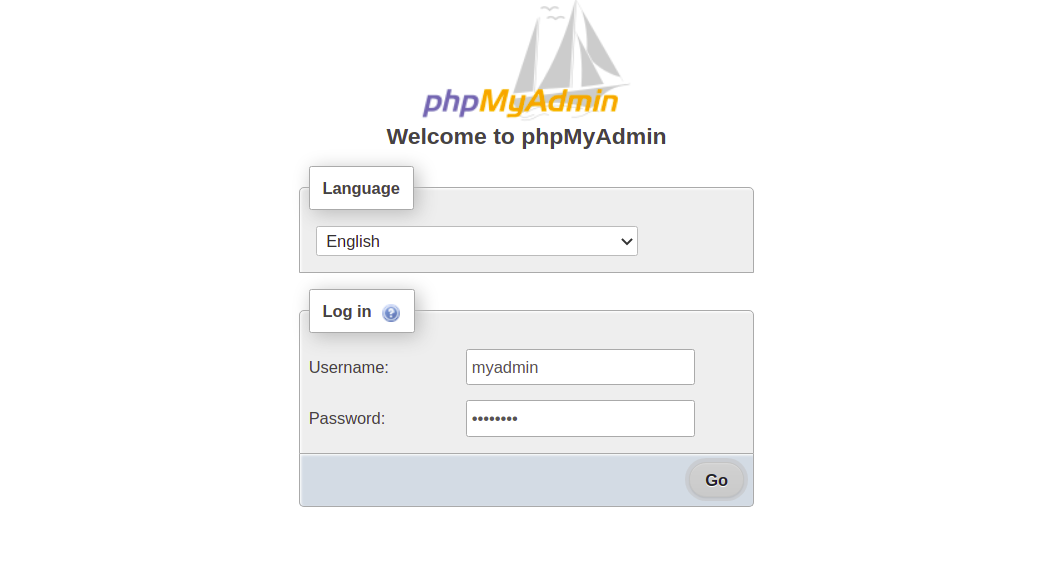
Visit http://your-server-ip/phpmyadmin in your browser to reach the login page.

Step 7: Secure phpMyAdmin
Enhance security with .htaccess authentication:
nano /etc/apache2/conf-available/phpmyadmin.conf
Add "AllowOverride All" within the directive.
Create the .htaccess file:
nano /usr/share/phpmyadmin/.htaccess
Add the following:
AuthType Basic
AuthName "Restricted Files"
AuthUserFile /usr/share/phpmyadmin/.htpasswd
Require valid-user
Create an htpasswd user:
htpasswd -c /usr/share/phpmyadmin/.htpasswd secureuser
Step 8: Verify Installation
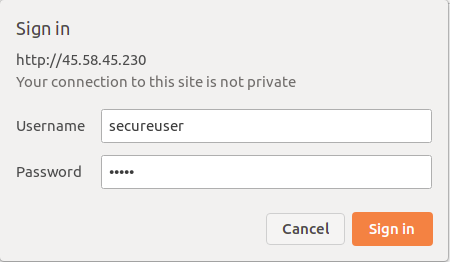
Verify enhanced security by revisiting your phpMyAdmin URL and entering the .htaccess credentials first.

Conclusion
You have now successfully installed and secured phpMyAdmin on your Debian 12 server, streamlining database management via your web browser.
FAQ
- What is phpMyAdmin used for?
- phpMyAdmin is a web-based tool that simplifies the management of MySQL and MariaDB databases.
- Is phpMyAdmin secure by default?
- Although phpMyAdmin has several security features, it is recommended to implement additional security measures like .htaccess password protection.
- Can I install phpMyAdmin without a LAMP stack?
- phpMyAdmin requires a web server (like Apache) and a working PHP environment, hence a LAMP stack is typically essential.
- How do I resolve phpMyAdmin login errors?
- Ensure that the web server, MySQL/MariaDB, and PHP configurations are correct, and user credentials are accurate.
