CMS Made Simple is a free and open-source content management system (CMS) written in PHP, utilizing MySQL for data storage. As a highly efficient CMS, it offers an attractive and user-friendly admin panel for developing themes, templates, and stylesheets. With CMS Made Simple, you can swiftly maintain and update your site from anywhere with an internet connection. If you are seeking a WordPress alternative, CMS Made Simple might be the ideal choice for you.
This guide will walk you through the process of installing CMS Made Simple on Ubuntu 18.04.
Requirements
- A server running Ubuntu 18.04
- A non-root user with sudo privileges
Installing the LAMP Stack
CMS Made Simple requires a LAMP (Linux, Apache, MySQL, PHP) stack. Begin by installing Apache and MariaDB using the following command:
sudo apt-get install apache2 mariadb-server -y
Since the latest PHP version is not available by default on Ubuntu 18.04, add the required repository:
sudo apt-get install python-software-properties -y
sudo add-apt-repository -y ppa:ondrej/php
After updating repositories, install PHP and associated libraries:
sudo apt-get install apache2 mariadb-server libapache2-mod-php7.1 php7.1-common php7.1-mbstring php7.1-xmlrpc php7.1-soap php7.1-gd php7.1-xml php7.1-intl php7.1-mysql php7.1-cli php7.1-mcrypt php7.1-zip php7.1-curl -y
Once installed, start the Apache and MariaDB services and configure them to launch at boot:
sudo systemctl start apache2
sudo systemctl start mysql
sudo systemctl enable apache2
sudo systemctl enable mysql
Next, adjust PHP settings by modifying the php.ini file:
sudo nano /etc/php/7.1/apache2/php.ini
Apply the following changes:
max_execution_time = 180
memory_limit = 256M
post_max_size = 25M
upload_max_file_size = 150M
Save and close the file when done.
Database Configuration
Secure your MariaDB installation by running:
sudo mysql_secure_installation
Follow the prompts to configure security settings:
Enter current password for root (enter for none): Enter
Set root password? [Y/n]: Y
New password:
Re-enter new password:
Remove anonymous users? [Y/n]: Y
Disallow root login remotely? [Y/n]: Y
Remove test database and access to it? [Y/n]: Y
Reload privilege tables now? [Y/n]: Y
Login to the MariaDB shell:
mysql -u root -p
Create a database and user for CMSMS:
MariaDB [(none)]> CREATE DATABASE cmsms_db;
MariaDB [(none)]> GRANT ALL PRIVILEGES ON cmsms_db.* TO 'cmsms'@'localhost' IDENTIFIED BY 'password';
Flush privileges and exit:
MariaDB [(none)]> FLUSH PRIVILEGES;
MariaDB [(none)]> exit;
Installing CMS Made Simple
Download the latest CMS Made Simple package from its official website:
wget http://s3.amazonaws.com/cmsms/downloads/14144/cmsms-2.2.7-install.zip
Extract the downloaded file to the Apache root directory:
sudo unzip cmsms-2.2.7-install.zip -d /var/www/html/cmsms
Set appropriate permissions for the CMS Made Simple directory:
sudo chown -R www-data:www-data /var/www/html/cmsms/
sudo chmod -R 755 /var/www/html/cmsms/
Create an Apache virtual host configuration file:
sudo nano /etc/apache2/sites-available/cmsms.conf
Add the following configuration:
<VirtualHost *:80>
 ServerAdmin admin@yourdomain.com
 DocumentRoot /var/www/html/cmsms
 ServerName yourdomain.com
 <Directory /var/www/html/cmsms/>
  Options +FollowSymLinks
  AllowOverride All
  Order allow,deny
  allow from all
 </Directory>
 ErrorLog /var/log/apache2/cmsms-error_log
 CustomLog /var/log/apache2/cmsms-access_log common
</VirtualHost>
Save the file and enable the site and Apache modules:
sudo a2ensite cmsms
sudo a2enmod rewrite
Restart Apache to apply changes:
systemctl restart apache2
Accessing CMS Made Simple
Open a web browser and enter the URL http://yourdomain.com/cmsms-2.2.7-install.php. The installation page should appear:
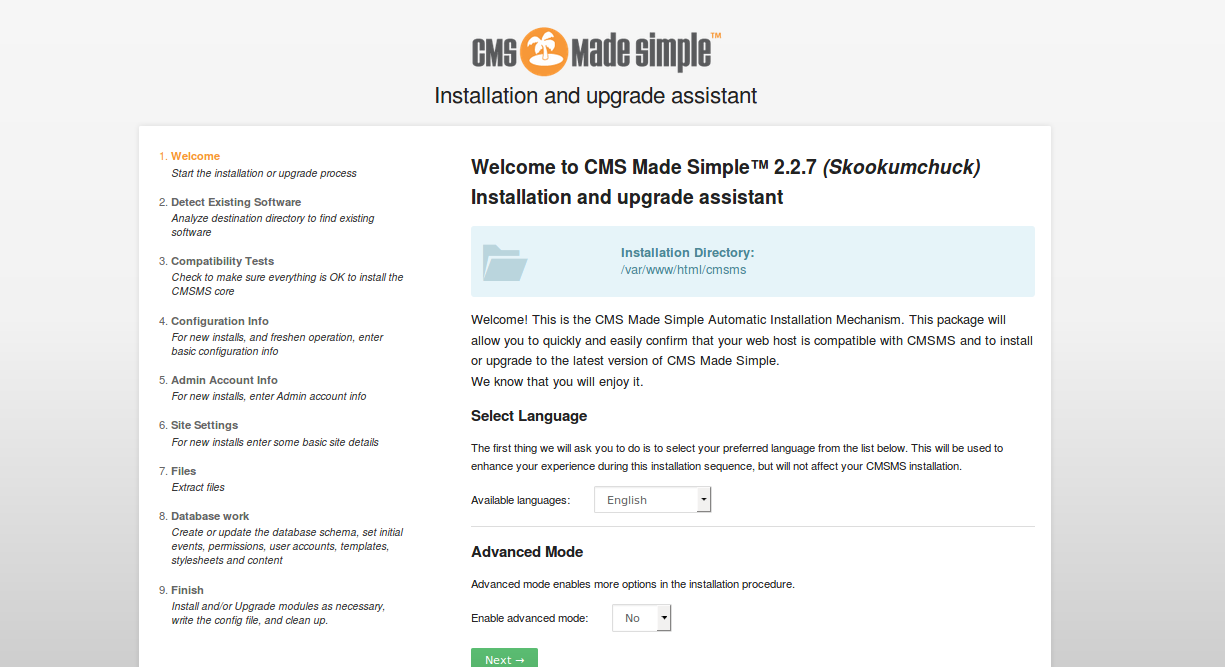
Select English and click Next to proceed:
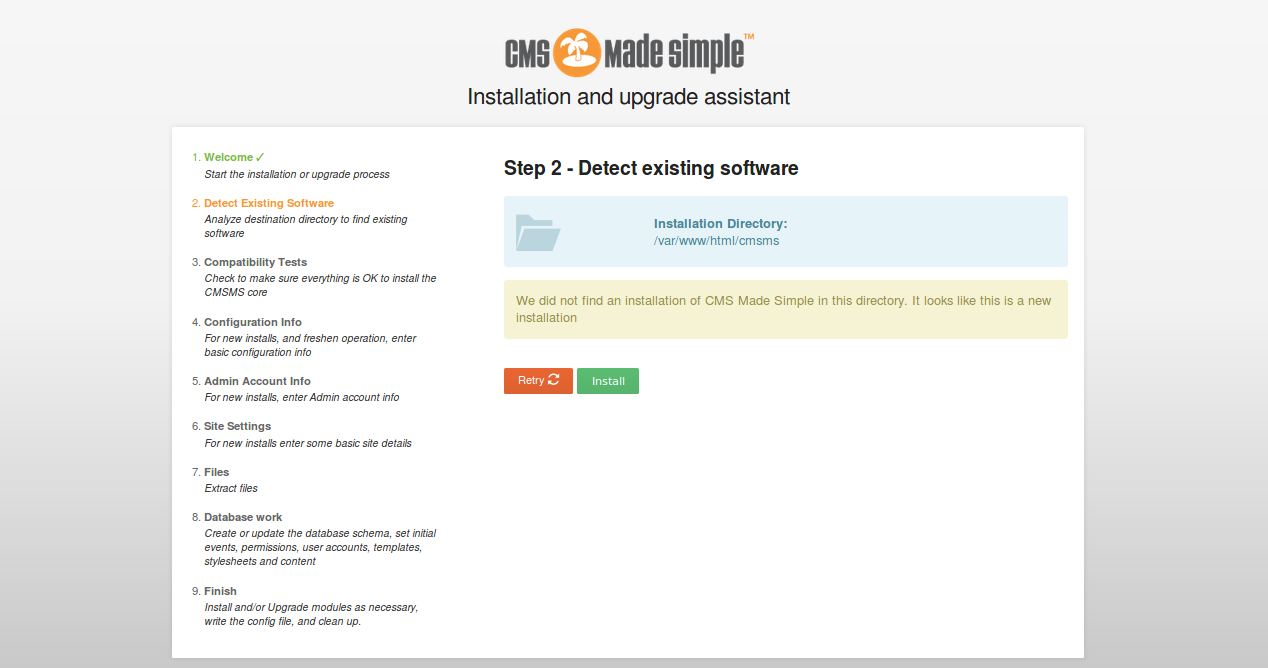
Review the destination directory, then click Install:
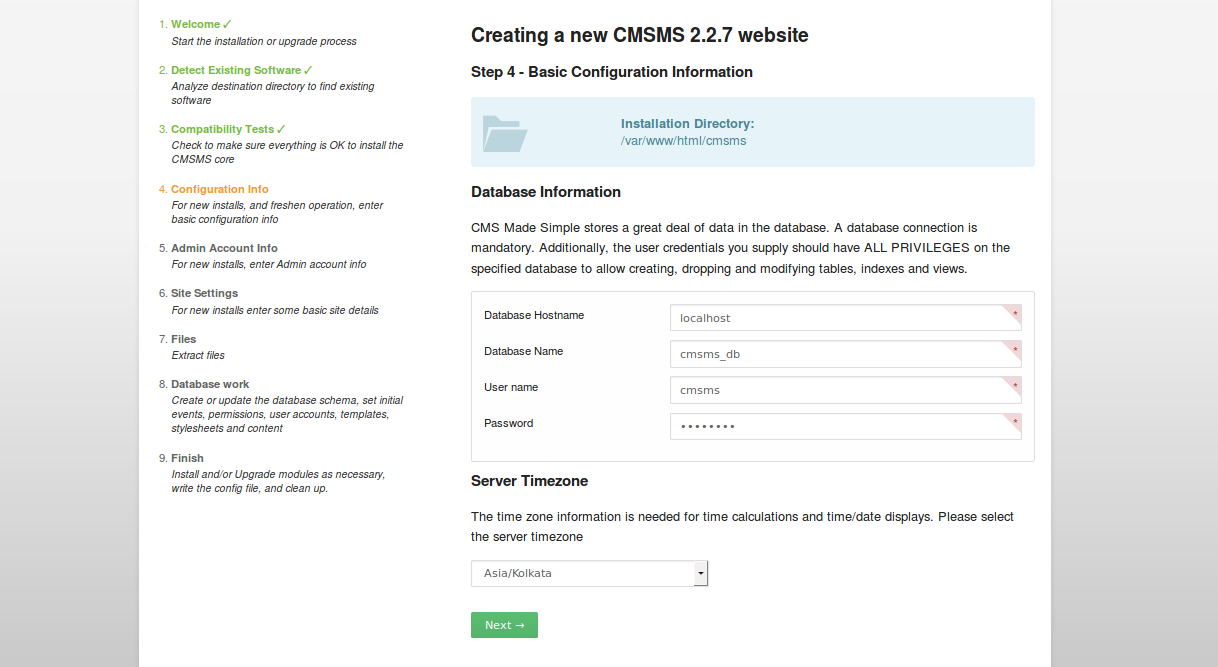
Enter your database information and timezone, then click Next:
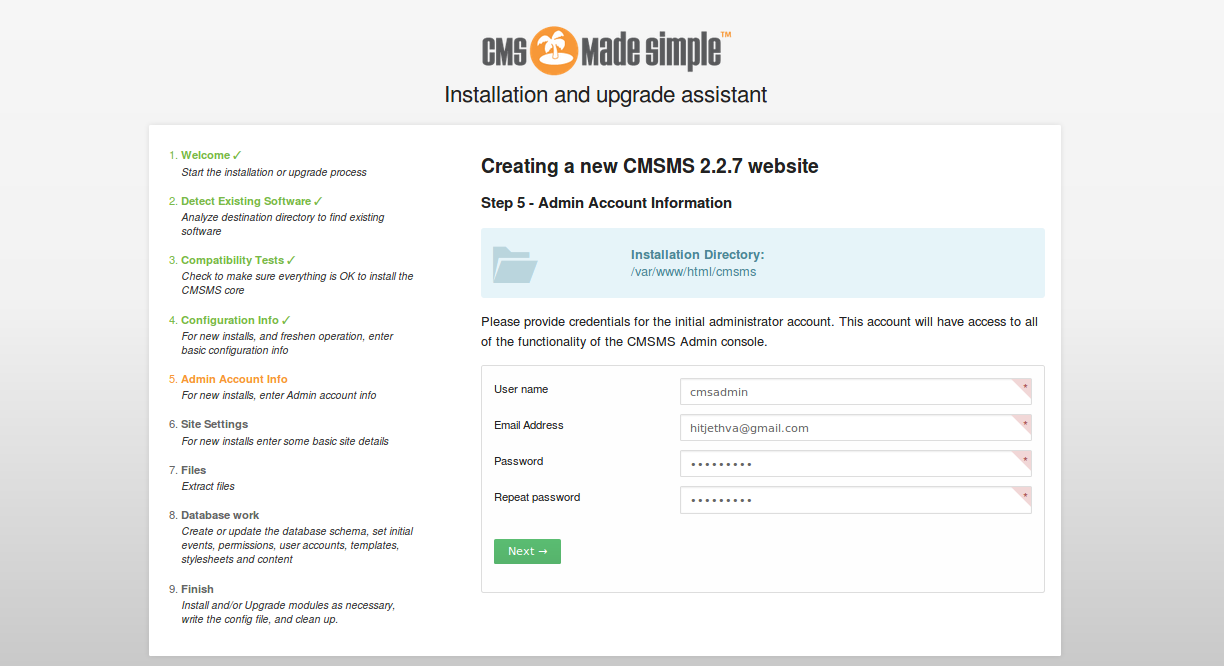
Set up your admin credentials and click Next:
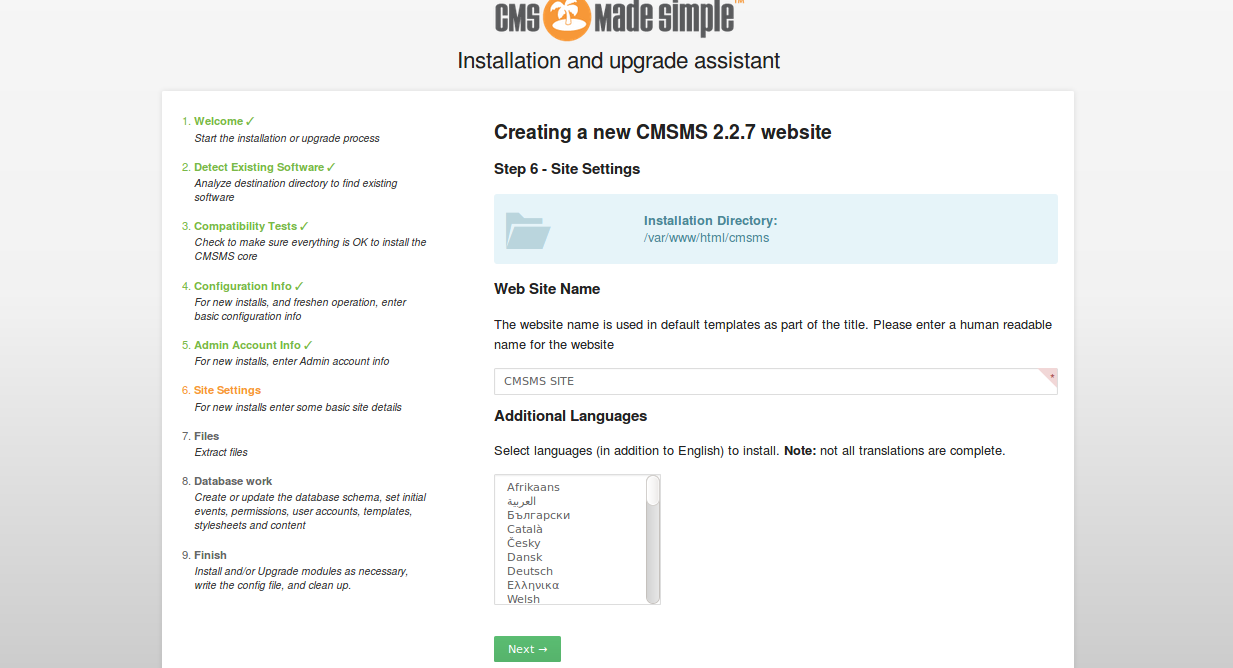
Provide your website name and optional languages, then click Next:
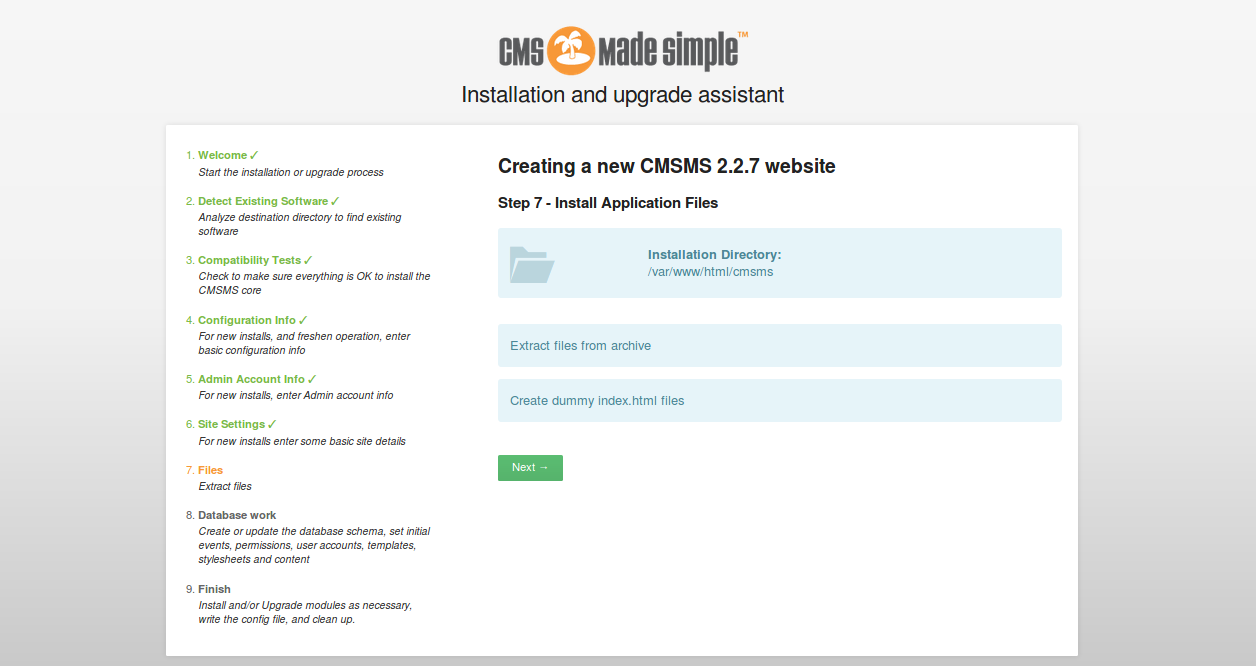
Proceed by clicking Next to install application files and database setup:
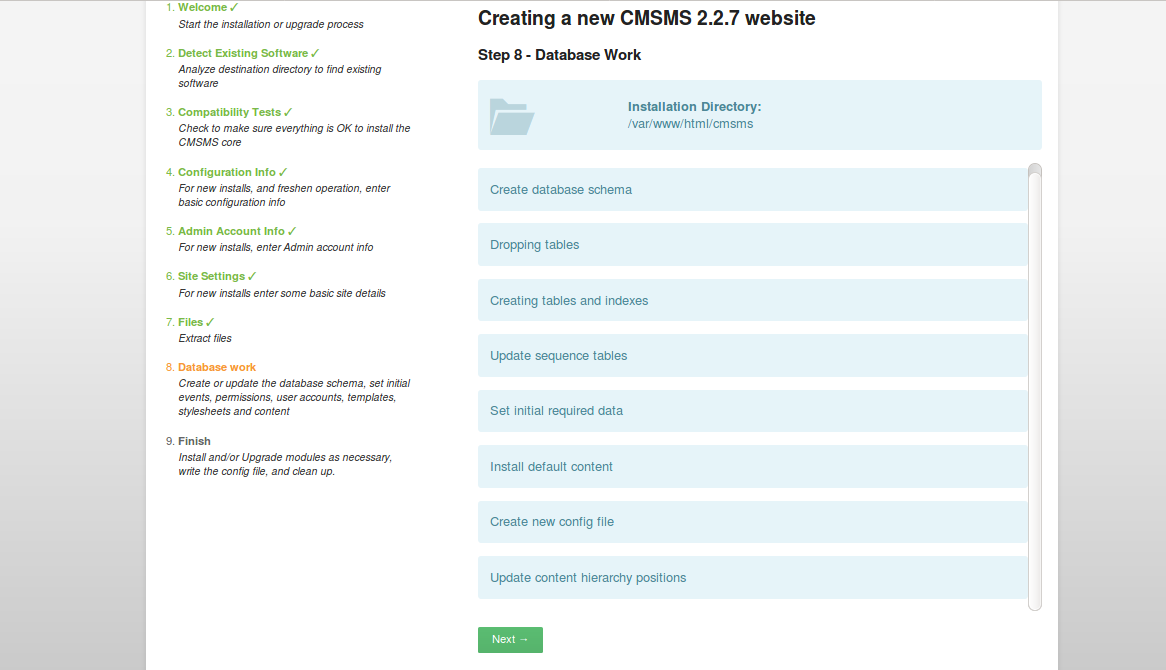
Final setup will direct you to create the database schema and essential components:
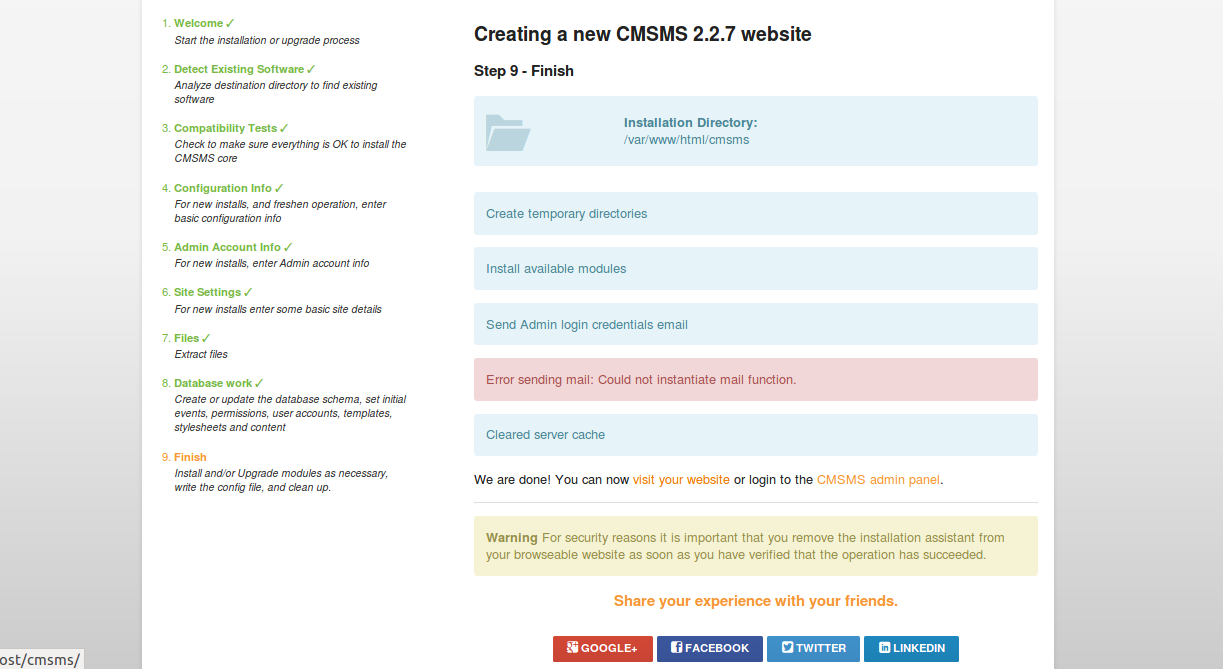
You will reach the CMSMS admin panel login page:
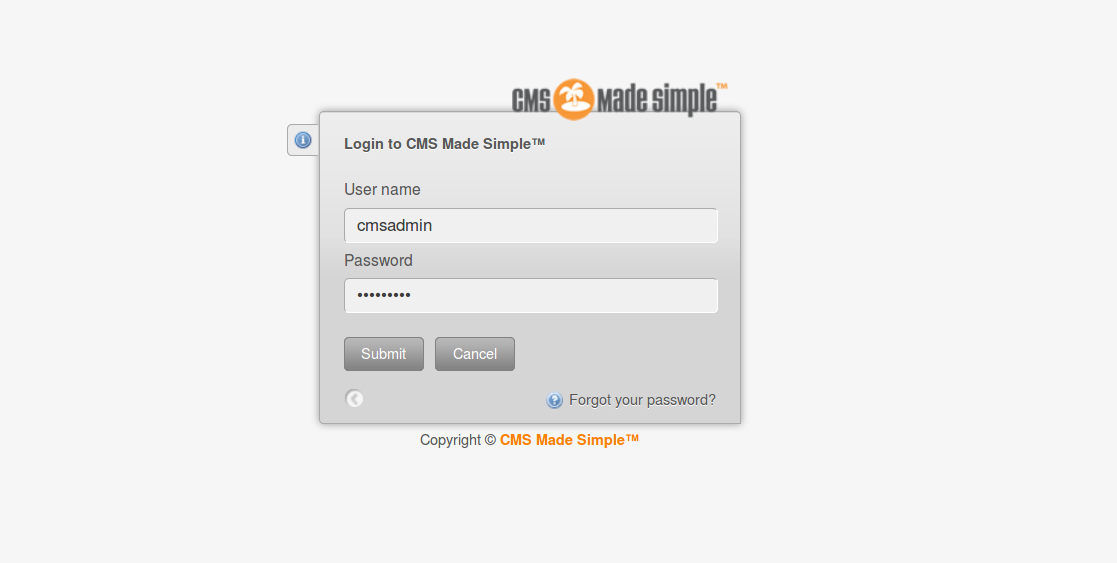
Enter your username and password, and click Submit to access the dashboard:
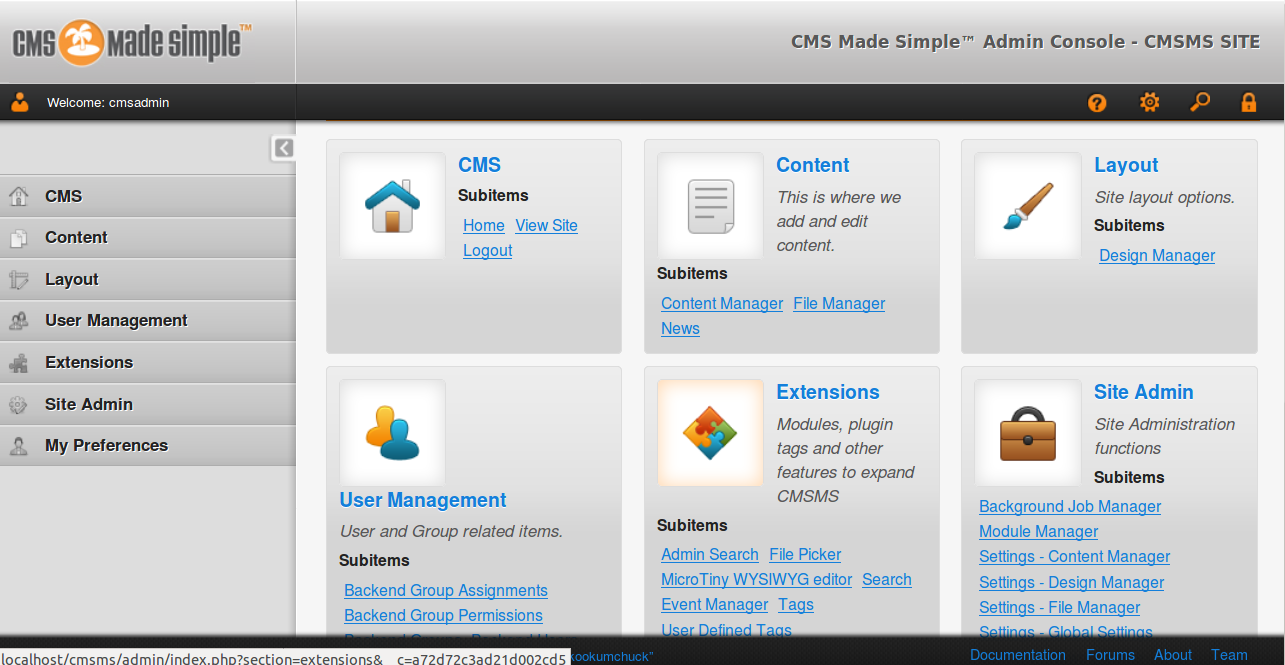
Congratulations! You have successfully installed CMS Made Simple on your Ubuntu 18.04 server.
Frequently Asked Questions (FAQ)
Q: Can I install CMS Made Simple on a different operating system?
A: Yes, CMS Made Simple can be installed on different Unix-based systems such as Debian, CentOS, or Red Hat. Adjust the installation steps according to your system’s package management and configurations.
Q: What are the system requirements for CMS Made Simple?
A: CMS Made Simple requires a web server (like Apache), PHP (version 7.1 or later), and a MySQL-compatible database (such as MariaDB). Sufficient disk space and memory are also necessary based on your website’s size and expected traffic.
Q: How do I secure my CMS Made Simple installation?
A: Securing your CMS involves using strong, unique passwords, keeping your software up-to-date, backing up data regularly, and securing your server with firewalls and intrusion detection systems.
Q: Where can I find more help or support for CMS Made Simple?
A: You can find support through the official CMS Made Simple website, forums, and community resources. Additionally, many third-party guides and tutorials are available online.