Django is an open-source web application framework written in Python that adheres to the MVC (Model-View-Controller) architecture. It is renowned for its speed and ability to help developers swiftly launch their applications while mitigating common security vulnerabilities such as SQL Injection, XSS, CSRF, and clickjacking.
Managed by the Django Software Foundation, Django is employed by a multitude of significant technology firms, government entities, and organizations worldwide. Esteemed platforms like Pinterest, Mozilla, Instagram, Disqus, and The Washington Post are built using Django.
This guide will walk you through the installation of Django 3.0 on Ubuntu 20.04, utilizing Python 3 as the default version. We’ll explore multiple installation methods: via the apt repository, pip, and using Python Virtualenv.
In this tutorial, we will:
- Set up Python and Pip
- Install the Django Framework
- Create your first project with Django
Step 1 – Set Up Python and Pip
Initially, we’ll configure Python and Pip on the Ubuntu 20.04 system.
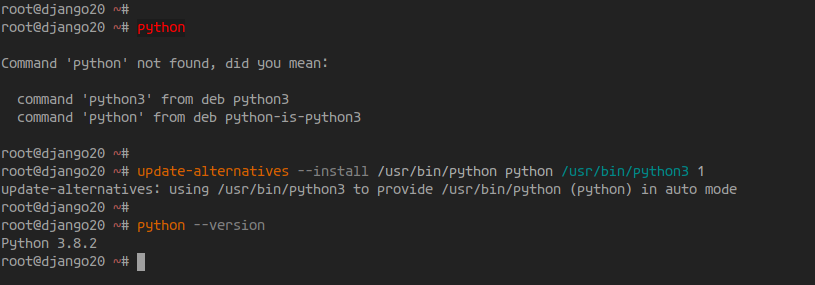
By default, Ubuntu 20.04 comes with Python 3. It can be accessed via the ‘python3’ command and not ‘python’.
To check the availability of the Python command, execute:
python
You should see an error noting:
Command 'python' not found, did you mean:

  command 'python3' from deb python3
  command 'python' from deb python-is-python3
To resolve this, create a symbolic link from the Python3 binary ‘/usr/bin/python3’ to ‘/usr/bin/python’. Use this command:
sudo update-alternatives --install /usr/bin/python python /usr/bin/python3 1
Verify the Python command by running:
python --version
You should see:
Python 3.8.2
Your Python 3 setup is now complete.
Next, we will install the Python package manager ‘python3-pip’.
Execute the following command:
sudo apt install python3-pip -y
After installation, set ‘pip3’ as the default ‘pip’ version:
sudo update-alternatives --install /usr/bin/pip pip /usr/bin/pip3 1
Check the pip version:
pip --version
You should see:
pip 20.0.2 from /usr/lib/python3/dist-packages/pip (python 3.8)

Step 2 – Install Django Framework
With Python and Pip configured, let’s install the Django Framework. There are four installation methods: using the Apt repository, pip, virtualenv, or the Django Git version.
Install Django with Apt
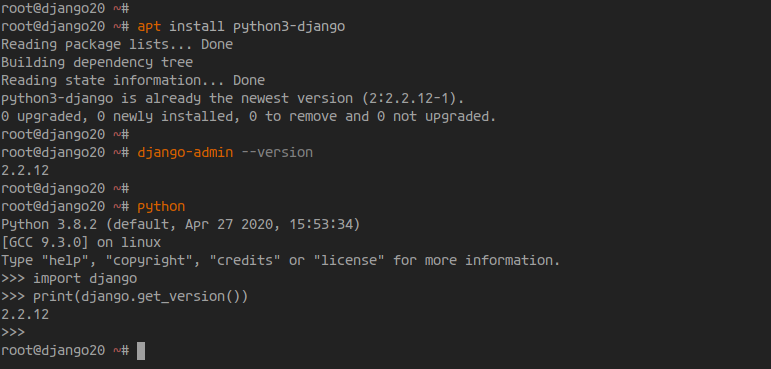
Ubuntu’s default repository provides a package named ‘python3-django’, which at the time of writing, is version 2.2.12. It may not be the latest stable version.
Inspect the package using:
apt show python3-django
To install it, use:
sudo apt install python3-django
After installation, verify the Django version with:
django-admin --version
Install Django with Pip
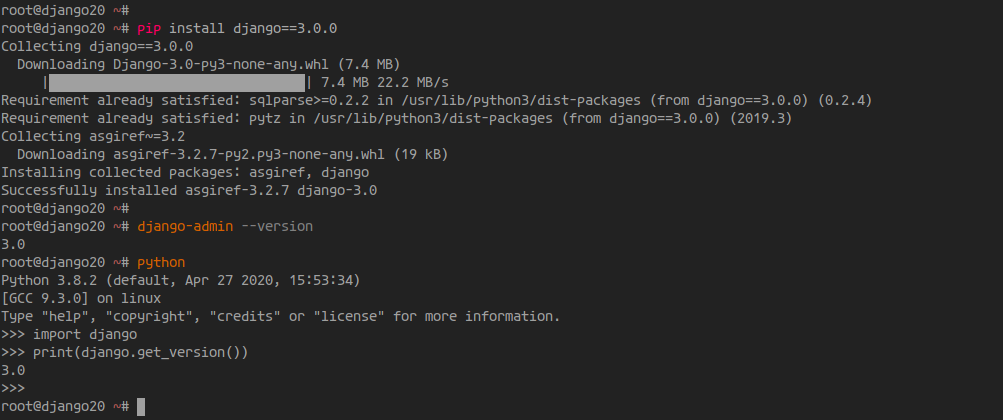
Installing Django via pip allows selection of the Django version suitable for your project. Here we’ll install Django 3.0.
Use this command to install:
pip install django==3.0.0
Verify the installation with:
django-admin --version
Alternatively, you can check in the Python interactive shell:
python
import django
print(django.get_version())
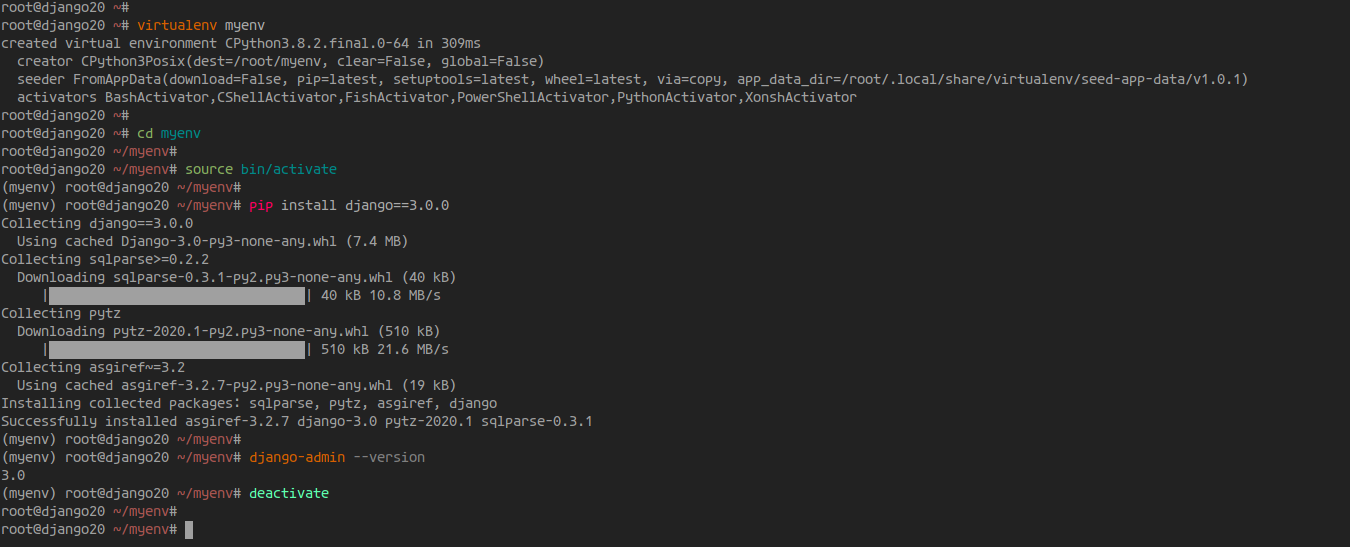
Install Django with Virtualenv
This is the recommended method for a development environment, keeping dependencies isolated.
First, install virtualenv:
pip install virtualenv
Create a virtual environment:
virtualenv myenv
Activate it with:
cd myenv/
source bin/activate
Install Django:
pip install django==3.0.0
Verify by running:
django-admin --version
To deactivate the environment:
deactivate
Install Django from Git Repository
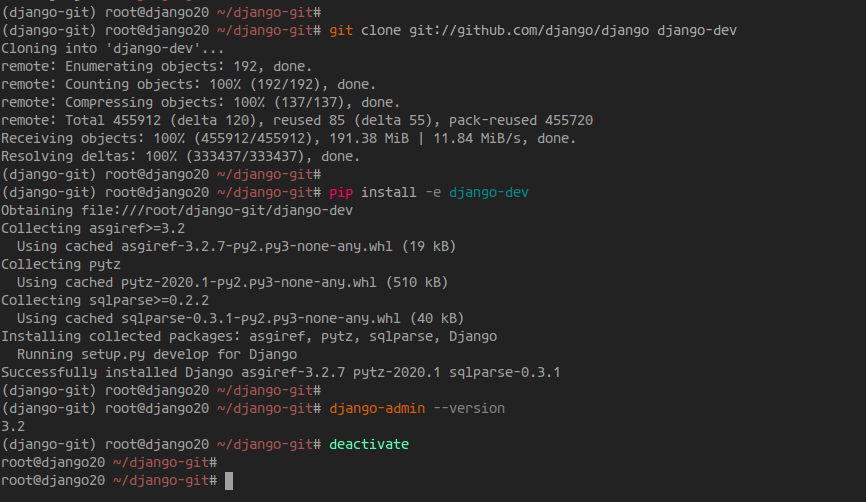
This is suitable for accessing the development version. Install git:
sudo apt install git
Create a new virtual environment:
virtualenv django-git
Activate it:
cd django-git/
source bin/activate
Clone and install the development version:
git clone git://github.com/django/django django-dev
pip install -e django-dev
Verify with:
django-admin --version
Step 3 – Create Your First Project with Django
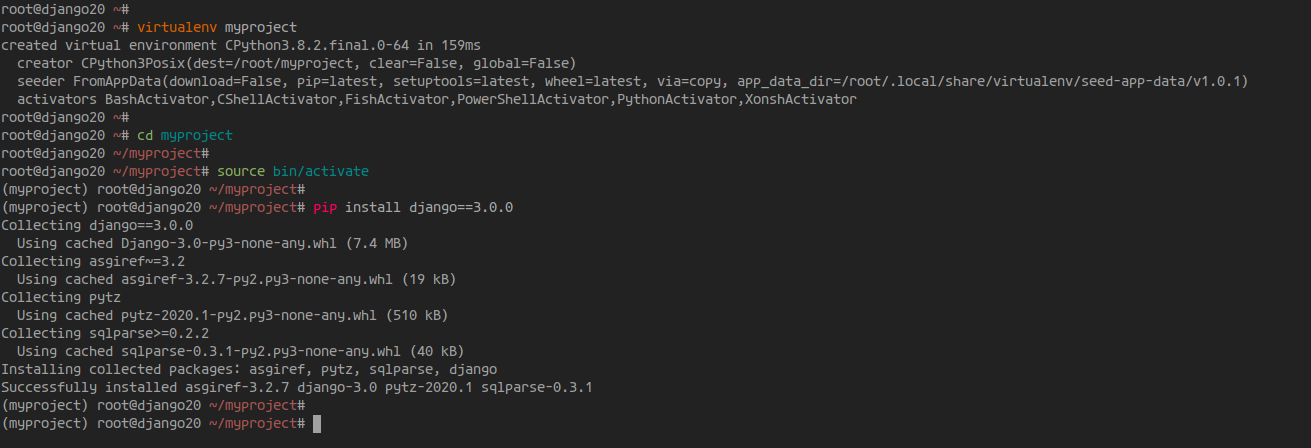
Now, let’s create your first Django project. Begin by setting up a new virtual environment:
virtualenv myproject
Activate it:
cd myproject/
source bin/activate
Install Django:
pip install django==3.0.0
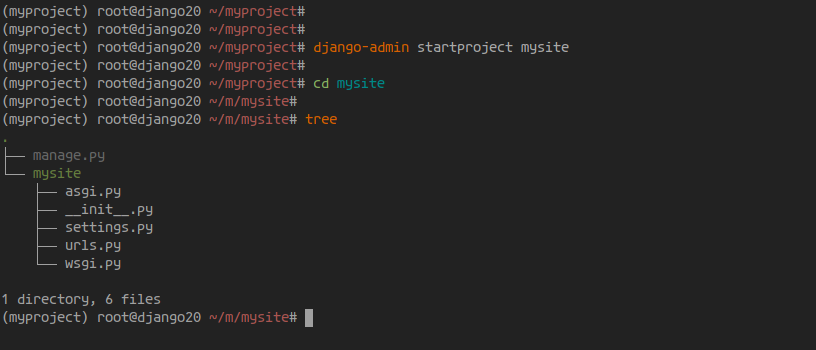
Create a Django project named ‘mysite’:
django-admin startproject mysite
Navigate to the ‘mysite’ directory:
cd mysite/; tree
Edit ‘settings.py’ to add your server’s IP:
vim mysite/settings.py
ALLOWED_HOSTS = ["your-server-ip"]
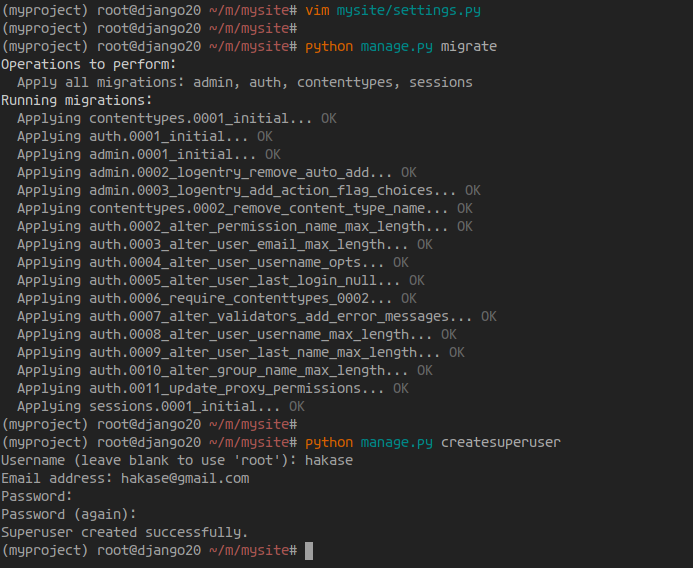
Migrate the database:
python manage.py migrate
Create an admin user:
python manage.py createsuperuser
Step 4 – Start the Django Project
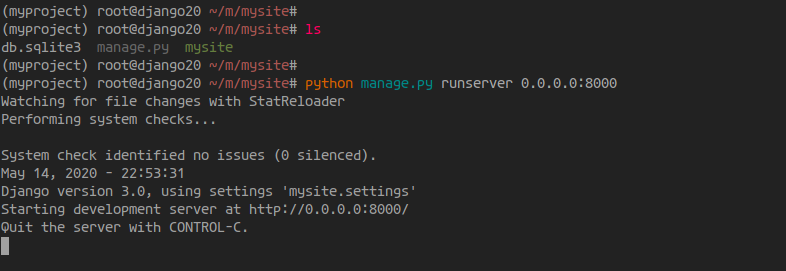
With the project set up, start the Django server:
python manage.py runserver 0.0.0.0:8000
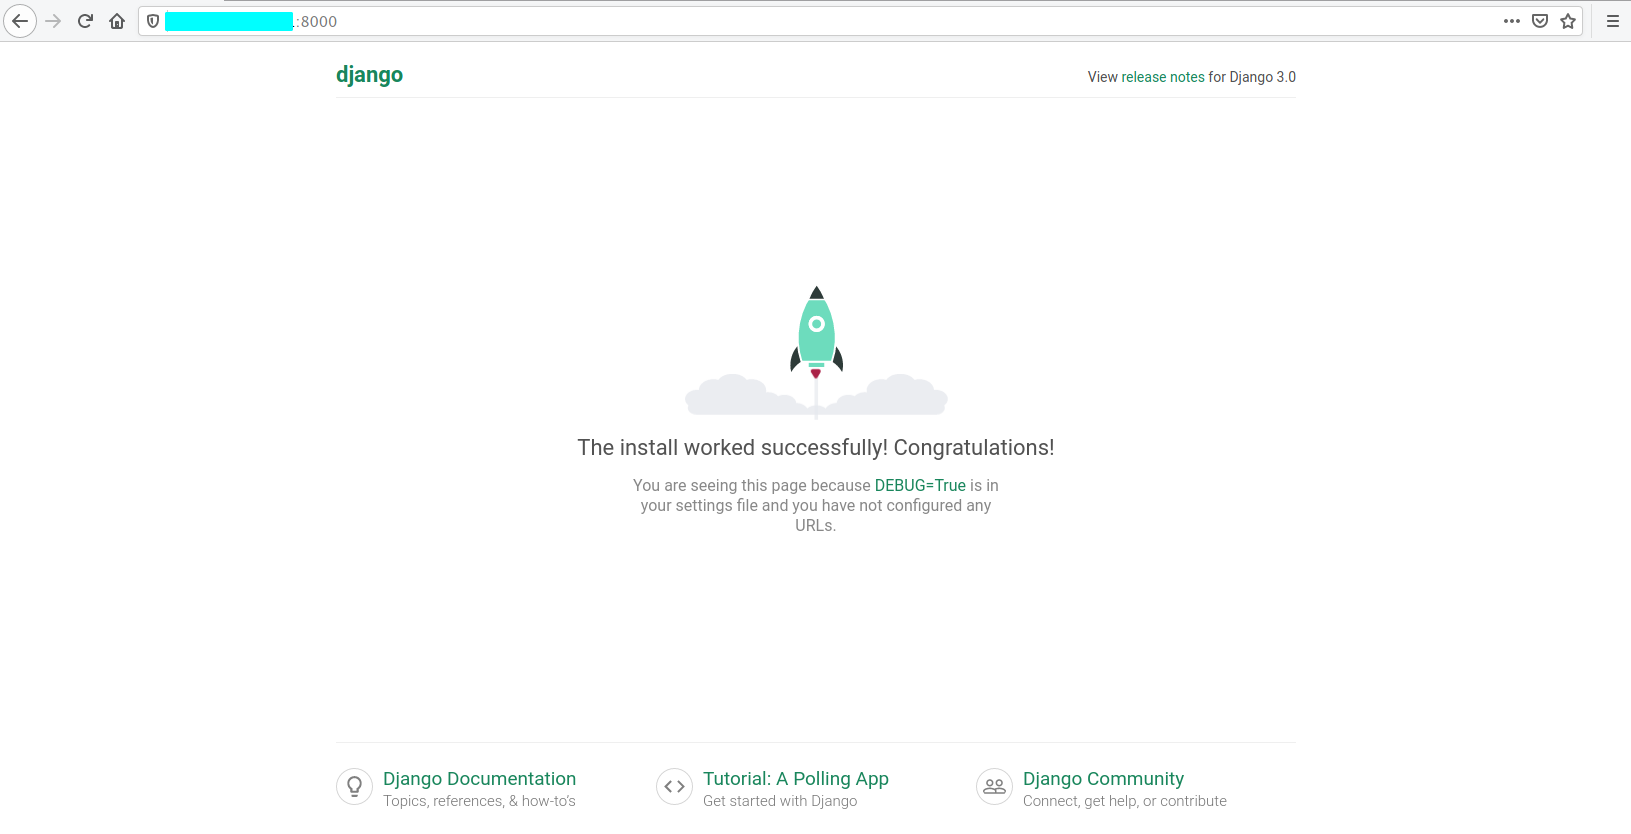
Visit your site in a web browser:
http://10.5.5.32:8000/
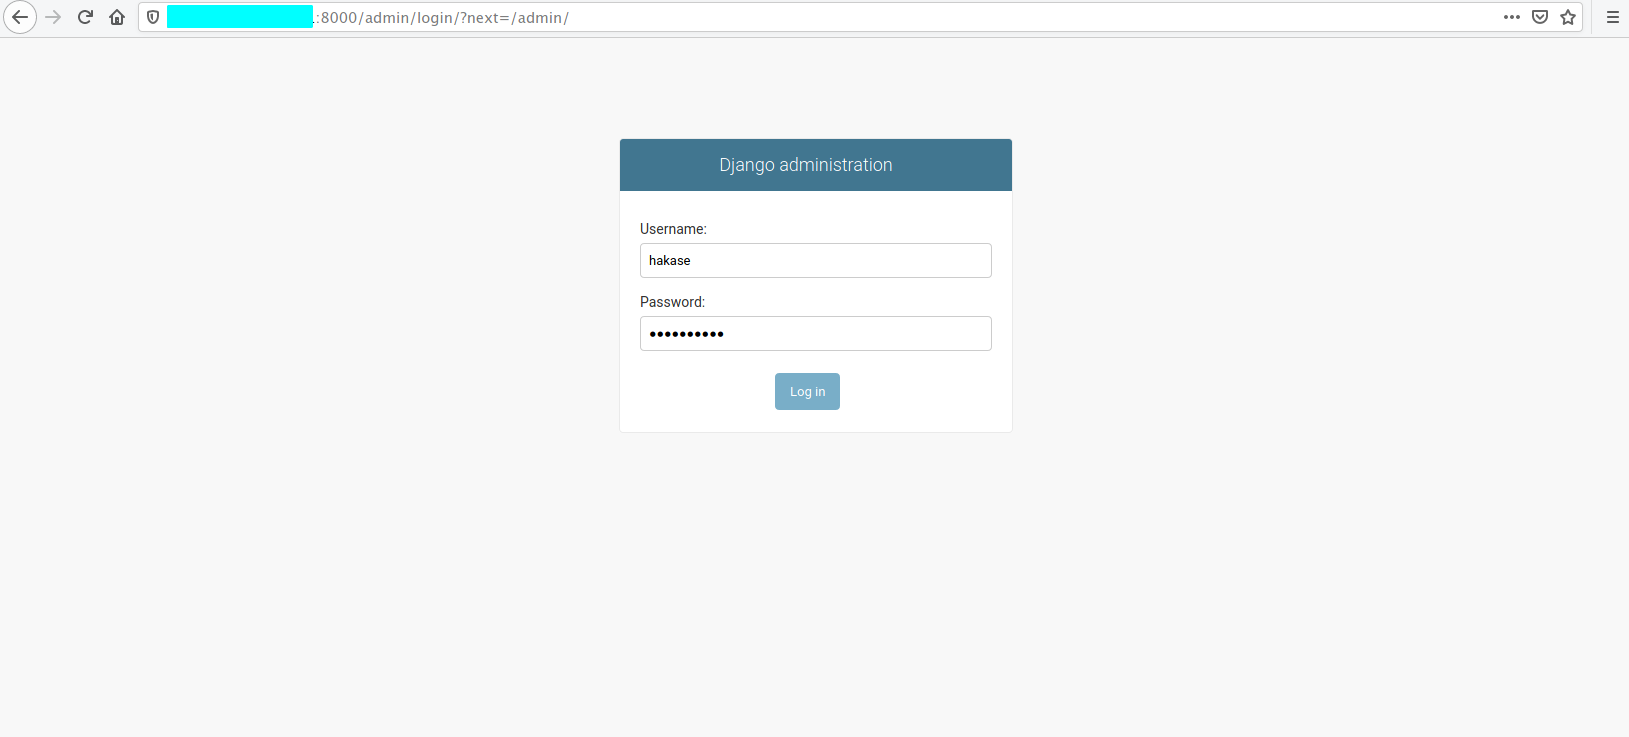
Access the admin panel:
http://10.5.5.32:8000/admin/
Log in with your admin credentials.
This concludes the setup of Django with Python 3 on Ubuntu 20.04.
FAQs
1. What is Django?
Django is a high-level Python web framework that encourages rapid development and pragmatic design. It’s free and open-source.
2. Why use Django?
Django is known for its simplicity and ability to handle complex applications. It also offers protection against a wide range of security threats.
3. What are the main components of a Django project?
A typical Django project consists of the model, view, and template components, aligned with the MVC design pattern.
4. Can Django integrate with other databases?
Yes, Django supports all the major databases like PostgreSQL, MySQL, SQLite, and Oracle.
5. How can I update Django to the latest version?
You can update Django using pip, with the command: pip install --upgrade django.
