FreeIPA is an open-source identity management solution for Linux/Unix operating systems, acting as the upstream project of the RedHat Identity Management System. It provides a cohesive solution for authentication and authorization across your systems.
FreeIPA integrates several components like the Directory Server, DNS, Kerberos, PKI, Certmonger, NTP Server, and a web administration UI, among others. It offers a centralized source for user credentials and access control, simplifying identity management and providing capabilities for user monitoring, authentication, and access control in a centralized environment.
This tutorial will guide you through the installation and setup of FreeIPA on a Rocky Linux 9 server. We will cover the installation of FreeIPA server packages, setting up of FreeIPA deployment, creating a FreeIPA user, and installing and configuring the FreeIPA client on a separate Rocky Linux host, adding it to the FreeIPA server network.
Prerequisites
Before diving into this tutorial, ensure you have the following:
- Two or more Rocky Linux 9 servers, one for the FreeIPA server and another for the FreeIPA client.
- A non-root user with sudo/root privileges.
- SELinux configured to run in permissive mode.
For this demonstration, the following server details are used:
Hostname    IP Address      Usage
--------------------------------------------
ipa         192.168.5.25    FreeIPA Server
client      192.168.5.80    FreeIPA Client
Once you have the prerequisites ready, we can start the FreeIPA installation.
Setup FQDN and Timezone
We’ll begin by setting up the FQDN (Fully Qualified Domain Name) and timezone on your FreeIPA server.
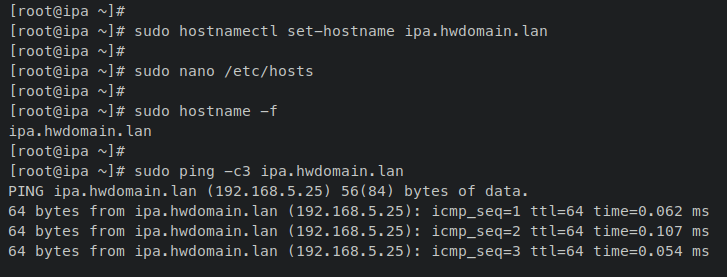
Set your system’s FQDN using the ‘hostnamectl‘ command. For instance, to set the FQDN to ‘ipa.hwdomain.lan’, execute:
sudo hostnamectl set-hostname ipa.hwdomain.lan
Modify the ‘/etc/hosts’ file with the following nano editor command:
sudo nano /etc/hosts
Add your server details to the file:
# ip - fqdn - hostname
192.168.5.25    ipa.hwdomain.lan    ipa
Save and exit once done, then verify your system’s FQDN:
sudo hostname -f
sudo ping -c3 ipa.hwdomain.lan
Your FQDN should resolve to the server’s internal IP. In this example, ‘ipa.hwdomain.lan’ resolves to ‘192.168.5.25‘.
Set the server’s timezone using ‘timedatectl‘:
sudo timedatectl set-timezone Europe/Stockholm
Then update the ‘/etc/localtime‘ file with the correct timezone symlink:
sudo unlink /etc/localtime
sudo ln -s /usr/share/timezone/Europe/Stockholm /etc/localtime

With FQDN and timezone configured, proceed to set up firewalld.
Setup Firewalld
By default, firewalld is the installed and running firewall on RHEL-based systems. Add the FreeIPA service along with additional services like NTP and DNS to firewalld:
sudo firewall-cmd --add-service={freeipa-ldap,freeipa-ldaps,dns,ntp,http,https,kerberos} --permanent
sudo firewall-cmd --reload
Confirm the firewalld status and list of enabled services and ports:
sudo firewall-cmd --list-all
Output similar to this confirms success – with FreeIPA, NTP, and DNS services added:

Installing and Configuring FreeIPA Server
FreeIPA is available in Rocky Linux 9’s ‘appstream’ repository, requiring no third-party additions. Install the FreeIPA server and its related packages:
sudo dnf install freeipa-server freeipa-server-dns freeipa-client

Begin interactive FreeIPA server deployment:
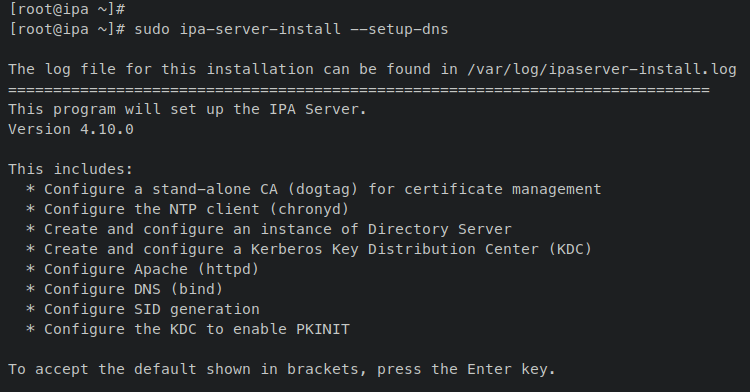
sudo ipa-server-install --setup-dns
These operations will configure FreeIPA. Accept default configurations or provide specific ones as needed:
Kerberos Admin Authentication and FreeIPA Web UI Dashboard
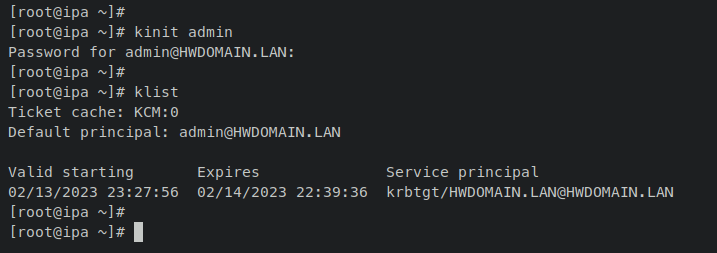
Authenticate against Kerberos by obtaining an admin ticket using:
kinit admin
List obtained Kerberos tickets:
klist
Successful Kerberos authentication results in an output containing cached ticket for ‘admin@HWDOMAIN.LAN‘:
Visit the FreeIPA web administration dashboard by opening the following in your web browser:
https://ipa.hwdomain.lan/
Log in using default credentials, ‘admin‘ and the configured password:
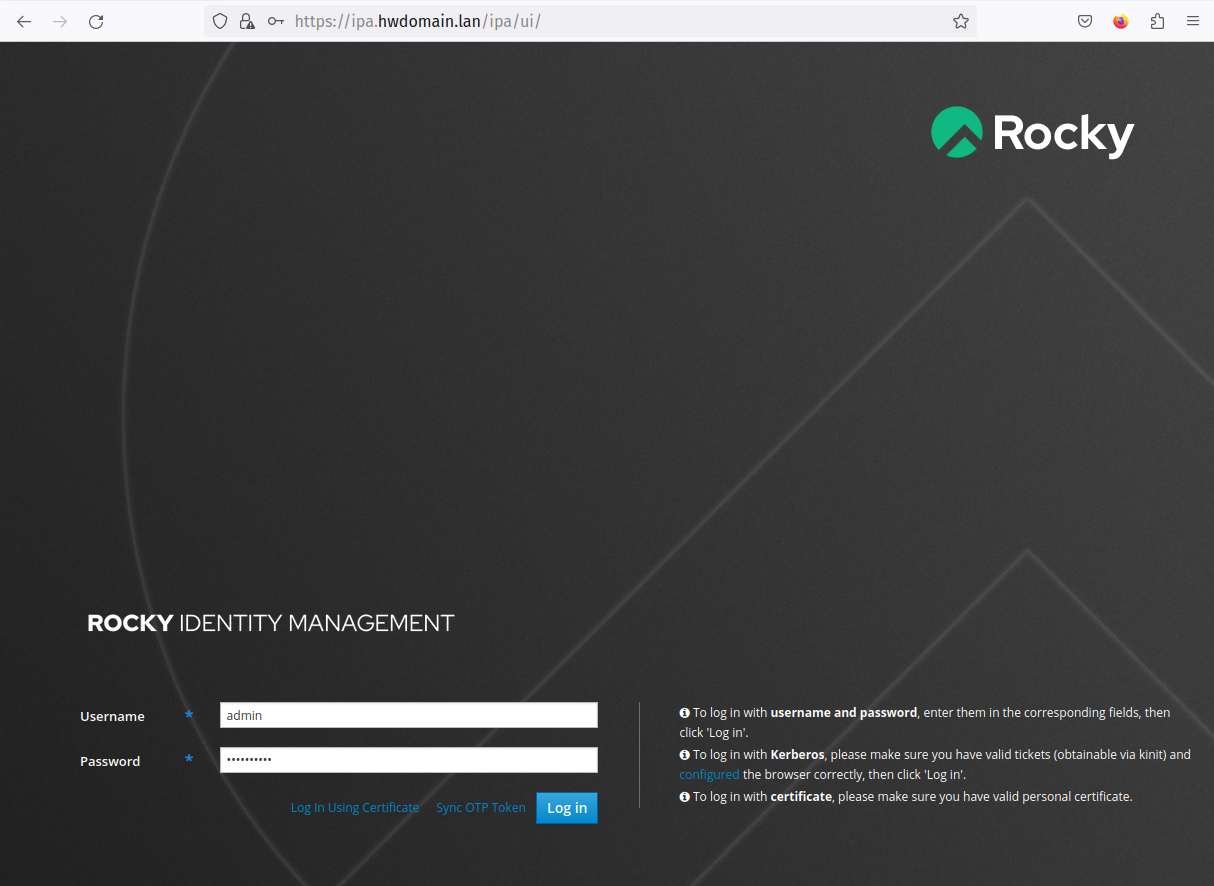
Successful login presents the FreeIPA dashboard:

Setup First FreeIPA User and Group
Manage users and groups via the ‘ipa’ command. Modify the default shell for FreeIPA users to ‘/bin/bash‘:
ipa config-mod --defaultshell=/bin/bash
Add a new user ‘rocky’ and verify user creation:
ipa user-add rocky --first=Rocky --last=Linux --password
ipa user-find rocky
Create a user group ‘development’ and add the ‘rocky’ user to it:
ipa group-add --desc='Development Team' development
ipa group-add-member --user=rocky development
Verify via the FreeIPA web administration dashboard by checking the ‘Identity’ tab:


Adding Hosts to FreeIPA Server: Rocky Linux
FreeIPA simplifies adding new hosts via the FreeIPA client package and ‘ipa-client-install’ utility:
Add DNS Records
Add client machine’s DNS to FreeIPA:
ipa dnsrecord-add hwdomain.lan client --a-rec 192.168.5.80
Setup FQDN, /etc/hosts, and Resolver
Edit ‘/etc/hosts‘ and ‘/etc/resolv.conf‘ on the client to ensure connectivity and name resolution:
sudo nano /etc/hosts
# Add server
192.168.5.25    ipa.hwdomain.lan    ipa
sudo nano /etc/resolv.conf
# Adding DNS resolver
nameserver 192.168.5.25
Installing and Configuring Client
Install and configure the FreeIPA client package:
sudo dnf install freeipa-client oddjob-mkhomedir
ipa-client-install --hostname=`hostname -f` \
--mkhomedir \
--server=ipa.hwdomain.lan \
--domain hwdomain.lan \
--realm HWDOMAIN.LAN
Logging into Client via FreeIPA User
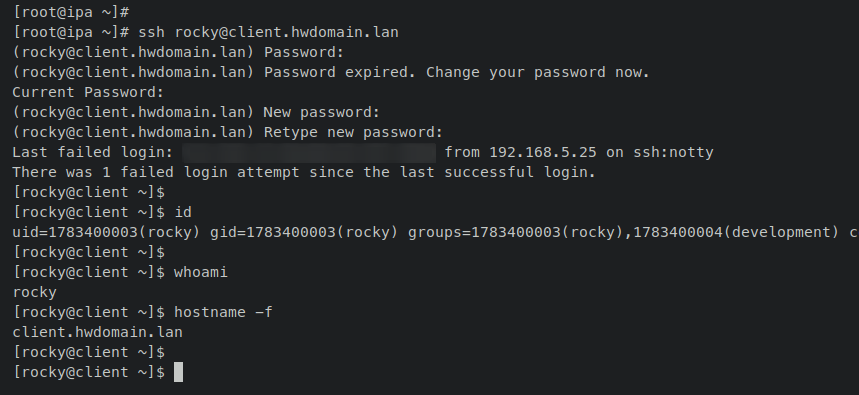
Test login using FreeIPA credentials:
ssh rocky@client.hwdomain.lan
Verify successful login with commands:
id
whoami
hostname -f
Conclusion
You’ve successfully installed and configured FreeIPA on Rocky Linux 9, managing users and groups, and integrating a client machine. Further documentation is available on FreeIPA’s official website.
FAQs:
- What is FreeIPA?
FreeIPA is an open-source identity management tool for Linux/Unix systems, derived from RedHat Identity Management System. - What are the components of FreeIPA?
FreeIPA includes components like Directory Server, DNS, Kerberos, PKI, Certmonger, NTP Server, and web administration UI. - Can FreeIPA manage non-Linux/Unix systems?
FreeIPA is primarily designed for Linux/Unix systems but can be integrated into heterogeneous environments to some extent. - Is FreeIPA secure?
Yes, FreeIPA implements robust security measures like Kerberos-based authentication and PKI-based identity management. - Where can I find more resources?
Refer to the official FreeIPA documentation available online for extensive information and advanced configurations.
