GitLab Server is an open-source version of the widely used cloud-hosted GitLab version control, designed for hosting Git repositories. By choosing to self-host your repositories, you gain full control over your code. GitLab Server includes all the features available on the cloud service, making it an invaluable tool for development teams. It also comes with the integrated Mattermost chat service, which facilitates communication and code reviews among team members.
This guide will show you how to install GitLab Server using Docker on a Ubuntu 22.04 server. GitLab offers two editions: the free Community edition and the paid Enterprise edition. We’ll be installing the Community edition, which can be upgraded to the Enterprise edition for more features if desired.
Prerequisites
- A server running Rocky Linux 9 with at least 4GB of RAM and 4 CPU Cores to support up to 500 users.
- A non-root user with sudo privileges.
- A domain name configured to point to the server,
gitlab.example.com. Additional configurations may includemattermost.example.comandpages.example.com. - Ensure all packages are updated.
$ sudo dnf update
- Install necessary system packages.
$ sudo dnf install -y wget nano unzip yum-utils policycoreutils-python-utils
Note: Some packages may already be installed.
Step 1 – Configure Firewall
Before installing GitLab, configure the firewall to open ports for HTTP and HTTPS. Check the firewall status.
$ sudo firewall-cmd --state
Ensure the firewall is running and list active services and ports.
$ sudo firewall-cmd --zone=public --list-all
Here’s the expected output:
public
  target: default
  icmp-block-inversion: no
  interfaces: enp1s0
  sources:
  services: cockpit dhcpv6-client ssh
  ports:
  protocols:
  forward: yes
  masquerade: no
  forward-ports:
  source-ports:
  icmp-blocks:
  rich rules:
Open HTTP and HTTPS ports.
$ sudo firewall-cmd --zone=public --add-service=http
    $ sudo firewall-cmd --zone=public --add-service=https
Verify changes.
$ sudo firewall-cmd --zone=public --list-all
You should see:
public
  target: default
  icmp-block-inversion: no
  interfaces: enp1s0
  sources:
  services: cockpit dhcpv6-client http https ssh
  ports:
  protocols:
  forward: yes
  masquerade: no
  forward-ports:
  source-ports:
  icmp-blocks:
  rich rules:
Make changes permanent and reload the firewall.
$ sudo firewall-cmd --runtime-to-permanent
    $ sudo firewall-cmd --reload
Step 2 – Install Dependencies
Install GitLab dependencies available in the Rocky Linux repository.
$ sudo dnf install -y curl policycoreutils openssh-server perl
Configure email solution for GitLab, either Postfix installation or external SMTP service usage.
$ sudo dnf install postfix
During Postfix setup, select “Internet Site” and add the server’s FQDN for mail configuration. Follow on-screen prompts.
For more details, see GitLab Postfix configuration.
Step 3 – Install GitLab
Download and execute the GitLab repository installer script.
$ curl https://packages.gitlab.com/install/repositories/gitlab/gitlab-ee/script.rpm.sh | sudo bash
Ignore warnings about missing pygpgme package on Rocky Linux 9. Specify external URL and admin password during installation.
$ sudo GITLAB_ROOT_PASSWORD="<strongpassword>" EXTERNAL_URL="https://gitlab.example.com" dnf install -y gitlab-ee
Choose a strong admin password. This example installs the Enterprise edition (gitlab-ee), which functions as a Community edition if not licensed. Upgrading to Enterprise is simpler from this edition.
After installation, expect this message:
Notes:
Default admin account has been configured with following details:
Username: root
Password: You didn't opt-in to print initial root password to STDOUT.

NOTE: Because these credentials might be present in your log files in plain text, it is highly recommended to reset the password following https://docs.gitlab.com/ee/security/reset_user_password.html#reset-your-root-password.

gitlab Reconfigured!
     _______ __  __          __
    / ____(_) /_/ /   ____ _/ /_
   / / __/ / __/ /   / __ `/ __ \
  / /_/ / / /_/ /___/ /_/ / /_/ /
  \____/_/\__/_____/\__,_/_.___/


Thank you for installing GitLab!
GitLab should be available at https://gitlab.example.com
Install a specific GitLab version by checking available versions:
$ sudo dnf --showduplicates list gitlab-ee*
To install version 16.7.0:
$ sudo GITLAB_ROOT_PASSWORD="<strongpassword>" EXTERNAL_URL="https://gitlab.example.com" dnf install -y gitlab-ee-16.7.0-ee.0.el9
Check GitLab and associated service statuses:
$ sudo gitlab-ctl status
Output:
run: alertmanager: (pid 6551) 1013s; run: log: (pid 6306) 1093s
run: crond: (pid 6507) 1018s; run: log: (pid 5663) 1251s
run: gitaly: (pid 6479) 1020s; run: log: (pid 5297) 1419s
run: gitlab-exporter: (pid 6522) 1016s; run: log: (pid 6183) 1118s
run: gitlab-kas: (pid 5553) 1400s; run: log: (pid 5566) 1399s
run: gitlab-workhorse: (pid 6455) 1021s; run: log: (pid 5766) 1233s
Manage GitLab with stop and start commands:
$ sudo gitlab-ctl stop
    $ sudo gitlab-ctl start
Verify service status. Access GitLab at https://gitlab.example.com.
Step 4 – Configure SSL
Edit /etc/gitlab/gitlab.rb to configure Let’s Encrypt settings for SSL:
$ sudo nano /etc/gitlab/gitlab.rb
letsencrypt['contact_emails'] = ['name@example.com']
letsencrypt['auto_renew'] = true
letsencrypt['auto_renew_hour'] = "12"
letsencrypt['auto_renew_minute'] = "30"
letsencrypt['auto_renew_day_of_month'] = "*/7"
Enable DHParam Directive
Generate a Diffie-Hellman group certificate:
$ sudo openssl dhparam -dsaparam -out /etc/gitlab/ssl/dhparams.pem 4096
Edit /etc/gitlab/gitlab.rb to add SSL DHParam:
nginx['ssl_dhparam'] = "/etc/gitlab/ssl/dhparams.pem"
Disable HTTP Strict Transport Security (HSTS)
Set the following in /etc/gitlab/gitlab.rb:
nginx['hsts_include_subdomains'] = false
Reconfigure GitLab:
$ sudo gitlab-ctl reconfigure
Verify GitLab access through https://gitlab.example.com.
Step 5 – Configure SMTP
If not using Postfix, configure SMTP in /etc/gitlab/gitlab.rb:
$ sudo nano /etc/gitlab/gitlab.rb
Modify the SMTP section with appropriate values:
gitlab_rails['smtp_enable'] = true
gitlab_rails['smtp_address'] = "email-smtp.region-1.amazonaws.com"
gitlab_rails['smtp_port'] = 587
gitlab_rails['smtp_user_name'] = "IAMmailerKey"
gitlab_rails['smtp_password'] = "IAMmailerSecret"
gitlab_rails['smtp_domain'] = "example.com"
gitlab_rails['smtp_authentication'] = "login"
gitlab_rails['smtp_enable_starttls_auto'] = true
gitlab_rails['gitlab_email_from'] = 'gitlab@example.com'
Save and reconfigure GitLab:
$ sudo gitlab-ctl reconfigure
Step 6 – Configure Nginx
Open /etc/gitlab/gitlab.rb for advanced Nginx configuration:
$ sudo nano /etc/gitlab/gitlab.rb
Redirect HTTP to HTTPS.
Set auto-redirect HTTPS:
nginx['redirect_http_to_https'] = true
Setting the Referrer-Policy header
Edit the Referrer-Policy:
nginx['referrer_policy'] = 'same-origin'
Insert Custom Nginx settings into the GitLab server block
Add custom settings:
nginx['custom_gitlab_server_config'] = "location ^~ /foo-namespace/bar-project/raw/ {\n deny all;\n}\n"
Insert custom settings into the Nginx configuration
Edit:
nginx['custom_nginx_config'] = "include /etc/gitlab/nginx/sites-enabled/*.conf;"
Reconfigure after adding configurations.
$ sudo gitlab-ctl reconfigure
Step 7 – Enable Container Registry
The container registry is available on the GitLab domain. Edit /etc/gitlab/gitlab.rb:
$ sudo nano /etc/gitlab/gitlab.rb
registry_external_url 'https://gitlab.example.com:5050'
registry_nginx['redirect_http_to_https'] = true
Save configurations and reconfigure GitLab.
$ sudo gitlab-ctl reconfigure
Open port 5050 in the firewall:
$ sudo firewall-cmd --zone=public --add-port=5050/tcp
    $ sudo firewall-cmd --runtime-to-permanent
    $ sudo firewall-cmd --reload
Validate with:
$ openssl s_client -showcerts -servername gitlab.example.com -connect gitlab.example.com:5050 > cacert.pem
Log into the container registry:
$ docker login gitlab.example.com:5050
Step 8 – Enable GitLab Pages
Use a separate domain, e.g., https://pages.example.com. Open /etc/gitlab/gitlab.rb:
$ sudo nano /etc/gitlab/gitlab.rb
pages_external_url 'https://pages.example.com'
................
pages_nginx['enable'] = true
pages_nginx['redirect_http_to_https'] = true
Save and reconfigure GitLab:
$ sudo gitlab-ctl reconfigure
Step 9 – Enable MatterMost
Enable Mattermost for company communication. Open /etc/gitlab/gitlab.rb:
$ sudo nano /etc/gitlab/gitlab.rb
Add Mattermost URL:
mattermost_external_url 'https://mattermost.example.com'
mattermost_nginx['redirect_http_to_https'] = true
Save and reconfigure GitLab.
$ sudo gitlab-ctl reconfigure
Access Mattermost via https://mattermost.example.com.
Configure SMTP for Mattermost
Edit /var/opt/gitlab/mattermost/config.json:
$ sudo nano /var/opt/gitlab/mattermost/config.json
Modify "EmailSettings" section:
"EmailSettings": {
        "EnableSMTPAuth": true,
        "SMTPUsername": "AmazonSESUsername",
        "SMTPPassword": "AmazonSESPassword",
        "SMTPServer": "email-smtp.us-west-2.amazonaws.com",
        "SMTPPort": "465",
        "ConnectionSecurity": "TLS"
    },
Save the file and reconfigure if needed.
Step 10 – Access and Configure GitLab Web
Accessing GitLab
Visit https://gitlab.example.com to see the login screen.
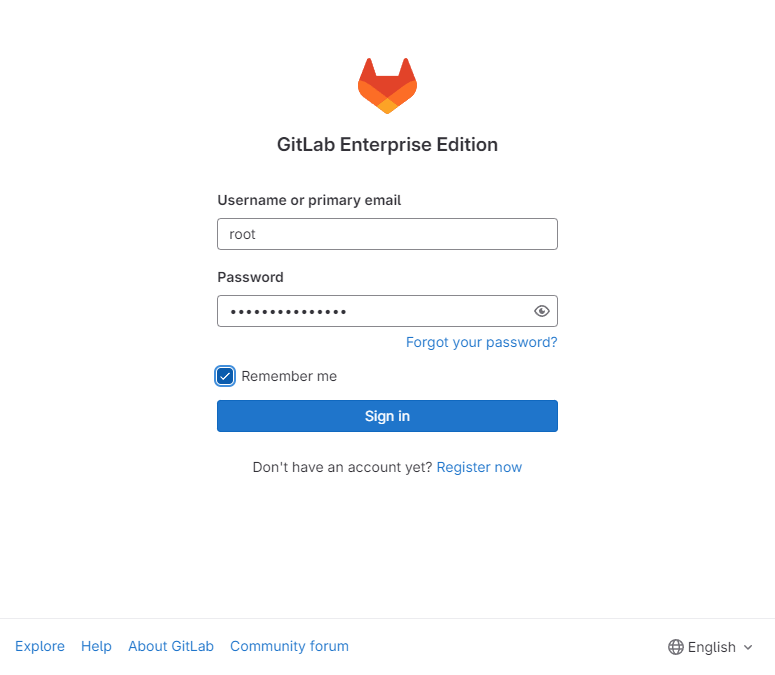
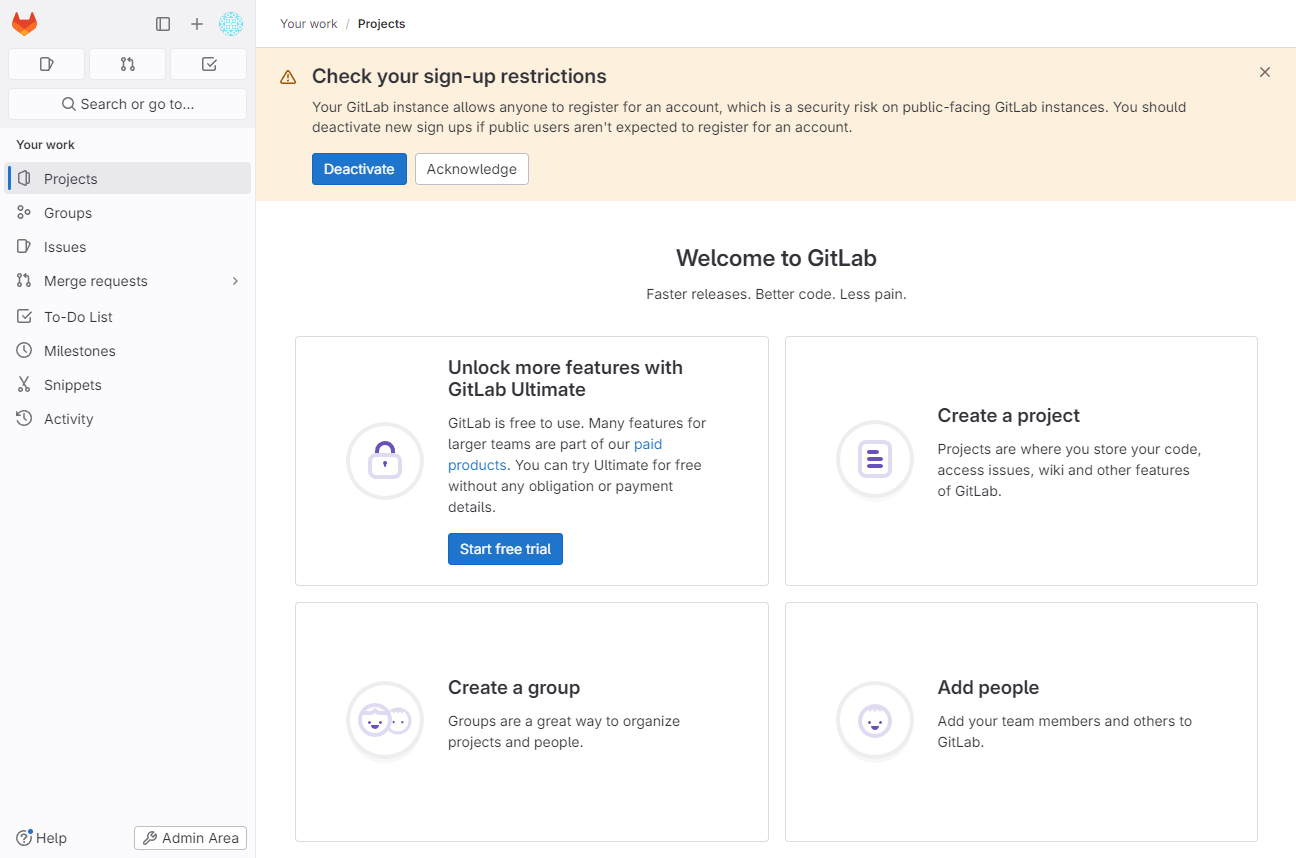
Log in as root using the password from installation. The Dashboard will appear:
Shut down GitLab for maintenance
Deploy maintenance page:
$ sudo gitlab-ctl deploy-page up
    cp /opt/gitlab/embedded/service/gitlab-rails/public/deploy.html /opt/gitlab/embedded/service/gitlab-rails/public/index.html
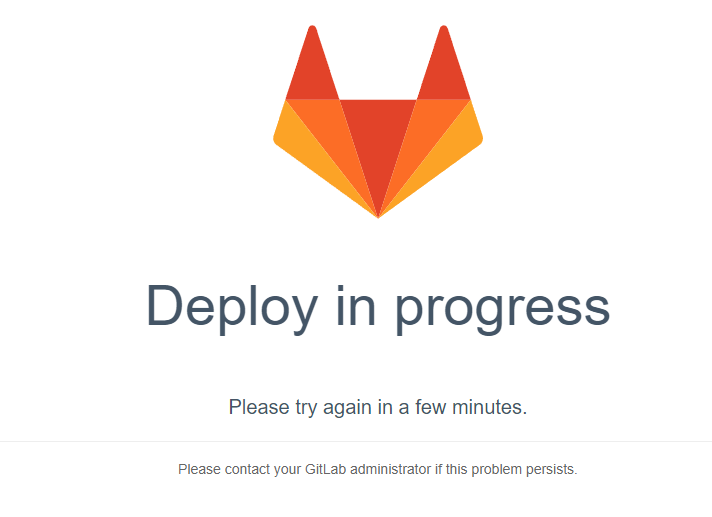
To revert:
$ sudo gitlab-ctl deploy-page down
Set projects read-only:
$ sudo gitlab-rails console
    Project.all.find_each { |project| project.update!(repository_read_only: true) }
Exit console and undo changes:
Project.all.find_each { |project| project.update!(repository_read_only: false) }
Restrict Public Sign-ups
Disable public sign-ups to prevent unauthorized access. Click Turn off on the dashboard pop-up:

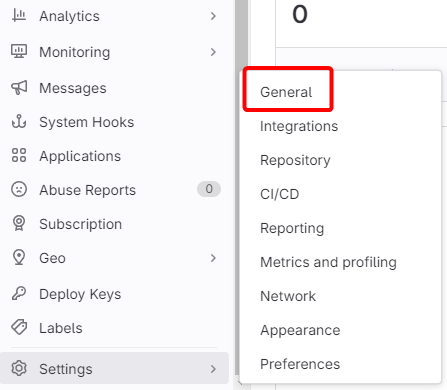
Alternatively, go to Admin Area → General settings:
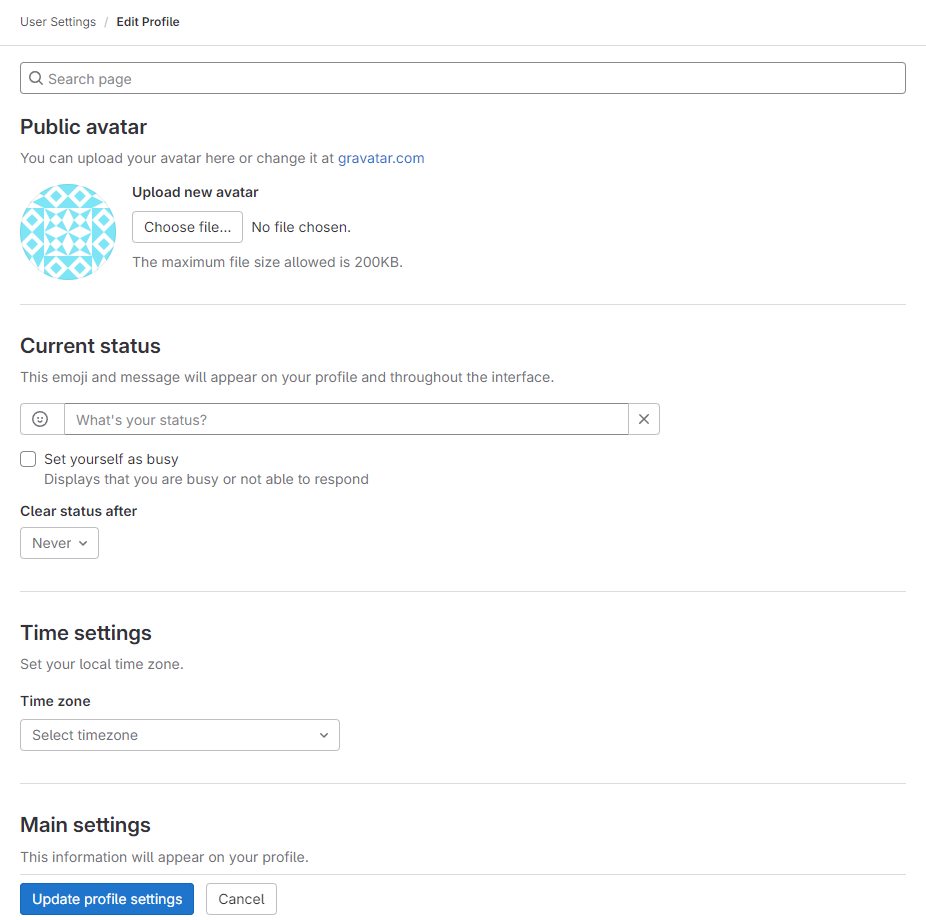
Configure GitLab Profile
Personalize your profile by accessing Edit Profile from the user dropdown:
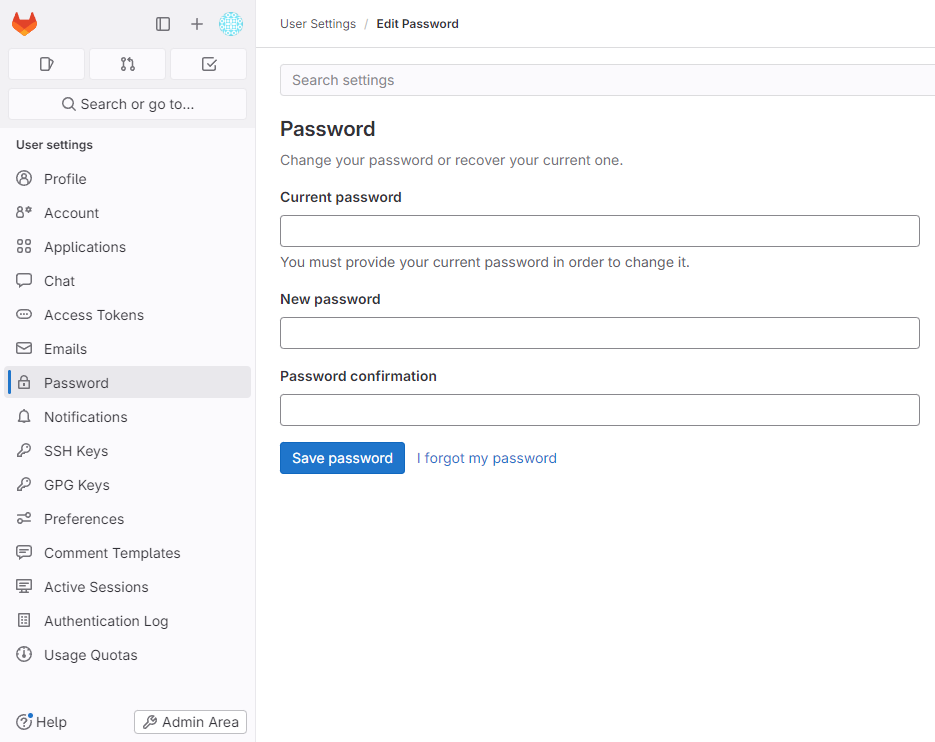
Change Root Password
For security, change your root password immediately through Password settings:
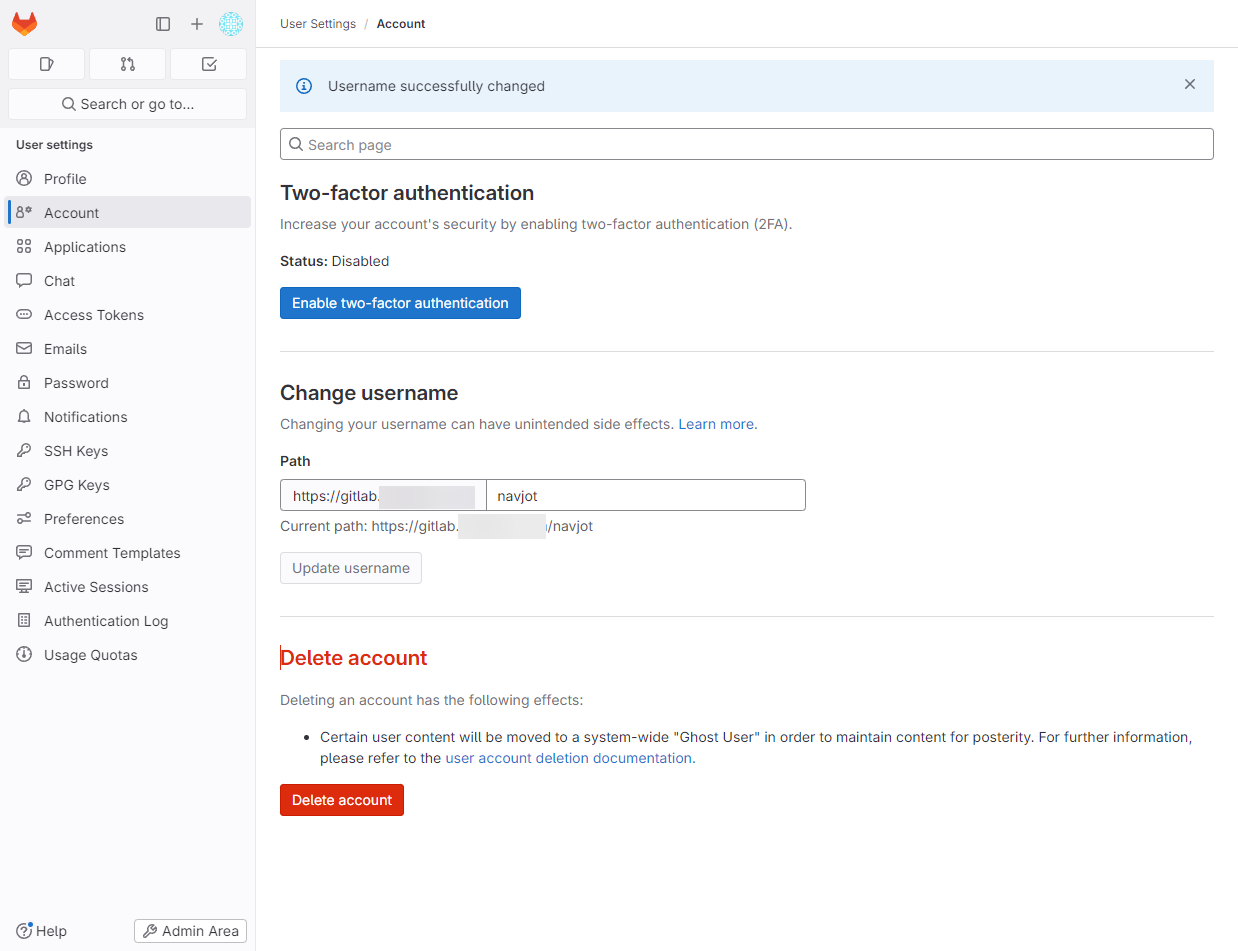
Change User Name and Enable Two-Factor Authentication
Change default username from root and enable two-factor authentication for added security:
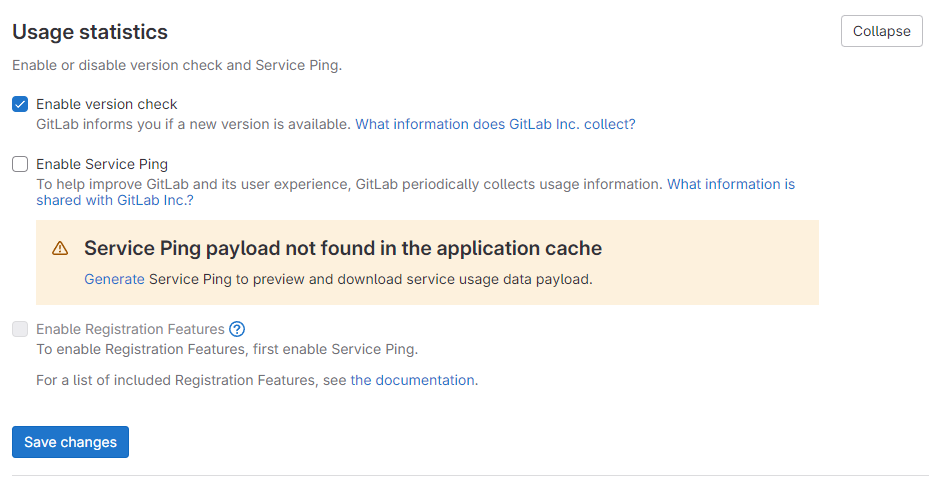
Disable Prometheus Metrics and Improve Privacy
For privacy, turn off Prometheus metrics and disable service pings in Admin Settings → Metrics and profiling:
Configure Mattermost
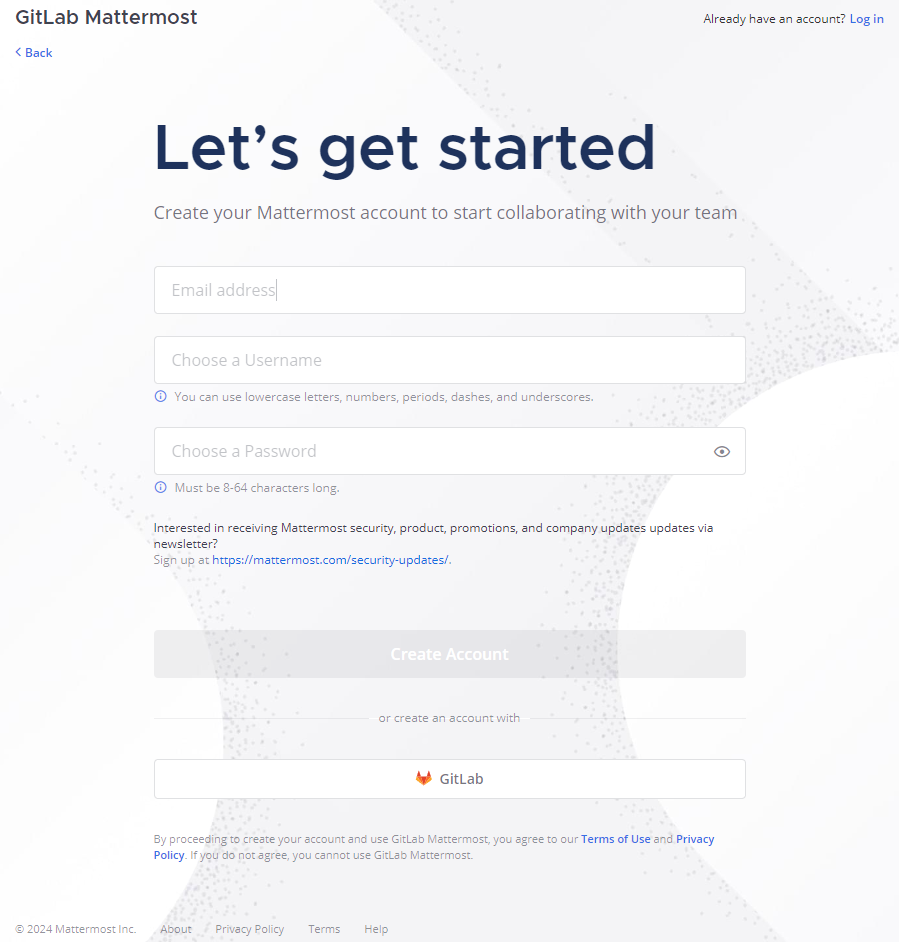
Sign up to Mattermost using the GitLab button at https://mattermost.example.com:
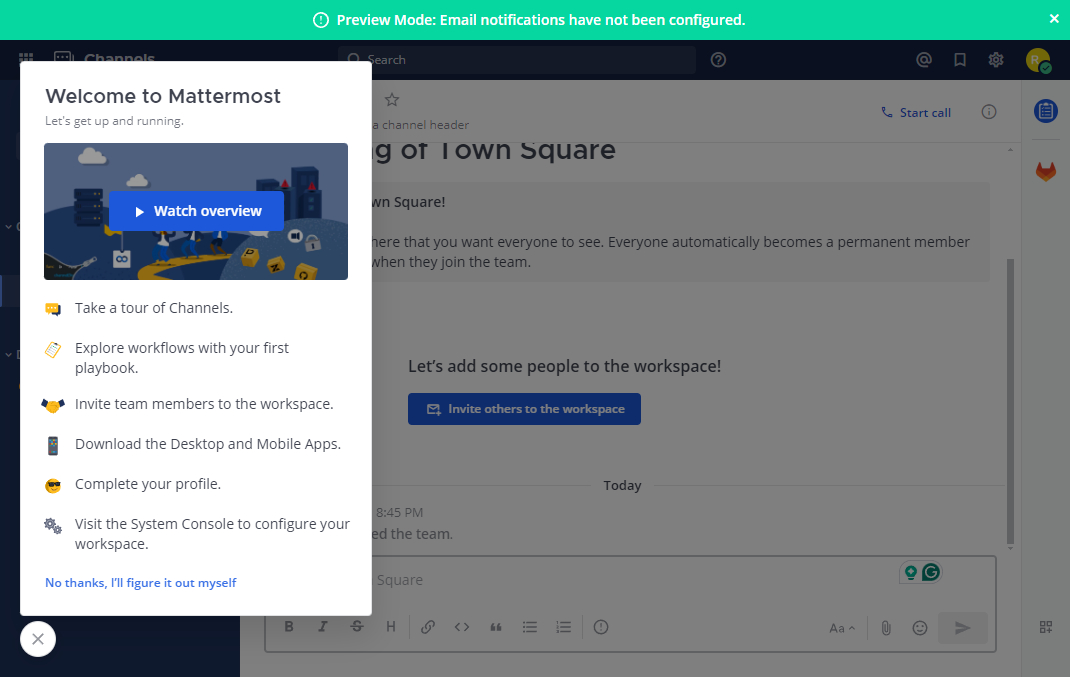
Authorize Mattermost access and complete setup steps:
Step 11 – Creating Your First Project
Adding Your SSH Key
Generate an SSH key pair if you don’t have one:
$ ssh-keygen -t ed25519 -C "gitlab.example.com"
Add your private key to the SSH agent:
$ ssh-add ~/.ssh/id_ed25519
Edit ~/.ssh/config:
Host gitlab.example.com
  PreferredAuthentications publickey
  IdentityFile ~/.ssh/id_ed25519
Get your public key:
$ cat ~/.ssh/id_ed25519.pub
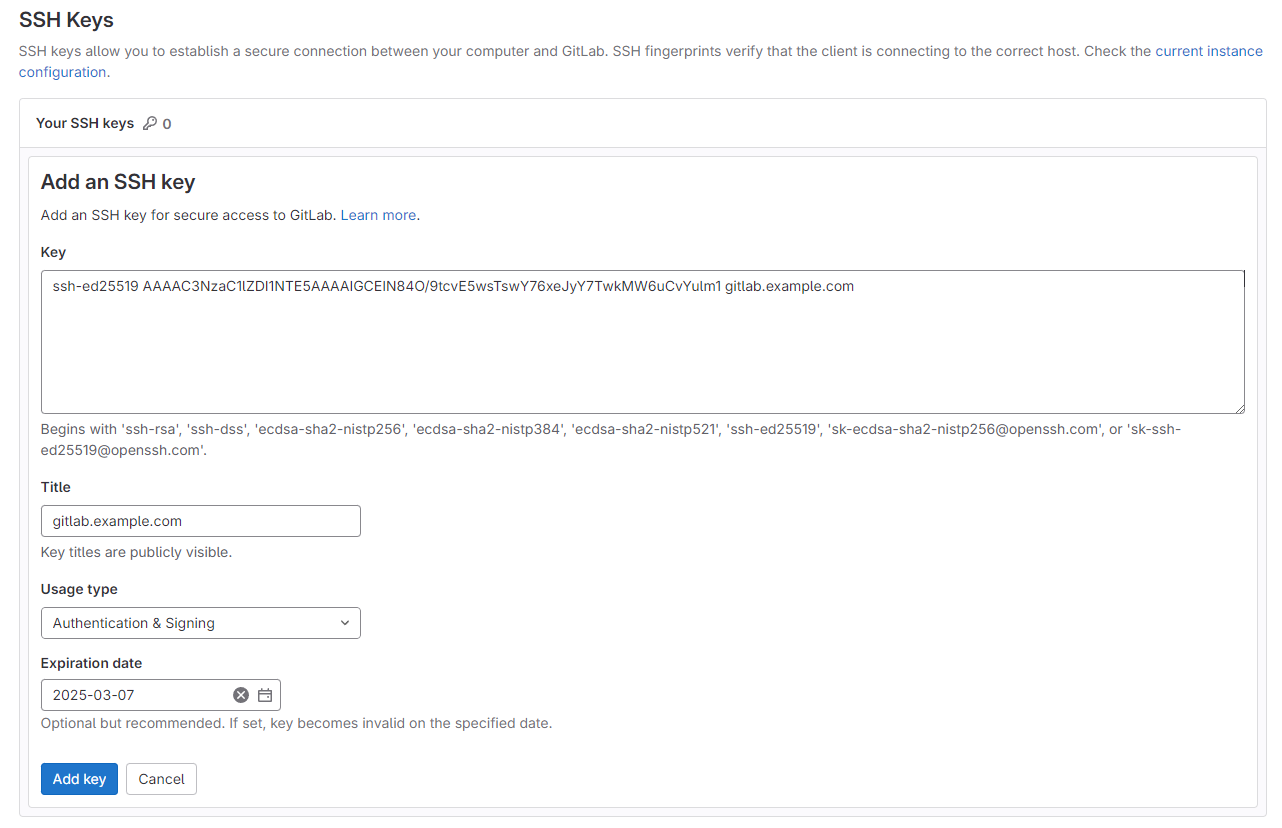
Test connection:
$ ssh -T git@gitlab.example.com
Creating a Project
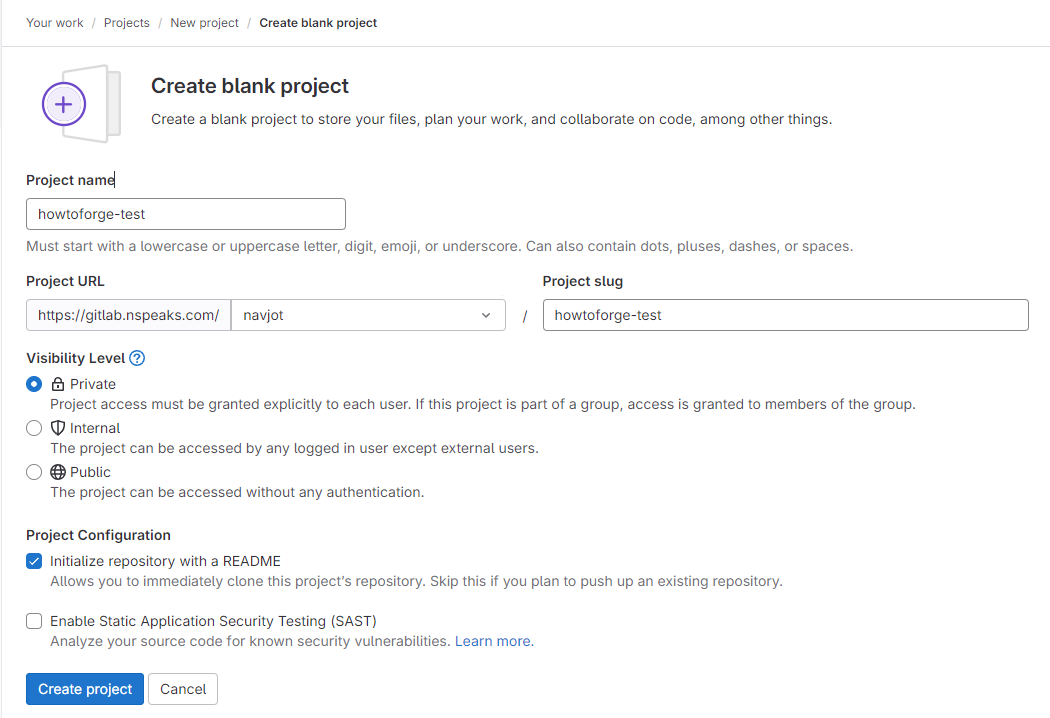
Projects combine a repository with a range of tools and services. Start by navigating to Create a project on the homepage.
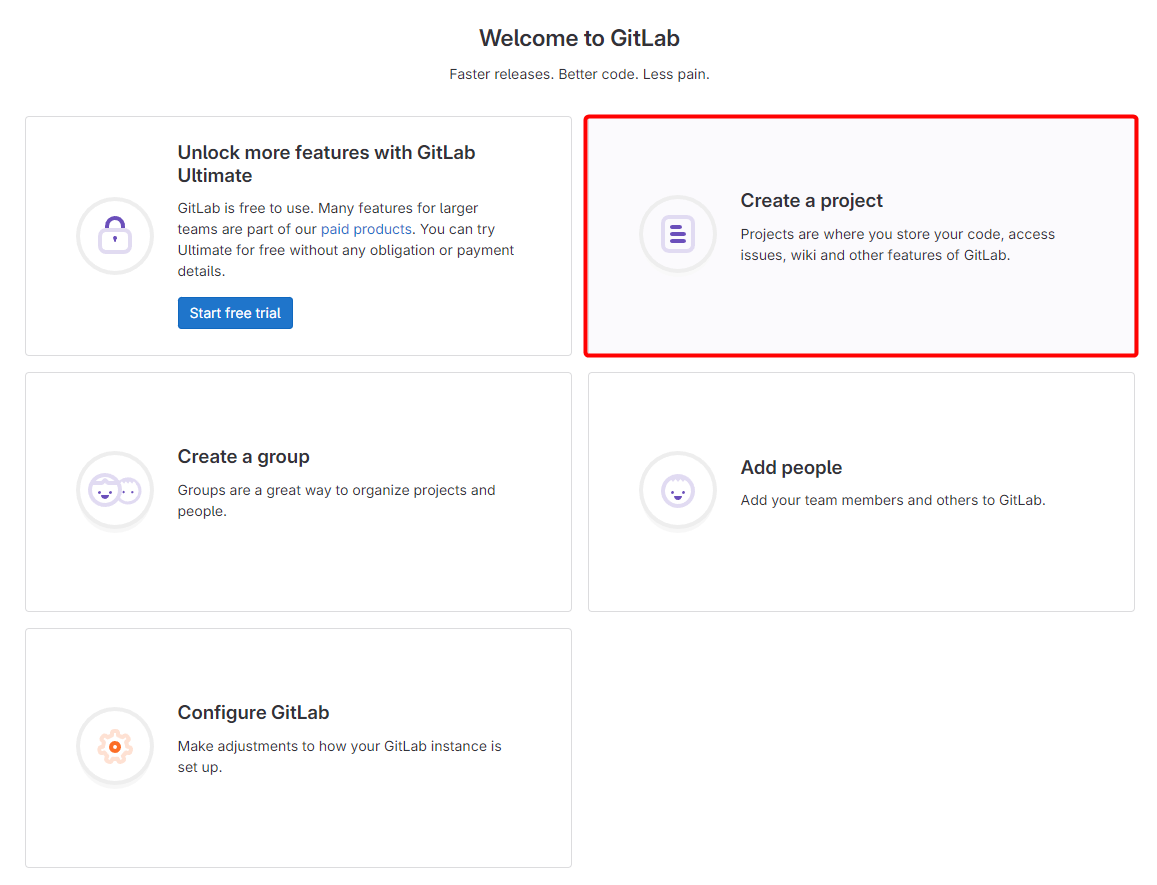
Select Create blank project on the new project page:
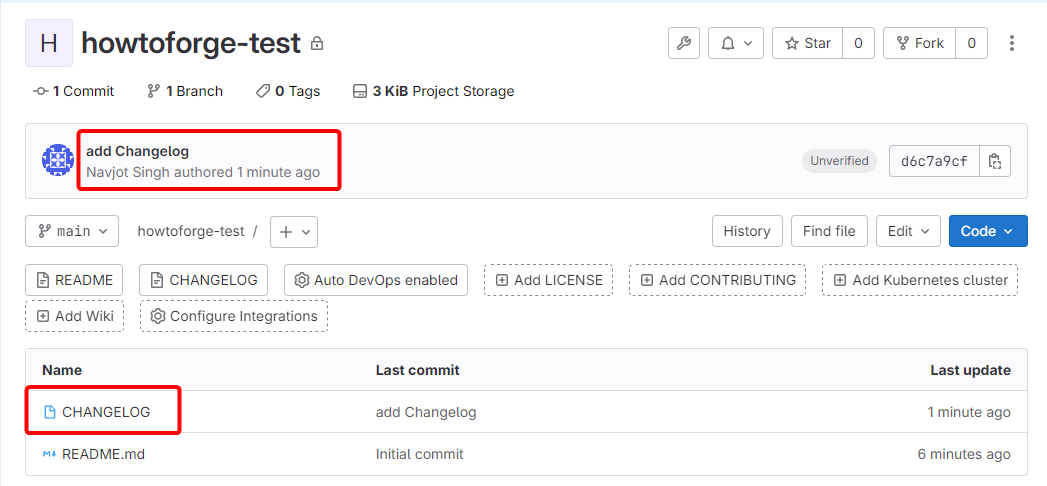
Add a changelog by cloning the project repository and committing new files:
$ git clone git@gitlab.example.com:user/howtoforge-test.git
    $ cd howtoforge-test
    $ touch CHANGELOG
    $ git add CHANGELOG
    $ git commit -m "add Changelog"
    $ git push -u origin main
Step 12 – Backup GitLab
Back up your GitLab instance, excluding some data:
$ sudo gitlab-backup create STRATEGY=copy
Backup file generated in /var/opt/gitlab/backups. Make manual copies of vital files like gitlab.rb and gitlab-secrets.json.
$ sudo cp /etc/gitlab/gitlab.rb /etc/gitlab/gitlab-secrets.json /var/opt/gitlab/backups
Set up a cron job for daily backups:
$ sudo crontab -e
0 2 * * * /opt/gitlab/bin/gitlab-backup create CRON=1
For more options, see the official GitLab backup documentation.
Step 13 – Restore GitLab
Ensure GitLab preconditions for restoring are met. Restore settings:
$ sudo cp gitlab.rb gitlab-secrets.json /etc/gitlab
Backup file should be in /var/opt/gitlab/backups. Set file permissions:
$ sudo chown git:git /var/opt/gitlab/backups/1709812117_2024_03_07_16.9.1-ee_gitlab_backup.tar
Stop associated processes and verify:
$ sudo gitlab-ctl stop puma
    $ sudo gitlab-ctl stop sidekiq
Restore backup:
$ sudo gitlab-backup restore BACKUP=1709812117_2024_03_07_16.9.1-ee
Step 14 – Upgrade GitLab
Ensure backups are ready before upgrading. Perform updates with:
$ sudo dnf update
Check for major version changes and breaking alterations before proceeding.
Complete post-upgrade checks to assure system stability:
$ sudo gitlab-rake gitlab:check
    $ sudo gitlab-rake gitlab:doctor:secrets
Conclusion
You’ve completed the GitLab installation and configuration tutorial on Rocky Linux 9, created your initial project, and committed files. If you have inquiries or need further guidance, feel free to drop them in the comments below.
FAQ
What is GitLab?
GitLab is a web-based DevOps lifecycle tool that provides a Git repository manager providing wiki, issue-tracking, and CI/CD pipeline features, using an open-source license, developed by GitLab Inc.
Is self-hosting GitLab secure?
Self-hosting GitLab can be secure if you take the necessary precautions, such as setting up proper firewalls, regularly updating your software, and following best practices for server security. Ensure SSL configurations are correct and regularly conduct security audits.
Can I upgrade from GitLab Community Edition to Enterprise Edition?
Yes, you can upgrade from GitLab Community Edition to Enterprise Edition. The Community Edition can be seamlessly transitioned to the Enterprise Edition by applying for a license that unlocks additional features.
How do I backup and restore GitLab?
Use GitLab’s built-in backup and restore functionalities. Backup can be performed using the command sudo gitlab-backup create and restoration can be done by placing the backup file in the required directory and running the gitlab-backup restore command.
Is it possible to revert to a previous GitLab version?
While GitLab does not support downgrades between major versions, you can restore from a backup if necessary. Ensure backups are complete before performing upgrades to safeguard against any issues.
