Gitlab Server is an open-source version of the cloud-hosted Gitlab version control system. Hosting your repositories on your own server provides you with total control over your code compared to cloud hosting.
This guide will walk you through the process of installing Gitlab Server using Docker on a Ubuntu 22.04 server. Gitlab offers two editions – the free Community edition and the paid Enterprise edition. In this guide, we will install the Community edition, which can be upgraded to the Enterprise edition if you need additional features.
Prerequisites
- A server running Ubuntu 22.04.
- A non-root user with sudo privileges.
- Ensure that the Uncomplicated Firewall (UFW) is enabled and running.
- A Fully Qualified Domain Name (FQDN) pointing to the server, such as
gitlab.example.com. - Make sure your system is updated.
$ sudo apt update && sudo apt upgrade
Step 1 – Configure Firewall
Before installing any packages, configure the firewall to allow HTTP and HTTPS connections. First, check the status of the firewall:
$ sudo ufw status
You should see output similar to the following:
Status: active

    To                         Action      From
    --                         ------      ----
    OpenSSH                    ALLOW       Anywhere
    OpenSSH (v6)               ALLOW       Anywhere (v6)
Allow HTTP and HTTPS ports:
$ sudo ufw allow http
$ sudo ufw allow https
Open port 587 for receiving mails via SMTP. Note: This can vary depending on your SMTP mailer:
$ sudo ufw allow http
$ sudo ufw allow 587
Check the status again to confirm:
$ sudo ufw status
Status: active

To                         Action      From
--                         ------      ----
OpenSSH                    ALLOW       Anywhere
80/tcp                     ALLOW       Anywhere
443                        ALLOW       Anywhere
587                        ALLOW       Anywhere
OpenSSH (v6)               ALLOW       Anywhere (v6)
80/tcp (v6)                ALLOW       Anywhere (v6)
443 (v6)                   ALLOW       Anywhere (v6)
587 (v6)                   ALLOW       Anywhere (v6)
Step 2 – Install Dependencies
Install necessary packages required for Gitlab:
$ sudo apt install ca-certificates curl openssh-server apt-transport-https gnupg lsb-release -y
Note: Some of these packages may already be installed on your system.
Step 3 – Change System’s SSH Port
To avoid port conflicts between Gitlab and your system, change the system’s default SSH port. Edit the /etc/ssh/sshd_config file:
$ sudo nano /etc/ssh/sshd_config
Find and modify the following line:
#Port 22
to:
Port 2425
Save the file and restart the SSH service:
$ sudo systemctl restart sshd
Open the new SSH port on your firewall:
$ sudo ufw allow 2425
Close your current SSH session and re-log using the new port:
$ ssh username@ -p 2425
Step 4 – Install Docker and Docker Compose
Add Docker’s official GPG key, and the Docker repository:
$ curl -fsSL https://download.docker.com/linux/ubuntu/gpg | sudo gpg --dearmor -o /usr/share/keyrings/docker.gpg
$ echo \
  "deb [arch=$(dpkg --print-architecture) signed-by=/usr/share/keyrings/docker.gpg] https://download.docker.com/linux/ubuntu \
  $(lsb_release -cs) stable" | sudo tee /etc/apt/sources.list.d/docker.list > /dev/null
Update the system and install Docker:
$ sudo apt update
$ sudo apt-get install docker-ce docker-ce-cli containerd.io docker-compose-plugin
The Docker Compose v2 plugin is used here. You can run Docker commands without using sudo frequently by adding your user to the Docker group:
$ sudo usermod -aG docker ${USER}
Logout and back in or run the following command to apply the changes:
$ su - $(USER)
Step 5 – Set Up Docker Volumes
Create directories for Docker volumes:
$ sudo mkdir /srv/gitlab -p
$ mkdir ~/gitlab-docker
$ cd ~/gitlab-docker
Create an environment file and define variables:
$ nano .env
GITLAB_HOME=/srv/gitlab
Step 6 – Install Gitlab using Docker Compose
In your Docker compose directory, open a configuration file:
$ nano docker-compose.yml
Paste the following command:
version: '3.6'
services:
  web:
    image: 'gitlab/gitlab-ee:latest'
    container_name: 'gitlab-howtoforge'
    restart: always
    hostname: 'gitlab.example.com'
    environment:
      GITLAB_OMNIBUS_CONFIG: |
        external_url 'https://gitlab.example.com'
        gitlab_rails['smtp_enable'] = true
        gitlab_rails['smtp_address'] = "email-smtp.us-west-2.amazonaws.com"
        gitlab_rails['smtp_user_name'] = "SESUsername"
        gitlab_rails['smtp_password'] = "SESKey"
        gitlab_rails['smtp_domain'] = "example.com"
        gitlab_rails['smtp_enable_starttls_auto'] = true
        gitlab_rails['smtp_port'] = 587
        gitlab_rails['smtp_authentication'] = "login"
        gitlab_rails['gitlab_email_from'] = 'gitlab@example.com'
        gitlab_rails['gitlab_email_reply_to'] = 'noreply@example.com'
        # Add any other gitlab.rb configuration here, each on its own line
    ports:
      - '80:80'
      - '443:443'
      - '22:22'
      - '587:587'
    volumes:
      - '$GITLAB_HOME/config:/etc/gitlab'
      - '$GITLAB_HOME/logs:/var/log/gitlab'
      - '$GITLAB_HOME/data:/var/opt/gitlab'
    shm_size: '256m'
The options in this file define the Gitlab configuration and container settings. Start the Gitlab Docker container:
$ docker compose up -d
Monitor the process with Docker logs:
$ docker logs gitlab-howtoforge -f
Check the Gitlab container status:
$ docker ps
Find your root password in initial_root_password file:
$ sudo cat /srv/gitlab/config/initial_root_password
Step 7 – Configure Gitlab
Accessing Gitlab
Open https://gitlab.example.com in your browser. Log in with root and the password obtained earlier:
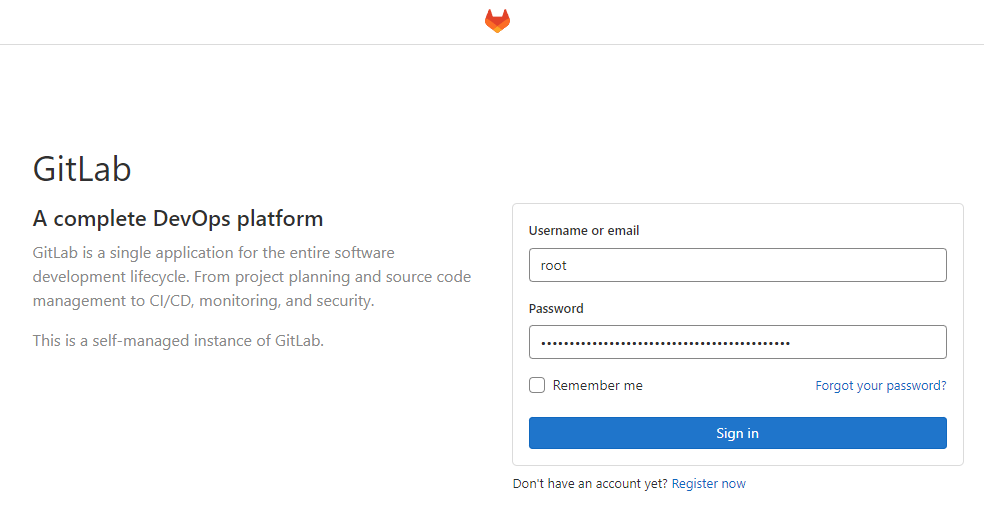
Sign in to view your dashboard:
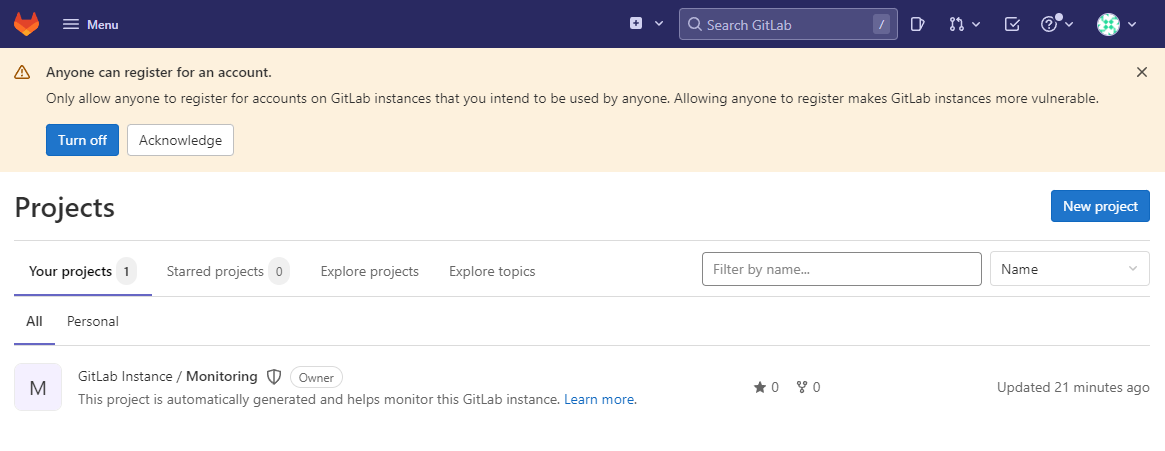
Restrict Public Sign-ups
To prevent public sign-ups, follow the on-screen pop-up or navigate to: Menu > Admin > Settings > General > Sign-up Restrictions.
Ensure Sign-up enabled is unchecked and save changes:

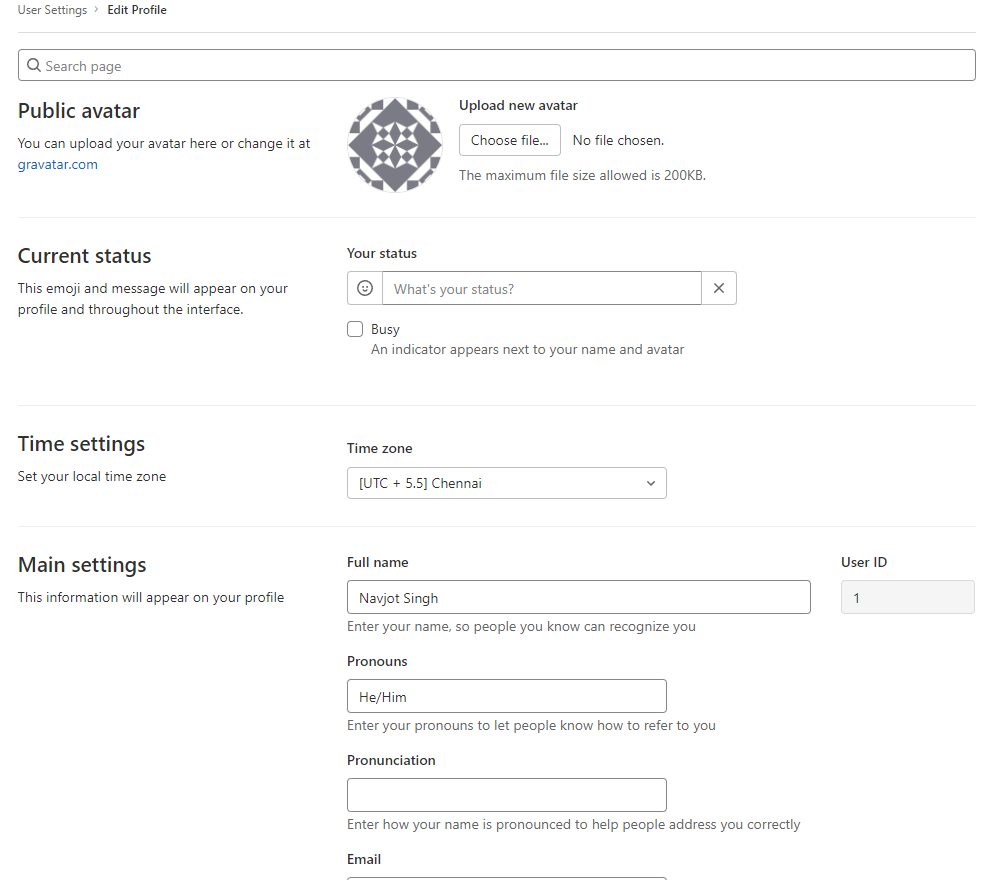
Configure Gitlab Profile
Edit your profile: From the user icon at the top-right, select Edit profile:
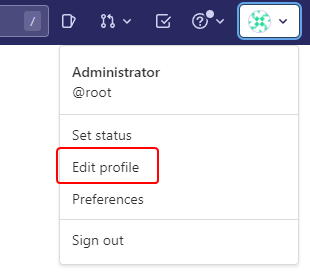
Update your personal information and save changes:
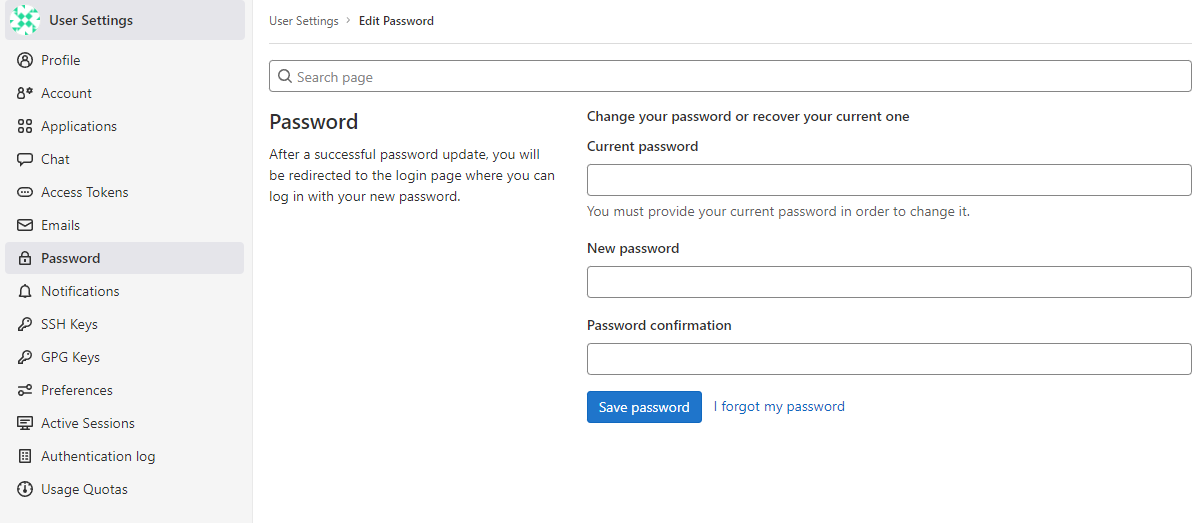
Change Root Password
To change your password, go to the Password menu and enter a new password:
Change User name
Change your username from root by selecting the Account menu:
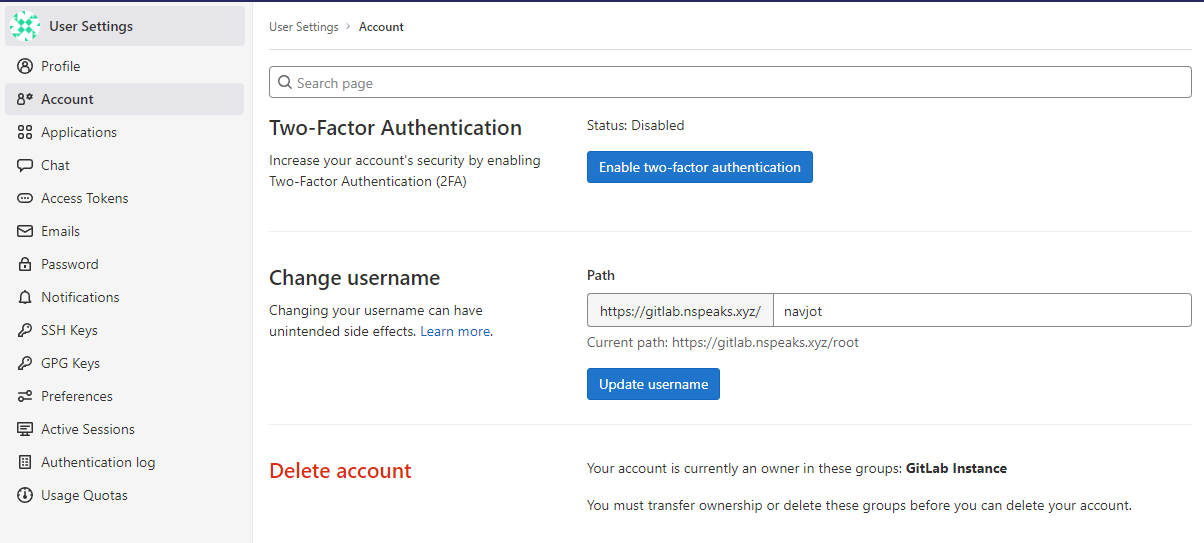
Enable two-factor authentication for improved security.
Disable Prometheus Metrics
Disable Prometheus metrics under Admin Panel > Settings > Metrics and profiling > Metrics – Prometheus.
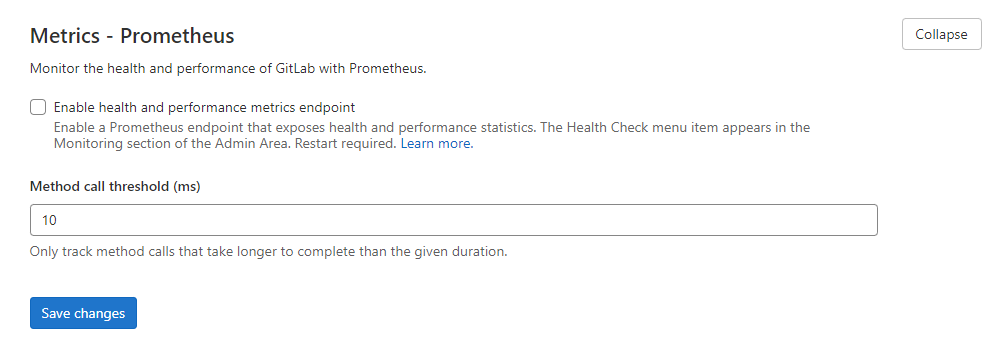
Also, consider disabling usage statistics to improve privacy:
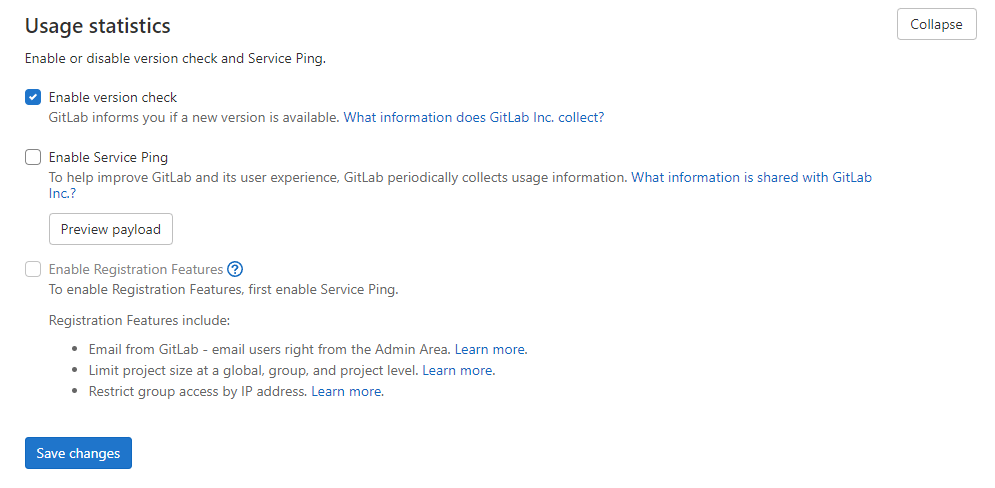
Step 8 – Create Your First Project
Adding Your SSH Key
If you don’t have an SSH key, generate one:
$ ssh-keygen -t ed25519 -C "gitlab.example.com"
Add the private key identity:
$ eval $(ssh-agent -s)
$ ssh-add ~/.ssh/id_ed25519
Add the configuration to the ~/.ssh/config file:
Host gitlab.example.com
  PreferredAuthentications publickey
  IdentityFile ~/.ssh/id_ed25519
Copy and add your SSH public key to Gitlab under Profile > SSH Keys:
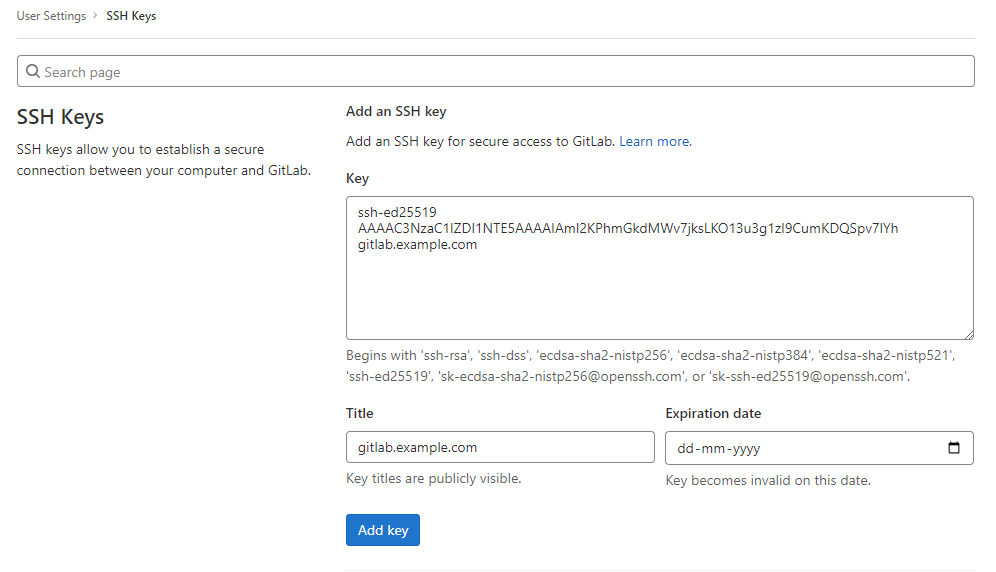
Test your SSH connection:
$ ssh -T git@gitlab.example.com
Proceed with creating a project.
Creating a Project
Create a new project via the New project button:
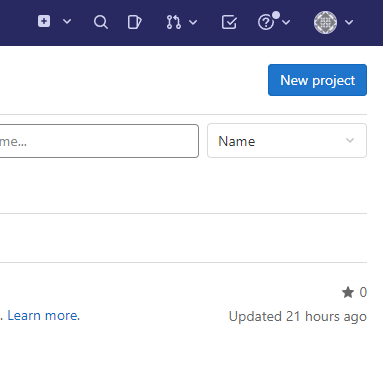
Choose Create blank project, name your project, and click Create project:
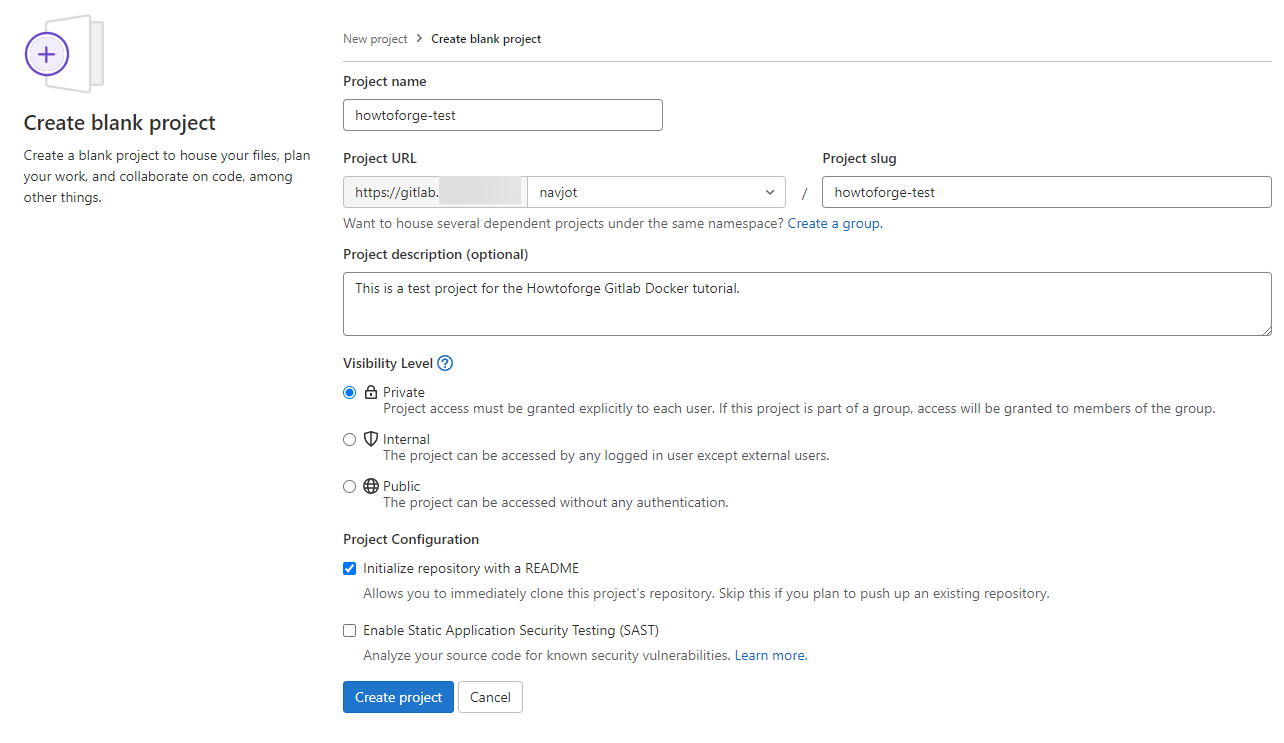
Clone the repository to make changes:
$ git clone git@gitlab.example.com:user/howtoforge-test.git
$ cd howtoforge-test
$ touch CHANGELOG
$ git add CHANGELOG
$ git commit -m "add Changelog"
$ git push -u origin main
View commits on your project page.
Step 9 – Manage Gitlab Container
Manage the Gitlab container using these commands:
$ docker compose down
$ docker compose up -d
$ docker compose restart
$ docker exec -it  bash
Step 10 – Backup Gitlab
Backup Gitlab:
$ docker exec -t gitlab-howtoforge gitlab-backup create
Remember to separately backup the gitlab-secrets.json file and docker-compose.yml.
Step 11 – Restore Gitlab
To restore Gitlab:
-
- Stop database-related processes:
$ docker exec -it  gitlab-ctl stop puma
$ docker exec -it  gitlab-ctl stop sidekiq
-
- Verify stopped processes:
$ docker exec -it gitlab-ctl status
-
- Copy and run restore command:
$ docker exec -it gitlab-backup restore BACKUP=filename_without_extension
- Copy secret files and update your configuration file, then restart the container.
Step 12 – Upgrade Gitlab
To upgrade Gitlab, follow these steps:
$ docker compose down --remove-orphans
$ docker compose pull
$ docker compose up -d
Visit Gitlab’s documentation for handling major version upgrades.
Conclusion
You’ve successfully installed Gitlab using Docker on a Ubuntu 22.04 server, created your first project, and committed a file using Git. For further assistance, feel free to post comments below.
FAQ
Can I upgrade from the Community edition to the Enterprise edition?
Yes, upgrading from the Gitlab Community edition to the Enterprise edition is straightforward as it involves updating your license key to enable additional features offered by the Enterprise edition.
What is the default access URL for Gitlab?
The access URL is typically set as https://gitlab.example.com, as configured in your Docker Compose file. Ensure your DNS records are correctly pointing this domain to your server’s IP.
What should I do if I forgot the initial root password?
If the password has been lost or forgotten, you can reset it by following the official GitLab reset steps.
Why should I disable Prometheus metrics?
If you are not using Prometheus for metrics, disabling it can reduce your server load and improve privacy. It is primarily used for monitoring and understanding performance metrics.
How can I ensure my Gitlab installation stays updated?
Regularly pulling the latest Docker images and following the upgrade steps provided in the guide will ensure your Gitlab installation stays updated.
