GlusterFS, also known as the Gluster File System, is an open-source distributed file system developed by RedHat. Designed for scalability, GlusterFS combines several servers into a singular entity, allowing users to connect to a GlusterFS volume seamlessly. Capable of handling petabytes of data, it is known for its ease of installation, maintenance, and scalability.
In this tutorial, you will learn to set up GlusterFS—a distributed, scalable network filesystem—on Debian 11 servers. By the end, you’ll have a GlusterFS volume set to automatically replicate data across multiple servers, ensuring a high-availability file system. Moreover, you’ll explore how to use ‘parted’, a Linux partitioning tool, to configure additional disks on Debian servers. The tutorial wraps up with verifying data replication and high availability on GlusterFS between several Debian servers.
Prerequisites
To complete this guide, ensure you have the following:
- Two or three Debian 11 servers
- A non-root user with sudo privileges or root access
The setup example uses three Debian 11 servers:
Hostname    IP Address
--------------------------
node1       192.168.5.50
node2       192.168.5.56
node3       192.168.5.57
Once you have these requirements ready, let’s proceed with installing GlusterFS.
Setup Hostname and FQDN
Initially, configure the hostname and FQDN (Fully Qualified Domain Name) for each Debian server. This is essential for GlusterFS operations. You can set the hostname using the ‘hostnamectl‘ command and configure the FQDN via the ‘/etc/hosts‘ file.
Execute these commands on each server to set up the hostname:
# run on node1
sudo hostnamectl set-hostname node1.home.lan
# run on node2
sudo hostnamectl set-hostname node2.home.lan
# run on node3
sudo hostnamectl set-hostname node3.home.lan
Next, edit the ‘/etc/hosts‘ file on each server with your preferred editor, like nano:
sudo nano /etc/hosts
Add these lines to map IP addresses to hostnames:
192.168.5.50  node1.home.lan  node1
192.168.5.56  node2.home.lan  node2
192.168.5.57  node3.home.lan  node3
Press Ctrl+x to exit, y to confirm changes, and ENTER to save.
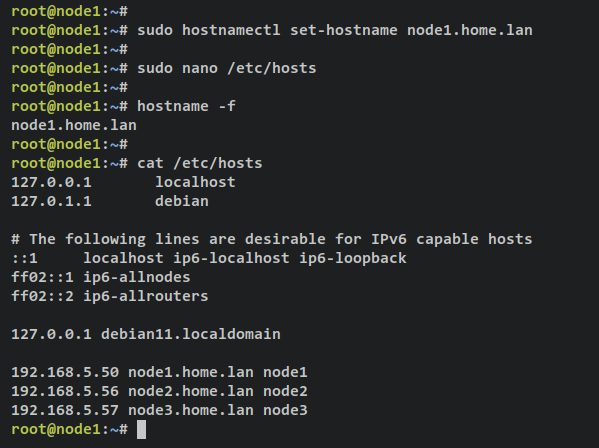
Verify the FQDN on each server:
hostname -f
cat /etc/hosts
You should get outputs similar to: node1.home.lan on node1, node2.home.lan on node2, and node3.home.lan on node3.
Setting up Disk Partition
For GlusterFS deployment, it is recommended to use a designated drive. In this demonstration, each server utilizes an additional disk ‘/dev/vdb’ for GlusterFS installation. Here, you’ll learn disk setup on Linux using ‘fdisk’ via the terminal.
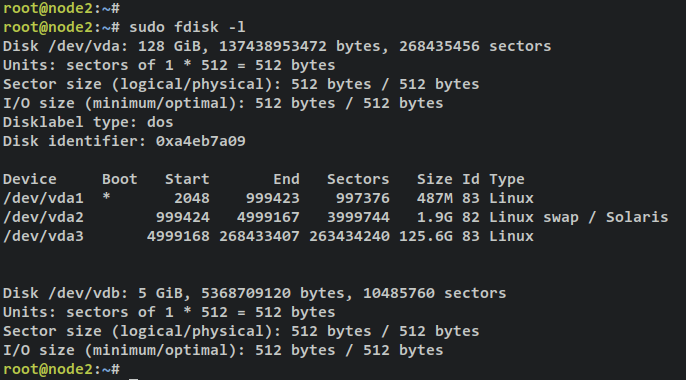
Begin by verifying available disks with:
sudo fdisk -l
You should see two disks on ‘node1‘: ‘/dev/vda‘ (operating system) and ‘/dev/vdb‘ (unconfigured).
To partition ‘/dev/vdb‘, use:
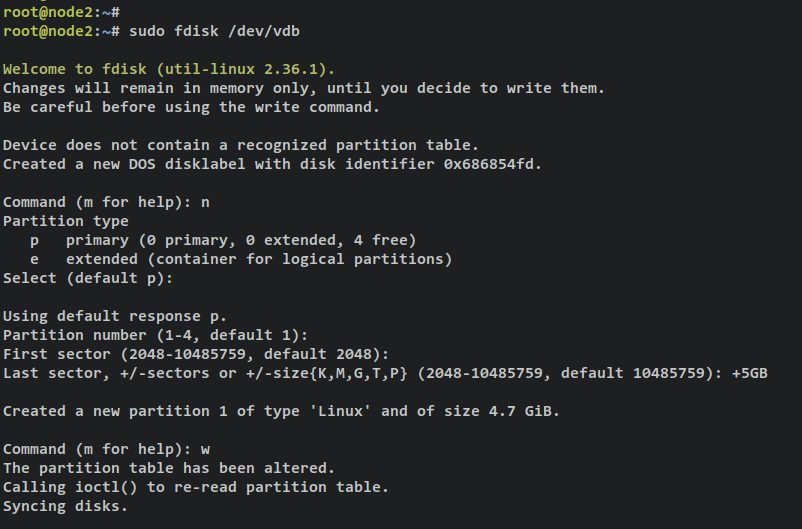
sudo fdisk /dev/vdb
- Create a partition: enter ‘n‘.
- Select partition type: ‘p‘ for primary.
- Define partition number: ‘1‘.
- Accept default first sector: press ENTER.
- For the last sector, input ‘+5GB‘.
- Apply changes: enter ‘w‘.
You’ll receive confirmation: ‘The partition table has been altered‘.
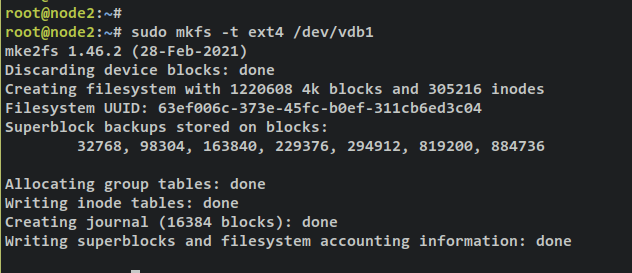
Now that the partition is set, format it to ext4:
sudo mkfs -t ext4 /dev/vdb1
Output will confirm: ‘/dev/vda1‘ formatted as ext4.
Setup Auto-Mount Partition
To auto-mount the partition ‘/dev/vdb1‘, configure the ‘/etc/fstab‘ file. Create storage directories for GlusterFS data.
Create target directories:
# run on node1
mkdir -p /data/node1
# run on node2
mkdir -p /data/node2
# run on node3
mkdir -p /data/node3
Edit ‘/etc/fstab‘ in nano:
sudo nano /etc/fstab
Add these entries for auto-mount:
# for node1
/dev/vdb1    /data/node1    ext4    defaults    0    1
# for node2
/dev/vdb1    /data/node2    ext4    defaults    0    1
# for node3
/dev/vdb1    /data/node3    ext4    defaults    0    1
Mount and verify configurations:
sudo mount -a
Create ‘brick0’ on the new partition:
# run on node1
mkdir -p /data/node1/brick0
# run on node2
mkdir -p /data/node2/brick0
# run on node3
mkdir -p /data/node3/brick0
Installing GlusterFS Server
Install GlusterFS on all Debian servers for the GlusterFS cluster. Run these commands on servers node1, node2, and node3.
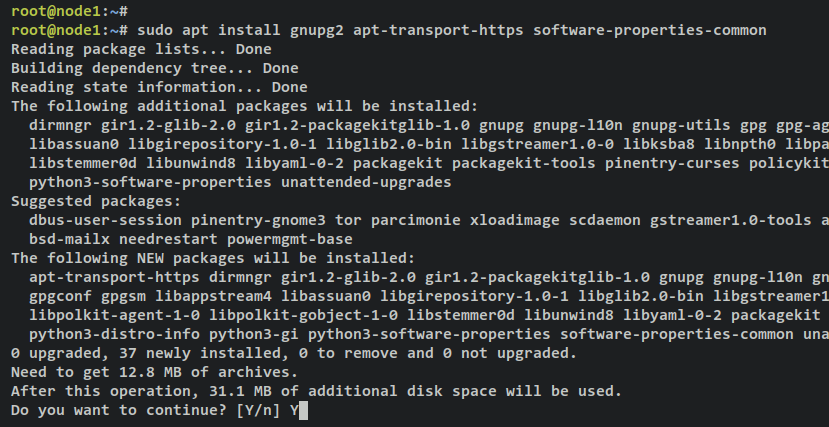
Install necessary dependencies:
sudo apt install gnupg2 apt-transport-https software-properties-common
Fetch and configure the GlusterFS GPG key:
curl https://download.gluster.org/pub/gluster/glusterfs/10/rsa.pub | gpg --dearmor > /usr/share/keyrings/glusterfs-archive-keyring.gpg
Add the GlusterFS repository:
DEBID=$(grep 'VERSION_ID=' /etc/os-release | cut -d '=' -f 2 | tr -d '"')
DEBVER=$(grep 'VERSION=' /etc/os-release | grep -Eo '[a-z]+')
DEBARCH=$(dpkg --print-architecture)
echo "deb [signed-by=/usr/share/keyrings/glusterfs-archive-keyring.gpg] https://download.gluster.org/pub/gluster/glusterfs/LATEST/Debian/${DEBID}/${DEBARCH}/apt ${DEBVER} main" | sudo tee /etc/apt/sources.list.d/gluster.list

Update package index:
sudo apt update

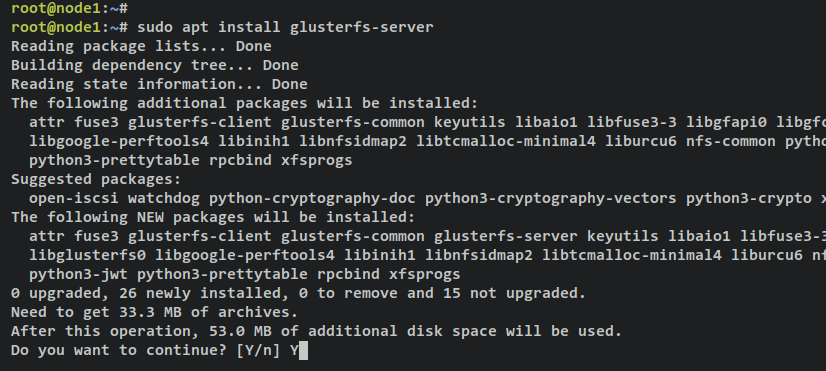
Install the GlusterFS server package:
sudo apt install glusterfs-server
Enable and start the GlusterFS service:
sudo systemctl start glusterd
sudo systemctl enable glusterd
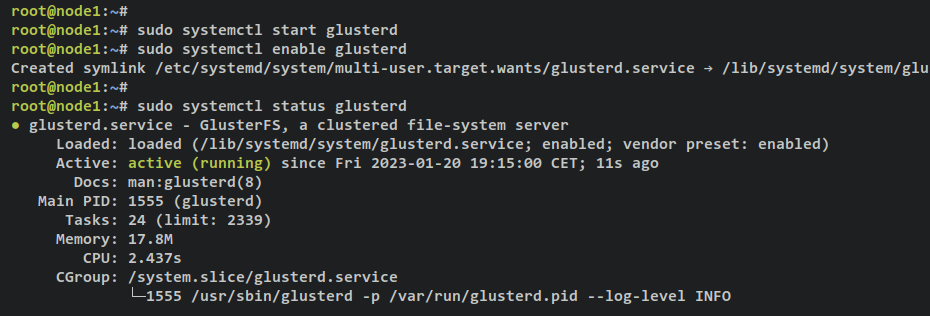
Verify the GlusterFS service is running and enabled:
sudo systemctl status glusterd
You should see ‘active (running)‘ confirming that GlusterFS is operational.
Initializing Storage Pool
Next, initialize the GlusterFS cluster across all three servers (node1, node2, and node3), starting from ‘node1‘. Add nodes ‘node2‘ and ‘node3‘ to the cluster.
Ensure each server is reachable via hostname or FQDN—validate with these commands:
ping node2.home.lan
ping node3.home.lan
From ‘node1’, initiate the GlusterFS cluster with:
sudo gluster peer probe node2.home.lan
sudo gluster peer probe node3.home.lan
Successful outputs will read ‘peer probe: success‘.

On ‘node2’, verify cluster status:
sudo gluster peer status
The output will reflect two connected peers: node1 and node3.
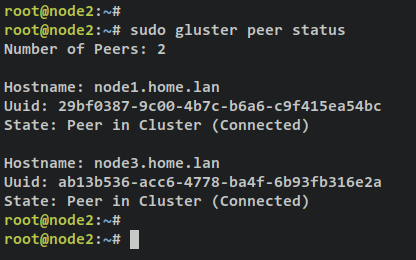
Repeat the check on ‘node3’:
sudo gluster peer status
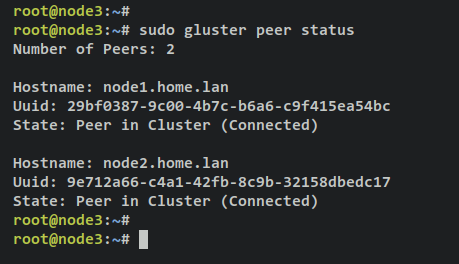
For a broad view of clusters, run:
sudo gluster pool list
Having established the GlusterFS cluster with three Debian servers, proceed to create a volume and mount it from a client.
Creating Replicated Volume
GlusterFS offers multiple volume types: Distributed, Replicated, Distributed Replicated, Dispersed, and Distributed Dispersed. Refer to the official GlusterFS Documentation for more volume type details.
We’ll create a Replicated volume across three servers to automatically sync data within the storage cluster.
Execute the following to create a new Replicated volume named ‘testVolume‘:
sudo gluster volume create testVolume replica 3 node1.home.lan:/data/node1/brick0 node2.home.lan:/data/node2/brick0 node3.home.lan:/data/node3/brick0
The ‘volume create: testVolume: success‘ output indicates successful volume creation.
Start ‘testVolume‘ to make it operational:
sudo gluster volume start testVolume
Success message: ‘volume start: testVolume: success‘ confirms readiness.

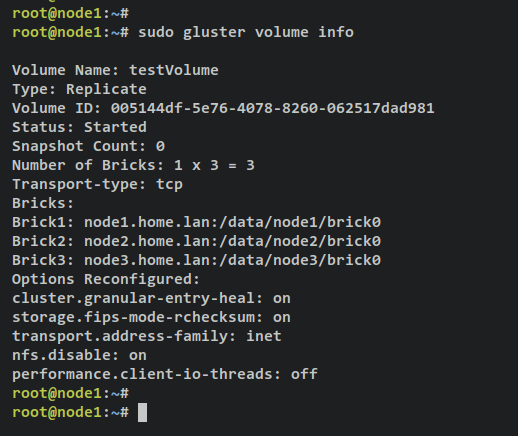
Verify volume details:
sudo gluster volume info
The output will reflect a Replicated volume ‘testVolume‘ across three servers (node1, node2, and node3).
Mount GlusterFS Volume on Client
This step shows you how to mount a GlusterFS volume from a client machine—illustrated here using an Ubuntu/Debian client named ‘client‘. You will mount the ‘testVolume‘ volume and set up auto-mount with ‘/etc/fstab‘.
Edit the ‘/etc/hosts‘ file to map GlusterFS server IPs:
sudo nano /etc/hosts
Add the following server details:
192.168.5.50  node1.home.lan  node1
192.168.5.56  node2.home.lan  node2
192.168.5.57  node3.home.lan  node3
Save and exit.
Install GlusterFS client package:
sudo apt install glusterfs-client
Post-installation, create the directory ‘/data‘ for volume mounting:
mkdir /data
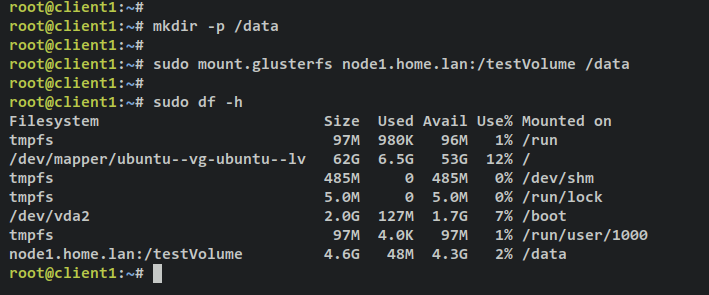
Mount ‘testVolume‘ to ‘/data‘ using:
sudo mount.glusterfs node1.home.lan:/testVolume /data
Confirm with:
sudo df -h
You should see ‘testVolume‘ mounted to ‘/data‘.
Configure auto-mount in ‘/etc/fstab‘ to ensure persistence after reboot:
sudo nano /etc/fstab
Add:
node1.home.lan:/testVolume /data glusterfs defaults,_netdev 0 0
Save and exit.
Test Replication and High-Availability
On the client, create files ‘1-15.md‘ in ‘/data’:
cd /data
touch file{1..15}.md
Verify the files:
ls

Check replication on ‘node1‘ in ‘/data/node1/brick0‘:
cd /data/node1/brick0
ls
The files ‘1-15.md‘ should be visible.

Repeat checks on ‘node2‘ and ‘node3‘:


To test high availability, shut down ‘node1‘ and verify client connectivity:
sudo poweroff
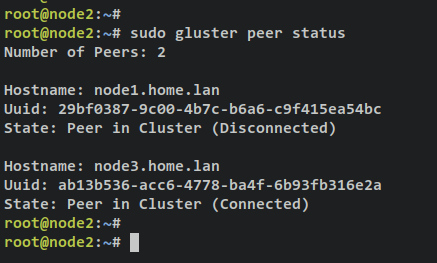
On ‘node2‘, check cluster status:
sudo gluster peer status
‘node1‘ will show ‘Disconnected‘.
From the client, confirm connectivity remains intact:
cd /data
ls

High-availability verification confirms system robustness.
Conclusion
In this tutorial, you’ve set up a GlusterFS cluster with three Debian 11 servers. From configuring disk partitions on Linux using fdisk to auto-mounting via ‘/etc/fstab’, this guide covers essential steps to effectively create a Replicated GlusterFS volume. Additionally, you’ve mounted a GlusterFS volume from a client machine.
Enhance your GlusterFS setup by adding more disks and servers for a robust, high-availability networked filesystem. For more advanced administration, explore the GlusterFS official documentation.
FAQ
- What is GlusterFS?
- GlusterFS is an open-source distributed file system capable of handling petabytes of data, providing an easy-to-install, maintain, and scalable storage solution.
- What are the prerequisites for setting up GlusterFS on Debian 11?
- You need two or three Debian 11 servers and a non-root user with sudo privileges.
- How do I ensure high availability with GlusterFS?
- High availability is ensured by configuring a Replicated volume across multiple servers, enabling data replication and uninterrupted access even when a server is down.
- Can I add more servers to the existing GlusterFS cluster?
- Yes, you can expand the GlusterFS cluster by adding more servers to enhance redundancy and storage capacity.
