Harbor is a powerful open-source Docker image registry tailored for cloud-native environments. It stores and distributes container images with enhanced security features. Harbor ensures artifact protection through policies, user role-based access control, image vulnerability scanning, and image signing. As a CNCF graduate project and an enterprise-grade registry, Harbor delivers compliance, high performance, and secure artifact management for Kubernetes and Docker environments.
This guide provides a comprehensive step-by-step on installing Harbor Image Registry using Docker on an Ubuntu 22.04 server. We’ll cover Docker CE installation, configuring Harbor with SSL, and basic usage and administration.
Prerequisites
Ensure you meet the following requirements before proceeding:
- An Ubuntu 22.04 server, using the hostname ‘harbor-server’ for demonstration purposes.
- A non-root user with administrative privileges.
- A domain name or locally defined domain for Harbor.
Installing Docker CE (Community Edition)
Harbor can be deployed in various environments. Here, we’ll install Harbor using Docker, starting with Docker CE installation from the official Docker repository.
First, install essential dependencies:
    sudo apt install \
      ca-certificates \
      curl \
      gnupg \
      lsb-release
Confirm with ‘y’ and proceed by pressing ENTER.
Next, download the GPG key for the Docker repository and add the official Docker repository to your system:
    sudo mkdir -p /etc/apt/keyrings
    curl -fsSL https://download.docker.com/linux/ubuntu/gpg | sudo gpg --dearmor -o /etc/apt/keyrings/docker.gpg

    echo \
      "deb [arch=$(dpkg --print-architecture) signed-by=/etc/apt/keyrings/docker.gpg] https://download.docker.com/linux/ubuntu \
      $(lsb_release -cs) stable" | sudo tee /etc/apt/sources.list.d/docker.list > /dev/null
Update the package index:
sudo apt update
Install Docker CE and Docker Compose:
sudo apt install docker-ce docker-ce-cli containerd.io docker-compose-plugin
Confirm installation with ‘y’, then press ENTER.

Verify the Docker service with:
    sudo systemctl is-enabled docker
    sudo systemctl status docker
Your output should resemble the following, indicating Docker is running and enabled:

Now that Docker is installed, proceed to download the Harbor installer package.
Downloading Harbor Installer
Download the Harbor offline installer package as follows:
    cd /tmp
    curl -s https://api.github.com/repos/goharbor/harbor/releases/latest | grep browser_download_url | cut -d '"' -f 4 | grep '\.tgz$' | wget -i -
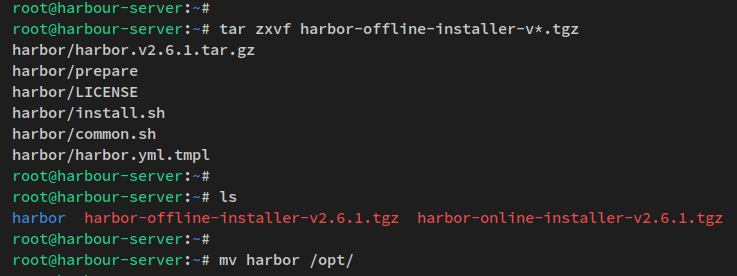
Extract the offline installer:
tar -xzvf harbor-offline-installer-v2.6.1.tgz
Move the ‘harbor’ directory to ‘/opt’:
sudo mv harbor /opt/
Configuring Harbor Installation
Configure Harbor using the ‘harbor.yml’ file:
Navigate to the installation directory:
cd /opt/harbor
Copy and edit the configuration template:
    cp harbor.yml.tmpl harbor.yml
    sudo nano harbor.yml
Adjust the following settings:
    # Example configurations:
    hostname: registry.howtoforge.local
    https:
      port: 443
      certificate: /etc/letsencrypt/live/registry.howtoforge.local/fullchain.pem
      private_key: /etc/letsencrypt/live/registry.howtoforge.local/privkey.pem
    harbor_admin_password: Harbor_Docker_Ubuntu
    database:
      password: db_pass_harbor
- hostname: Specify your domain for accessing Harbor.
- https: Configure SSL certificate paths for secure access.
- harbor_admin_password: Define the initial admin password.
- database: Set a strong password for the Harbor database.
Installing Harbor via Installer Script and Docker Compose
With configurations ready, initiate the Harbor installation:
In the ‘/opt/harbor’ directory, execute the installer:
sudo ./install.sh
The installer will check system requirements, extract necessary images, set up the environment, and begin installation.
Once complete, verify container services with:
    ls
    docker compose ps

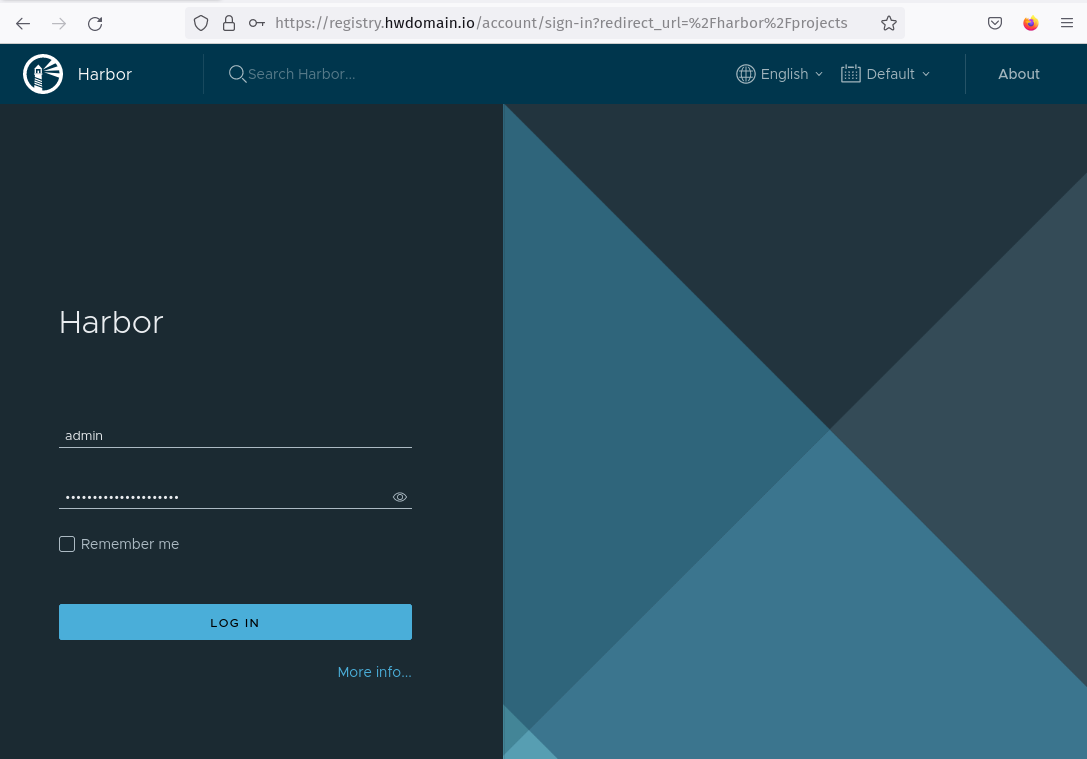
Access Harbor via a web browser at your domain (e.g., https://registry.howtoforge.local/) and log in with the admin credentials you configured.
Creating Harbor User
Learn how to create a new user via the Harbor interface:
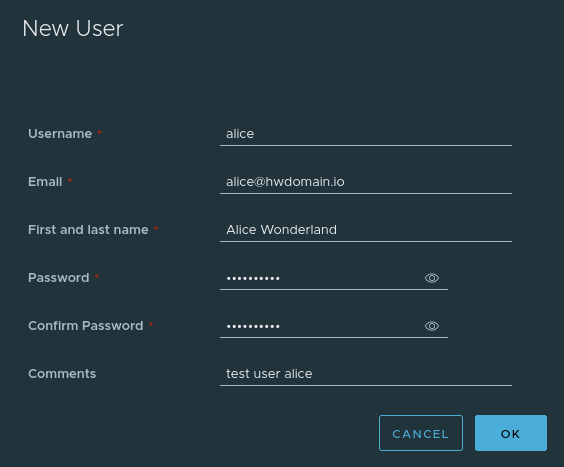
Navigate to ‘Administration‘ > ‘Users‘ and click ‘NEW USER‘.

Fill in user details and save. For example, create user ‘alice‘.
Adding User to Harbor Project
Assign the new user to a project in Harbor:
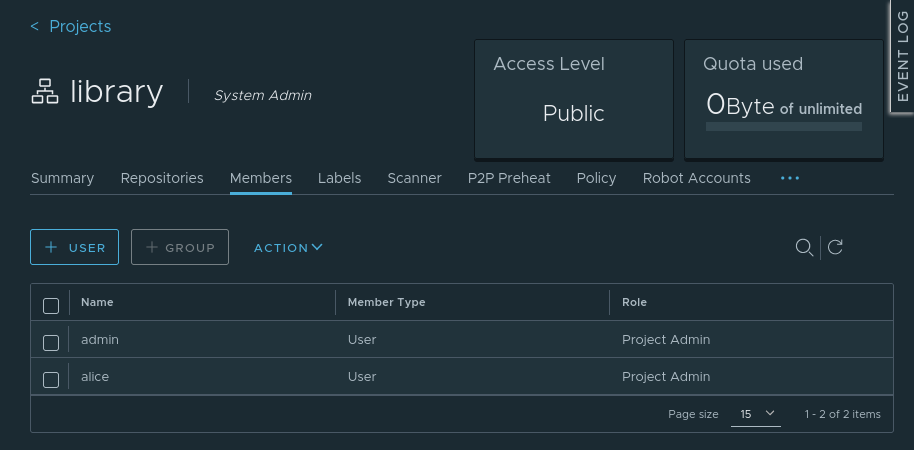
Under ‘Project‘, select ‘library‘, then ‘Members‘, and add the user ‘alice‘ as ‘Project Admin‘.
Logging in to Harbor via Docker Client
Use the Docker CLI to log in to your Harbor registry:
docker login https://registry.howtoforge.local/
Enter your credential (e.g., user ‘alice‘). A successful login displays ‘Login Succeeded‘.

Pushing Images to Harbor Registry
To upload an image to Harbor, first pull an existing image:
docker pull nginx:alpine
Edit the tag and push the image:
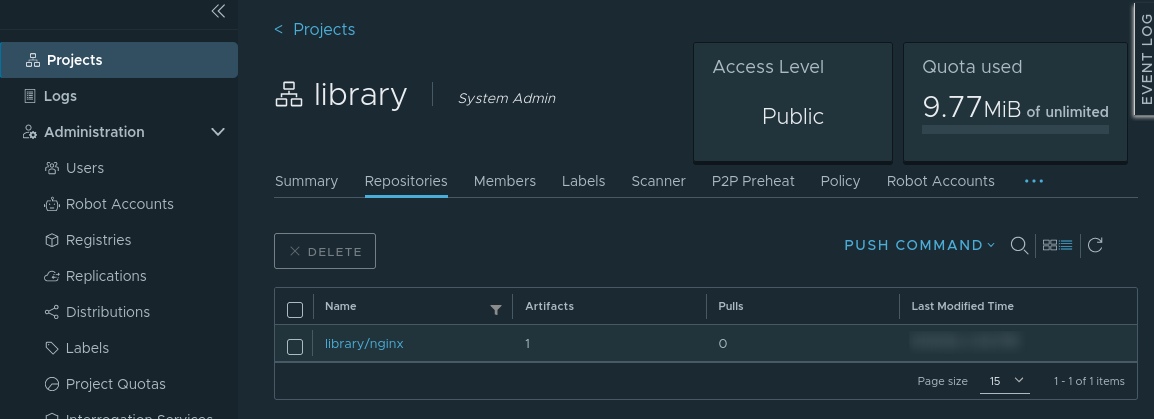
    docker tag nginx:alpine registry.howtoforge.local/library/nginx:alpine
    docker push registry.howtoforge.local/library/nginx:alpine
Conclusion
You have successfully installed and secured Harbor, learned basic administration including user setup, project management, and Docker registry configuration. You can now explore advanced features and customize Harbor further for your development team.
FAQ
- What is Harbor?Harbor is an open-source container image registry that provides secure storage and distribution of Docker images. It’s a CNCF graduate project designed for cloud-native environments.
- Why use Harbor?Harbor offers security features like role-based access control, vulnerability scanning, and image signing, which enhances your artifact management across cloud-native environments.
- Can I install Harbor without Docker?Yes, Harbor supports deployment on Kubernetes through its Helm charts.
- Is SSL required for Harbor installation?While not required, it is highly recommended to use SSL for secure communication with your Harbor registry.
- How can I manage users and projects in Harbor?Harbor’s web-based UI allows easy management of users and projects, enabling you to set roles and define user access on a project basis.
