JIRA is a commercial software application developed by Atlassian, designed for issue tracking and project management. Available as a trial version for a limited period, JIRA is extensively used in support and customer service environments for creating and monitoring ticket statuses, providing a web-based interface for tracking work progress and addressing issues. It boasts a host of features like bug and defect management, advanced security, comprehensive reporting, customizable dashboards, search and filtering capabilities, workflows, and robust administrative tools.
This tutorial will guide you through the installation of the JIRA project management tool on an Ubuntu 22.04 server.
Prerequisites
- A server running Ubuntu 22.04 with at least 4GB of RAM.
- A valid domain name configured to point to your server’s IP address.
- Root access and password configured on the server.
Getting Started
First, it’s recommended to update your system package cache to ensure you’re installing the latest versions. Execute the following command:
apt-get update -y
Once updated, install the necessary dependencies with the command:
apt-get install unzip fontconfig -y
Install and Configure MySQL Database
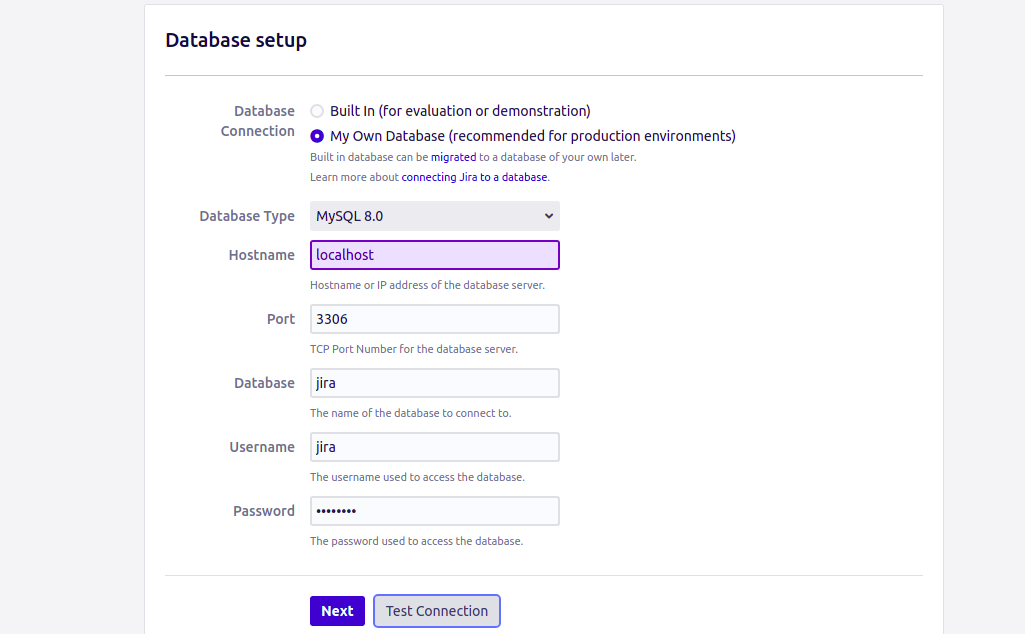
JIRA requires a MySQL or MariaDB database as a backend. Install the MySQL server with:
apt-get install mysql-server -y
Verify MySQL’s operational status using:
systemctl status mysql
You should see an output indicating MySQL is active and running:
? mysql.service - MySQL Community Server
         Loaded: loaded (/lib/systemd/system/mysql.service; enabled; vendor preset: enabled)
         Active: active (running)
Log into the MySQL shell using:
mysql
Create a dedicated database and user for JIRA with these commands:
mysql> CREATE DATABASE jira CHARACTER SET utf8mb4 COLLATE utf8mb4_bin;
mysql> CREATE USER 'jira'@'localhost' IDENTIFIED BY 'password';
Grant necessary privileges to the JIRA user:
mysql> GRANT ALL ON jira.* TO 'jira'@'localhost' WITH GRANT OPTION;
Finish by flushing privileges and exiting:
mysql> FLUSH PRIVILEGES;
mysql> EXIT;
Install JIRA on Ubuntu 22.04
Visit JIRA’s official download page to obtain the latest version using wget:
wget https://www.atlassian.com/software/jira/downloads/binary/atlassian-jira-software-9.0.0-x64.bin
Modify file permissions to make it executable:
chmod a+x atlassian-jira-software-9.0.0-x64.bin
Commence the installation by executing:
./atlassian-jira-software-9.0.0-x64.bin
Follow the prompts, opting for a custom installation for advanced options. When prompted for ports, use the default HTTP and control ports.
Configure JIRA
Download and copy the MySQL JDBC driver into Jira’s lib directory:
wget https://dev.mysql.com/get/Downloads/Connector-J/mysql-connector-java-8.0.18.zip
unzip mysql-connector-java-8.0.18.zip
cp mysql-connector-java-8.0.18/mysql-connector-java-8.0.18.jar /opt/atlassian/jira/lib
Restart the JIRA service using:
/etc/init.d/jira stop
/etc/init.d/jira start
Access JIRA Web UI
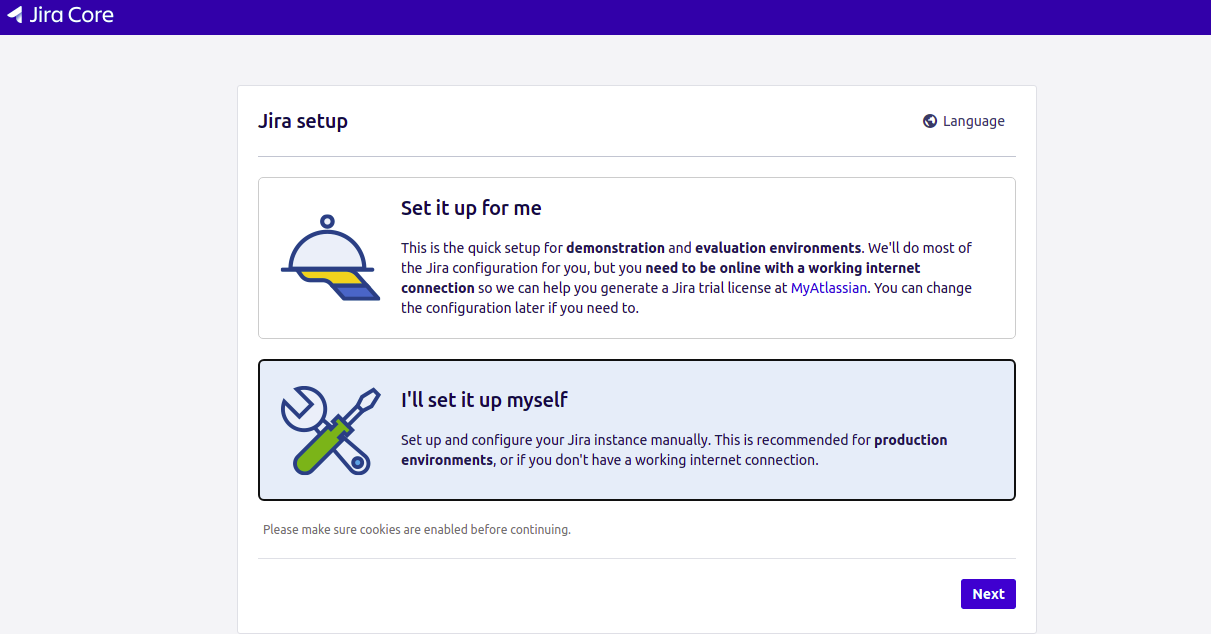
Open a browser and navigate to JIRA’s web interface by entering http://your-server-ip:8080. Follow the setup steps as depicted in the images below:


Conclusion
Congratulations! You have successfully installed JIRA on Ubuntu 22.04. You can now integrate JIRA within your organization to streamline project management.
FAQs
What is the recommended system requirement for installing JIRA?
A minimum of 4GB RAM on a server running Ubuntu 22.04 is recommended for JIRA installation.
Can I install JIRA on other Linux distributions?
Yes, JIRA can be installed on other Linux distributions, but installation steps may vary slightly.
How do I access JIRA after installation?
After installation, access JIRA via your browser using the URL format http://your-server-ip:8080.
What if I encounter port conflicts during JIRA installation?
During installation, you have the option to specify custom ports if the default ports are in use by other services.
