Memcached is an open-source, high-performance, general-purpose distributed memory caching system. It functions as an in-memory key-value store for small chunks of arbitrary data, designed to speed up dynamic websites by caching data in RAM. Memcached is especially useful for web applications with high read calls and infrequent writes.
This tutorial will guide you through installing and configuring Memcached on Ubuntu 20.04.
Prerequisites
- A server running Ubuntu 20.04.
- Root access to the server.
Install Memcached
To install Memcached, take advantage of the Ubuntu repository’s default package using the command below:
apt-get install memcached libmemcached-tools -y
After installation, start and enable the Memcached service at boot time with these commands:
systemctl start memcached
systemctl enable memcached
Verify the Memcached service’s status with:
systemctl status memcached
You should see an output resembling the following:
? memcached.service - memcached daemon
     Loaded: loaded (/lib/systemd/system/memcached.service; enabled; vendor preset: enabled)
     Active: active (running) since Thu 2020-05-14 03:03:35 UTC; 33s ago
       Docs: man:memcached(1)
   Main PID: 93483 (memcached)
      Tasks: 10 (limit: 2282)
     Memory: 1.6M
     CGroup: /system.slice/memcached.service
             ??93483 /usr/bin/memcached -m 64 -p 11211 -u memcache -l 127.0.0.1 -P /var/run/memcached/memcached.pid

May 14 03:03:35 ubuntu2004 systemd[1]: Started memcached daemon.
Memcached listens on port 11211 by default. Confirm this with:
ss -tulpn | grep :11211
The expected result:
tcp LISTEN 0 1024 127.0.0.1:11211 0.0.0.0:* users:(("memcached",pid=93483,fd=26))
Configure Memcached
Memcached’s configuration file is located at /etc/memcached.conf. Modify it according to your requirements.
Though default settings suffice for most applications, to allow remote access and set a custom port, edit the configuration file:
nano /etc/memcached.conf
Change the following configurations:
# Default connection port is 11211
-p 11211

-l your-server-ip

# Limit the number of simultaneous incoming connections. The daemon default is 1024
-c 1024
Save your changes, close the file, and restart the Memcached service:
systemctl restart memcached
Validate Memcached status using:
memcstat --servers=your-server-ip
Expected output:
Server: your-server-ip (11211)
	 pid: 94106
	 uptime: 30
	 time: 1589425647
	 version: 1.5.22
	 libevent: 2.1.11-stable
	 pointer_size: 64
	 rusage_user: 0.036605
	 rusage_system: 0.006100
	 max_connections: 1024
Configure PHP to Use Memcached
With Memcached installed and configured, set up PHP to utilize Memcached.
Install Apache and the necessary PHP modules:
apt-get install apache2 libapache2-mod-php php php-cli php-memcached -y
Create a sample PHP file in Apache’s root directory:
nano /var/www/html/phpinfo.php
Add the following code:
<?php
phpinfo();
?>
Save and close the file, then restart Apache to apply changes:
systemctl restart apache2
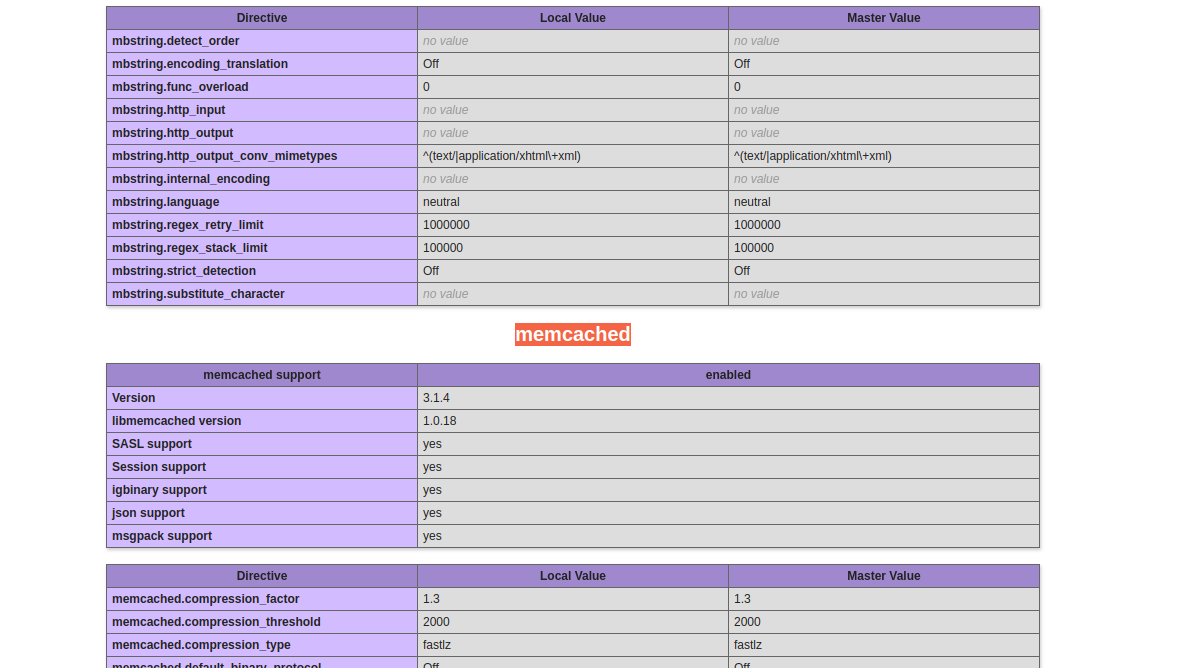
Open your web browser and navigate to http://your-server-ip/phpinfo.php. You should see a screen like this:

This confirms Memcached support is enabled in PHP.
To enable Python support, use this command:
apt-get install python3-pymemcache -y
For Perl support:
apt-get install libcache-memcached-libmemcached-perl -y
Conclusion
This guide walked you through the installation and configuration of Memcached on an Ubuntu 20.04 server. You also learned how to incorporate PHP, Python, and Perl support in Memcached. Please feel free to reach out if you have any questions.
Frequently Asked Questions
- What is Memcached?
- Memcached is a high-performance distributed memory caching system used to speed up web applications by storing data in RAM.
- Why use Memcached?
- Memcached is effective for applications with high read operations and infrequent writes as it significantly reduces data fetching times.
- How can I confirm Memcached is running?
- You can verify Memcached is active using the command
systemctl status memcached. - How do I enable remote access in Memcached?
- Edit the
/etc/memcached.conffile to bind Memcached to your server’s IP and configure connection settings accordingly.
