MinIO is a free, open-source object storage server written in Go, compatible with Amazon S3 object storage. It serves as a robust solution for storing various types of data such as photos, videos, log files, backups, and container or VM images.
On the server side, MinIO offers a highly scalable architecture coupled with straightforward installation and configuration. On the client side, it features a command-line tool to manage the storage directly from a terminal, alongside an intuitive web-based administrative dashboard.
MinIO is versatile enough to accommodate multiple deployment environments, ranging from large infrastructures with continuous data replication to smaller setups like home servers.
This tutorial guides you through installing MinIO Object Storage on a Rocky Linux server, setting up a new object storage instance, and configuring a Linux client to manage the MinIO server.
By the end of this tutorial, you will have a fully operational MinIO Object Storage server on Rocky Linux, secured with SSL certificates, and a client machine configured for management tasks.
Prerequisites
To follow this tutorial, ensure you meet the following requirements:
- A server running Rocky Linux (version 8 or 9).
- A non-root user with sudo/root privileges.
- An additional disk or directory designated for object storage.
- A domain name pointed to your Rocky Linux server IP for production environments.
Let’s proceed with installing MinIO.
Installing MinIO Manually
With its next-generation storage capabilities, MinIO is simple to install on servers and clients alike. Supported platforms include Kubernetes, Red Hat OpenShift, and Docker, as well as traditional virtual machines across Linux, Windows, and macOS.
This example demonstrates a manual installation of MinIO on a Rocky Linux server.
Use the following command to download the MinIO binary to ‘/usr/local/bin/minio’:
curl -o /usr/local/bin/minio https://dl.min.io/server/minio/release/linux-amd64/minio
Make the MinIO binary executable with the command:
sudo chmod +x /usr/local/bin/minio
Ensure the binary is executable by adding ‘/usr/local/bin’ to your $PATH environment variable.

Add ‘/usr/local/bin’ to your $PATH in the ‘~/.bashrc’ file with:
echo 'export PATH="$PATH:/usr/local/bin"' >> ~/.bashrc
Reload the ‘~/.bashrc’ configuration and check your $PATH with these commands:
source ~/.bashrc
echo $PATH
Verify whether the MinIO binary is accessible:
which minio

Lastly, confirm the installed version of MinIO:
minio --version

Now MinIO is installed. Next, prepare the disk or directory intended for object storage.
Setting up Storage for MinIO Object Storage
Prepare a directory or additional disk to serve as storage. Here, we’ll use ‘/dev/vdb’ as MinIO object storage.
Check available partitions on ‘/dev/vdb’:
fdisk -l /dev/vdb
Create a directory ‘/minio-data’ to mount the partition ‘/dev/vdb1’:
mkdir -p /minio-data
Mount ‘/dev/vdb1’ to ‘/minio-data’:
sudo mount /dev/vdb1 /minio-data
To ensure permanence, configure ‘/etc/fstab’ to auto-mount on boot. Edit the file:
sudo nano /etc/fstab
Add:
/dev/vdb1 /minio-data ext4 defaults 0 0
Save and exit the editor.
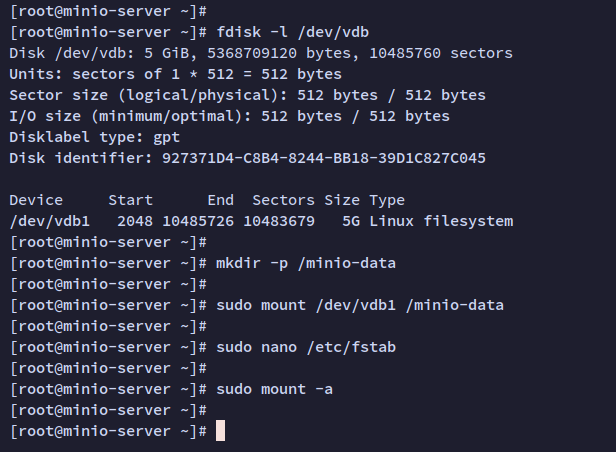
Mount all partitions listed in ‘/etc/fstab’:
sudo mount -a
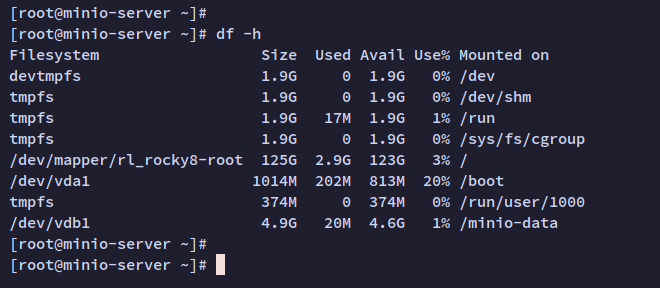
Verify partition configuration:
sudo df -h
Configuring MinIO Object Storage
Create a configuration directory and file for MinIO.
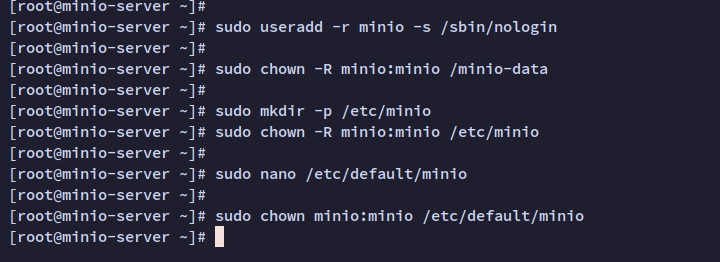
Add a dedicated system user:
sudo useradd -r minio -s /sbin/nologin
Change the ownership of ‘/minio-data’:
sudo chown -R minio:minio /minio-data
Create ‘/etc/minio’ and adjust permissions:
sudo mkdir -p /etc/minio
sudo chown -R minio:minio /etc/minio
Create the configuration file ‘/etc/default/minio’:
sudo nano /etc/default/minio
Insert:
MINIO_ROOT_USER="minio"
MINIO_VOLUMES="/minio-data"
MINIO_OPTS="-C /etc/minio --address :9000 --console-address :9001"
MINIO_ROOT_USER=admin
MINIO_ROOT_PASSWORD="PassMinioStorage"
Save and exit. Adjust ownership of this file:
sudo chown minio:minio /etc/default/minio
Running MinIO as a Systemd Service
Set up MinIO as a systemd service:
Create a new service file:
sudo nano /lib/systemd/system/minio.service
Add the following content:
[Unit]
Description=Minio
Documentation=https://docs.minio.io
Wants=network-online.target
After=network-online.target
AssertFileIsExecutable=/usr/local/bin/minio
[Service]
WorkingDirectory=/usr/local/

User=minio
Group=minio

EnvironmentFile=-/etc/default/minio
ExecStartPre=/bin/bash -c "if [ -z \"${MINIO_VOLUMES}\" ]; then echo \"Variable MINIO_VOLUMES not set in /etc/default/minio\"; exit 1; fi"

ExecStart=/usr/local/bin/minio server $MINIO_OPTS $MINIO_VOLUMES

# Let systemd restart this service always
Restart=always

# Specifies the maximum file descriptor number that can be opened by this process
LimitNOFILE=65536

# Disable timeout logic and wait until the process is stopped
TimeoutStopSec=infinity
SendSIGKILL=no

[Install]
WantedBy=multi-user.target
Save the file and exit.
Reload the systemd manager:
sudo systemctl daemon-reload
Start and enable the MinIO service:
sudo systemctl start minio
sudo systemctl enable minio

Verify the MinIO service status:
sudo systemctl status minio

Setting up Firewalld
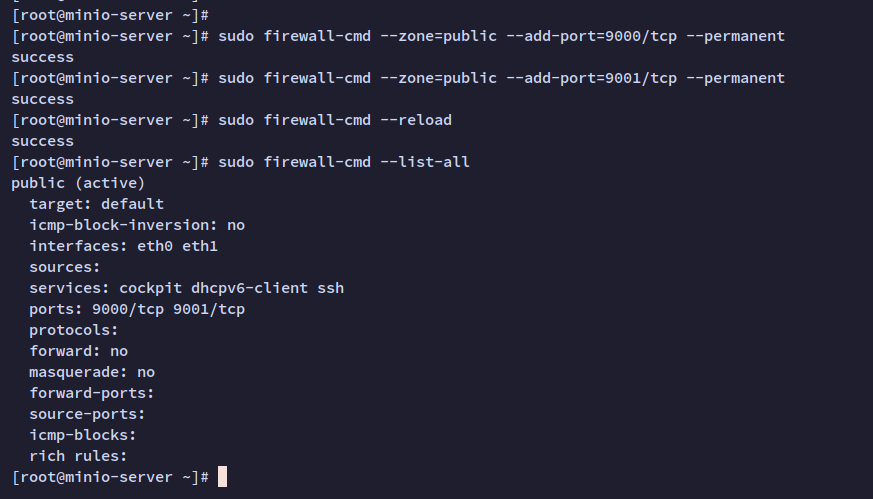
Configure firewalld to open necessary ports:
Open ports 9000 and 9001:
sudo firewall-cmd --zone=public --add-port=9000/tcp --permanent
sudo firewall-cmd --zone=public --add-port=9001/tcp --permanent
Reload firewalld rules:
sudo firewall-cmd --reload
Confirm open ports:
sudo firewall-cmd --list-all
Securing MinIO with SSL Certificates
Secure MinIO using SSL. Ensure SSL certificates are prepared, especially for production with a properly pointed domain.
Copy SSL certificates:
sudo cp /etc/letsencrypt/live/minio.howtoforge.local/privkey.pem /etc/minio/certs/private.key
sudo cp /etc/letsencrypt/live/minio.howtoforge.local/fullchain.pem /etc/minio/certs/public.crt
Edit MinIO configuration:
sudo nano /etc/default/minio
Add:
MINIO_SERVER_URL="https://minio.howtoforge.local:9000"
Save changes and restart MinIO:
sudo systemctl restart minio

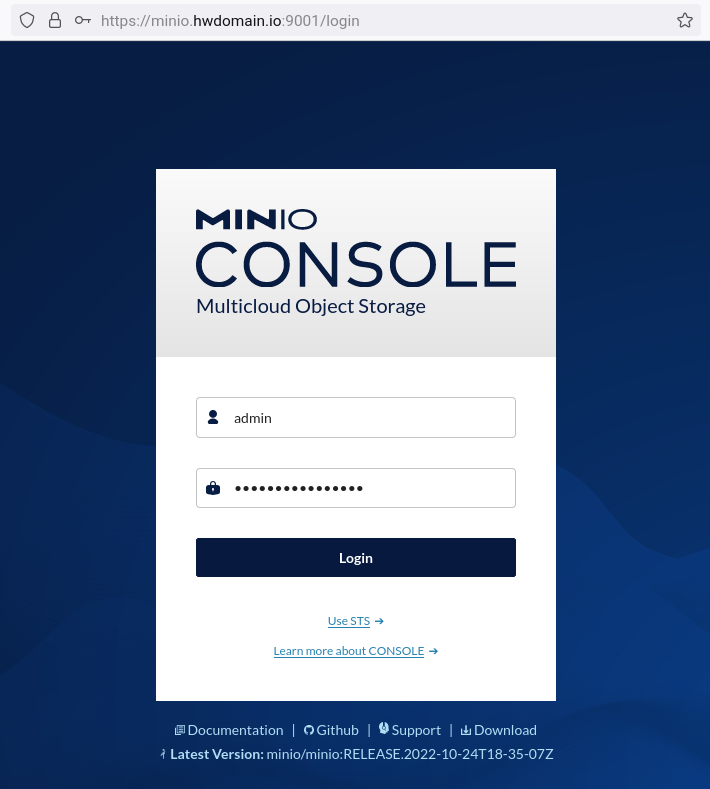
Access the MinIO dashboard by navigating to https://minio.howtoforge.local:9000/ in a browser.
Log in using the configured username and password in ‘/etc/default/minio’.
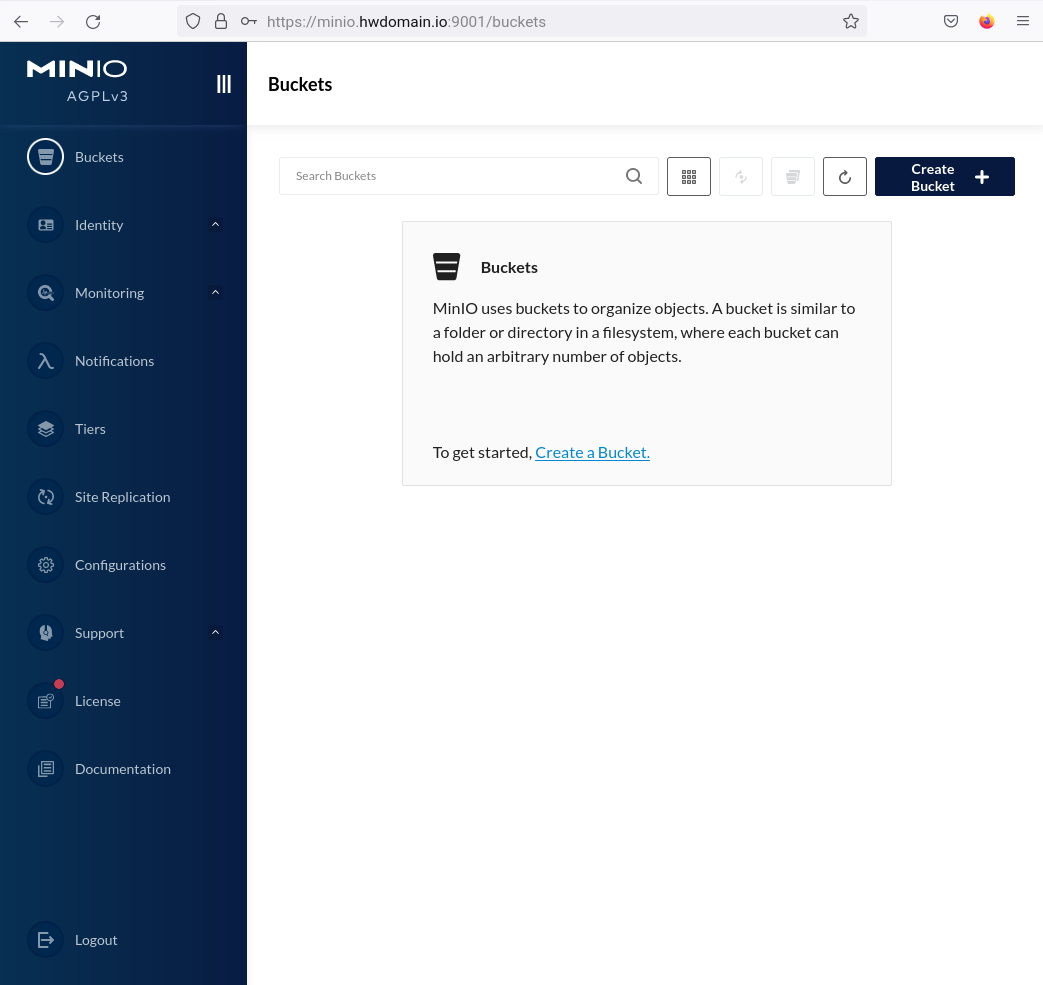
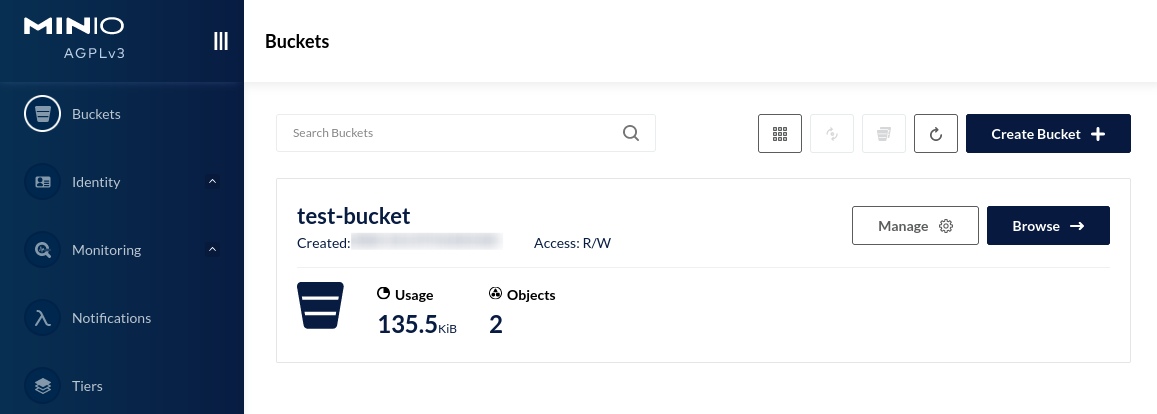
Upon successful login, you’ll see the MinIO dashboard.
Creating First Bucket and Uploading Files
Create a bucket from the MinIO dashboard.
Select “Buckets“, then click “Create Bucket“.
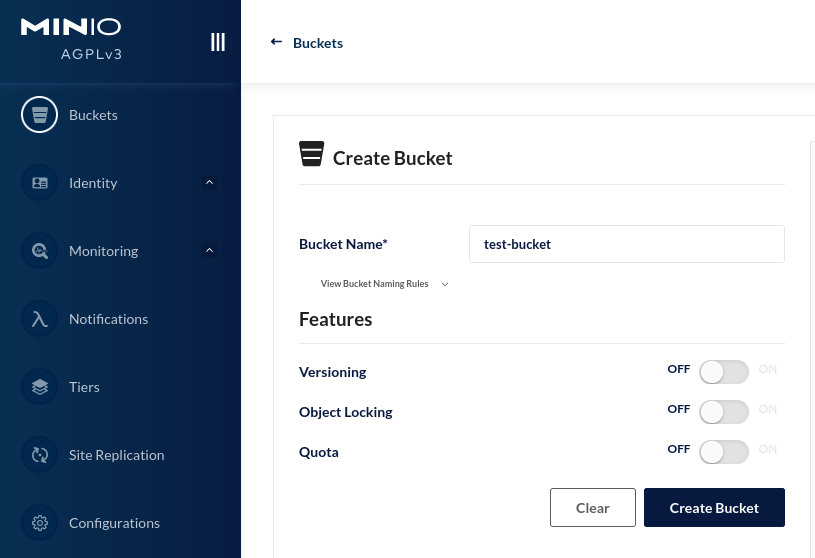
Enter a name and create the bucket ‘test-bucket‘.
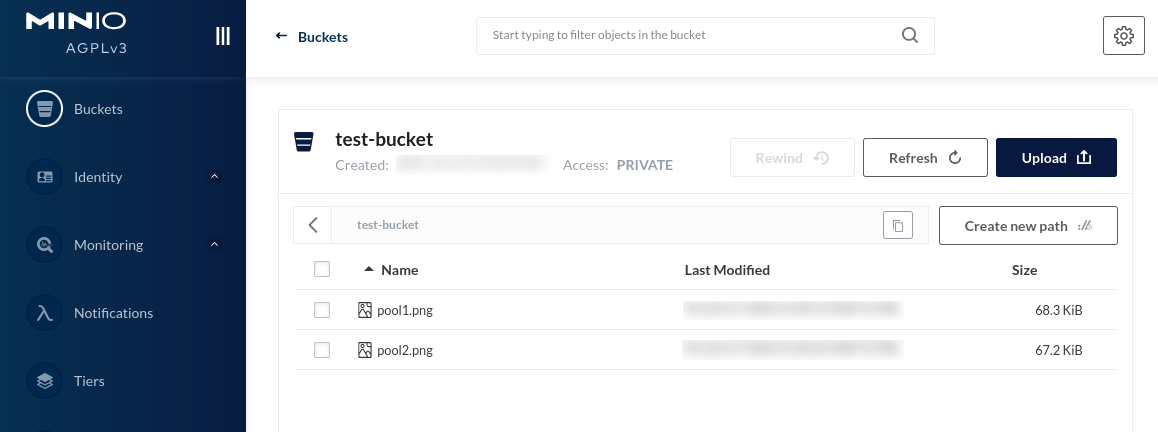
Upload files to the newly created bucket and manage them from the dashboard.
Setting up MinIO Client CLI
MinIO provides a command-line client application for storage management. Install the client and configure it to connect to the MinIO server.
Download the CLI to ‘/usr/local/bin/mc’:
curl -o /usr/local/bin/mc https://dl.min.io/client/mc/release/linux-amd64/mc
Make the client executable:
sudo chmod +x /usr/local/bin/mc

Verify the client installation:
which mc
mc --version

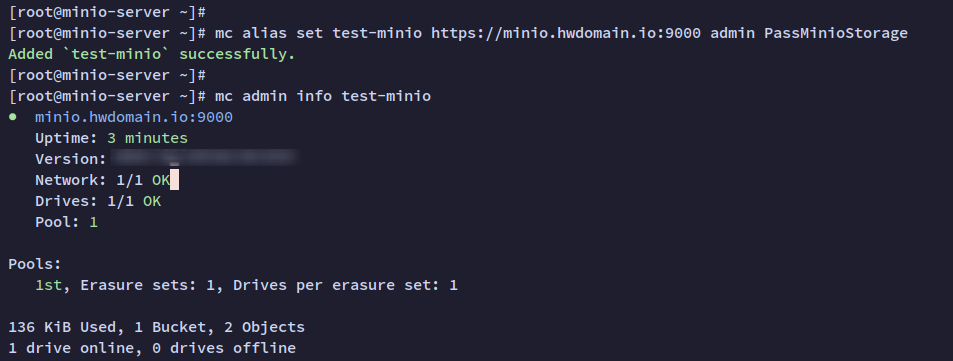
Add the MinIO server:
mc alias set test-minio https://minio.howtoforge.local:9000 admin PassMinioStorage
Verify the MinIO server:
mc admin info test-minio
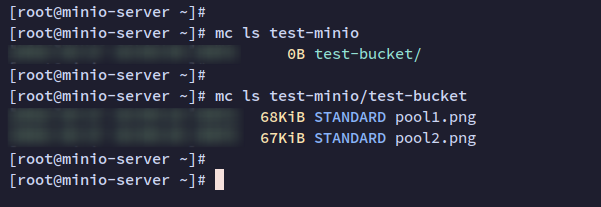
Check available buckets:
mc ls test-minio
Check files within a bucket:
mc ls test-minio/test-bucket
Creating Bucket via MinIO Command Line
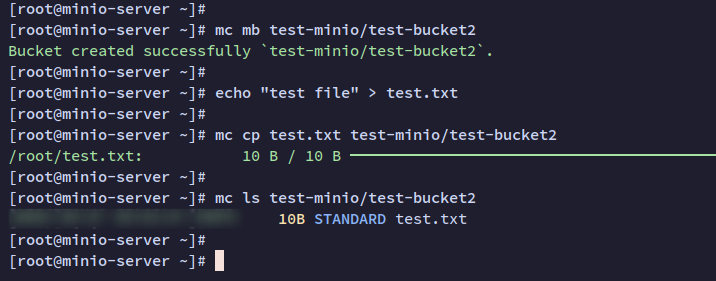
Manage buckets using the command line interface. Create a bucket, upload files, and verify file presence.
Create a new bucket ‘test-bucket2‘:
mc mb test-minio/test-bucket2
Create a test file:
echo "test file" > test.txt
Upload the file to the new bucket:
mc cp test.txt test-minio/test-bucket2
Verify files in the bucket:
mc ls test-minio/test-bucket2
Return to the MinIO dashboard to confirm bucket creations.
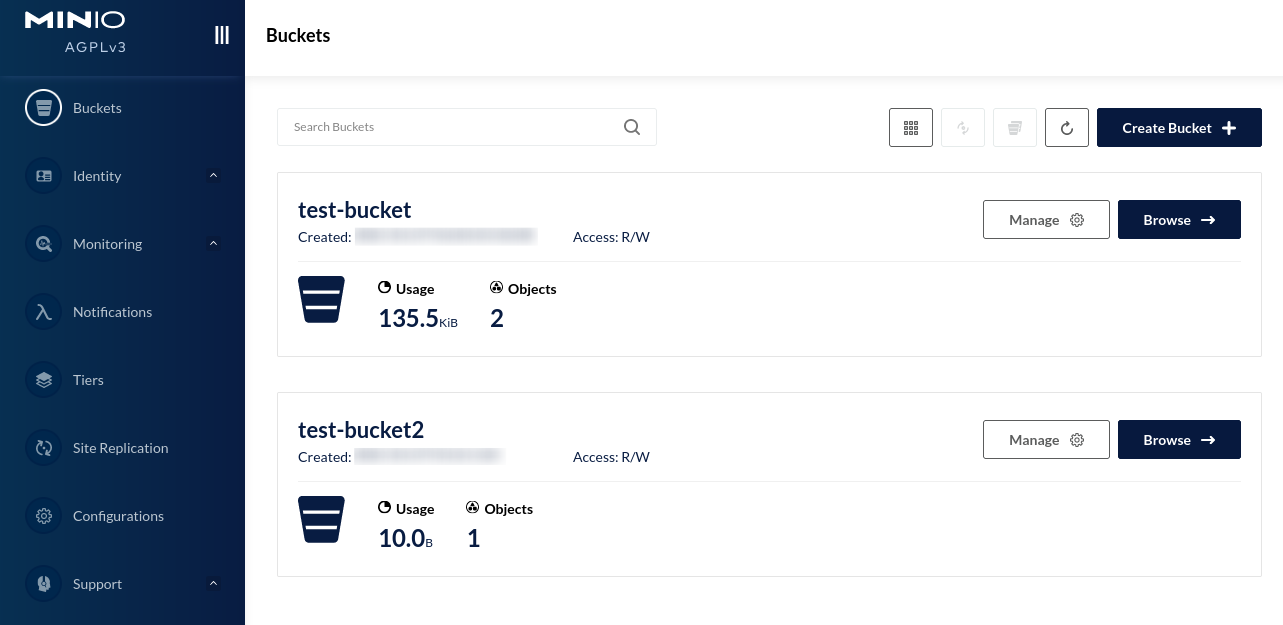
Verify uploaded files:

Conclusion
In conclusion, this guide covered the installation and configuration of MinIO Object Storage on a Rocky Linux server. You learned about setting up storage, securing the server with SSL, and creating systemd services for MinIO operations. Additionally, the tutorial delved into basic MinIO operations via the web dashboard and command-line interface, demonstrating creating and managing buckets, and file uploads.
Frequently Asked Questions
- What is MinIO used for?
- MinIO is an open-source object storage server that helps store large amounts of unstructured data like photos, videos, log files, backups, and VMs.
- Can I use MinIO in a production environment?
- Yes, MinIO is highly scalable and can be used in large production environments as well as small-scale deployments like home servers.
- Is it possible to access MinIO through a web interface?
- Yes, MinIO provides a web-based administration dashboard that is easy to use and allows for management of stored data through a browser.
- How do I secure my MinIO server?
- You can secure your MinIO server using SSL certificates. Make sure to generate SSL certificates and configure them as shown in the tutorial.
- What are the default ports used by MinIO?
- By default, MinIO uses port 9000 for the web administration dashboard and port 9001 for API access.
- How can I manage MinIO from a command line?
- MinIO provides a command-line client, ‘mc’, which allows for comprehensive management through terminal commands.
