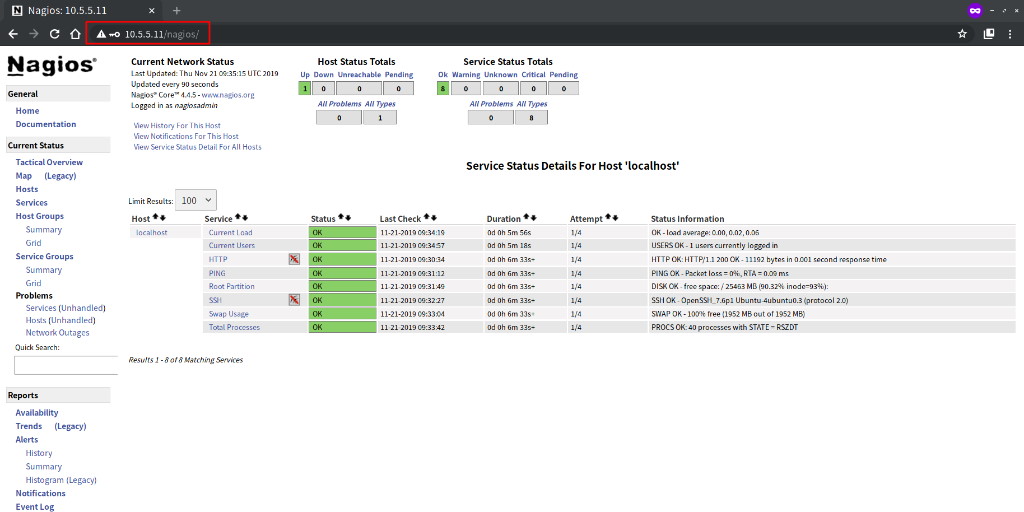
Nagios is a leading open-source software used for system and network monitoring. It tracks the activities of hosts and their services, providing timely alerts when issues arise on the server. Nagios operates seamlessly on Linux, and in this guide, we’ll demonstrate its installation on an Ubuntu 20.04 server environment.
This tutorial will guide you through the installation of Nagios 4.4.x on Ubuntu 20.04. You will learn how to compile Nagios Core 4.4.x from source, install the necessary plugins like NRPE, and configure hosts for monitoring.
Prerequisites
- 2 Ubuntu 20.04 servers are required:
- Nagios server with hostname: nagios20 and IP: 172.16.0.5
- Ubuntu client with hostname: client01 and IP: 172.16.0.6
- Root or sudo privileges
Process Overview:
- Install Package Dependencies
- Install Nagios Core 4.4.6
- Install Nagios and NRPE Plugins
- Add Hosts to Monitor
- Testing the Installation
Step 1 – Install Package Dependencies
Let’s begin by updating the Ubuntu repositories and installing packages necessary for Nagios.
Run the following command to update the package lists:
sudo apt update
Then install the package dependencies using:
sudo apt install -y autoconf bc gawk dc build-essential gcc libc6 make wget unzip apache2 php libapache2-mod-php libgd-dev libmcrypt-dev make libssl-dev snmp libnet-snmp-perl gettext
Step 2 – Install Nagios Core 4.4.6
We’ll now install Nagios Core 4.4.6 manually from source. Follow these steps for a clean setup:
– Download Nagios Core 4.4.6
Start by moving into your home directory and downloading the Nagios Core source code:
cd ~/
wget https://github.com/NagiosEnterprises/nagioscore/archive/nagios-4.4.6.tar.gz
Extract the downloaded package and move into the extracted directory:
tar -xf nagios-4.4.6.tar.gz
cd nagioscore-*/
– Compile and Install Nagios
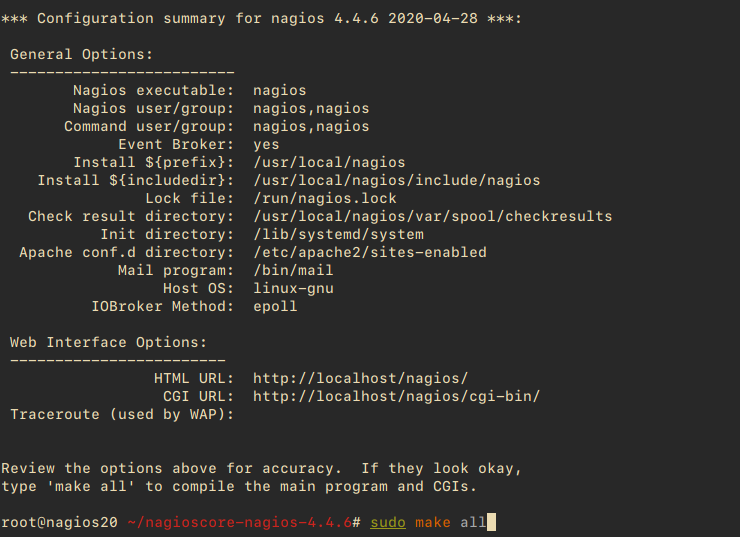
Compile the Nagios source code and set up the Apache virtual host configuration:
sudo ./configure --with-httpd-conf=/etc/apache2/sites-enabled
sudo make all
Create the required Nagios user and group, and ensure that the Apache ‘www-data’ user is added to the ‘nagios’ group:
sudo make install-groups-users
sudo usermod -a -G nagios www-data

Proceed with installing Nagios binaries, daemon scripts, and set the correct command mode:
sudo make install
sudo make install-daemoninit
sudo make install-commandmode
Follow up with installing the sample configuration files:
sudo make install-config
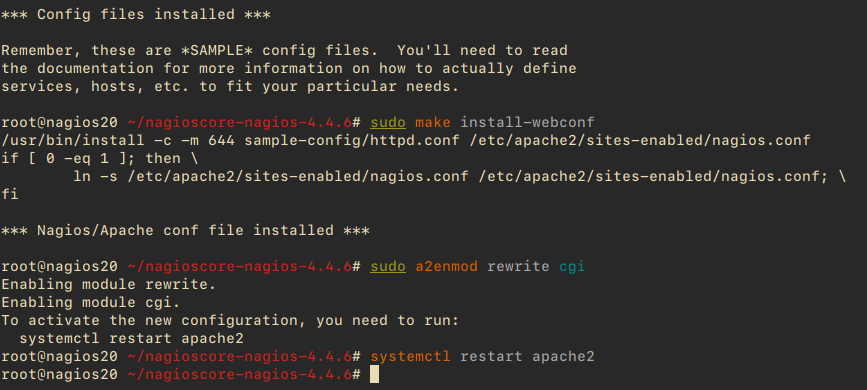
Now, install the Apache configuration for Nagios and enable necessary modules:
sudo make install-webconf
sudo a2enmod rewrite cgi
Restart the Apache service to apply the changes:
systemctl restart apache2
– Create nagiosadmin User
Set up basic authentication for accessing the Nagios dashboard:
sudo htpasswd -c /usr/local/nagios/etc/htpasswd.users nagiosadmin
Create a strong password for the ‘nagiosadmin’ user.

– Setup UFW Firewall
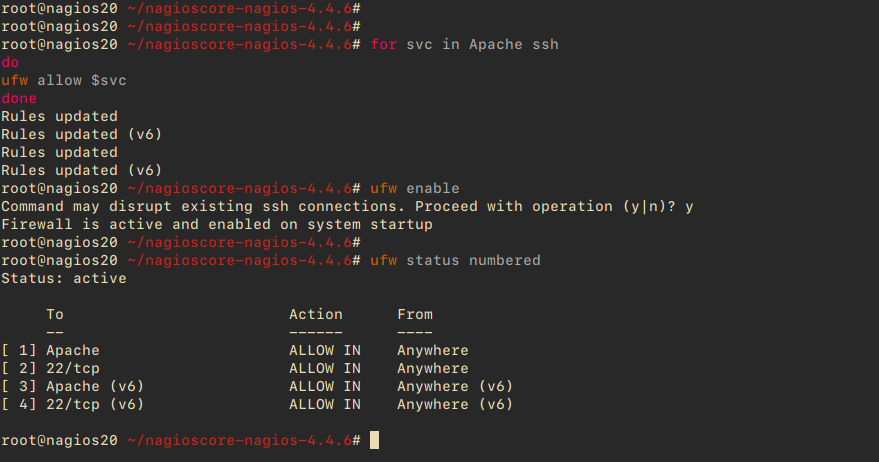
To secure your server, configure the UFW firewall to allow access to essential services:
for svc in Apache ssh
do
ufw allow $svc
done
Enable and start the UFW firewall:
ufw enable
Verify the rules to ensure SSH and Apache are allowed:
ufw status numbered
Step 3 – Install Nagios Plugins and NRPE Plugin
After setting up Nagios Core, we will proceed with installing Nagios Plugins and NRPE Plugin:
Install these packages directly from the Ubuntu repository:
sudo apt install monitoring-plugins nagios-nrpe-plugin
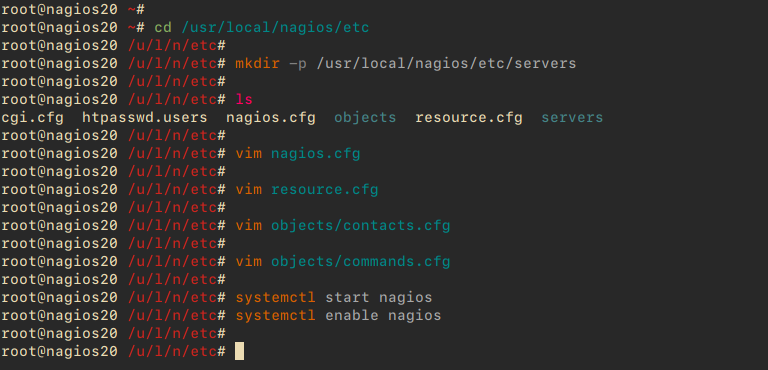
Go to the Nagios configuration directory and create a subdirectory for host configurations:
cd /usr/local/nagios/etc
mkdir -p /usr/local/nagios/etc/servers
Edit the Nagios configuration file to include your server’s configuration directory:
vim nagios.cfg
Uncomment the line to include the server directory:
cfg_dir=/usr/local/nagios/etc/servers
Edit the ‘resource.cfg’ file to define the path for Nagios Plugins:
vim resource.cfg
Set the following path:
$USER1$=/usr/lib/nagios/plugins
Adjust the notification email in ‘objects/contacts.cfg’:
vim objects/contacts.cfg
Update with your admin email:
define contact{
        ......
        email             email@host.com
}
Define the NRPE check command in ‘objects/commands.cfg’:
vim objects/commands.cfg
Add the following configuration:
define command{
        command_name check_nrpe
        command_line $USER1$/check_nrpe -H $HOSTADDRESS$ -c $ARG1$
}
Start the Nagios service and enable it at startup:
systemctl start nagios
systemctl enable nagios
Check the status of the Nagios service:
systemctl status nagios

Restart Apache to apply new configurations:
systemctl restart apache2
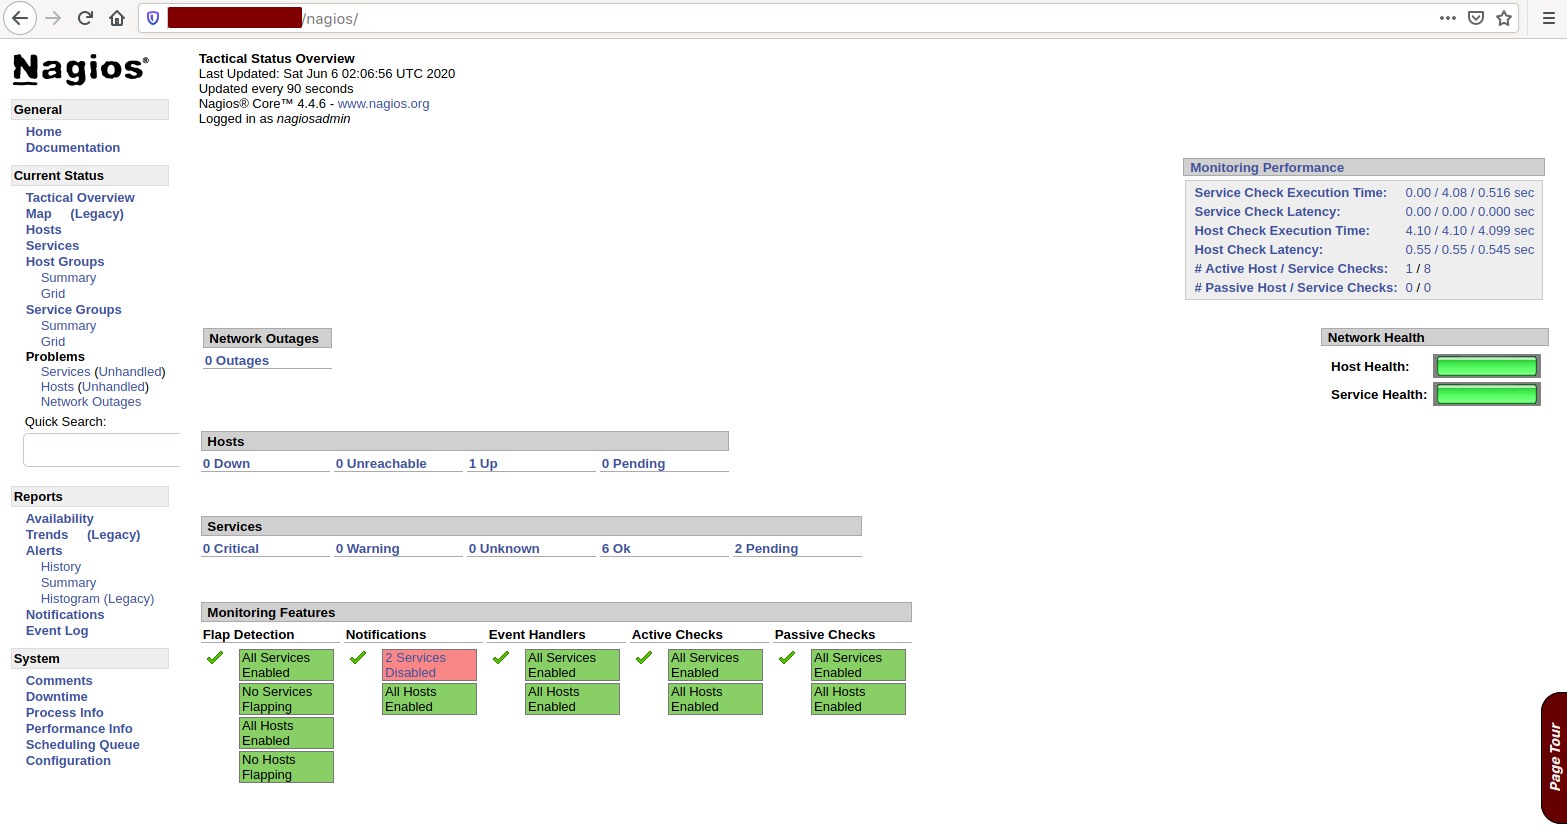
Access the Nagios dashboard via a web browser using the IP address with the “nagios” path:
http://172.16.0.5/nagios/
Log in with the ‘nagiosadmin’ credentials:

You’ll be greeted with the Nagios Dashboard:
Step 5 – Add Linux Host to Monitor
We’ll add the Ubuntu client with hostname “client01” to the monitoring system:
– Install NRPE Server on the Client01 Server
SSH into your “client01” server:
ssh root@172.16.0.6
Update the repository and install necessary plugins:
sudo apt update
sudo apt install nagios-nrpe-server monitoring-plugins
Edit the ‘nrpe.cfg’ to specify the server address and allowed hosts:
cd /etc/nagios/
vim nrpe.cfg
Update the ‘server_address’ and ‘allowed_hosts’:
server_address=172.16.0.6
allowed_hosts=127.0.0.1,::1,172.16.0.5
Edit ‘nrpe_local.cfg’ to define the monitoring checks:
vim nrpe_local.cfg
Insert the following configurations:
command[check_root]=/usr/lib/nagios/plugins/check_disk -w 20% -c 10% -p /
command[check_ping]=/usr/lib/nagios/plugins/check_ping -H 172.16.0.6 -w 100.0,20% -c 500.0,60% -p 5
command[check_ssh]=/usr/lib/nagios/plugins/check_ssh -4 172.16.0.6
command[check_http]=/usr/lib/nagios/plugins/check_http -I 172.16.0.6
command[check_apt]=/usr/lib/nagios/plugins/check_apt
Restart and enable the NRPE service:
systemctl restart nagios-nrpe-server
systemctl enable nagios-nrpe-server

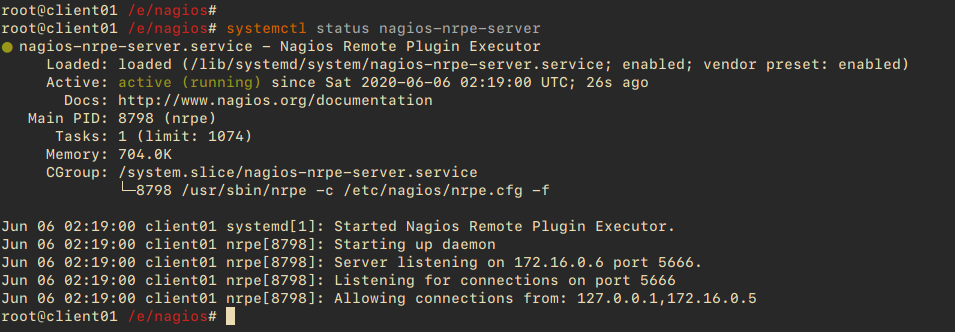
Verify the NRPE service status:
systemctl status nagios-nrpe-server
On the Nagios Server, verify the “client01” NRPE server:
/usr/lib/nagios/plugins/check_nrpe -H 172.16.0.6
/usr/lib/nagios/plugins/check_nrpe -H 172.16.0.6 -c check_ping

– Add Hosts Configuration to the Nagios Server
Back on the Nagios server, create a configuration file for “client01”:
cd /usr/local/nagios/etc
vim servers/client01.cfg
Define host and service settings:
# Ubuntu Host configuration file1
define host {
use                          linux-server
host_name                    client01
alias                        Ubuntu Host
address                      172.16.0.6
register                     1
}

define service {
host_name                       client01
service_description               PING
check_command                   check_nrpe!check_ping
max_check_attempts              2
check_interval                  2
retry_interval                  2
check_period                    24x7
check_freshness                1
contact_groups                admins
notification_interval           2
notification_period             24x7
notifications_enabled           1
register                       1
}
Repeat service definitions for Check Users, Check SSH, Check Root / Disk, Check APT Update, and Check HTTP using similar format.
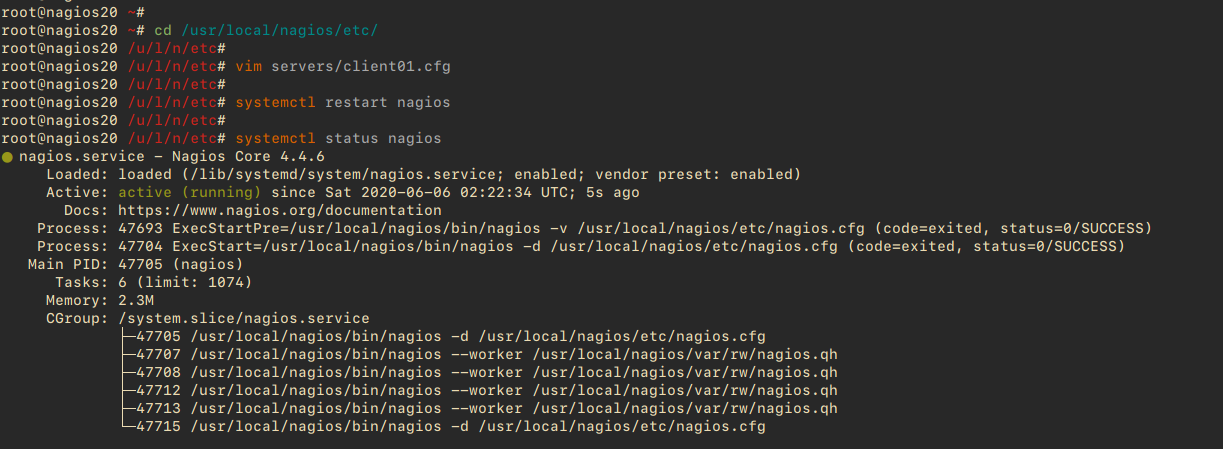
Restart the Nagios service:
systemctl restart nagios
Step 5 – Testing
Refresh your browser and navigate to the “Hosts” section in the Nagios dashboard to verify that “client01” has been successfully added:

You should see detailed monitoring information for “client01”:
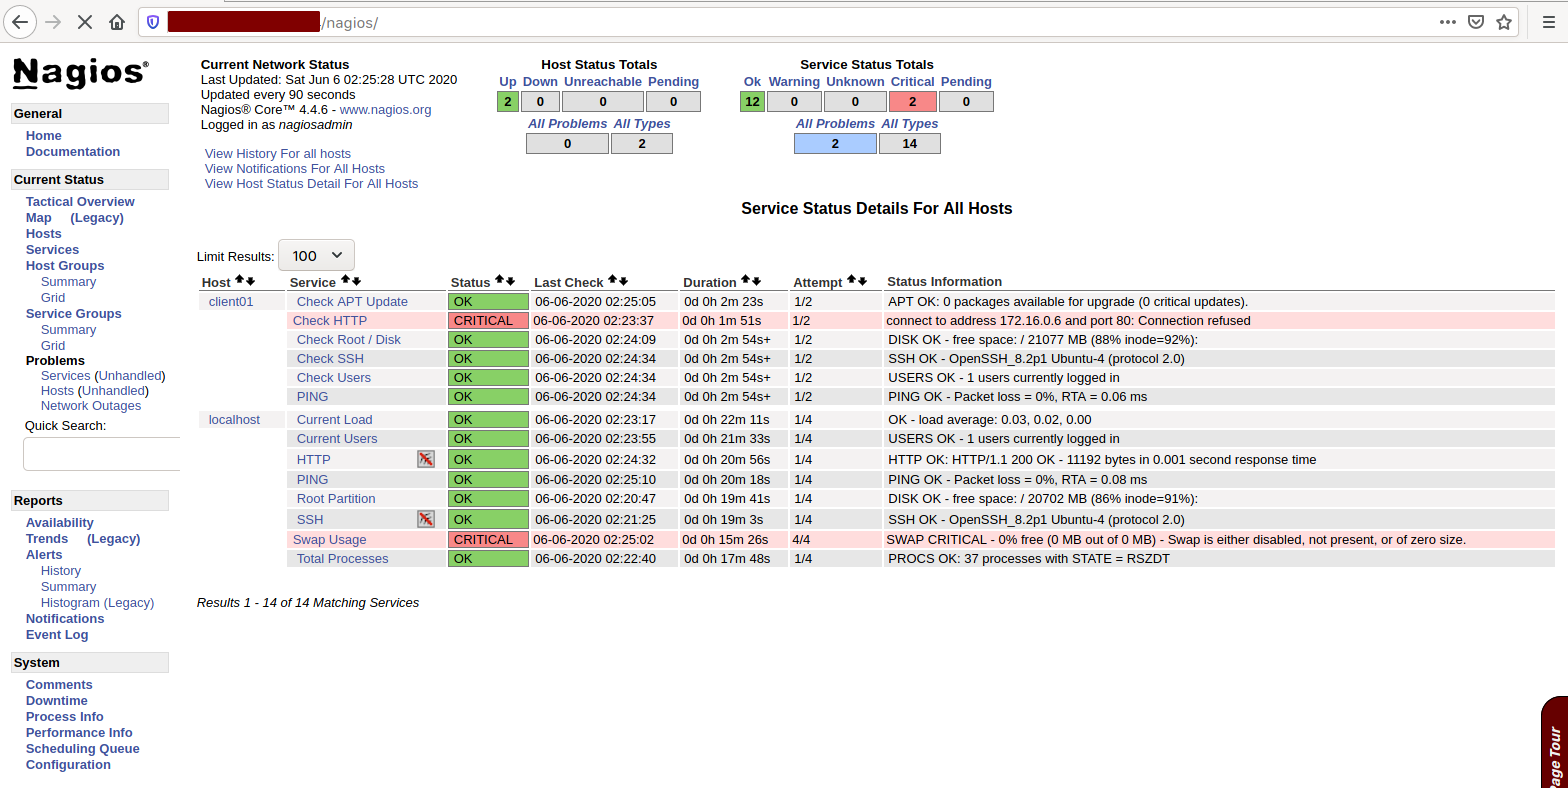
Nagios 4.4.6 has been successfully installed on your Ubuntu 20.04 server, and hosts are actively being monitored.
Reference
Frequently Asked Questions (FAQ)
Q1: What is Nagios used for?
A1: Nagios is used for monitoring the performance and availability of network services and hosts, generating alerts, and displaying the status on a web-based dashboard.
Q2: Why should I choose Nagios over other monitoring tools?
A2: Nagios is highly customizable, has a large community support, and provides powerful monitoring capabilities suitable for diverse environments.
Q3: Can I monitor Windows hosts with Nagios?
A3: Yes, monitoring of Windows hosts is possible using Nagios by configuring NRPE or using NSClient++ on Windows machines.
Q4: How do I add more hosts to the Nagios server for monitoring?
A4: To add more hosts, create a new configuration file under “/usr/local/nagios/etc/servers” and define the host and services required to be monitored.
Q5: Is it possible to configure email alerts with Nagios?
A5: Yes, Nagios can be configured to send email alerts by modifying the contact configurations and ensuring your mail server settings are correctly configured.
