NetBox is an Infrastructure Resource Modeling (IRM) software crafted for network automation and infrastructure engineering. Originally built by the DigitalOcean team, it is now an open-source project under the Apache 2 License. Developed using the Python Django Web framework, NetBox utilizes PostgreSQL as its default database, aligning its installation process with other Python Django web applications.
NetBox helps you to manage your infrastructure, which includes:
- Data Center Infrastructure Management (DCIM)
- IP Address Management (IPAM)
- Data Circuits
- Connections (Network, console, and power)
- Equipment racks
- Virtualization
- Secrets
This guide will walk you through the installation of NetBox IRM on a Rocky Linux 9 server, setting it up with PostgreSQL as the database system and Apache/httpd as a reverse proxy. You will also secure NetBox with SSL/TLS certificates using Certbot and Let’s Encrypt.
Prerequisites
Before beginning, ensure you have the following requirements:
- A Rocky Linux 9 server, referred to as ‘netbox-rocky‘ in this guide.
- A non-root user with sudo/root privileges.
- SELinux set to permissive mode.
- A domain or subdomain pointing to the server’s IP address, exemplified as ‘netbox.howtoforge.local‘.
With these prerequisites, proceed to install NetBox.
Installing and Configuring PostgreSQL
NetBox IRM requires PostgreSQL database server v10 or newer. Rocky Linux provides PostgreSQL server v13, suitable for NetBox deployment.
Begin by installing PostgreSQL server, setting up password authentication, and creating the necessary database and user for NetBox.
Run the command below to install PostgreSQL server:
sudo dnf install postgresql-server
Confirm the installation by entering ‘y’ and pressing ENTER.

Initialize PostgreSQL database and configuration:
sudo postgresql-setup --initdb
The output should indicate: ‘Initializing database in …’

Proceed to set up password encryption and authentication for PostgreSQL users.
Edit the PostgreSQL config file ‘/var/lib/pgsql/data/postgresql.conf’ using nano:
sudo nano /var/lib/pgsql/data/postgresql.conf
Uncomment ‘password_encryption’ and set its value to ‘scram-sha-256’:
password_encryption = scram-sha-256
Save and exit the file.
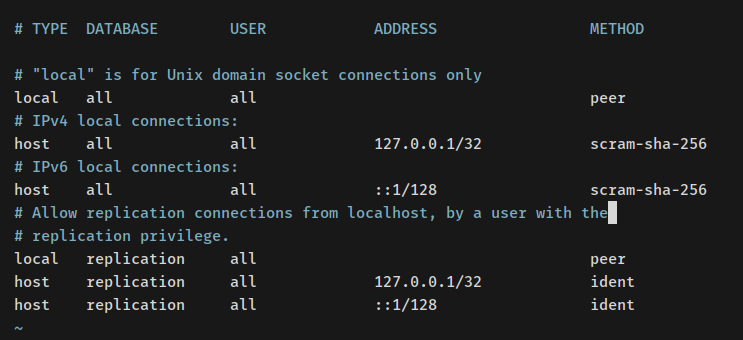
Edit the file ‘/var/lib/pgsql/data/pg_hba.conf’ to change authentication methods:
sudo nano /var/lib/pgsql/data/pg_hba.conf
Modify host configurations for ‘127.0.0.1/32’ and ‘::1/128’ to ‘scram-sha-256’:
# TYPE  DATABASE        USER            ADDRESS                 METHOD
# "local" is for Unix domain socket connections only
local   all             all                                     peer
# IPv4 local connections:
host    all             all             127.0.0.1/32            scram-sha-256
# IPv6 local connections:
host    all             all             ::1/128                 scram-sha-256
Save and close the file.
Start and enable PostgreSQL service:
sudo systemctl start postgresql
sudo systemctl enable postgresql
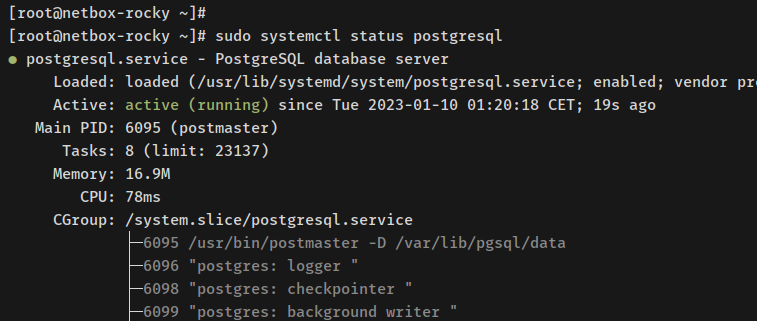
Verify PostgreSQL service status:
sudo systemctl status postgresql
The service should show as running and enabled.
Create a password for the default ‘postgres’ user and set up a database for NetBox:
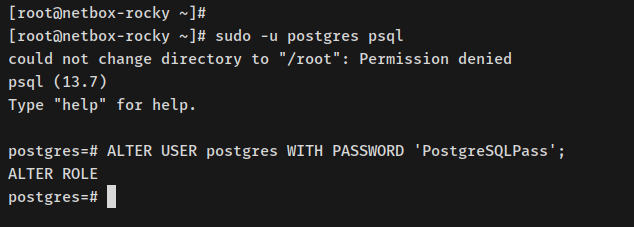
Access PostgreSQL shell:
sudo -u postgres psql
Alter user’s password (update ‘PostgreSQLPass’):
ALTER USER postgres WITH PASSWORD 'PostgreSQLPass';
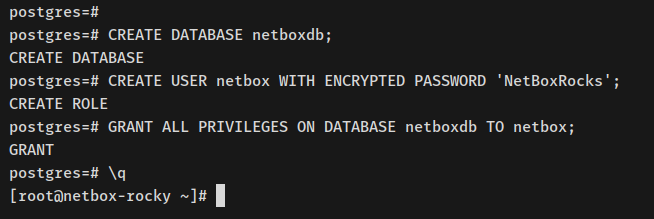
Create database and user for NetBox:
CREATE DATABASE netboxdb;
CREATE USER netbox WITH ENCRYPTED PASSWORD 'NetBoxRocks';
GRANT ALL PRIVILEGES ON DATABASE netboxdb TO netbox;
Exit shell with Ctrl+d or type quit.
Verify connection via the new user:
sudo -u postgres psql --username netbox --password --host localhost netboxdb
Run to check connection:
\conninfo
Output should confirm connection through ‘netbox’ user to ‘netboxdb’.

Next step is installing Redis for cache management on NetBox.
Installing and Configuring Redis
Redis, a key-value database, is used by NetBox for cache management and queue management. The default version on Rocky Linux is 6, which is suitable for NetBox.
Install Redis:
sudo dnf install redis
Confirm with ‘y’ and press ENTER.

Edit Redis configuration ‘/etc/redis/redis.conf’:
sudo nano /etc/redis/redis.conf
Uncomment ‘requirepass’ and input new password:
requirepass RedisPasswordNetBox
Save and close editor.
Start and enable Redis:
sudo systemctl start redis
sudo systemctl enable redis

Check Redis status:
sudo systemctl status redis
It should be running and enabled.

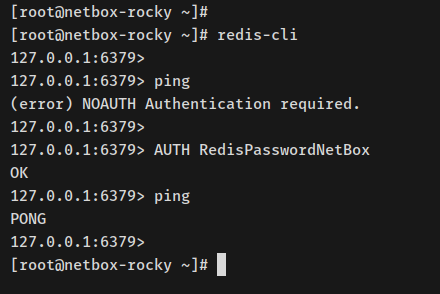
Verify Redis setup:
redis-cli
Attempt a ping, it should request authentication.
ping
Authenticate and verify with ping:
AUTH RedisPasswordNetBox
ping
With PostgreSQL and Redis set up, you can now proceed to install NetBox.
Installing NetBox IRM
NetBox requires Python 3.8, 3.9, 3.10, or 3.11. Rocky Linux 9 ships with Python 3.9, making it compatible with NetBox.
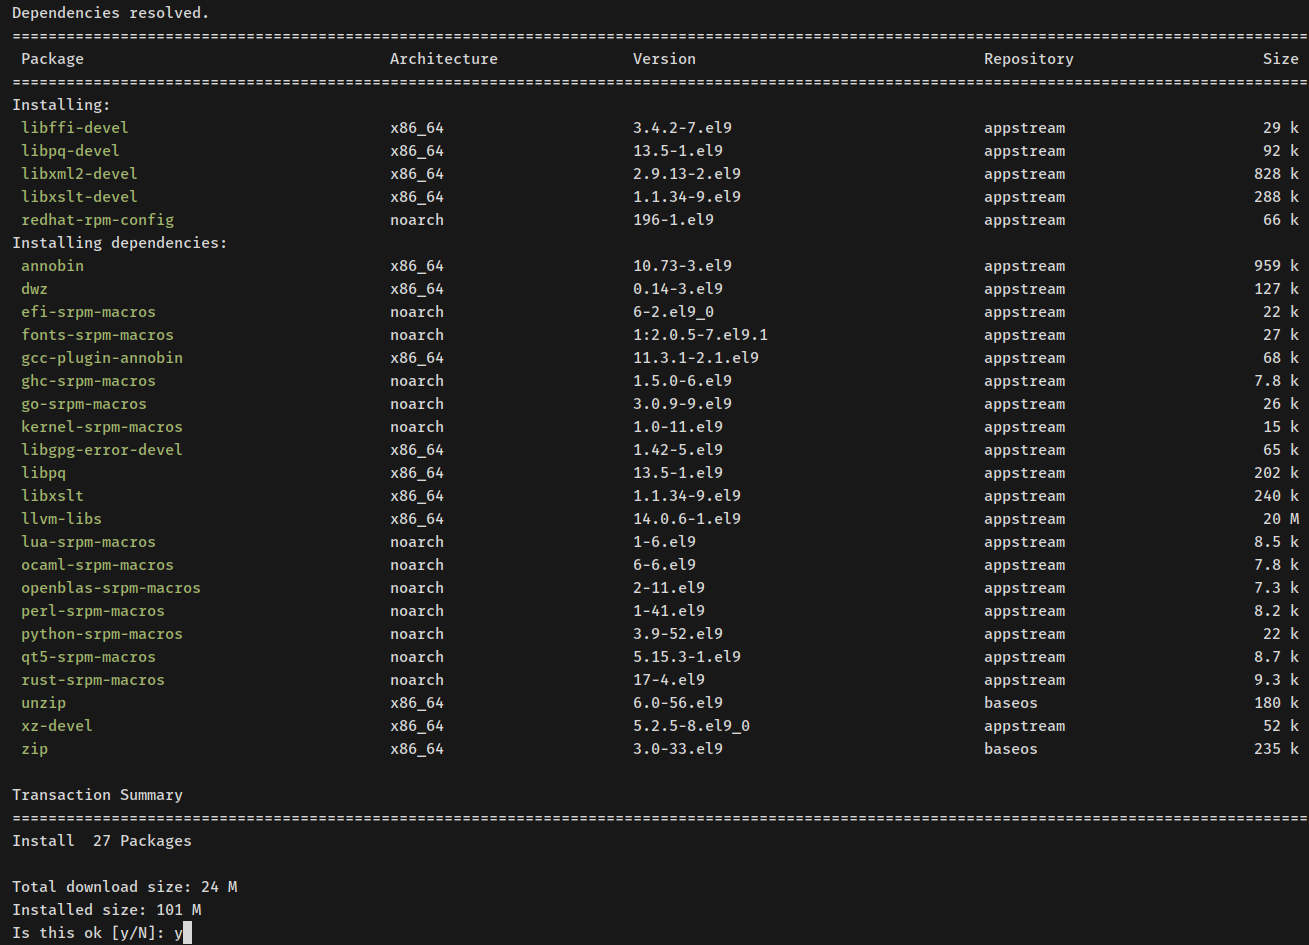
Install dependencies:
sudo dnf install gcc libxml2-devel libxslt-devel libffi-devel libpq-devel openssl-devel redhat-rpm-config git
Create the system user and download NetBox:
sudo useradd -r -d /opt/netbox -s /usr/sbin/nologin netbox
mkdir -p /opt/netbox; cd /opt/netbox
sudo git clone -b master --depth 1 https://github.com/netbox-community/netbox.git .
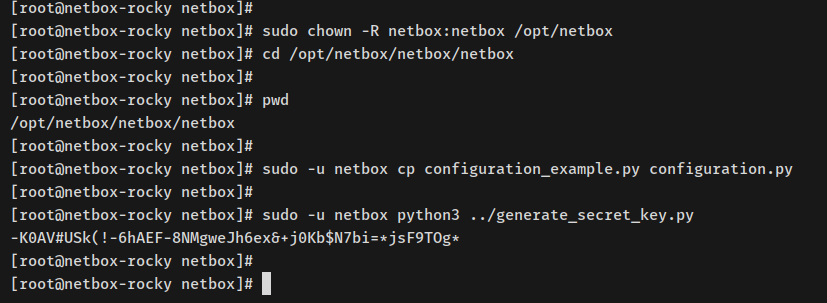
Change ownership to ‘netbox’ and navigate into working directory:
sudo chown -R netbox:netbox /opt/netbox
cd /opt/netbox/netbox/netbox
Copy configuration and generate SECRET_KEY:
sudo -u netbox cp configuration_example.py configuration.py
sudo -u netbox python3 ../generate_secret_key.py
Note down the generated SECRET_KEY.
Edit config file configuration.py:
sudo -u netbox nano configuration.py
Modify following settings:
    # domain and IP address
    ALLOWED_HOSTS = ['netbox.howtoforge.local', '192.168.5.59']

    # database configuration
    DATABASE = {
        'NAME': 'netboxdb',
        'USER': 'netbox',
        'PASSWORD': 'NetBoxRocks',
        'HOST': 'localhost',
        'PORT': '',
        'CONN_MAX_AGE': 300,
    }

    # Redis cache configuration
    REDIS = {
        'tasks': {
            'HOST': 'localhost',
            'PORT': 6379,
            'PASSWORD': 'RedisPasswordNetBox',
            'DATABASE': 0,
            'SSL': False,
        },
        'caching': {
            'HOST': 'localhost',
            'PORT': 6379,
            'PASSWORD': 'RedisPasswordNetBox',
            'DATABASE': 1,
            'SSL': False,
        },
    }

    # Secret key
    SECRET_KEY = '-K0AV#USk(!-6hAEF-8NMgweJh6ex&+j0Kb$N7bi=*jsF9TOg*'
Save and close file.
Run installation script:
sudo -u netbox /opt/netbox/upgrade.sh
This script sets up the Python environment, dependencies, and generates static files.
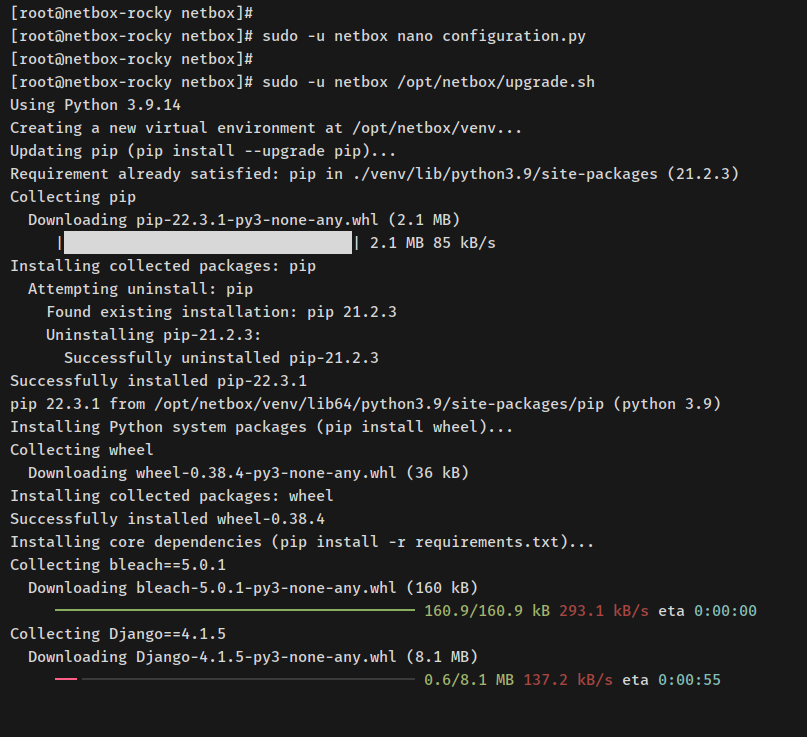
Completion message should be akin to below:
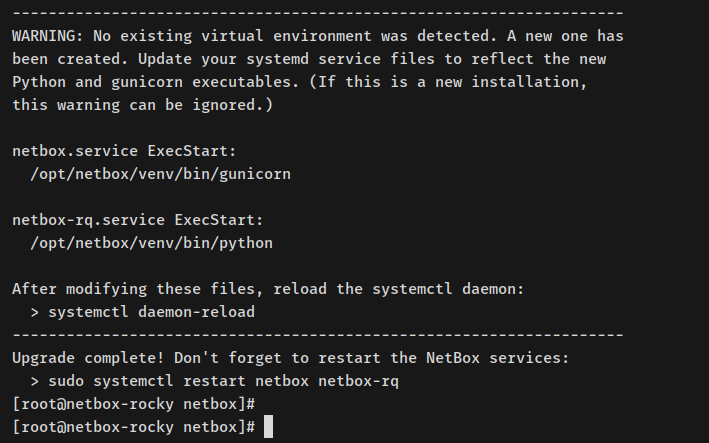
You have now installed the NetBox IRM. Next, configure it.
Configuring NetBox IRM
In this step, you will create an admin user, set up a cron job, and configure systemd services for NetBox.
Activate Python virtual environment:
source /opt/netbox/venv/bin/activate
Prompt changes to ‘(venv) root@hostname…‘.
Create an admin user:
cd /opt/netbox/netbox
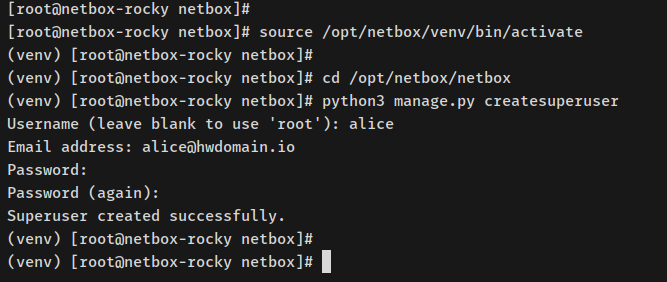
python3 manage.py createsuperuser
Enter admin user details and confirm creation:
Set up daily cron for housekeeping:
sudo ln -s /opt/netbox/contrib/netbox-housekeeping.sh /etc/cron.daily/netbox-housekeeping
Configure Gunicorn for NetBox:
sudo -u netbox cp /opt/netbox/contrib/gunicorn.py /opt/netbox/gunicorn.py
sudo -u netbox nano /opt/netbox/gunicorn.py
Amend bind parameter:
bind = '127.0.0.1:8001'
Save and exit editor.

Set up NetBox services in systemd:
sudo cp -v /opt/netbox/contrib/*.service /etc/systemd/system/
Apply changes:
sudo systemctl daemon-reload
Start and enable NetBox services:
sudo systemctl start netbox netbox-rq
sudo systemctl enable netbox netbox-rq

Check services status:
sudo systemctl status netbox
sudo systemctl status netbox-rq


With NetBox IRM successfully running as a systemd service, proceed to set up httpd as a reverse proxy.
Setting up httpd as a Reverse Proxy
Now, set up httpd as a reverse proxy for NetBox. Install httpd package, create and configure a virtual host, then enable and start httpd service. Also, allow HTTP and HTTPS in firewalld.
Install httpd:
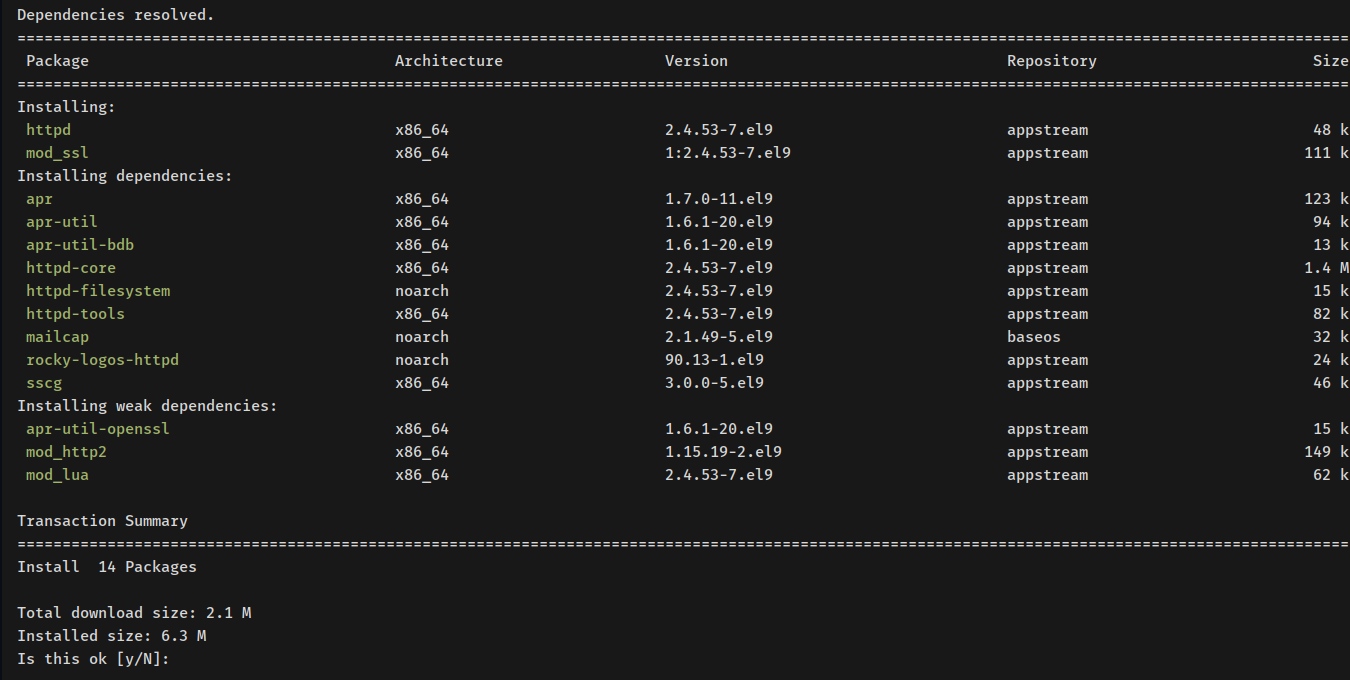
sudo dnf install httpd
Confirm with ‘y’ and press ENTER.
Create virtual host ‘/etc/httpd/conf.d/netbox.conf’:
sudo nano /etc/httpd/conf.d/netbox.conf
Configure as follows, replacing domain name:
<VirtualHost *:80>
    ProxyPreserveHost On
# CHANGE THIS TO YOUR SERVER'S NAME
ServerName netbox.howtoforge.local

Alias /static /opt/netbox/netbox/static

<Directory /opt/netbox/netbox/static>
Options Indexes FollowSymLinks MultiViews
AllowOverride None
Require all granted
</Directory>

<Location /static>
ProxyPass !
</Location>

RequestHeader set "X-Forwarded-Proto" expr=%{REQUEST_SCHEME}
ProxyPass / http://127.0.0.1:8001/
ProxyPassReverse / http://127.0.0.1:8001/
</VirtualHost>
Save and close file.
Verify httpd configuration:
sudo apachectl configtest
Output should be ‘Syntax OK‘.
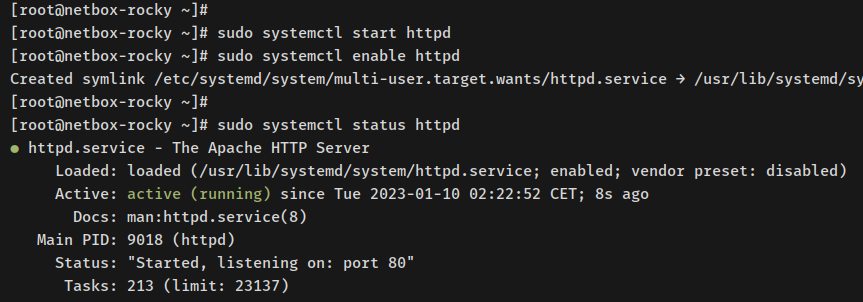
Start and enable httpd:
sudo systemctl start httpd
sudo systemctl enable httpd
Check httpd status:
sudo systemctl status httpd
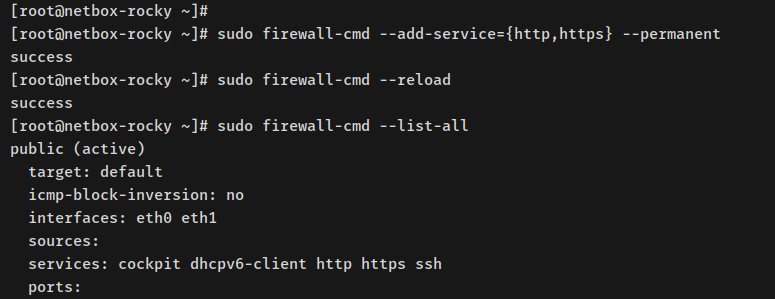
Open HTTP and HTTPS ports:
sudo firewall-cmd --add-servic={http,https} --permanent
sudo firewall-cmd --reload
Confirm changes:
sudo firewall-cmd --list-all
Output should confirm open ports.
Now you can access the NetBox web application, albeit currently via HTTP.
Securing NetBox IRM with SSL Letsencrypt
Secure the NetBox installation with SSL/TLS certificates via Certbot and Letsencrypt. Ensure proper domain pointing and an email for registration.
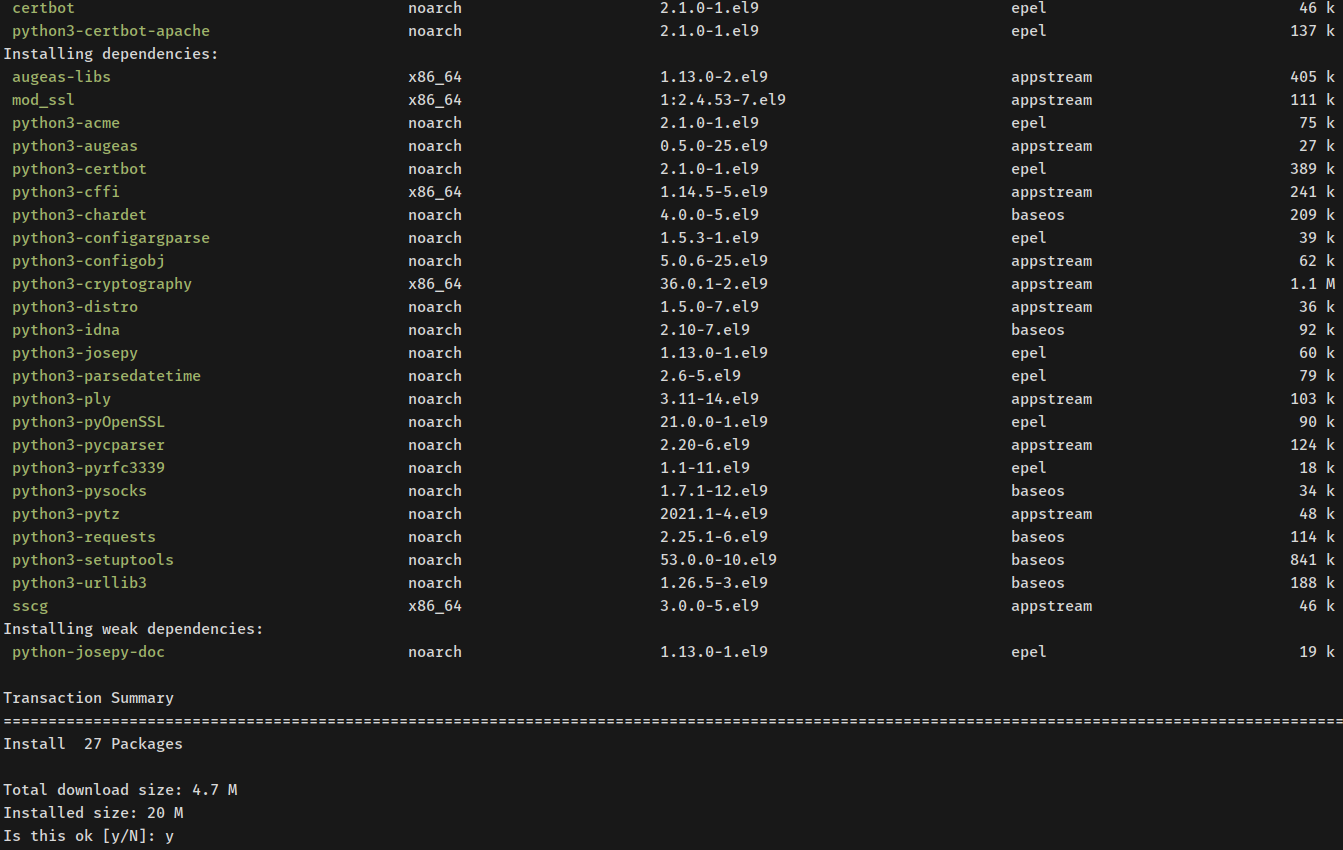
Install Certbot and plugin:
sudo dnf install certbot python3-certbot-apache
Proceed with ‘y’ and ENTER.
Generate SSL certificates:
sudo certbot --apache2 --agree-tos --redirect --hsts --staple-ocsp --email alice@howtoforge.local -d netbox.howtoforge.local
Certificates are saved at ‘/etc/elstencrypt/live/netbox.howtoforge.local/‘.
Logging in to NetBox
Open your browser and navigate to: https://netbox.howtoforge.local/
The default homepage should appear:
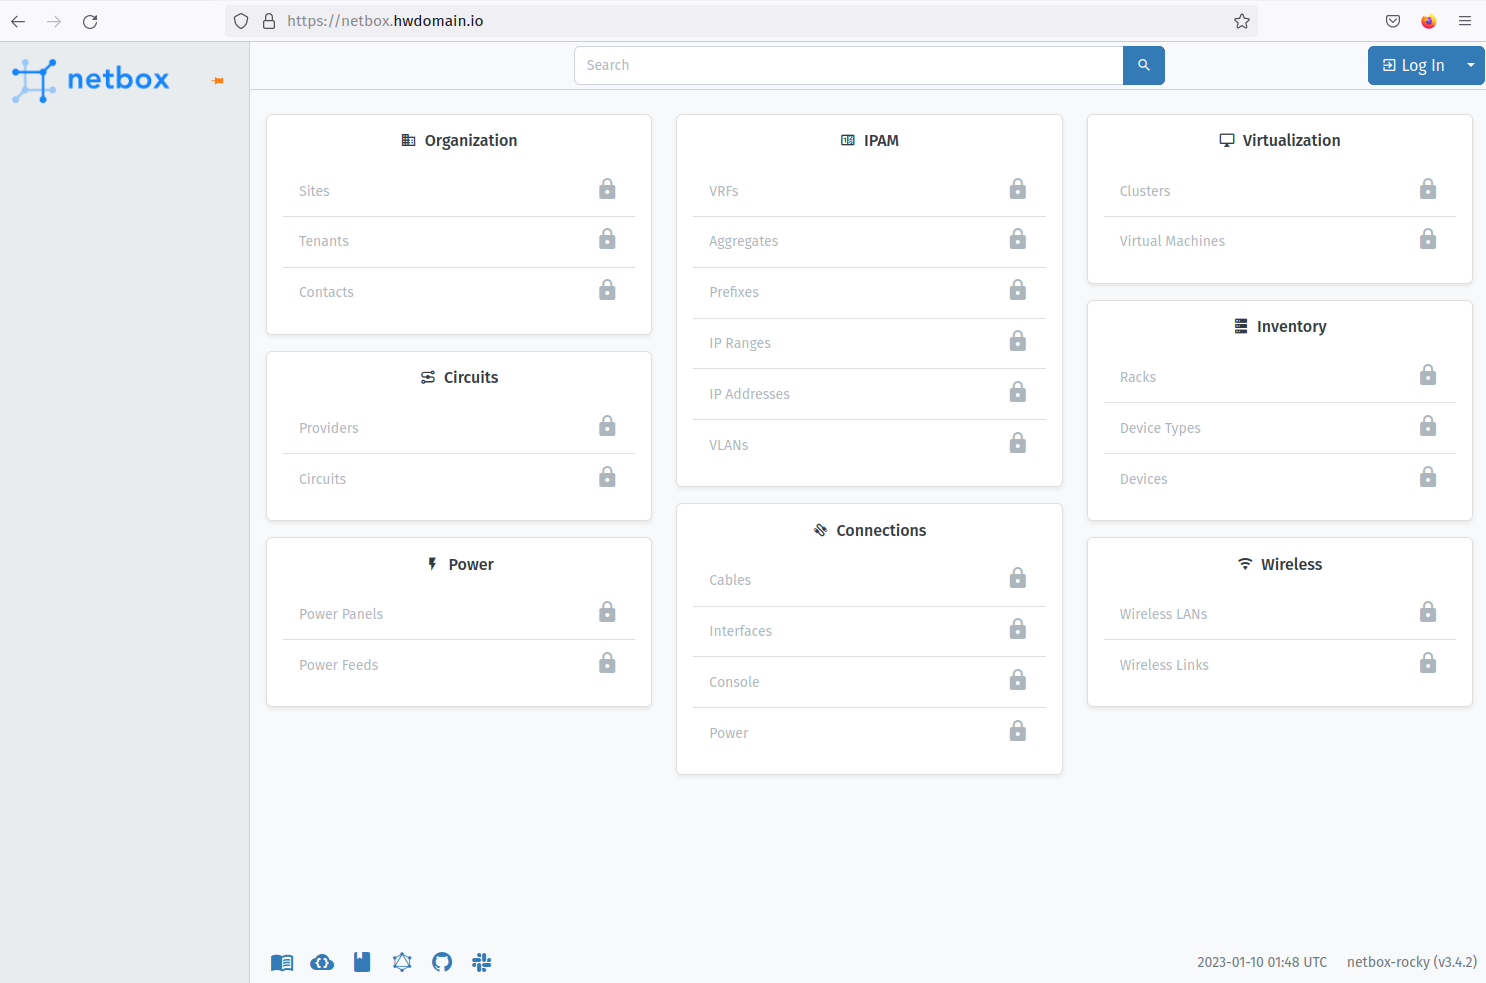
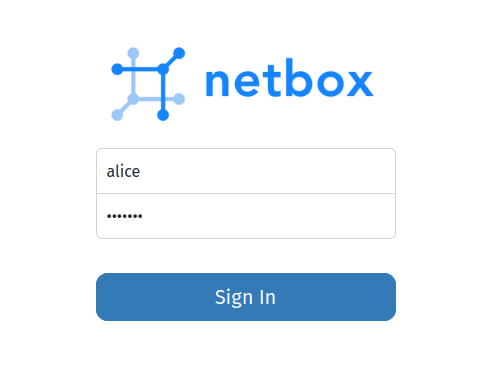
Click ‘Login‘, and enter the admin credentials:
Upon successful login, you will be redirected to the NetBox dashboard:
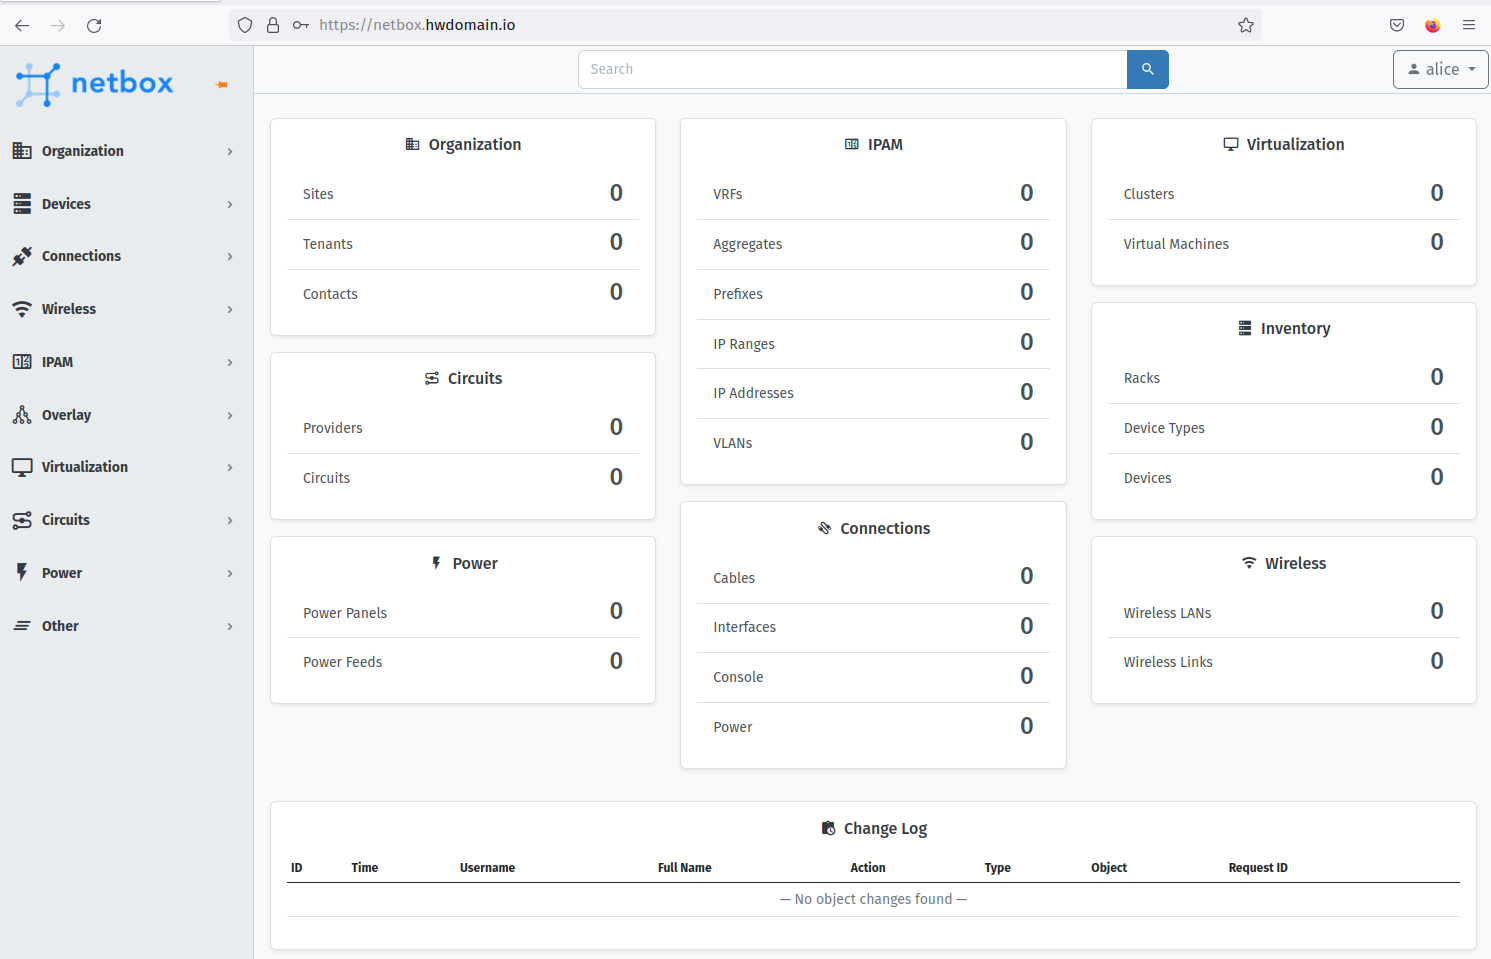
NetBox IRM installation is now complete, featuring PostgreSQL, Redis, Gunicorn, and the httpd web server.
Conclusion
In this comprehensive guide, you successfully installed NetBox IRM on a Rocky Linux 9 server. Key steps included configuring PostgreSQL for the database, Redis for cache management, and setting up httpd as a reverse proxy. You also secured your setup using SSL/TLS certificates via Certbot and Letsencrypt.
With NetBox fully operational, explore further by integrating it into data centers, utilizing its REST API for automation, or enabling third-party authentication systems such as LDAP, Azure AD, and Okta for Single Sign-On (SSO).
Frequently Asked Questions
- What is the default database used by NetBox?
- NetBox uses PostgreSQL as its default database system.
- Can I use other web servers aside from Apache for NetBox?
- Yes, you can use other web servers like Nginx, but this guide specifically uses Apache/httpd.
- What versions of Python are compatible with NetBox on Rocky Linux 9?
- NetBox is compatible with Python versions 3.8, 3.9, 3.10, and 3.11. Rocky Linux 9 uses Python 3.9 by default.
- Why do we need to use Certbot and Letsencrypt?
- Certbot and Letsencrypt are used to secure your NetBox deployment with SSL/TLS certificates, ensuring encrypted connections.
- Is it mandatory to use SELinux in permissive mode?
- For this guide, SELinux is recommended to be set in permissive mode to avoid permission-related issues during the setup. You can configure it to be more restrictive after ensuring proper operation.
