NFS, or Network File System, is a network protocol essential for mounting remote file systems over a network. It operates with a client-server architecture, where the NFS server shares directories or partitions, and clients access them over the network using the rpcbind protocol.
NFS Protocol Overview
- NFSv2 and NFSv3: Remain supported across major operating systems. For security reasons, restrict access to the trusted local network. These versions are suitable for small and medium-sized deployments.
- NFSv4: Offers enhanced security features like authentication and encryption, which require Kerberos. Additional configuration is necessary to leverage these security features.
This guide provides a step-by-step approach to installing and configuring an NFS server and client on Debian 12, focusing on NFSv4 and pseudo file systems, and setting up automatic mounting via /etc/fstab.
Prerequisites
- Two Debian 12 servers: “bookworm” as the NFS server (IP: 192.168.10.15) and “client1” as the NFS client (IP: 192.168.10.20).
- A non-root user with sudo privileges.
Installing NFS Server
Begin by updating the Debian repository to get the latest package information.
sudo apt update
Install the NFS server package nfs-kernel-server.
sudo apt install nfs-kernel-server nfs-common
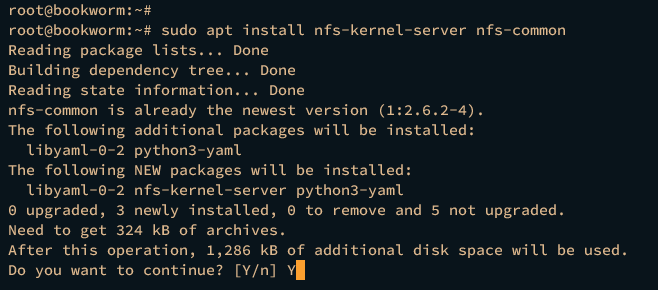
Verify the service is enabled and running.
sudo systemctl is-enabled nfs-server
sudo systemctl status nfs-server

Use these commands for service management:
sudo systemctl start nfs-server
sudo systemctl restart nfs-server
sudo systemctl stop nfs-server
Configuring NFSv4
Modify the configuration files for NFSv4. Edit /etc/default/nfs-common and set:
NEED_STATD="no"
NEED_IDMAPD="yes"
Edit /etc/default/nfs-kernel-server to disable NFSv2 and NFSv3.
RPCNFSDOPTS="-N 2 -N 3"
RPCMOUNTDOPTS="--manage-gids -N 2 -N 3"
Restart the NFS server to apply changes.
sudo systemctl restart nfs-server
Configuring Firewall via UFW
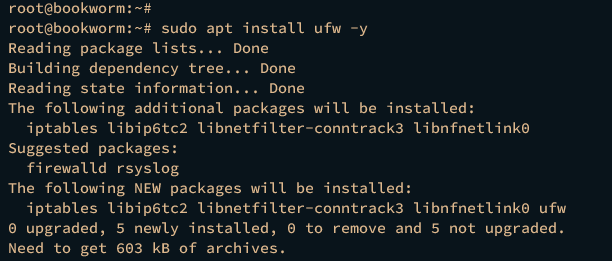
Secure the NFS server by configuring UFW.
sudo apt install ufw -y
Enable UFW to allow SSH service.
sudo ufw allow ssh
sudo ufw enable

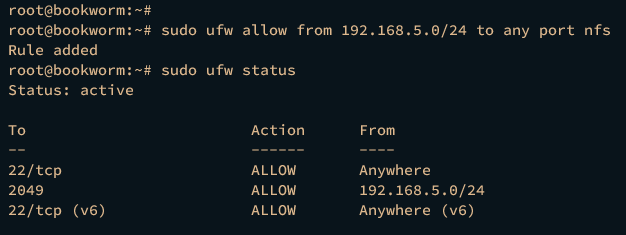
Allow access from your local network subnet.
sudo ufw allow from 192.168.10.0/24 to any port nfs
Reload and verify UFW status.
sudo ufw reload
sudo ufw status
Setting Up Pseudo Filesystem and Exports
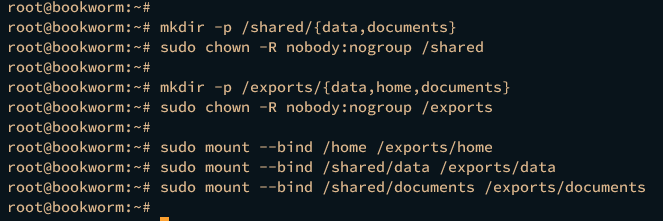
Create directories for your pseudo filesystem and change their ownership.
mkdir -p /shared/{data,documents}
sudo chown -R nobody:nogroup /shared
mkdir -p /exports/{data,home,documents}
sudo chown -R nobody:nogroup /exports
Mount directories as pseudo filesystems.
sudo mount --bind /home /exports/home
sudo mount --bind /shared/data /exports/data
sudo mount --bind /shared/documents /exports/documents
Verify mounted filesystems.
sudo df -ah

Edit /etc/fstab to make mounts permanent.
/home /exports/home none bind
/shared/data /exports/data none bind
/shared/documents /exports/documents none bind
Add exported directory to NFS server.
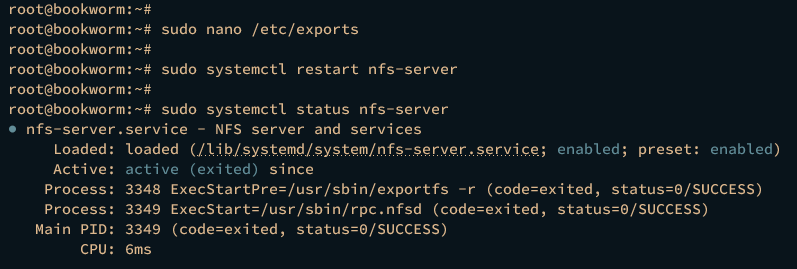
sudo nano /etc/exports
/exports 192.168.10.0/255.255.255.0(rw,no_root_squash,no_subtree_check,crossmnt,fsid=0)
Restart the NFS server and verify.
sudo systemctl restart nfs-server
sudo systemctl status nfs-server
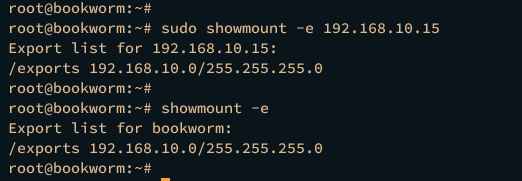
Check the exported directory.
sudo showmount -e 192.168.10.15
sudo showmount -e
Setting Up NFS Client
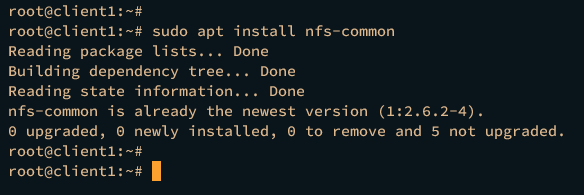
Install necessary packages on the client machine.
sudo apt update
sudo apt install nfs-common
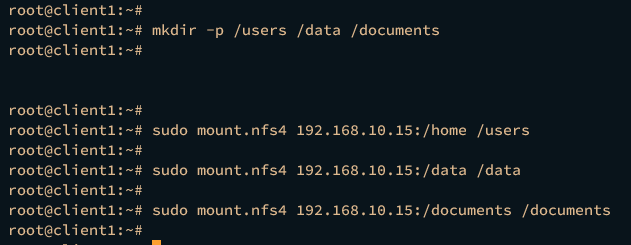
Create target mount directories and mount the NFS exports.
mkdir -p /users /data /documents
sudo mount.nfs4 192.168.10.15:/home /users
sudo mount.nfs4 192.168.10.15:/data /data
sudo mount.nfs4 192.168.10.15:/documents /documents
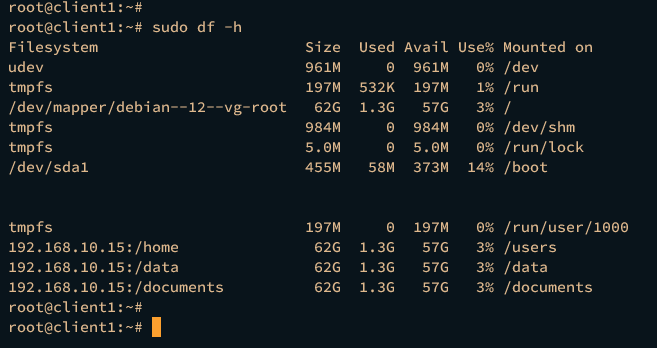
Verify mounted filesystems.
sudo df -h
Mount NFS Server via /etc/fstab
Unmount current mounts and edit /etc/fstab for persistent mounting.
sudo umount /users /data /documents
sudo nano /etc/fstab
192.168.10.15:/home /users nfs4 soft,intr,rsize=8192,wsize=8192
192.168.10.15:/data /data nfs4 soft,intr,rsize=8192,wsize=8192
192.168.10.15:/documents /documents nfs4 soft,intr,rsize=8192,wsize=8192
Reload systemd manager and mount filesystems.
sudo systemctl daemon-reload
sudo mount -a
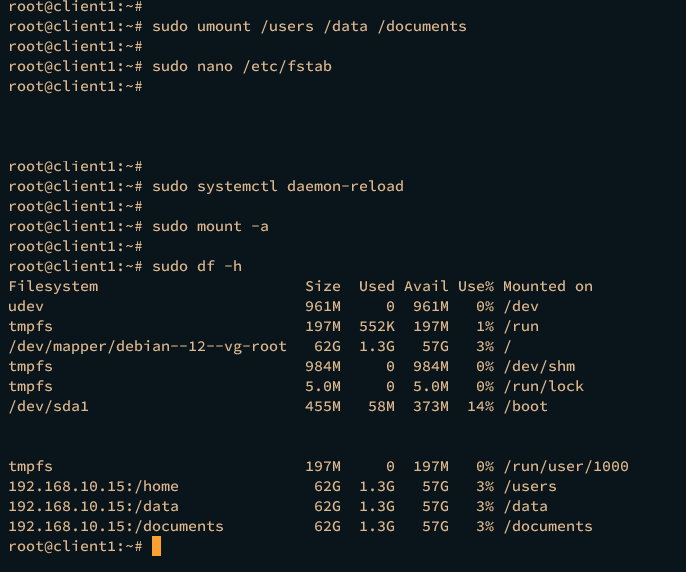
Verify mounted filesystems again.
sudo df -h
Conclusion
You’ve successfully set up the NFS server and client on Debian 12, including configuration of NFSv4, creation of a pseudo filesystem, and secure management via UFW. The client has been configured for automatic mounting using /etc/fstab.
FAQ
- What is the primary advantage of using NFSv4?
- NFSv4 offers enhanced security and performance features, making it more suitable for larger environments requiring authentication and encryption.
- Can I simultaneously run NFSv2, NFSv3, and NFSv4 on the same server?
- While it is technically possible, it’s advised to configure a server to use NFSv4 exclusively to maximize security and minimize protocol conflicts.
- How can I verify which directories are shared by the NFS server?
- Use the
showmount -ecommand on the NFS server to list currently exported directories. - Why should I use a pseudo filesystem?
- A pseudo filesystem simplifies sharing multiple directories as one filesystem, making management easier and more streamlined.
- How can I make the NFS mounts persistent across reboots on the client machine?
- Edit the
/etc/fstabfile on the client to include your mount configurations, ensuring mounts are restored after a reboot.
