The LEMP stack is a widely-used combination of software that enables servers to host dynamic websites and web applications. The acronym “LEMP” represents four main components essential for this setup:
- Linux: The operating system. Linux is an open-source platform that forms the foundation of the server.
- Engine-X (pronounced “Nginx”): A high-performance web server known for its stability, rich features, simple configuration, and low resource consumption.
- MySQL or MariaDB: The database management system, typically used to store and manage data for websites and applications. While MySQL is popular, MariaDB serves as a fully open-source alternative.
- PHP: A server-side scripting language designed primarily for web development but also used as a general-purpose programming language.
LEMP is often preferred for hosting database-driven and server-side processed websites, akin to the LAMP stack, except that it substitutes Apache with Nginx.
This guide provides step-by-step instructions for installing a LEMP stack on an Ubuntu 20.04-based server. We will also cover the installation of phpMyAdmin, Redis, Opcache, and Let’s Encrypt SSL.
Prerequisites
-
- A server running Ubuntu 20.04.
- A non-root user with sudo privileges.
- Ensure your system is up to date:
$ sudo apt update
$ sudo apt upgrade
-
- Install necessary packages:
$ sudo apt install wget curl nano -y
Note: Some packages might already be pre-installed.
Configure Firewall
The initial step involves configuring the firewall using Ubuntu’s default ufw (Uncomplicated Firewall).
To check its status:
$ sudo ufw status
If it shows:
Status: inactive
Enable SSH port, allowing firewall adjustments without losing connectivity:
$ sudo ufw allow OpenSSH
Also, enable HTTP and HTTPS ports:
$ sudo ufw allow 80
$ sudo ufw allow 443
Activate the firewall:
$ sudo ufw enable
Command may disrupt existing ssh connections. Proceed with operation (y|n)? y
Firewall is active and enabled on system startup
Recheck the firewall status:
$ sudo ufw status
Expect this output:
Status: active

To                         Action      From
--                         ------      ----
OpenSSH                    ALLOW       Anywhere
80                         ALLOW       Anywhere
443                        ALLOW       Anywhere
OpenSSH (v6)               ALLOW       Anywhere (v6)
80 (v6)                    ALLOW       Anywhere (v6)
443 (v6)                   ALLOW       Anywhere (v6)
Install PHP
To install the updated PHP repository, add Ondrej’s PHP repository:
$ sudo add-apt-repository ppa:ondrej/php
Install PHP 7.4 with additional packages:
$ sudo apt install php-cli php-fpm php-mysql -y
Verify PHP installation:
$ php --version
This should display something like:
PHP 7.4.5 (cli) (built: Apr 28 2020 14:49:23) ( NTS )
Copyright (c) The PHP Group
Zend Engine v3.4.0, Copyright (c) Zend Technologies
    with Zend OPcache v7.4.5, Copyright (c), by Zend Technologies
Install MariaDB
MariaDB, a MySQL alternative, is compatible with MySQL commands. Install the latest stable version by adding the official MariaDB repository:
$ sudo apt-key adv --fetch-keys 'https://mariadb.org/mariadb_release_signing_key.asc'
$ sudo add-apt-repository 'deb [arch=amd64] http://mirror.lstn.net/mariadb/repo/10.4/ubuntu focal main'
Install MariaDB:
$ sudo apt install mariadb-server -y
Confirm installation:
$ mysql --version
You should see:
mysql Ver 15.1 Distrib 10.4.13-MariaDB, for debian-linux-gnu (x86_64) using readline 5.2
Enable MariaDB service:
$ sudo systemctl enable mariadb
Secure the installation with the following command:
$ sudo mysql_secure_installation
During the setup, choose the unix_socket plugin for a secure configuration.
Install Redis
Install Redis and its PHP extension:
$ sudo apt install redis php-redis
Configure Redis Server
Open the Redis configuration file:
$ sudo nano /etc/redis/redis.conf
Modify the supervised directive to:
supervised systemd
For remote client connections, change:
bind 0.0.0.0
Optionally, change the port from 6379:
port 3458
Configure it as a cache server:
maxmemory 256mb
maxmemory-policy allkeys-lru
Set a password:
requirepass
Save and restart Redis:
$ sudo systemctl restart redis
Update the firewall if remote access is necessary:
$ sudo ufw allow 6379/tcp
Install Nginx
Switch to Nginx’s stable repository for the latest version:
$ sudo apt install curl gnupg2 ca-certificates lsb-release
$ echo "deb [arch=amd64] http://nginx.org/packages/ubuntu `lsb_release -cs` nginx" | sudo tee /etc/apt/sources.list.d/nginx.list
$ curl -fsSL https://nginx.org/keys/nginx_signing.key | sudo apt-key add -
Install Nginx:
$ sudo apt update
$ sudo apt install nginx -y
Verify installation:
$ nginx -v
This should show:
nginx version: nginx/1.18.0
Start and enable Nginx:
$ sudo systemctl start nginx
$ sudo systemctl enable nginx
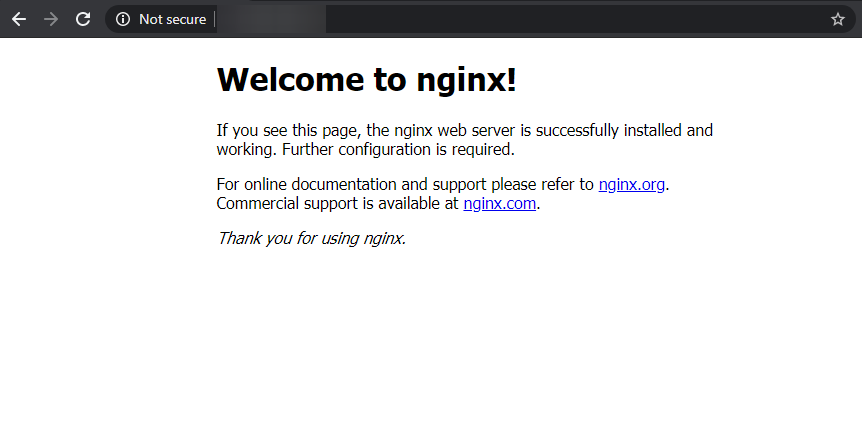
Access your server’s IP in a browser, and you should see the default Nginx page:

Configure Nginx
Create directories for server blocks:
$ sudo mkdir /etc/nginx/sites-available
$ sudo mkdir /etc/nginx/sites-enabled
Set up the directory for your site:
$ sudo mkdir /var/www/example.com/html -p
Create a configuration file for your site:
$ sudo nano /etc/nginx/sites-available/example.com.conf
Insert the following content:
server {
  listen          *:80;
  server_name     example.com;
  root            /var/www/example.com/html;
  index           index.php index.html;

  location / {
    try_files   $uri $uri/ =404;
  }

  access_log /var/log/nginx/example.com.access.log;
  error_log /var/log/nginx/example.com.error.log;

  location ~ \.php$ {
    try_files $uri =404;
    fastcgi_pass  unix:/run/php/php7.4-fpm.sock;
    fastcgi_param SCRIPT_FILENAME $document_root$fastcgi_script_name;
    fastcgi_index index.php;
    include  fastcgi_params;
  }
}
Close and save the configuration file. Enable it by linking it to the sites-enabled directory:
$ sudo ln -s /etc/nginx/sites-available/example.com.conf /etc/nginx/sites-enabled/
Edit the Nginx configuration file:
$ sudo nano /etc/nginx/nginx.conf
Add these lines:
include /etc/nginx/sites-enabled/*.conf;
server_names_hash_bucket_size 64;
types_hash_max_size 4096;
Save changes and test the configuration:
$ sudo nginx -t
You should see:
nginx: the configuration file /etc/nginx/nginx.conf syntax is ok
nginx: configuration file /etc/nginx/nginx.conf test is successful
Reload Nginx:
$ sudo systemctl reload nginx
Configure PHP-FPM
Edit the PHP-FPM configuration:
$ sudo nano /etc/php/7.4/fpm/pool.d/www.conf
Adjust the user and group lines from www-data to nginx:
user = nginx
group = nginx
Also update listen.owner and listen.group to nginx:
listen.owner = nginx
listen.group = nginx
Save and restart PHP-FPM:
$ sudo systemctl restart php7.4-fpm
Test PHP setup by creating a test.php file:
$ sudo nano /var/www/example.com/html/test.php
Insert and save this content:
<?php phpinfo();
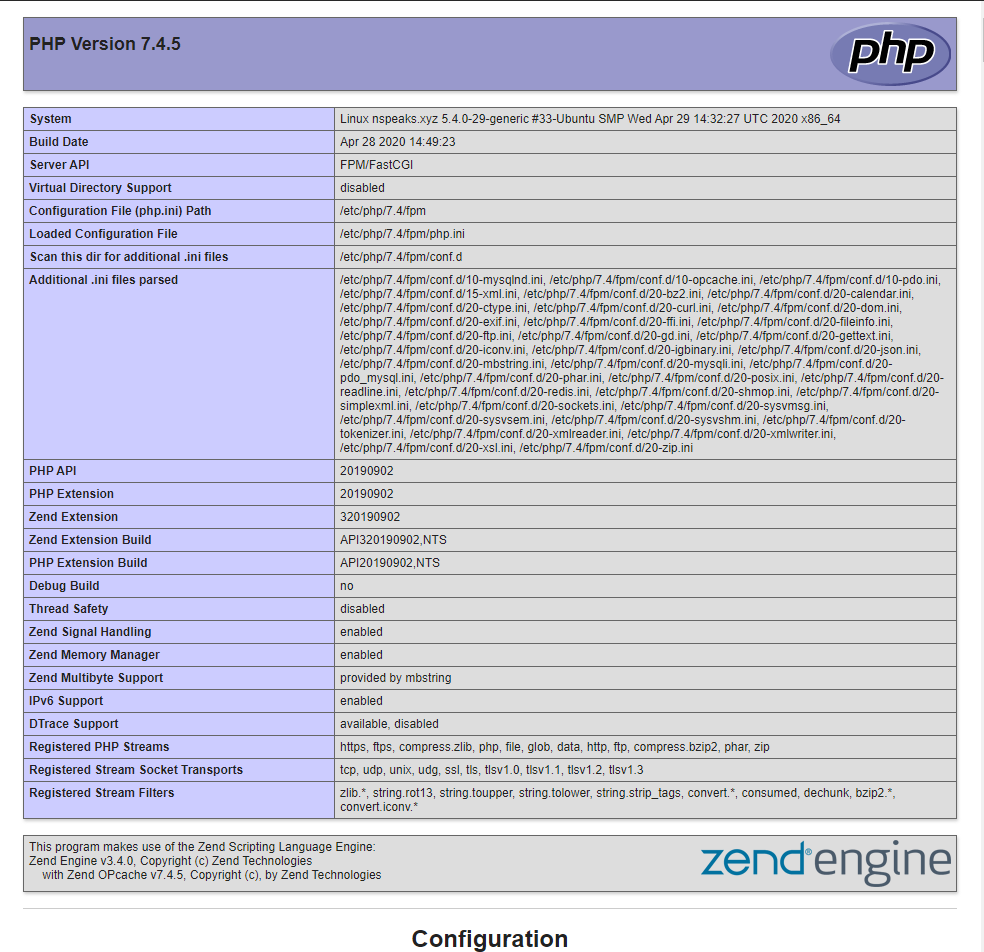
Open http://<yourserverip>/test.php in your browser:

Install phpMyAdmin
Install required PHP packages:
$ sudo apt install php-mbstring php-zip php-gd php-json php-curl php-bz2 php-xml
Download phpMyAdmin files into the /usr/share directory:
$ cd /usr/share
$ sudo wget https://files.phpmyadmin.net/phpMyAdmin/5.0.2/phpMyAdmin-5.0.2-english.tar.gz
$ tar xvzf phpMyAdmin-5.0.2-english.tar.gz
$ sudo mv phpMyAdmin-5.0.2-english /usr/share/phpmyadmin
$ sudo rm phpMyAdmin*.tar.gz
Set permissions for phpMyAdmin:
$ sudo chown -R nginx:nginx phpmyadmin
$ sudo chmod -R 744 phpmyadmin
Configure phpMyAdmin
Create a configuration file from the sample:
$ sudo cp /usr/share/phpmyadmin/config.sample.inc.php /usr/share/phpmyadmin/config.inc.php
Add a secret for cookies and security:
$ randomBlowfishSecret=$(openssl rand -base64 32)
$ sed -i "s|cfg\['blowfish_secret'\] = ''|cfg['blowfish_secret'] = '$randomBlowfishSecret'|" /usr/share/phpmyadmin/config.inc.php
Create a symbolic link in Nginx’s root directory:
$ sudo ln -s /usr/share/phpmyadmin /var/www/example.com/html/phpmyadmin
Access phpMyAdmin via http://example.com/phpmyadmin, changing its location enhances security:
$ sudo mv /var/www/example.com/html/phpmyadmin /var/www/example.com/html/sm123
Access via http://example.com/sm123. Create a MySQL user to use phpMyAdmin:
$ sudo mysql
Create a new user with privileges:
CREATE USER 'user'@'localhost' IDENTIFIED BY 'password';
GRANT ALL PRIVILEGES ON *.* TO 'user'@'localhost';
FLUSH PRIVILEGES;
EXIT
Log in using this new user.
Configure Opcache
If missing, install Opcache:
$ sudo apt install php7.4-opcache
Verify installation:
$ php -v
PHP 7.4.5 (cli) (built: Apr 28 2020 14:49:23) ( NTS )
Copyright (c) The PHP Group
Zend Engine v3.4.0, Copyright (c) Zend Technologies
    with Zend OPcache v7.4.5, Copyright (c), by Zend Technologies
Edit Opcache settings:
$ sudo nano /etc/php/7.4/fpm/conf.d/10-opcache.ini
Add the following settings:
opcache.enable_cli=1
opcache.memory_consumption=128
opcache.interned_strings_buffer=8
opcache.max_accelerated_files=4000
opcache.revalidate_freq=60
Apply changes by restarting your server:
$ sudo systemctl restart php7.4-fpm
Install SSL via Let’s Encrypt
SSL is crucial for website security. Install Certbot:
$ sudo apt install certbot python3-certbot-nginx
Generate SSL certificates:
$ sudo certbot --nginx -d example.com
If running for the first time, follow prompts to set up the certificate. Choose HTTPS configuration:
Please choose whether HTTPS access is required or optional.
-------------------------------------------------------------------------------
1: Easy - Allow both HTTP and HTTPS access to these sites
2: Secure - Make all requests redirect to secure HTTPS access
-------------------------------------------------------------------------------
Select the appropriate number [1-2] then [enter] (press 'c' to cancel):
Your site is now secure via https://example.com.
Verify SSL Auto-Renewal
Ensure certificates renew automatically:
$ sudo certbot renew --dry-run
Without errors, certbot will manage renewal and inform of expiration.
Conclusion
Congratulations! Your LEMP stack is successfully set up. You can now host dynamic websites and web applications smoothly.
FAQ
- What is the difference between LEMP and LAMP?
- LEMP replaces Apache (in LAMP) with Nginx, offering different configurations and performance benefits.
- Why use MariaDB instead of MySQL?
- MariaDB is a community-driven fork of MySQL, known for being fully open-source with improved features and performance.
- How can I access phpMyAdmin?
- Access phpMyAdmin by navigating to
http://example.com/phpmyadminor the hidden directory specified during setup. - What does OPCache do?
- OPCache caches precompiled script content, improving PHP performance by reducing server load.
- How often does Certbot renew SSL certificates?
- Certbot attempts renewal 30 days before certificate expiration, to ensure uninterrupted SSL coverage.
