Node.js is a versatile, cross-platform JavaScript runtime optimized for server-side programming. Built on Chrome’s high-performance V8 JavaScript engine, Node.js facilitates JavaScript execution in a server environment, easing the development of scalable backend applications. Its popularity among both full-stack and front-end developers underscores its integral role in modern software development.
As it continues to rise in prominence, Node.js stands as a staple in constructing server-side and networking applications, establishing itself as an industry standard. Whether for backend operations, desktop software, web fronts, or mobile apps, Node.js serves multiple platforms with ease.
In this guide, you’ll explore two methods to install Node.js on Rocky Linux:
- Installation via the AppStream repository: Ideal for those requiring a stable Node.js version for ongoing production environments.
- Installation using NVM (Node Version Manager): Suited for developers needing to switch between Node.js versions frequently, NVM handles multiple Node.js installations seamlessly.
Prerequisites
- A Rocky Linux system with all packages and repositories updated to their latest versions.
- You should have root access or a user with sudo privileges to install packages and modify system settings.
Method 1 – Installing Node.js from the AppStream Repository
Rocky Linux includes a repository module for Node.js that offers three LTS (Long-Term Support) versions. This method suits applications needing a stable Node.js version for production. If your applications demand a specific version of Node.js, consider using the second method.
Setting up the Repository
1. Start by listing all available Node.js repository modules on your Rocky Linux system:
sudo dnf module list | grep nodejs

The default module for Node.js version 10 is selected with the ‘common’ profile.
2. To enable the latest stable LTS version (currently version 14), use:
sudo dnf module enable nodejs:14

Optional different profiles can be activated like so:
sudo dnf module enable nodejs:14/minimal
3. Verify the Node.js module with:
sudo dnf module list nodejs

Installing Node.js and npm on Rocky Linux
1. Install Node.js and npm:
sudo dnf install nodejs npm

As shown, Node.js 14.x from the AppStream repository is selected.
2. Verify the installation:
which node
which npm
node --version
npm --version

Method 2 – Installing Node.js with NVM (Node Version Manager)
NVM is an indispensable tool for Node.js version management, enabling multiple installations on one machine. This flexibility allows developers to easily switch Node.js versions tailored to different projects.
Installing NVM (Node Version Manager)
1. Install NVM with the following:
curl -o- https://raw.githubusercontent.com/nvm-sh/nvm/v0.38.0/install.sh | bash

2. Refresh your shell configuration:
source ~/.bashrc
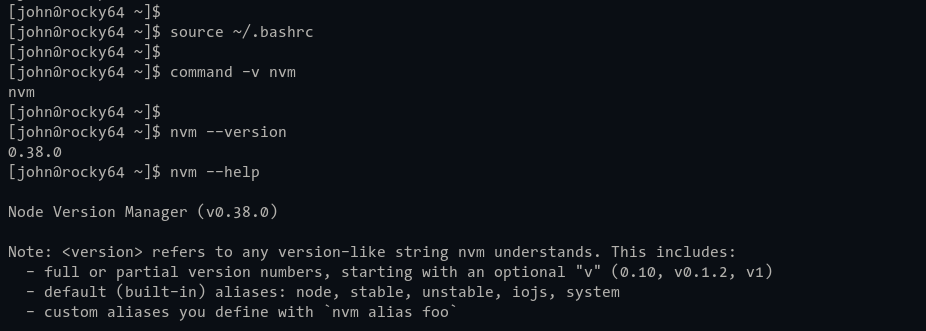
3. Confirm the NVM installation:
command -v nvm
Verify NVM details:
nvm --version
nvm --help

NVM Basic Usage: Check Available Node.js Versions
1. List all Node.js versions on the remote repository:
nvm ls-remote
2. For LTS versions only:
nvm ls-remote --lts
NVM Basic Usage: Installing Node.js with NVM
1. Install a specific Node.js version:
nvm install v16.8.0

Verify installation:
node --version
npm --version
2. For the LTS version:
nvm install --lts

3. Install using codename:
nvm install lts/dubnium

NVM Basic Usage: Managing Multiple Node.js Versions
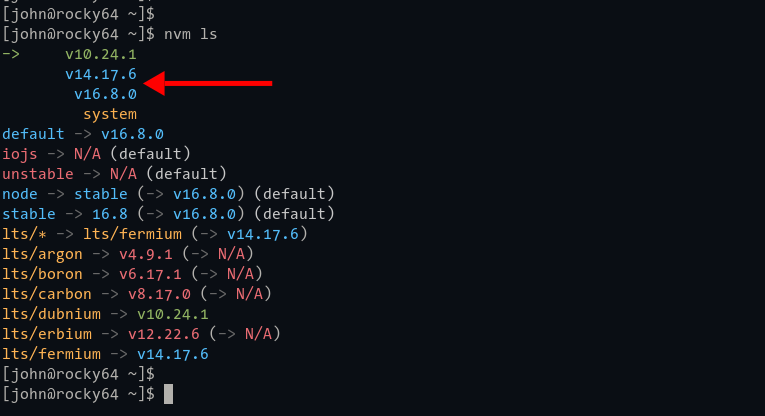
1. List installed Node.js versions:
nvm ls

2. Change the default Node.js version:
nvm use v16.8.0
Confirm the current version:
nvm current

Switch to an LTS version:
nvm use --lts
Verify the change:
nvm current

Conclusion
Congratulations! You have successfully installed Node.js on Rocky Linux. The AppStream repository method is applicable to other RHEL-based distributions like CentOS, while the NVM method is widely compatible across most Linux distributions due to its POSIX compliance. Choose the method that suits your system and development needs best.
FAQ
Do I need to remove Node.js if I switch between the methods?
No. You can have Node.js installed through both the AppStream repository and NVM simultaneously. NVM will manage versions independently of AppStream.
Can I use NVM on other Linux distributions?
Yes. NVM is POSIX-compliant and can be used on most Unix-like operating systems, not just Rocky Linux.
Which installation method should I choose?
If you require a stable Node.js environment for production, use the AppStream method. If you regularly need to switch Node.js versions for development tasks, opt for NVM.
