OpenEMR is a robust open-source electronic health record (EHR) and medical practice management solution. It is certified by the Office of the National Coordinator for Health Information Technology (ONC) and offers features like integrated health records, practice management, scheduling, electronic billing, multi-language support, and more. OpenEMR can track patient demographics, manage appointments, maintain detailed health records including lab reports, medications, and procedures, streamline medical billing, generate comprehensive reports, and support multiple languages.
This guide will walk you through the process of installing OpenEMR on a Debian 12 server.
Prerequisites
- A server running Debian 12.
- A non-root user with sudo privileges.
- A fully qualified domain name (FQDN) such as
openemr.example.com. - Update your system packages:
$ sudo apt update
$ sudo apt upgrade
- Install necessary packages:
$ sudo apt install wget curl nano ufw software-properties-common dirmngr apt-transport-https gnupg2 ca-certificates lsb-release debian-archive-keyring unzip -y
Note: Some packages may already be installed.
Step 1 – Configure Firewall
Start by configuring the firewall using ufw (Uncomplicated Firewall), which is available by default in Debian.
Check the firewall status:
$ sudo ufw status
Expected output if inactive:
Status: inactive
Allow SSH, HTTP, and HTTPS traffic:
$ sudo ufw allow OpenSSH
$ sudo ufw allow http
$ sudo ufw allow https
Enable the firewall:
$ sudo ufw enable
Command may disrupt existing SSH connections. Proceed with operation (y|n)? y
Firewall is active and enabled on system startup
Verify firewall status:
$ sudo ufw status
You should see a similar output:
Status: active
To                         Action      From
--                         ------      ----
OpenSSH                    ALLOW       Anywhere
80/tcp                     ALLOW       Anywhere
443                        ALLOW       Anywhere
OpenSSH (v6)               ALLOW       Anywhere (v6)
80/tcp (v6)                ALLOW       Anywhere (v6)
443 (v6)                   ALLOW       Anywhere (v6)
Step 2 – Install Nginx
Debian 12 includes an older version of Nginx. To install the latest version, first add the official Nginx repository.
Import Nginx’s signing key:
$ curl https://nginx.org/keys/nginx_signing.key | gpg --dearmor \
    | sudo tee /usr/share/keyrings/nginx-archive-keyring.gpg >/dev/null
Add the Nginx stable repository:
$ echo "deb [signed-by=/usr/share/keyrings/nginx-archive-keyring.gpg] \
http://nginx.org/packages/debian `lsb_release -cs` nginx" \
    | sudo tee /etc/apt/sources.list.d/nginx.list
Update system repositories:
$ sudo apt update
Install Nginx:
$ sudo apt install nginx
Verify the installation:
$ sudo nginx -v
nginx version: nginx/1.24.0
Start the Nginx service:
$ sudo systemctl start nginx
Check the service status:
? nginx.service - nginx - high performance web server
     Loaded: loaded (/lib/systemd/system/nginx.service; enabled; preset: enabled)
     Active: active (running) since ...
Step 3 – Install MariaDB
MariaDB is a robust alternative to MySQL that ships with Debian 12. To install it, run:
$ sudo apt install mariadb-server
Check the MySQL version:
$ mysql --version
mysql  Ver 15.1 Distrib 10.11.3-MariaDB, for debian-linux-gnu ...
Secure the MariaDB installation:
$ sudo mysql_secure_installation
Follow the prompts to set root password and secure MariaDB as shown:
Enter current password for root (enter for none):
Choose n for Unix socket authentication. Set other security options as prompted.
Step 4 – Configure MariaDB
Log in to MariaDB shell:
$ sudo mysql
Create the OpenEMR database and user:
CREATE DATABASE openemr;
CREATE USER 'openemruser'@'localhost' IDENTIFIED BY 'Your_password2!';
GRANT ALL PRIVILEGES ON openemr.* TO 'openemruser'@'localhost';
FLUSH PRIVILEGES;
exit
Step 5 – Install PHP and its Extensions
Install PHP 8.2 and required extensions:
$ sudo apt install php-fpm php-mysql php-bcmath php-xml php-zip php-curl php-mbstring php-gd php-tidy php-intl php-cli php-soap imagemagick libtiff-tools php-ldap
Optionally, add Ondřej Surý’s PHP repository for additional PHP versions:
$ sudo curl -sSLo /usr/share/keyrings/deb.sury.org-php.gpg https://packages.sury.org/php/apt.gpg
$ sudo sh -c 'echo "deb [signed-by=/usr/share/keyrings/deb.sury.org-php.gpg] https://packages.sury.org/php/ $(lsb_release -sc) main" > /etc/apt/sources.list.d/php.list'
$ sudo apt update
$ sudo apt install php8.2-fpm php8.2-mysql php8.2-bcmath ...
Verify PHP installation:
$ php --version
PHP 8.2.8 (cli) ...
Step 6 – Install SSL
Use Snap to install Certbot for SSL:
$ sudo apt install snapd
$ sudo snap install core && sudo snap refresh core
$ sudo snap install --classic certbot
$ sudo ln -s /snap/bin/certbot /usr/bin/certbot
Verify Certbot:
$ certbot --version
certbot 2.6.0
Generate SSL certificate:
$ sudo certbot certonly --nginx --agree-tos --no-eff-email ...
Create a Diffie-Hellman group certificate:
$ sudo openssl dhparam -dsaparam -out /etc/ssl/certs/dhparam.pem 4096
Test automatic renewal:
$ sudo certbot renew --dry-run
Step 7 – Download OpenEMR
Download and extract OpenEMR:
$ wget https://sourceforge.net/projects/openemr/files/OpenEMR%20Current/7.0.1/openemr-7.0.1.tar.gz
$ tar -pxzf openemr-7.0.1.tar.gz
$ sudo mkdir /var/www/html -p
$ sudo mv openemr-7.0.1 /var/www/html/openemr
$ sudo chown -R nginx:nginx /var/www/html/openemr
Step 8 – Install phpMyAdmin
Download phpMyAdmin:
$ wget https://files.phpmyadmin.net/phpMyAdmin/5.2.1/phpMyAdmin-5.2.1-english.tar.gz
$ sudo tar -xzf phpMyAdmin-5.2.1-english.tar.gz -C /var/www/html/openemr
$ cd /var/www/html/openemr
$ sudo mv phpMyAdmin-5.2.1-english sm175
Step 9 – Configure phpMyAdmin
Setup phpMyAdmin:
$ sudo cp sm175/config.sample.inc.php sm175/config.inc.php
$ sudo nano sm175/config.inc.php
Enter a blowfish secret for cookie authentication:
$cfg['blowfish_secret'] = 'Tc/HfLPBOAPxJ-rhQP}HJoZEK69c3j:m';
Make necessary permissions:
$ sudo chown -R nginx:nginx /var/www/html/openemr/sm175
$ sudo rm -rf /var/www/html/openemr/sm175/setup
Step 10 – Configure PHP-FPM
Configure PHP-FPM:
$ sudo nano /etc/php/8.2/fpm/pool.d/www.conf
Change user and group:
user = nginx
group = nginx
Adjust PHP settings:
$ sudo sed -i 's/max_execution_time = 30/max_execution_time = 60/' /etc/php/8.2/fpm/php.ini
$ sudo sed -i 's/max_input_time = 60/max_input_time = -1/' /etc/php/8.2/fpm/php.ini
$ sudo sed -i 's/memory_limit = 128M/memory_limit = 512M/' /etc/php/8.2/fpm/php.ini
$ sudo sed -i 's/post_max_size = 8M/post_max_size = 30M/' /etc/php/8.2/fpm/php.ini
$ sudo sed -i 's/upload_max_filesize = 2M/upload_max_filesize = 30M/' /etc/php/8.2/fpm/php.ini
$ sudo sed -i 's/;max_input_vars = 1000/max_input_vars = 3000/g' /etc/php/8.2/fpm/php.ini
$ sudo sed -i 's/;mysqli.allow_local_infile = On/mysqli.allow_local_infile = On/g' /etc/php/8.2/fpm/php.ini
$ sudo systemctl restart php8.2-fpm
$ sudo chgrp -R nginx /var/lib/php/sessions
Step 11 – Configure Nginx
Create and edit Nginx configuration:
$ sudo nano /etc/nginx/conf.d/openemr.conf
Paste the following configuration:
server {
    listen       443 ssl http2;
    listen       [::]:443 ssl http2;
    server_name  openemr.example.com;

    access_log  /var/log/nginx/openemr.access.log;
    error_log   /var/log/nginx/openemr.error.log;
    ...
    ssl_dhparam /etc/ssl/certs/dhparam.pem;
    resolver 1.1.1.1 1.0.0.1 ...

    root /var/www/html/openemr;
    index index.php;
    ...
    return 404;
    }

    server {
        listen       80;
        listen       [::]:80;
        server_name  openemr.example.com;
        return 301   https://$host$request_uri;
    }
Edit /etc/nginx/nginx.conf to include:
server_names_hash_bucket_size 64;
Verify and restart Nginx:
$ sudo nginx -t
$ sudo systemctl restart nginx
Step 12 – Install OpenEMR
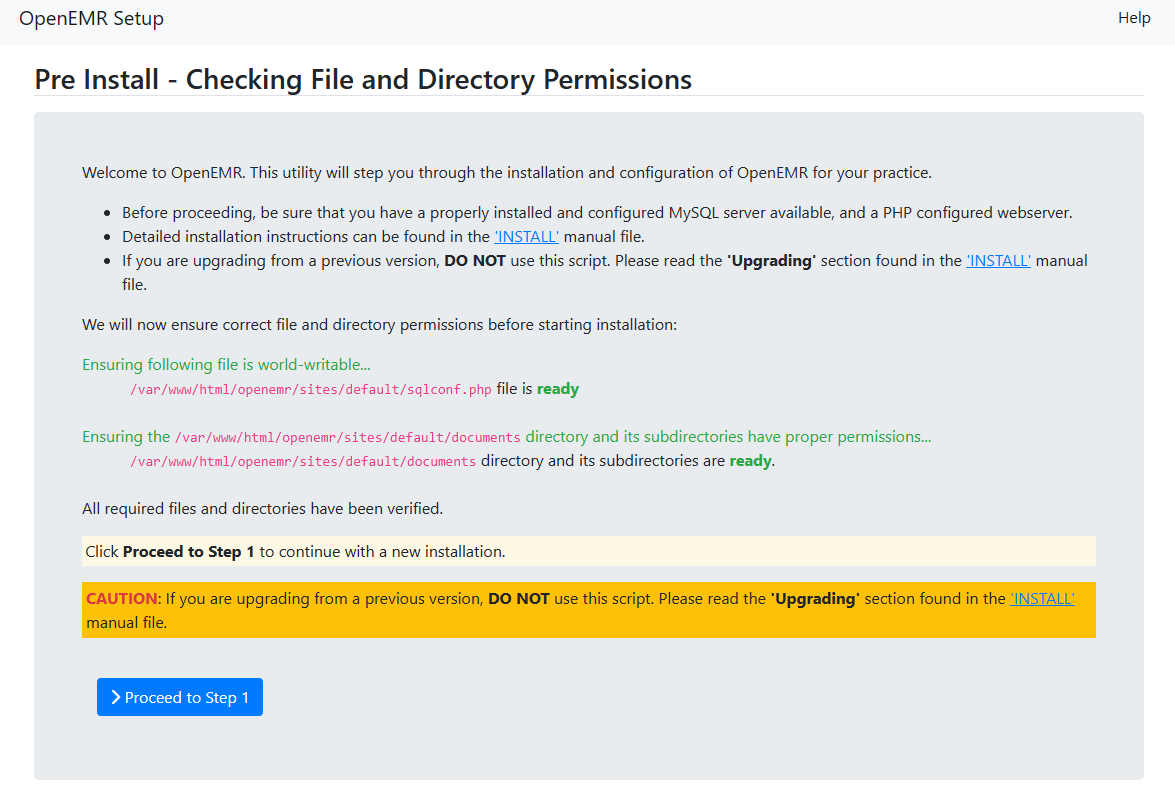
Access the setup interface via the URL https://openemr.example.com and follow the on-screen instructions to complete the OpenEMR installation.

Conclusion
Congratulations! You have successfully installed and configured OpenEMR on your Debian 12 server. If you encounter any issues or have questions, feel free to leave a comment below.
Frequently Asked Questions (FAQ)
- Can I use OpenEMR with other databases besides MariaDB?OpenEMR is primarily designed for use with MariaDB and MySQL, but theoretically could be configured to use other SQL-based databases with some adjustments. However, this may not be officially supported.
- Why do we use Nginx instead of Apache?Nginx is chosen for its high performance and efficiency with concurrent connections, which is beneficial for handling multiple requests in a medical practice environment.
- Is it necessary to use SSL certificates?Yes, SSL certificates ensure secure data transmission between the server and clients, which is critical for handling sensitive medical information.
- How often do I need to renew SSL certificates?Tools like Certbot can automatically renew SSL certificates, typically every 60-90 days, without manual intervention.
- Can I run OpenEMR on other Linux distributions?Yes, OpenEMR can be installed on various Linux distributions, but installation steps may differ depending on the OS and version.
