OpenProject is a popular open-source, web-based management system that facilitates location-independent team collaboration. As project management software, it boasts features like task management, team collaboration, and scrum, among others. This software is released under the GNU GPL 3 License and is developed using Ruby on Rails and AngularJS.
In this guide, we’ll walk you through the installation and configuration of OpenProject on CentOS 7, leveraging RPM packages from the OpenProject repository for a streamlined installation process.
Prerequisites
- CentOS 7
- Root Privileges
Steps To Follow
- Update and Upgrade System
- Install OpenProject Management System
- OpenProject Post-Install Configuration
- Testing OpenProject
Step 1 – System Update and Upgrade
Before diving into the OpenProject installation, ensure your CentOS system is current by updating the available repositories and upgrading the system packages:
yum -y update
Step 2 – Install OpenProject Management System
OpenProject provides a repository with packages for multiple Linux distributions, including Ubuntu, CentOS, Debian, and SUSE Linux Enterprise. Here, we’ll focus on installing OpenProject from the repository on CentOS 7:
Add the OpenProject repository using the following command:
sudo wget -O /etc/yum.repos.d/openproject-ce.repo \
 https://dl.packager.io/srv/opf/openproject-ce/stable/7/installer/el/7.repo
Proceed to install OpenProject:
yum -y install openproject
Upon successful installation, you will see a result like this:

Step 3 – OpenProject Post-Install Configuration
After installing the OpenProject packages, configure necessary components such as the database and web server. This includes setting up MySQL, Apache, domain configuration, Git and SVN support, email notifications, and enabling Memcached for optimized performance.
Start the configuration wizard with:
openproject configure
You will be presented with a database configuration wizard:
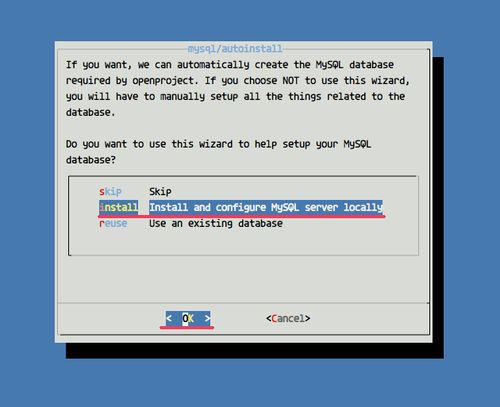
- Select “Install and configure MySQL server locally” and click “OK”. The MySQL server will be installed and configured automatically.
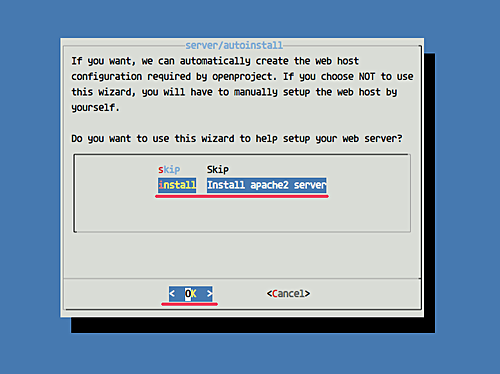
- For web server configuration, choose “Install apache2 server” and click “OK”. Apache2 will be installed and configured as a virtual host for OpenProject.
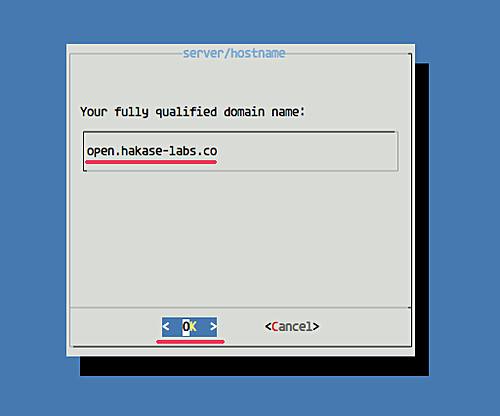
Specify the domain name for your OpenProject application and press “OK”.
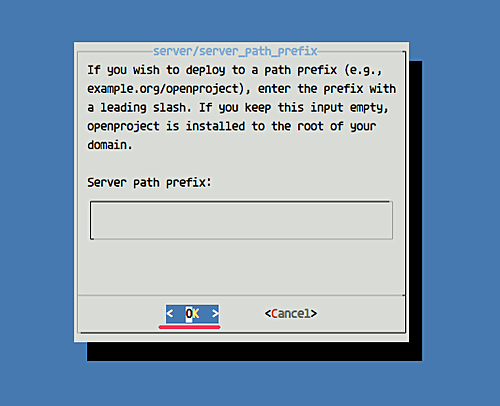
If required, define the server path prefix. Otherwise, leave it blank.
Choose whether to enable SSL configuration. Select “yes” if you have SSL certificates.
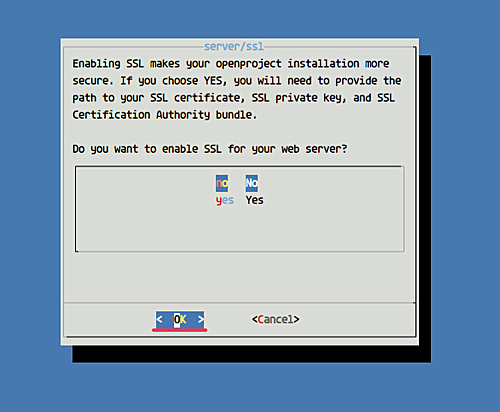
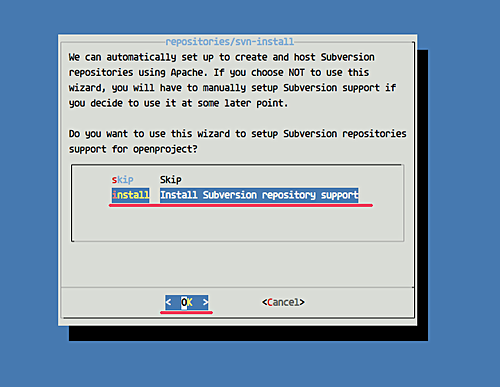
For Subversion and Git support, select “yes” to enable these features as they enhance integration capabilities.
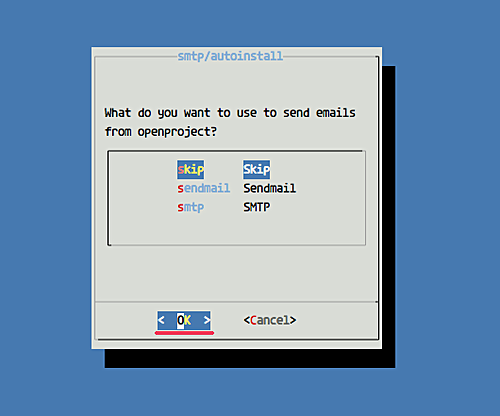
Enable the desired option for email notifications, whether it’s the server’s “sendmail” or third-party SMTP like Google’s.
Finally, choose to install Memcached to bolster OpenProject’s performance.
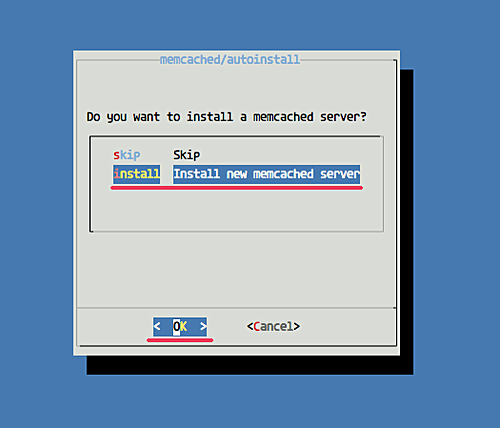
The configuration command will automatically handle package installations and configurations. Once complete, you should see this final confirmation:

Step 4 – Testing OpenProject
Launch your web browser and visit the URL where OpenProject is hosted, such as http://open.hakase-labs.co.
You’ll be greeted by the initial login page:
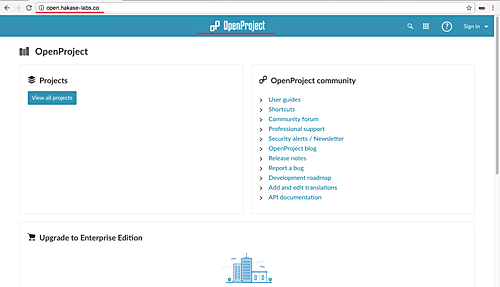
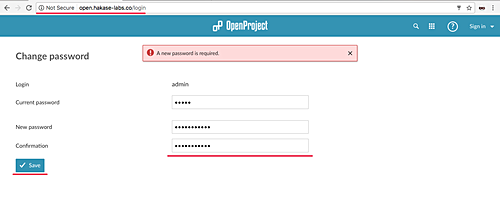
Log in to the admin dashboard using “admin” for both username and password. You will then be prompted to change the default admin password:

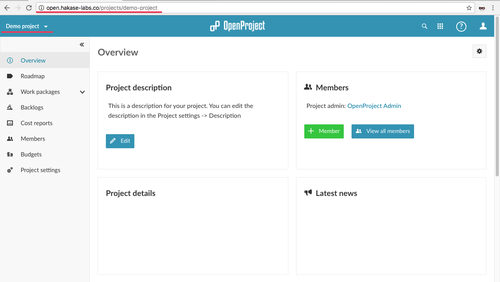
Set your new password and click “Save”. You’ll gain access to the dashboard:
Explore the ‘Demo Project’ to understand how OpenProject manages projects:
Congratulations! You have successfully installed and configured OpenProject on CentOS 7.
Reference
FAQ
What are the system requirements for installing OpenProject?
OpenProject requires a modern web browser and is compatible with most recent distributions of Linux, such as CentOS, Ubuntu, Debian, and SUSE. A minimum of 4GB RAM is recommended.
Can I use an existing MySQL server instead of installing a new one?
Yes, the OpenProject configuration wizard allows you to use an existing MySQL server. You’ll need to provide the connection details during the configuration process.
Is it possible to integrate OpenProject with other tools?
Yes, OpenProject offers various integrations including Git, Subversion, and third-party email services, which can be configured during installation.
How can I troubleshoot installation issues?
Reviewing the installation logs usually helps. Ensure all required dependencies are installed and that network configurations allow repository access.