OpenVPN is an open-source software allowing secure private network creation over the internet. It implements a robust VPN (Virtual Private Network) solution using the OpenSSL library to ensure encryption and offers diverse authentication mechanisms, including certificate-based authentication, pre-shared keys, and username/password authentication.
In this comprehensive guide, we’ll explore the steps to install and configure OpenVPN on CentOS 7.6 with certificate-based authentication.
Prerequisites
- CentOS 7.6
- Root access
Steps to Follow
- Install OpenVPN and Easy-RSA
- Configure Easy-RSA 3 Variables
- Generate OpenVPN Keys
- Configure the OpenVPN Server
- Set Up Firewall and Enable Port Forwarding
- Client Setup
- Testing the Connection
Step 1: Install OpenVPN and Easy-RSA
We will utilize OpenVPN 2.4 and easy-rsa 3 on CentOS 7.6. Ensure you have the ‘epel’ repository installed.
yum install epel-release -y
Proceed to install OpenVPN and Easy-RSA.
yum install openvpn easy-rsa -y
Verify their versions:
openvpn --version
ls -lah /usr/share/easy-rsa/
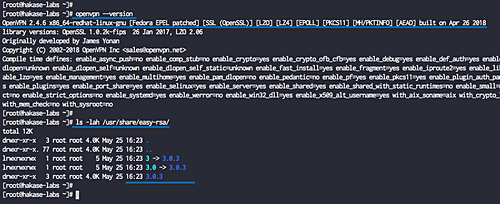
Both OpenVPN 2.4 and easy-rsa 3 are now installed.
Step 2: Configure Easy-RSA 3 Variables
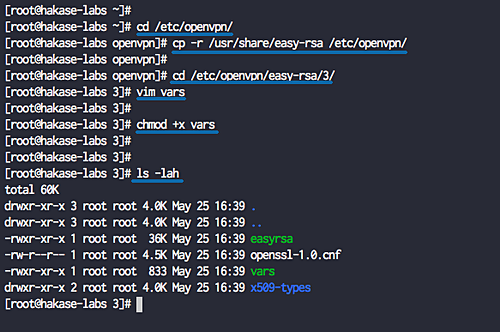
Navigate to the ‘/etc/openvpn/’ directory and copy the easy-rsa script:
cd /etc/openvpn/
cp -r /usr/share/easy-rsa /etc/openvpn/
Create a new ‘vars’ file in the ‘easy-rsa/3/’ directory using vim.
cd /etc/openvpn/easy-rsa/3/
vim vars
Add the following configuration settings:
set_var EASYRSA                 "$PWD"
set_var EASYRSA_PKI             "$EASYRSA/pki"
set_var EASYRSA_DN              "cn_only"
set_var EASYRSA_REQ_COUNTRY     "ID"
set_var EASYRSA_REQ_PROVINCE    "Jakarta"
set_var EASYRSA_REQ_CITY        "Jakarta"
set_var EASYRSA_REQ_ORG         "hakase-labs CERTIFICATE AUTHORITY"
set_var EASYRSA_REQ_EMAIL       "openvpn@hakase-labs.io"
set_var EASYRSA_REQ_OU          "HAKASE-LABS EASY CA"
set_var EASYRSA_KEY_SIZE        2048
set_var EASYRSA_ALGO            rsa
set_var EASYRSA_CA_EXPIRE       7500
set_var EASYRSA_CERT_EXPIRE     365
set_var EASYRSA_NS_SUPPORT      "no"
set_var EASYRSA_NS_COMMENT      "HAKASE-LABS CERTIFICATE AUTHORITY"
set_var EASYRSA_EXT_DIR         "$EASYRSA/x509-types"
set_var EASYRSA_SSL_CONF        "$EASYRSA/openssl-1.0.cnf"
set_var EASYRSA_DIGEST          "sha256"
Save and exit. Adjust the configuration variables as needed, such as increasing ‘EASYRSA_KEY_SIZE’ for enhanced security.
chmod +x vars
Step 3: Generate OpenVPN Keys
Using the ‘vars’ file, generate the necessary keys: CA key, server and client keys, DH and CRL PEM files. Start in the easy-rsa directory:
cd /etc/openvpn/easy-rsa/3/
Initialization and Build CA
Initialize the PKI directory and build the CA key:
./easyrsa init-pki
./easyrsa build-ca

Build Server and Client Keys
Generate the server and client keys:
./easyrsa gen-req hakase-server nopass
./easyrsa sign-req server hakase-server
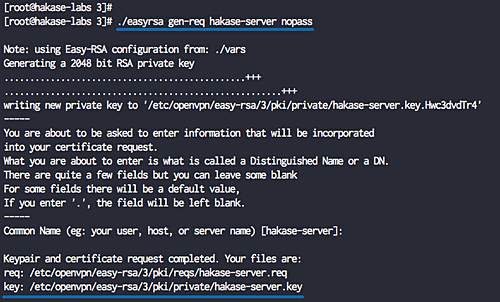
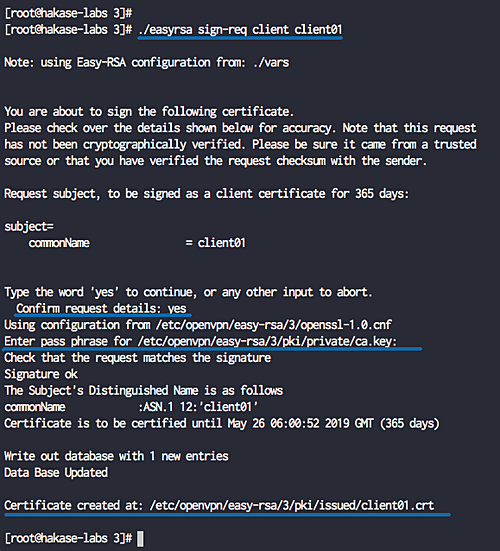
./easyrsa gen-req client01 nopass
./easyrsa sign-req client client01
Build Diffie-Hellman and Optional CRL Key
Generate a Diffie-Hellman key:
./easyrsa gen-dh

Optionally generate a CRL key for revoking client keys.
./easyrsa revoke someone
./easyrsa gen-crl

Copy Certificate Files
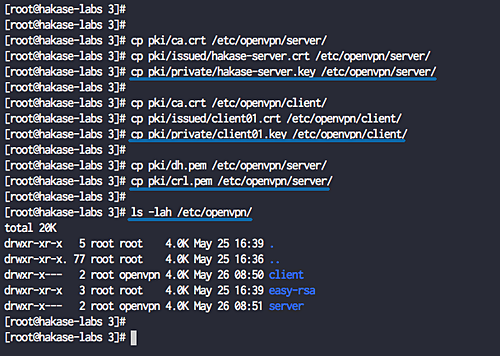
Copy the generated certificate and key files.
cp pki/ca.crt /etc/openvpn/server/
cp pki/issued/hakase-server.crt /etc/openvpn/server/
cp pki/private/hakase-server.key /etc/openvpn/server/
cp pki/ca.crt /etc/openvpn/client/
cp pki/issued/client01.crt /etc/openvpn/client/
cp pki/private/client01.key /etc/openvpn/client/
cp pki/dh.pem /etc/openvpn/server/
cp pki/crl.pem /etc/openvpn/server/
Step 4: Configure OpenVPN
Create a server configuration file named ‘server.conf’.
cd /etc/openvpn/
vim server.conf
Add the following configuration:
# OpenVPN Port, Protocol and the Tun
port 1194
proto udp
dev tun

# OpenVPN Server Certificate - CA, server key and certificate
ca /etc/openvpn/server/ca.crt
cert /etc/openvpn/server/hakase-server.crt
key /etc/openvpn/server/hakase-server.key

#DH and CRL key
dh /etc/openvpn/server/dh.pem
crl-verify /etc/openvpn/server/crl.pem

# Network Configuration - Internal network
# Redirect all Connection through OpenVPN Server
server 10.10.1.0 255.255.255.0
push "redirect-gateway def1"

# Using the DNS from https://dns.watch
push "dhcp-option DNS 84.200.69.80"
push "dhcp-option DNS 84.200.70.40"

#Enable multiple client to connect with same Certificate key
duplicate-cn

# TLS Security
cipher AES-256-CBC
tls-version-min 1.2
tls-cipher TLS-DHE-RSA-WITH-AES-256-GCM-SHA384:TLS-DHE-RSA-WITH-AES-256-CBC-SHA256:TLS-DHE-RSA-WITH-AES-128-GCM-SHA256:TLS-DHE-RSA-WITH-AES-128-CBC-SHA256
auth SHA512
auth-nocache

# Other Configuration
keepalive 20 60
persist-key
persist-tun
comp-lzo yes
daemon
user nobody
group nobody

# OpenVPN Log
log-append /var/log/openvpn.log
verb 3
Save and exit the file.
Step 5: Enable Port-Forwarding and Configure Firewall
Activate port forwarding and configure the firewall for OpenVPN:
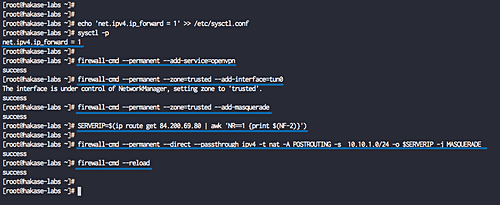
echo 'net.ipv4.ip_forward = 1' >> /etc/sysctl.conf
sysctl -p
Adjust firewall settings:
firewall-cmd --permanent --add-service=openvpn
firewall-cmd --permanent --zone=trusted --add-interface=tun0
firewall-cmd --permanent --zone=trusted --add-masquerade
Enable NAT:
SERVERIP=$(ip route get 84.200.69.80 | awk 'NR==1 {print $(NF-2)}')
firewall-cmd --permanent --direct --passthrough ipv4 -t nat -A POSTROUTING -s 10.10.1.0/24 -o $SERVERIP -j MASQUERADE
Reload firewall settings and start OpenVPN:
firewall-cmd --reload
systemctl start openvpn@server
systemctl enable openvpn@server
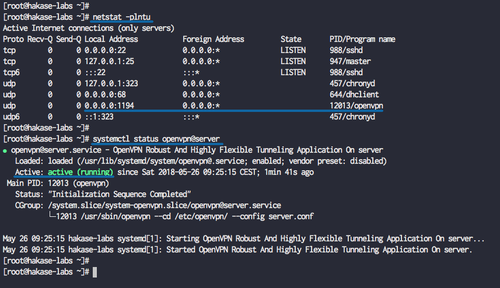
Verify OpenVPN is running:
netstat -plntu
systemctl status openvpn@server
Step 6: OpenVPN Client Setup
Create a client configuration file ‘client01.ovpn’ in the client directory:
cd /etc/openvpn/client
vim client01.ovpn
Add the following client configuration:
client
dev tun
proto udp

remote 139.xx.xx.xx 1194

ca ca.crt
cert client01.crt
key client01.key

cipher AES-256-CBC
auth SHA512
auth-nocache
tls-version-min 1.2
tls-cipher TLS-DHE-RSA-WITH-AES-256-GCM-SHA384:TLS-DHE-RSA-WITH-AES-256-CBC-SHA256:TLS-DHE-RSA-WITH-AES-128-GCM-SHA256:TLS-DHE-RSA-WITH-AES-128-CBC-SHA256

resolv-retry infinite
compress lzo
nobind
persist-key
persist-tun
mute-replay-warnings
verb 3
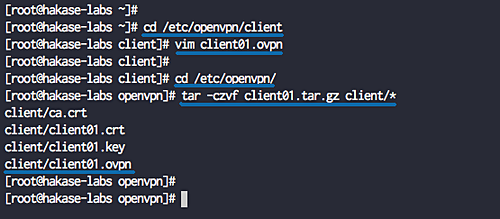
Save and exit. Compress the ‘/etc/openvpn/client’ directory:
cd /etc/openvpn/
tar -czvf client01.tar.gz client/*
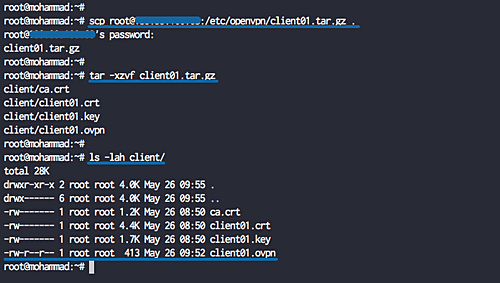
Download the configuration to your local machine using:
scp root@139.xx.xx.xx:/etc/openvpn/client01.tar.gz .
Step 7: Testing OpenVPN
Testing on Linux
Install the necessary packages:
sudo apt install openvpn network-manager-openvpn network-manager-openvpn-gnome -y
To connect, use:
openvpn --config client01.ovpn
Check the connection:
curl ifconfig.io
On Mac OS
Download and install Tunnelblick. After extracting the ‘client01.tar.gz’, rename the directory to ‘client01.tblk’, then double-click to import into Tunnelblick.
On Windows
Download OpenVPN client for Windows and import the configuration.
References
For further reading and resources, visit OpenVPN Documentation.
Frequently Asked Questions (FAQs)
1. What is OpenVPN?
OpenVPN is an open-source software that allows you to create secure point-to-point or site-to-site connections over the public Internet.
2. What are the prerequisites for setting up OpenVPN on CentOS?
You will need a CentOS 7.6 server with root access to install OpenVPN.
3. Why do I need a VPN?
VPNs protect your data and identity by encrypting your connection to the internet, making it important for secure browsing, especially on public Wi-Fi networks.
4. Can I use OpenVPN on multiple devices?
Yes, you can set up OpenVPN on multiple devices by configuring client keys and configurations for each device.
5. What is Easy-RSA?
Easy-RSA is a CLI utility to build and manage a PKI CA; in this guide, it’s used to generate SSL keys for OpenVPN.
