OPNSense, a robust open-source firewall router, is based on FreeBSD and developed by the Netherlands-based company Deciso. As a fork of pfSense (itself a fork of m0n0wall), OPNSense was first released in January 2015. This tutorial guides you through installing and configuring the OPNSense Router Firewall on VirtualBox, enabling you to set it up in a virtual environment before deploying it live.
Prerequisites
This guide utilizes two virtual machines in VirtualBox: one for OPNSense and another running Debian as a client. First, download the OPNSense ‘dvd’ version from the OPNSense download page and extract the ISO file using the following command:
bunzip2 -d OPNsense-19.7-OpenSSL-dvd-amd64.iso.bz2
Now, you’re ready to install OPNSense in the VirtualBox environment.
Virtual Machine Configuration
Ensure the virtual machines are configured as follows:
1. OPNSense Firewall Router
- Type: FreeBSD 64-bit
- Memory: 1GB
- Disk: 16GB
- Audio: Disabled
- Network:
- Adapter 1: Internal Network ‘intnet’ with promiscuous mode ‘Allow All’ – (For LAN)
- Adapter 2: NAT or Bridge to your WiFi with promiscuous mode ‘Allow All’ – (For WAN)
2. Debian Client
- Type: Debian 64-bit
- Memory: 512MB
- Disk: 8GB
- Network:
- Adapter 1: Internal Network ‘intnet’ with promiscuous mode ‘Allow All’
1. Installing OPNSense Firewall Router
Start by booting the OPNSense VM in VirtualBox using the ‘Start’ button. You’ll see the boot splash screen below once OPNSense starts.
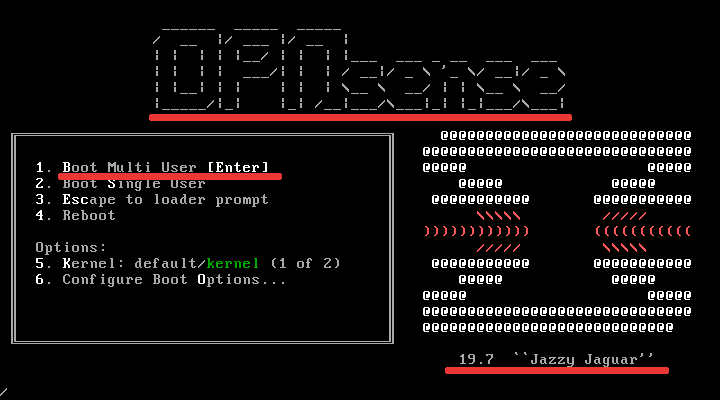
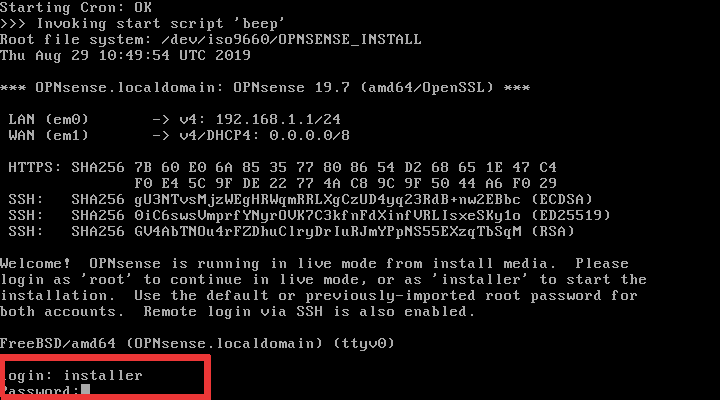
Press ‘Enter’ to boot into ‘Live’ mode. Use the ‘installer’ account with the password ‘opnsense’ for setup. Log in as ‘installer‘ with password ‘opnsense‘.
Proceed with the installation screens, setting the keymap, installation type, and disk setup:
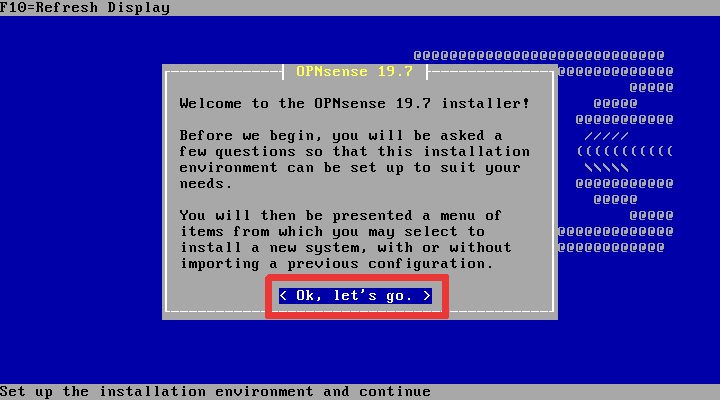
Once installation is complete, set a strong ‘root’ password when prompted. Remove the ISO installer and reboot the server.
Log in to the OPNSense system with ‘root’ and your configured password to access the OPNSense interface:
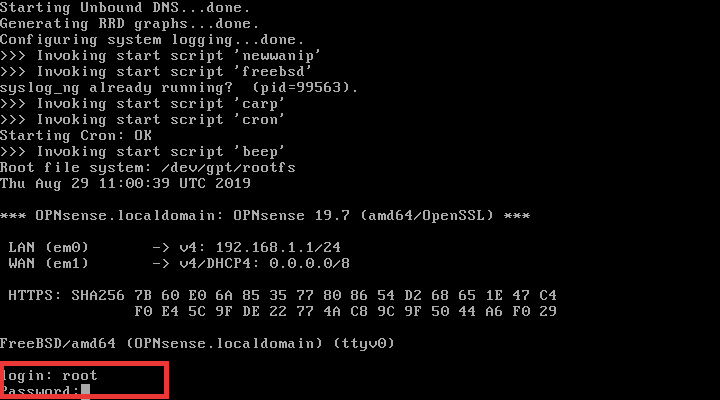
2. Configuring LAN and WAN IP Addresses
Begin by assigning the interfaces for LAN and WAN:
– Assign Network Interfaces
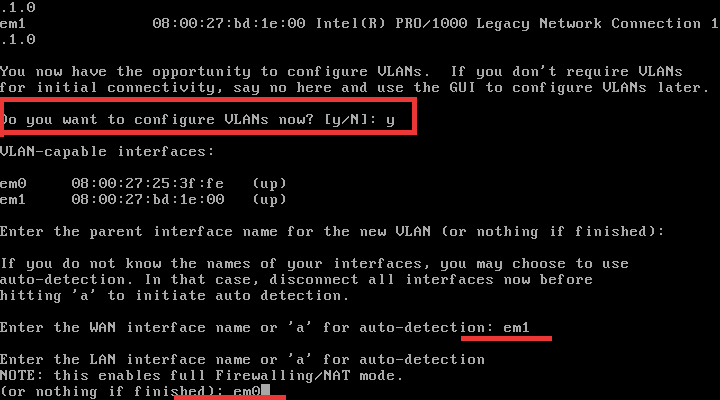
Select option ‘1‘ from the OPNSense menu to ‘Assign Interfaces‘ and configure as follows:
Do you want to configure VLANs now? y
Enter the parent interface for the new VLAN: Just press the 'ENTER' key
Enter the WAN interface name or 'a' for auto-detection: em1
Enter the LAN interface name or 'a' for auto-detection: em0
– Setup LAN IP Address
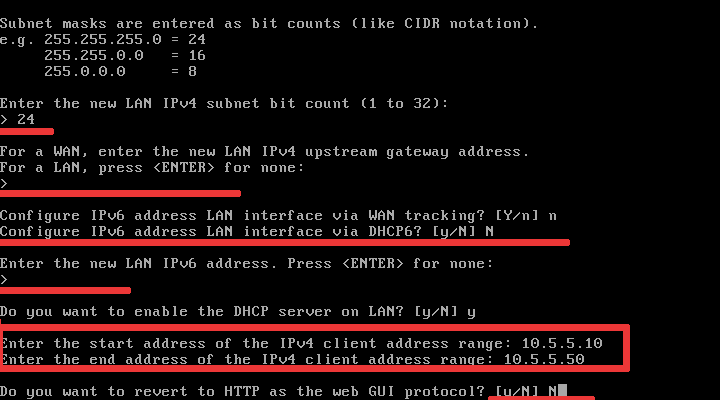
Now, to set up the LAN IP address, choose option ‘2‘ for ‘Set interface IP address‘ and configure:
Configure IPv4 address LAN interface via DHCP: N
Enter the new LAN IPv4 address: 10.5.5.1
Enter the new LAN IPv4 subnet bit count: 24
Do you want to enable the DHCP server on LAN? y
Enter the start address: 10.5.5.10
Enter the end address: 10.5.5.50
– Setup WAN IP Address
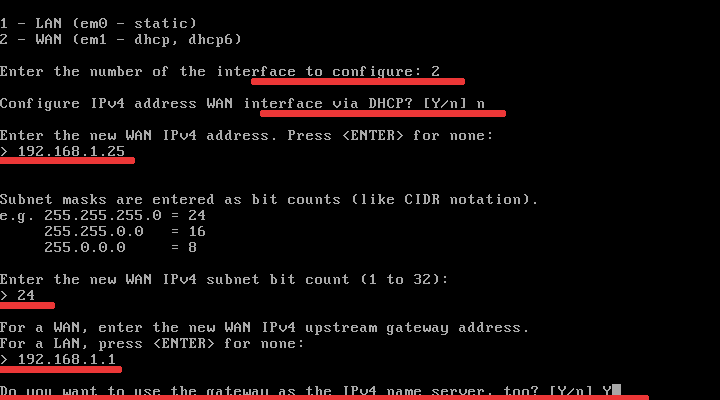
Select ‘2‘ again to configure the WAN interface:
Configure IPv4 address WAN interface via DHCP: N
New WAN IPv4 address: 192.168.1.25
Subnet bit count: 24
Gateway: 192.168.1.1
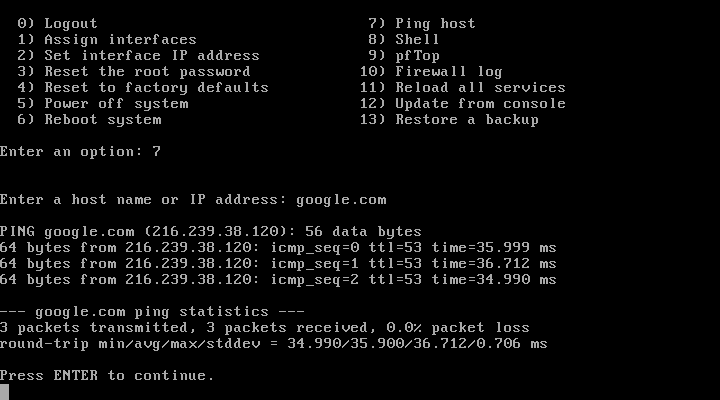
Test internet connectivity via option ‘7‘, pinging a known host:
Ping host: howtoforge.com
3. Use OPNSense Setup Wizard via Debian Client
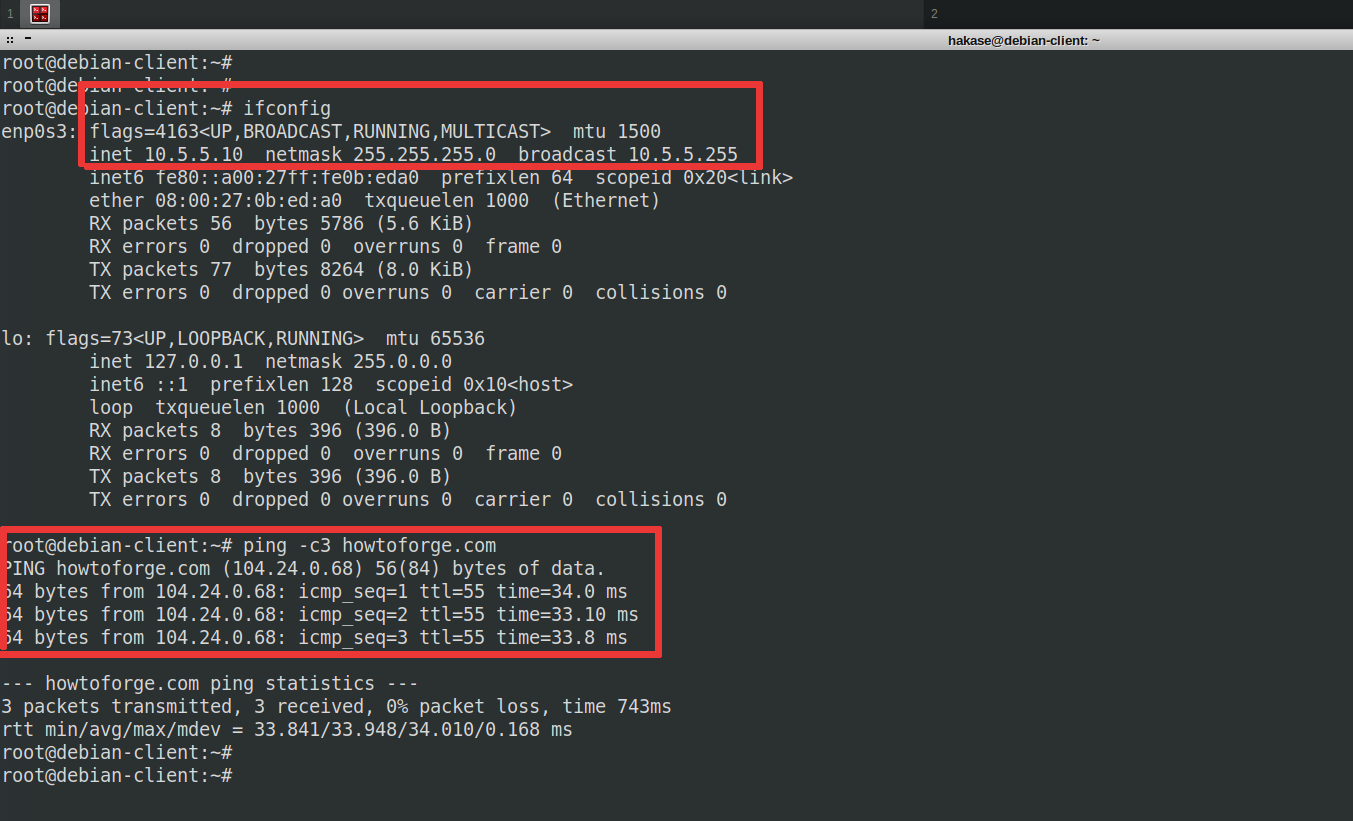
Launch the Debian VM, ensure it obtains an IP via DHCP, and check connectivity:
ifconfig
ping -c3 howtoforge.com
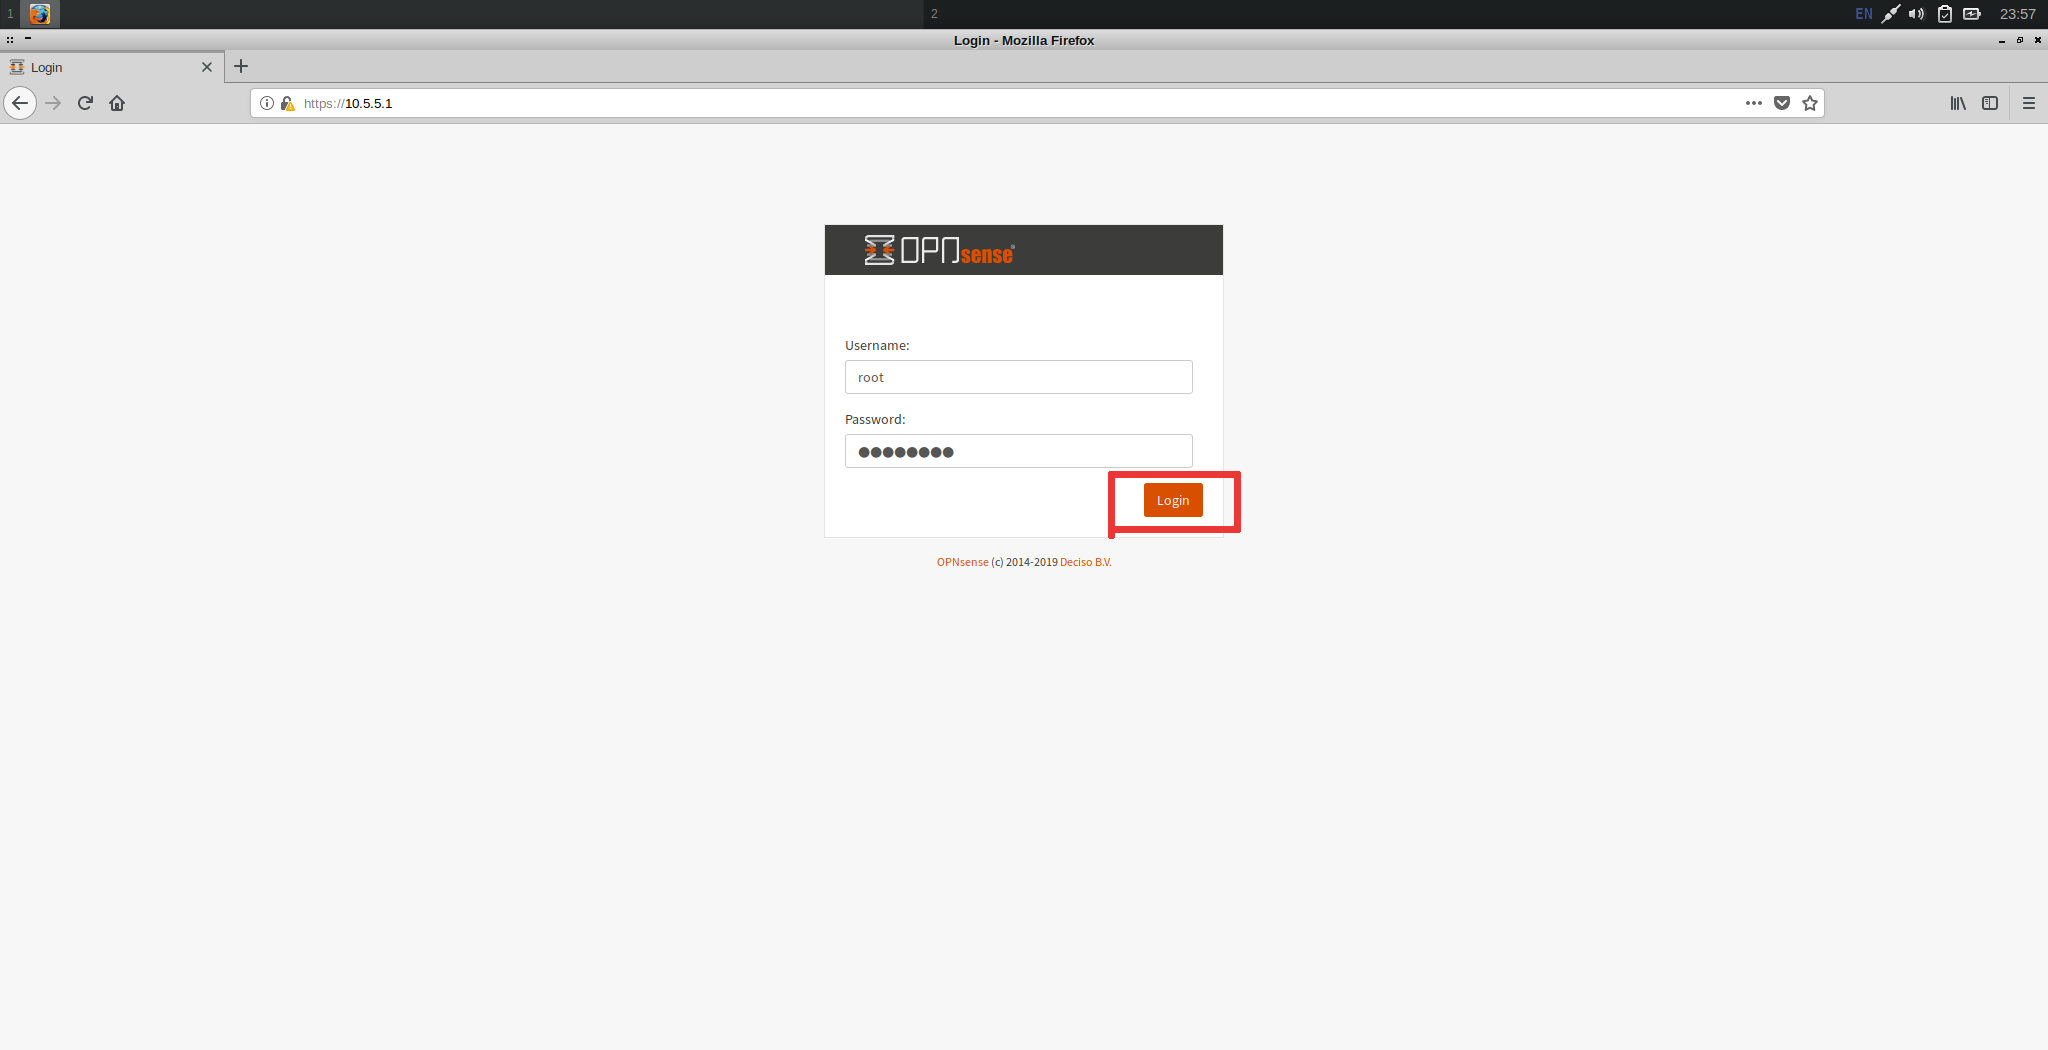
Access the OPNSense web interface by navigating to https://10.5.5.1/ via a browser:
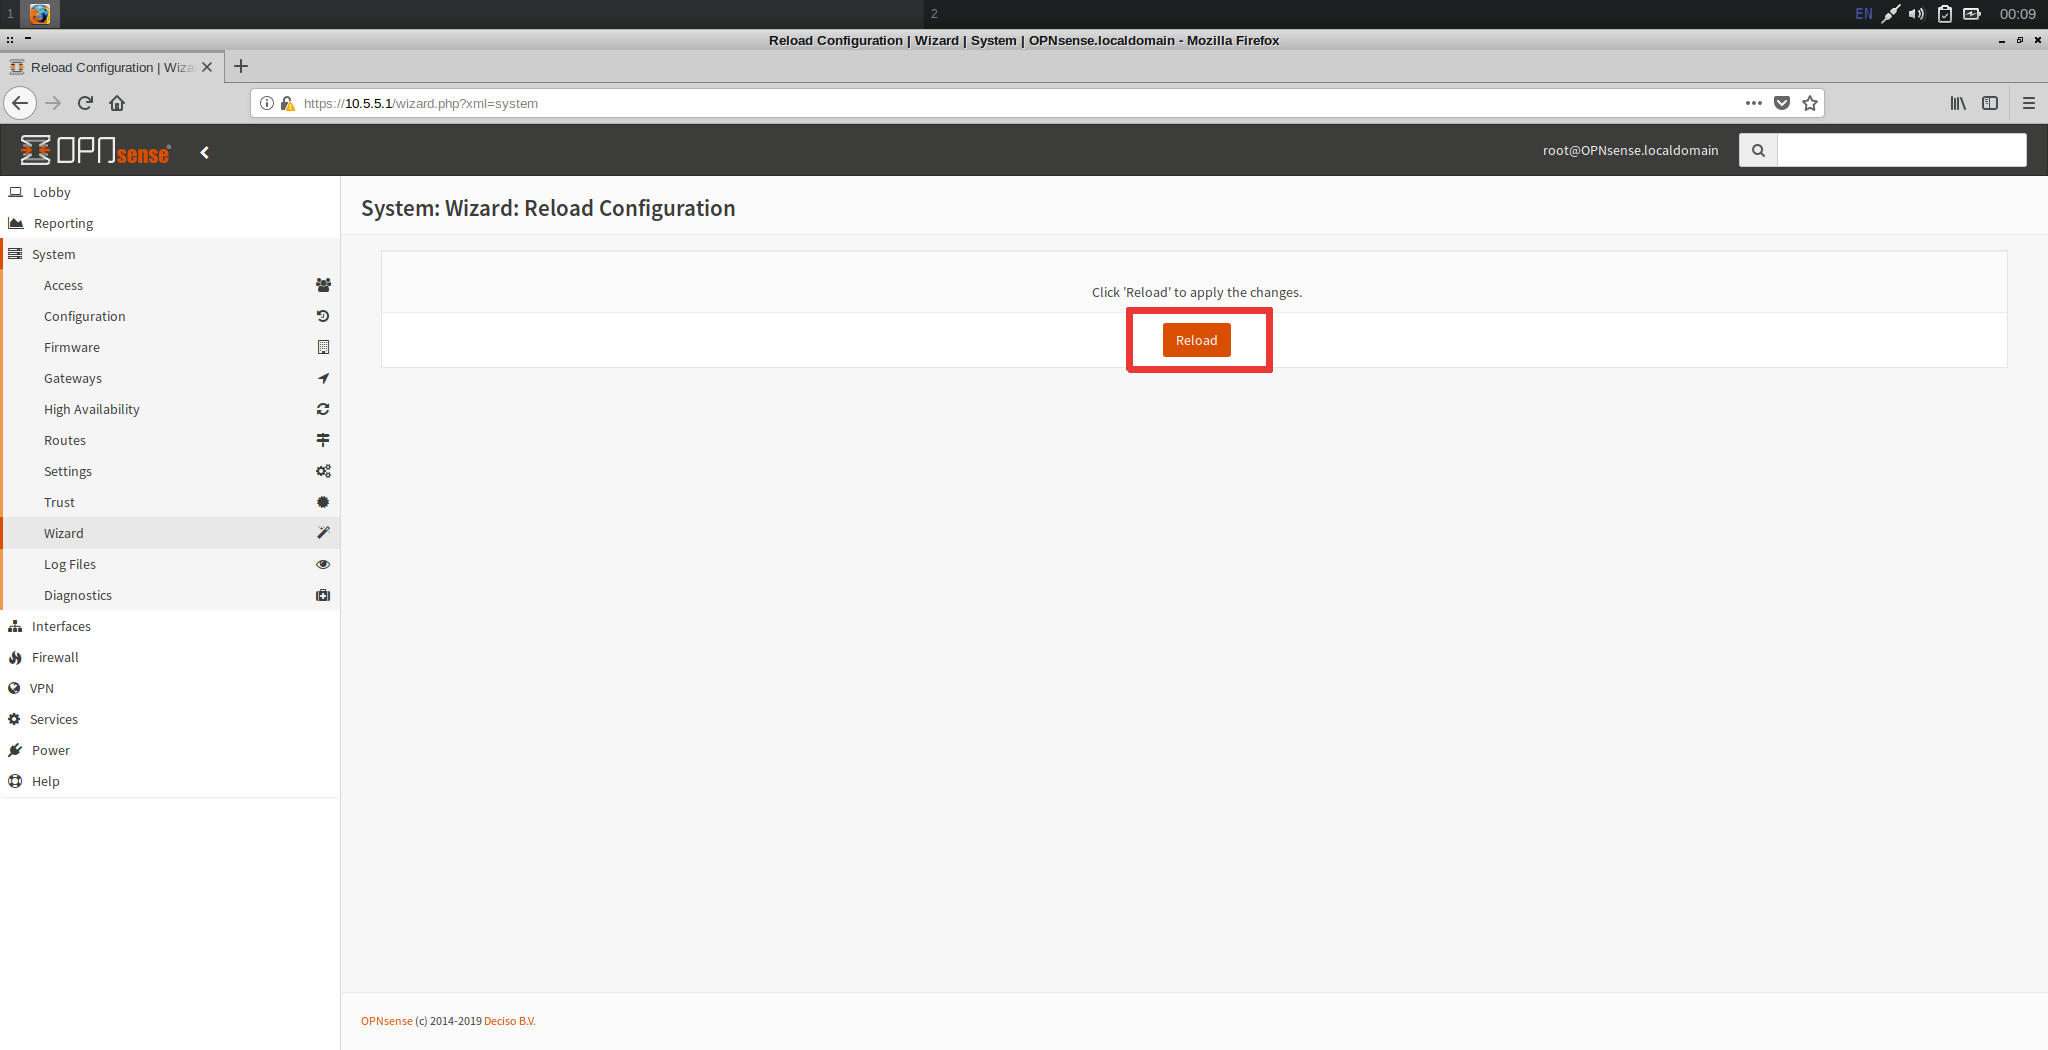
Complete the setup wizard using your configuration preferences and finalize configurations with the ‘Reload’ button:
Reference
FAQ
- What is OPNSense? OPNSense is an open-source firewall/router based on FreeBSD, providing robust networking and security features.
- Why use OPNSense on VirtualBox? Testing OPNSense in VirtualBox allows users to experiment with configuration and settings before deploying it on physical hardware.
- Can I run OPNSense on hardware? Yes, OPNSense can be installed on physical hardware for production environments, offering comprehensive network security and management features.
- What are the default login credentials? The default login credentials are username ‘installer’ and password ‘opnsense’ when booting the installation disk.
- Is DHCP supported on OPNSense? Yes, OPNSense supports DHCP on LAN interfaces, enabling automatic IP address assignment to client devices.