osTicket is a robust, open-source support ticketing system that enhances your customer service operations and improves user experience. It offers a user-friendly web interface to efficiently manage, organize, and track support tickets. Written in PHP, it supports multiple databases, including MySQL and PostgreSQL.
Key Features
- Dashboard Reports
- Configurable Help Topics
- Service Level Agreements
- Ticket Filters
- Customer Support Portal
- Auto-Responder
This guide demonstrates how to install osTicket on Debian 11.
Prerequisites
- A server running Debian 11.
- A registered domain name pointed at your server’s IP address.
- Root password configured on the server.
Getting Started
Begin by updating and upgrading all system packages with the following commands:
apt update -y
apt upgrade -y
After upgrading, install the necessary packages:
apt install ca-certificates apt-transport-https software-properties-common wget curl -y
Install Nginx and PHP
First, install the Nginx web server:
apt install nginx -y
Next, add the PHP repository:
curl -sSL https://packages.sury.org/php/README.txt | bash -x
Install PHP 8.1 and required extensions:
apt install php8.1 php8.1-mysql php8.1-cgi php8.1-fpm php8.1-cli php8.1-curl php8.1-gd php8.1-imap php8.1-mbstring php8.1-intl php8.1-apcu php8.1-common php8.1-gettext php8.1-bcmath php8.1-xml php8.1-dom -y
Edit the PHP configuration:
nano /etc/php/8.1/fpm/php.ini
Make the following change:
cgi.fix_pathinfo=0
Save the file and restart PHP-FPM:
systemctl restart php8.1-fpm
Install and Configure MariaDB
Start by installing the MariaDB server:
apt install mariadb-server -y
Secure the MariaDB installation:
mysql_secure_installation
Answer the questions as follows:
Set root password? [Y/n] Y
New password:
Re-enter new password:
Remove anonymous users? [Y/n] Y
Disallow root login remotely? [Y/n] Y
Remove test database and access to it? [Y/n] Y
Reload privilege tables now? [Y/n] Y
Log into MariaDB as root:
mysql -u root -p
Create a database and user for osTicket:
MariaDB [(none)]> create database osticketdb;
MariaDB [(none)]> grant all privileges on osticketdb.* to osticketuser identified by 'secure-password';
MariaDB [(none)]> flush privileges;
MariaDB [(none)]> exit;
Install osTicket
Download osTicket:
wget https://github.com/osTicket/osTicket/releases/download/v1.17.2/osTicket-v1.17.2.zip
Create an installation directory and extract osTicket:
mkdir /var/www/html/osticket
unzip osTicket-v1.17.2.zip -d /var/www/html/osticket
Set permissions:
chown -R www-data:www-data /var/www/html/osticket
chmod -R 755 /var/www/html/osticket
Rename the configuration file:
mv /var/www/html/osticket/upload/include/ost-sampleconfig.php /var/www/html/osticket/upload/include/ost-config.php
Configure Nginx for osTicket
Create an Nginx configuration file for osTicket:
nano /etc/nginx/conf.d/osticket.conf
Insert the following configuration:
server {
    listen 80;
    server_name osticket.example.com;
    root /var/www/html/osticket/upload;
    index index.php index.html index.htm;
    access_log /var/log/nginx/access.log;
    error_log /var/log/nginx/error.log;

    # Enable gzip
    gzip on;
    gzip_min_length 1000;
    gzip_types text/plain application/x-javascript text/xml text/css application/xml;

    set $path_info "";

    location ~ /include {
        deny all;
        return 403;
    }

    if ($request_uri ~ "^/api(/[^\?]+)") {
        set $path_info $1;
    }

    location ~ ^/api/(?:tickets|tasks).*$ {
        try_files $uri $uri/ /api/http.php?$query_string;
    }

    if ($request_uri ~ "^/scp/.*\.php(/[^\?]+)") {
        set $path_info $1;
    }

    location ~ ^/scp/ajax.php/.*$ {
        try_files $uri $uri/ /scp/ajax.php?$query_string;
    }

    location / {
        try_files $uri $uri/ index.php;
    }

    location ~ \.php$ {
        fastcgi_param SCRIPT_FILENAME $document_root$fastcgi_script_name;
        include fastcgi_params;
        include snippets/fastcgi-php.conf;
        fastcgi_pass unix:/run/php/php8.1-fpm.sock;
    }
  }
Save the file then test the Nginx configuration:
nginx -t
Upon success, restart the Nginx service:
systemctl restart nginx
Check Nginx status:
systemctl status nginx
Access osTicket Web Interface
Open your browser and visit http://osticket.example.com to begin the installation.
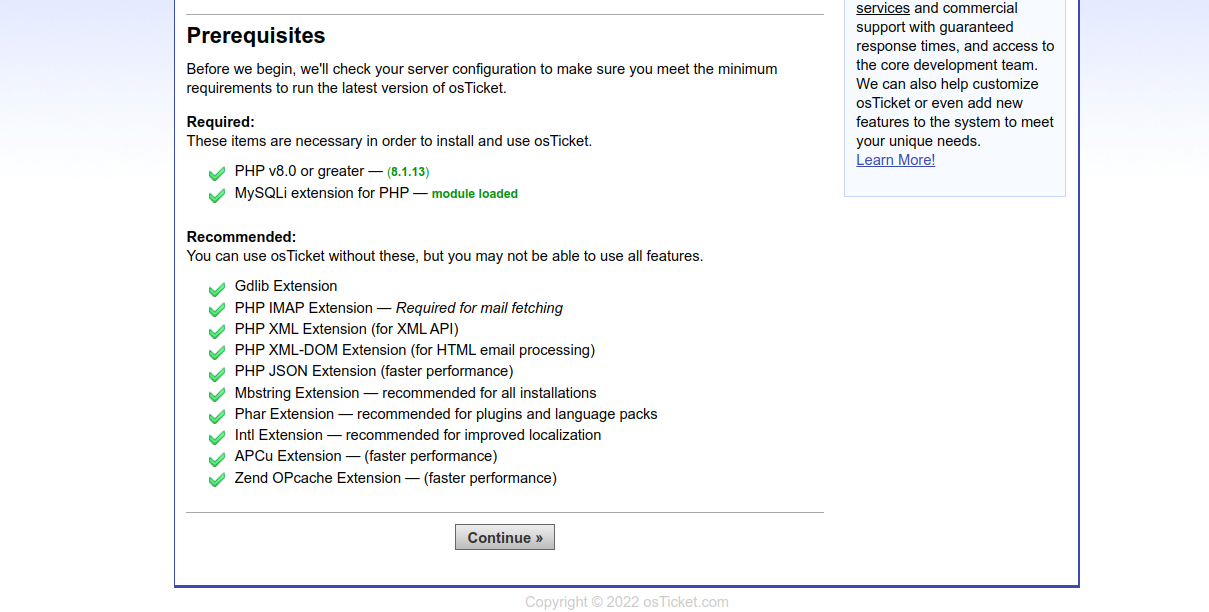
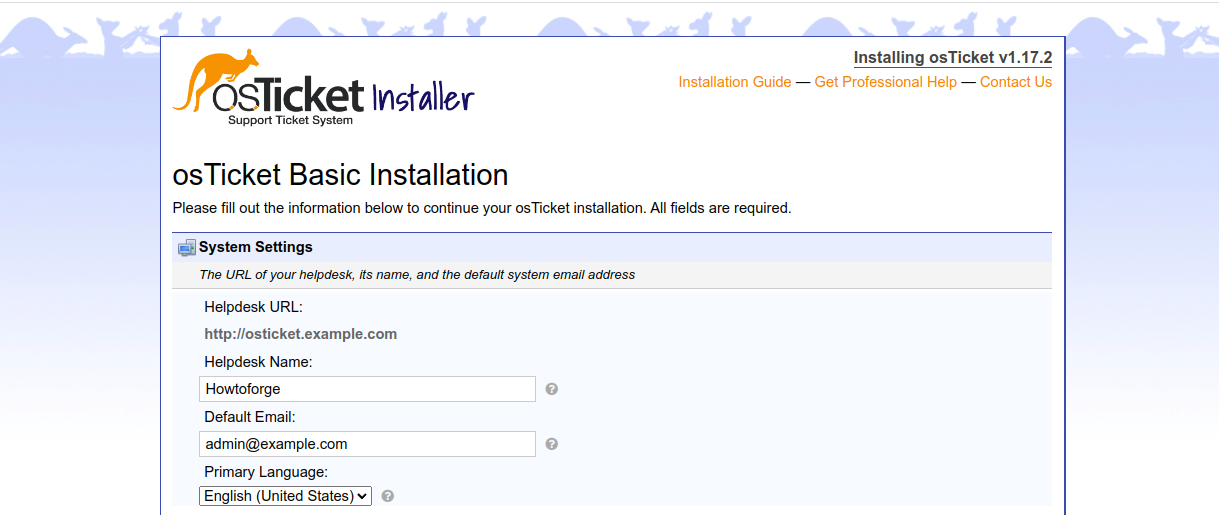
Follow the prompts to complete the installation, providing necessary database details.
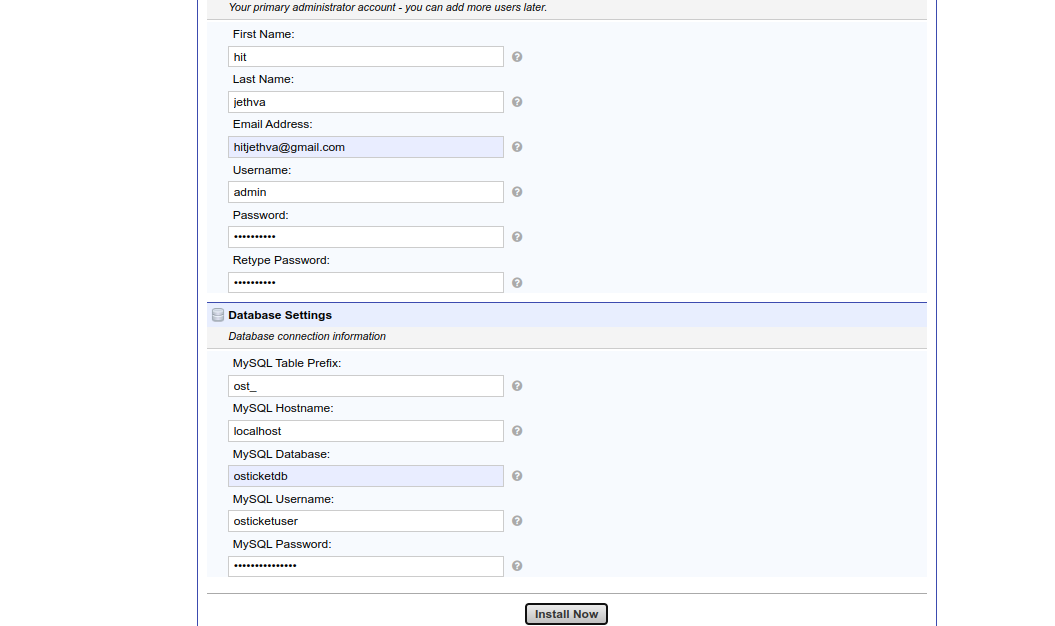
Access the admin panel via http://osticket.example.com/scp and log in.

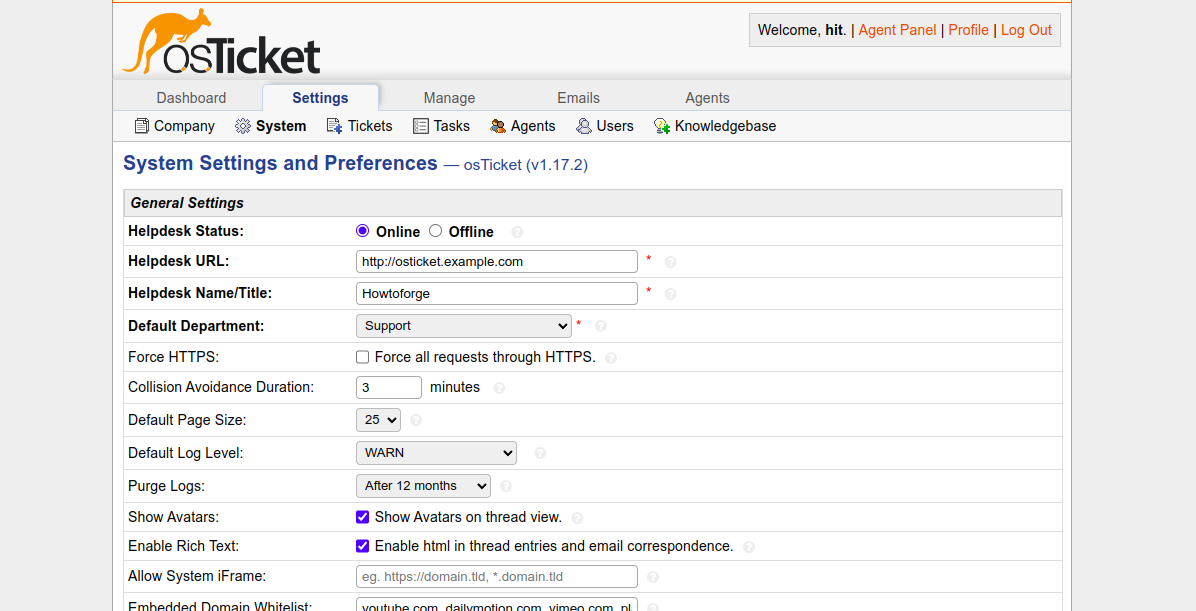
Visit the osTicket forum at https://forum.osticket.com.
Enable SSL on osTicket
Install Let’s Encrypt SSL via Certbot:
Install Snap package manager:
apt install snapd
Update Snap:
snap install core
snap refresh core
Install Certbot:
snap install --classic certbot
Create symbolic link:
ln -s /snap/bin/certbot /usr/bin/certbot
Run Certbot to obtain an SSL certificate:
certbot --nginx -d osticket.example.com
Follow the prompts to complete the installation successfully.
Account registered.
Requesting a certificate for osticket.example.com

Successfully received certificate.
Certificate is saved at: /etc/letsencrypt/live/osticket.example.com/fullchain.pem
Key is saved at:         /etc/letsencrypt/live/osticket.example.com/privkey.pem
This certificate expires on 2023-03-22.
These files will be updated when the certificate renews.
Certbot has set up a scheduled task to automatically renew this certificate in the background.

Deploying certificate
Successfully deployed certificate for osticket.example.com to /etc/nginx/conf.d/osticket.conf
Congratulations! You have successfully enabled HTTPS on https://osticket.example.com
Conclusion
Congratulations! You’ve successfully installed osTicket with Nginx on Debian 11. You are now ready to deploy it as a helpdesk management system in your organization. If you have any questions, feel free to ask.
FAQ
- Can I use a different web server instead of Nginx?
Yes, osTicket can also be configured with Apache, but you will need to adjust the configuration files accordingly. - Is there an official support channel for osTicket?
Yes, you can access support via the osTicket forums at https://forum.osticket.com. - Can I install osTicket on a virtual machine?
Absolutely, osTicket can be installed on both physical servers and virtual machines as long as they run a supported operating system. - Will this guide work for other Debian-based distributions?
Mostly yes, as long as the Debian-based system supports the packages mentioned. Some adjustments may be necessary depending on the distribution. - How do I keep my osTicket installation updated?
Regularly check the osTicket GitHub page for the latest releases and follow the provided instructions for updating your installation.
