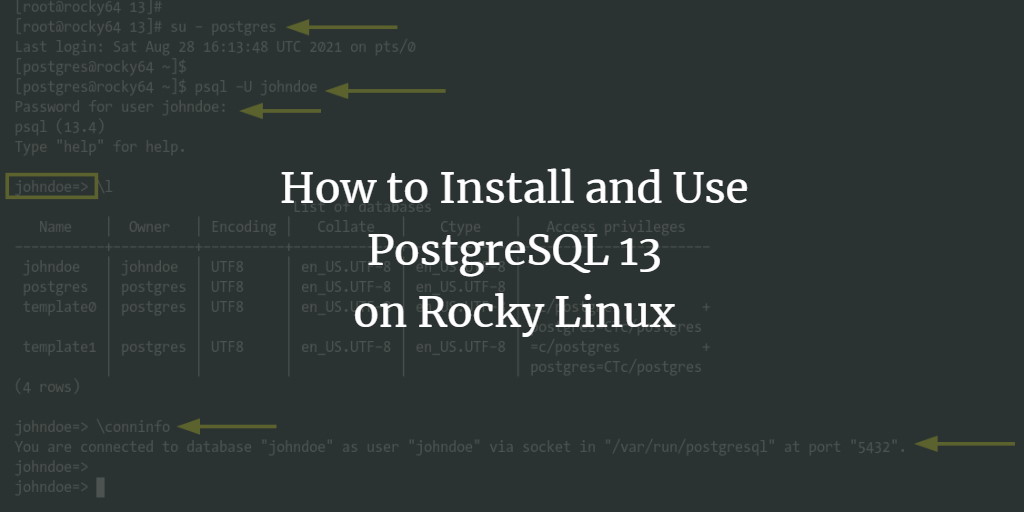
PostgreSQL is an advanced, enterprise-class, and open-source Relational Database Management System (RDBMS) that guards a strong reputation among developers for its reliability and flexibility. It seamlessly supports SQL (relational) and JSON (non-relational) querying, making it a preferred choice for numerous renowned organizations like Reddit, Skype, Instagram, and more.
This guide provides detailed steps on installing PostgreSQL on Rocky Linux, securing the deployment, and performing basic operations such as managing users and databases.
Prerequisites
- A Rocky Linux system
- A user with root or sudo privileges to install packages and make system-wide changes
Adding PostgreSQL Repository
This guide details the installation of PostgreSQL version 13.4, using its official repository for Rocky Linux. Follow these steps to add the repository.
Step 1: Add the official PostgreSQL repository using the command below:
sudo dnf install -y https://download.postgresql.org/pub/repos/yum/reporpms/EL-8-x86_64/pgdg-redhat-repo-latest.noarch.rpm
Step 2: Verify the repository addition with:
sudo dnf -qy repolist
Look for PostgreSQL repositories as depicted below:

Installing PostgreSQL 13 on Rocky Linux
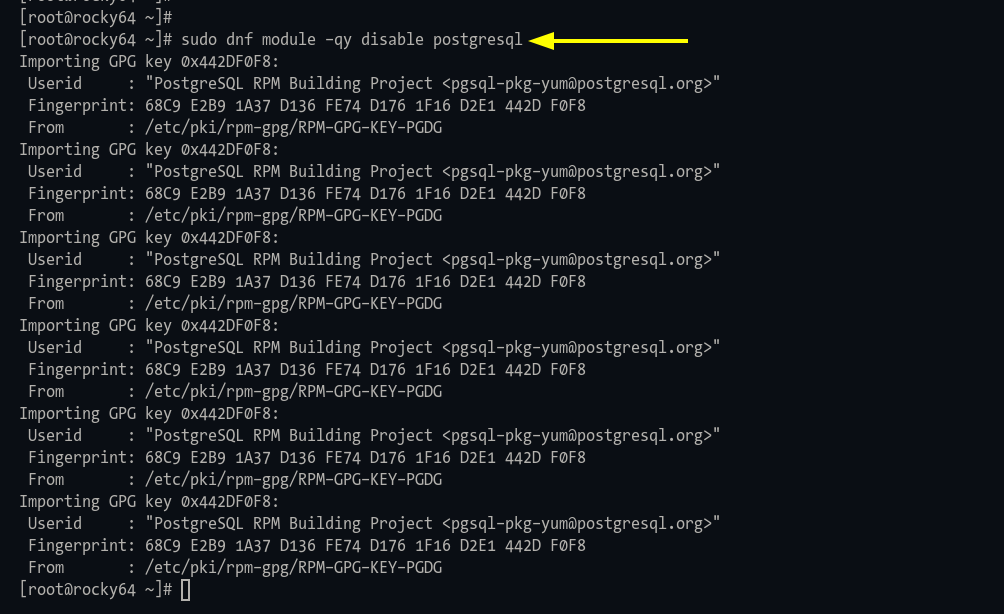
Before proceeding with the installation, disable Rocky Linux’s built-in PostgreSQL repository.
Step 1: Disable the repository using the command:
sudo dnf module -qy disable postgresql
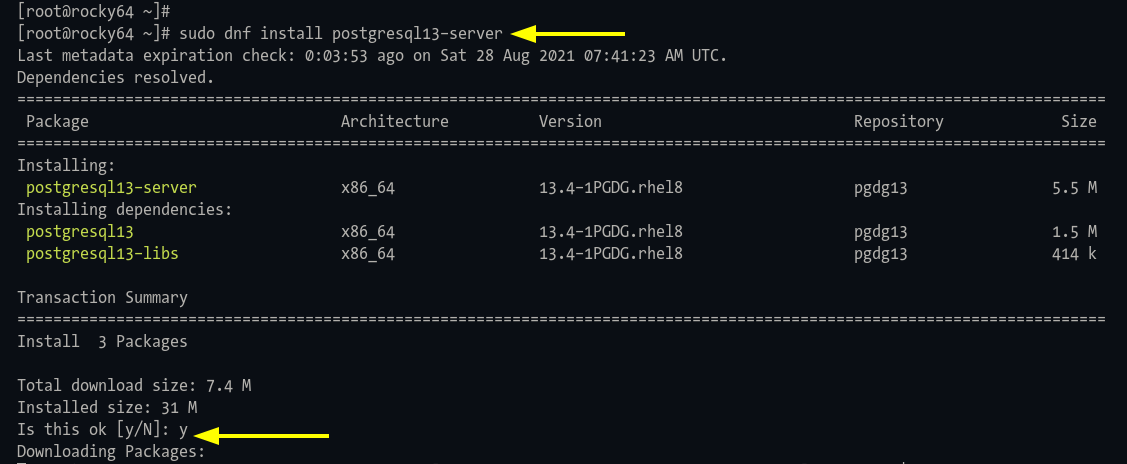
Step 2: Install PostgreSQL 13.4:
sudo dnf install postgresql13-server
Type ‘y‘ and press ‘Enter‘ to confirm:
PostgreSQL Database Initialization
Complete the PostgreSQL setup by initializing configurations and starting services:
Step 1: Initialize with:
sudo /usr/pgsql-13/bin/postgresql-13-setup initdb

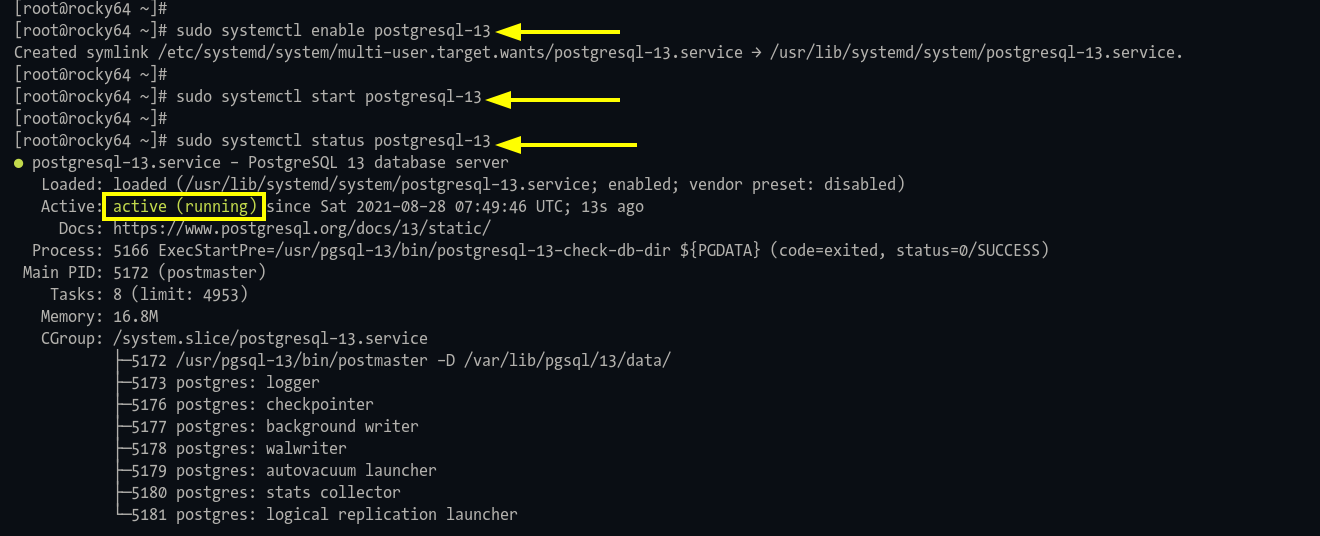
Step 2: Start and enable the PostgreSQL service:
sudo systemctl enable postgresql-13
sudo systemctl start postgresql-13
Step 3: Verify the service status:
sudo systemctl status postgresql-13
Securing PostgreSQL Deployment
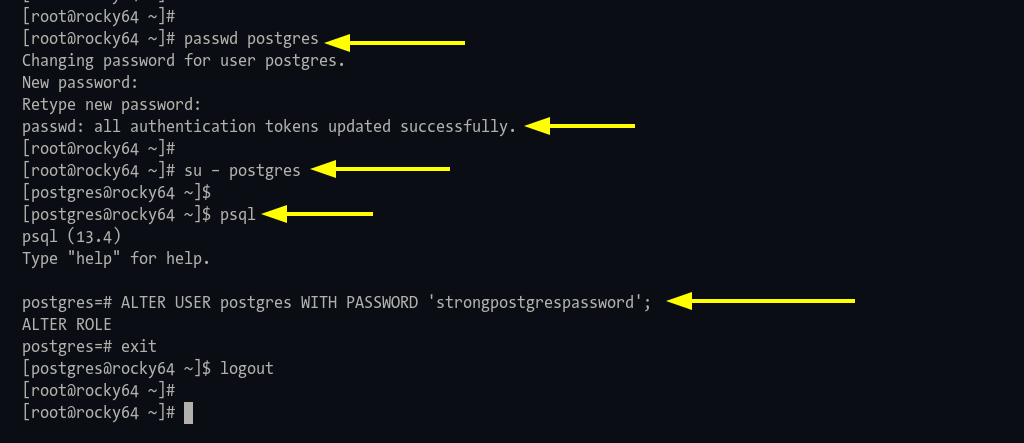
PostgreSQL automatically creates a “postgres” system and database user during installation. Update its password for enhanced security.
System Password: Execute:
passwd postgres
Database Password:
Log in as system “postgres“:
su - postgres
Enter the PostgreSQL shell with:
psql
Alter user password:
ALTER USER postgres WITH PASSWORD 'strongpostgrespassword';
Change Authentication Method
Switch from default ‘peer’ to ‘scram-sha-256’ password authentication for enhanced security in production environments.
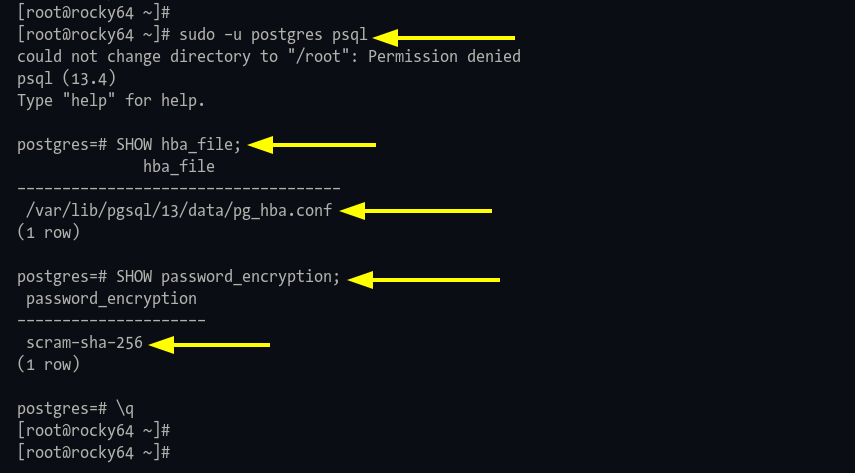
Step 1: Access PostgreSQL shell:
sudo -u postgres psql
Identify configuration file:
SHOW hba_file;
SHOW password_encryption;
Step 2: Edit “pg_hba.conf” file:
cd /var/lib/pgsql/13/data/
nano pg_hba.conf
Change to scram-sha-256:
# TYPE  DATABASE    USER    ADDRESS       METHOD
local   all         all                     scram-sha-256
host    all         all     127.0.0.1/32   scram-sha-256
host    all         all     ::1/128        scram-sha-256
Step 3: Restart PostgreSQL:
sudo systemctl restart postgresql-13
Creating New User and Database for Your Application
Create a user and a database for your applications:
Step 1: Open the PostgreSQL shell:
sudo -u postgres psql
Step 2: Create a user with:
CREATE USER johndoe WITH
CREATEDB
CREATEROLE
PASSWORD 'johndoestrongpassword';

Verify the user:
\du
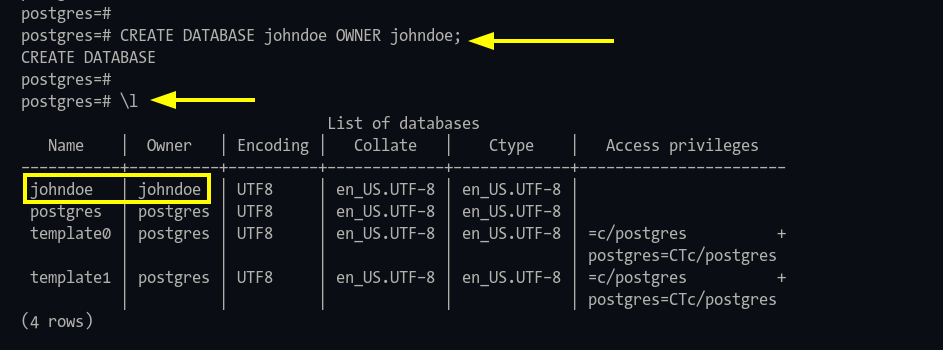
Step 3: Create a database and assign ownership:
CREATE DATABASE johndoe OWNER johndoe;
\l
Create Table and Insert Data
Create tables and manage data effectively:
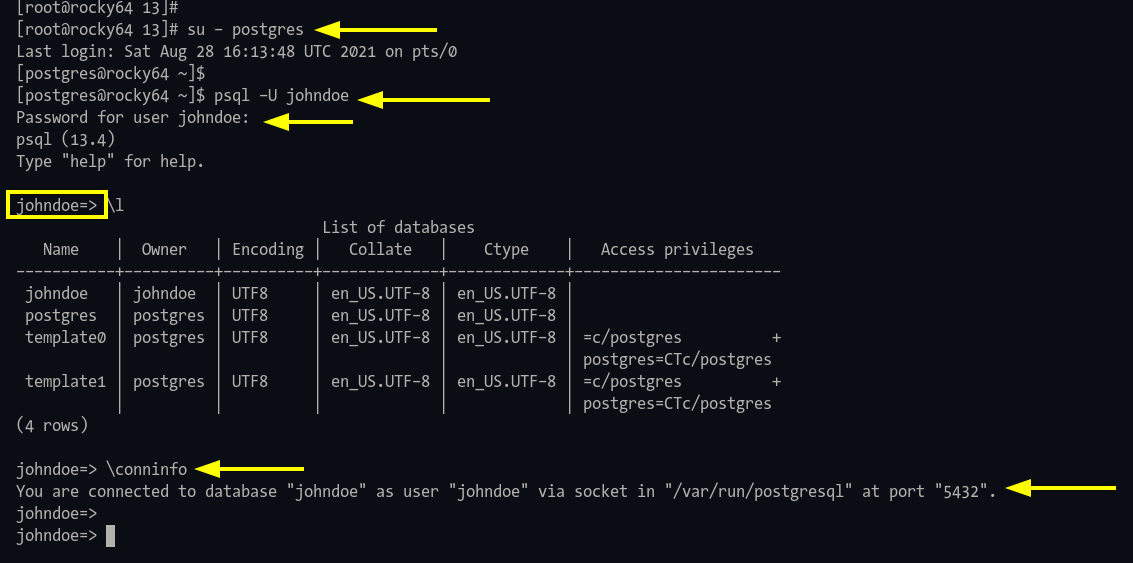
Step 1: Login as user ‘johndoe‘ and access database:
sudo -u postgres psql -U johndoe
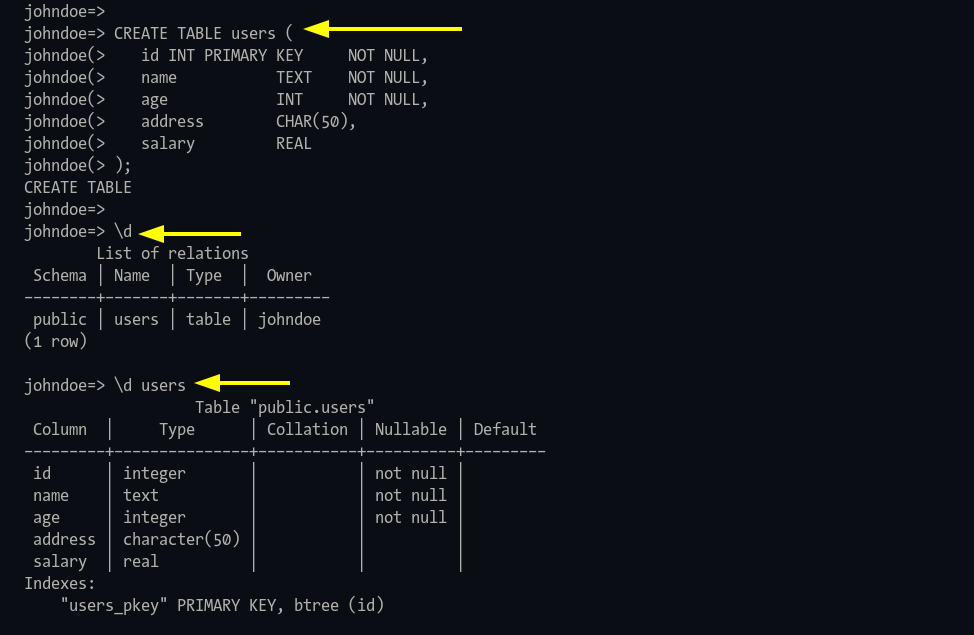
Step 2: Define table schema:
CREATE TABLE users (
  id INT PRIMARY KEY NOT NULL,
  name TEXT NOT NULL,
  age INT NOT NULL,
  address CHAR(50),
  salary REAL);
Step 3: Insert data:
INSERT INTO users (id, name, age, address, salary) VALUES (1, 'Paul', 32, 'California', 20000.00);
INSERT INTO users (id, name, age, address, salary) VALUES (2, 'Jesse', 35, 'Mexico', 30000.00);
INSERT INTO users (id, name, age, address, salary) VALUES (3, 'Linda', 27, 'Canada', 40000.00);

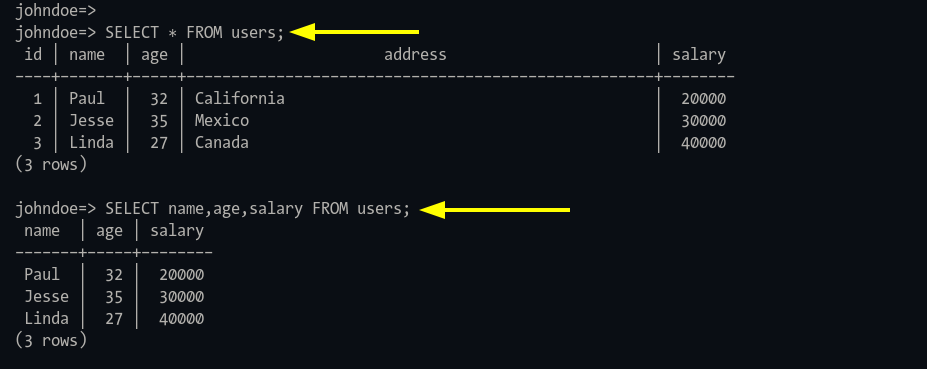
Step 4: Query data:
SELECT * FROM users;
Conclusion
You’ve successfully installed PostgreSQL on Rocky Linux, implemented security measures, and managed basic database operations!
Frequently Asked Questions
1. Why use PostgreSQL for my projects?
PostgreSQL is highly stable, flexible, supports both relational and non-relational queries, and is open-source, making it a preferred choice for diverse applications.
2. How often is PostgreSQL updated?
PostgreSQL receives regular updates. Ensure your system setup follows best practices for applying these updates.
3. Can I install different versions of PostgreSQL on the same machine?
Yes, you can use version-specific repositories to manage multiple PostgreSQL installations on a single system.
4. Is PostgreSQL secure for enterprise applications?
PostgreSQL is considered very secure, especially when configured correctly using password encryption methods like scram-sha-256.
