Roadiz is an advanced, open-source content management system (CMS) that utilizes a node-based system, allowing users to create custom data schemas and organize content according to their specific needs. Designed for both designers and developers, Roadiz provides a robust platform to build dynamic and engaging experiences. Its centralized document management interface supports storing images, videos, and PDFs, and it allows multiple themes for a single content base.
This tutorial will guide you through the steps to install Roadiz on a Debian 11 server.
Requirements
- A server running Debian 11.
- A configured root password on your server.
Install Nginx, PHP, and MariaDB
First, install the necessary services including the Nginx web server, MariaDB database server, PHP, and essential PHP extensions using the following command:
apt-get install -y nginx mariadb-server php php-cli php-fpm php-common php-mysql php-mbstring php-gd php-intl php-xml php-curl php-zip php-pgsql php-sqlite3 php-opcache php-apcu curl unzip wget -y
After installing the required packages, configure PHP by editing the php.ini file:
nano /etc/php/7.4/fpm/php.ini
Modify these settings:
memory_limit = 128M
post_max_size = 16M
upload_max_filesize = 16M
date.timezone = Asia/Kolkata
Save and exit the file. Subsequently, start and enable Nginx and MariaDB to launch at system startup:
systemctl start nginx
systemctl enable nginx
systemctl start mariadb
systemctl enable mariadb
With this setup complete, proceed to configure the database for Roadiz.
Configure a Database for Roadiz
Create a database along with a user and password for Roadiz. Access the MariaDB shell with:
mysql -u root -p
Create a database and user with these commands:
MariaDB [(none)]> CREATE DATABASE roadizdb;
MariaDB [(none)]> GRANT ALL ON roadizdb.* TO 'roadiz' IDENTIFIED BY 'password';
MariaDB [(none)]> FLUSH PRIVILEGES;
MariaDB [(none)]> EXIT;
With the database in place, you can now proceed with the Roadiz installation.
Install Roadiz
Begin by downloading the latest version of Roadiz from its Git repository into the Nginx document root. Execute the following:
cd /var/www/html/
git clone https://github.com/roadiz/roadiz.git
After downloading, edit the config.mysql.travis.yml file to match your database settings:
cd roadiz
nano conf/config.mysql.travis.yml
Update the configurations as follows:
driver: "pdo_mysql"
host: "localhost"
user: "roadiz"
password: "password"
dbname: "roadizdb"
Save and exit the file. Next, set your server’s IP address in the install.php file:
nano install.php
Include your IP address in the $allowedIp array:
$allowedIp = [
    '10.0.2.2',     // vagrant host (forwarded)
    '192.168.33.1', // vagrant host (private)
    '127.0.0.1', 'fe80::1', '::1', ':ffff:127.0.0.1', '::ffff:127.0.0.1', 'YOUR-IP-ADDRESS'
];
Save and close the file. Then, install Composer to manage PHP dependencies:
curl -sS https://getcomposer.org/installer -o composer-setup.php
php composer-setup.php --install-dir=/usr/local/bin --filename=composer
After installation, run the following to install the dependencies required by PHP:
composer install
Set the appropriate permissions for the Roadiz directory:
chown -R www-data:www-data /var/www/html/roadiz
chmod -R 755 /var/www/html/roadiz
Configure Nginx for Roadiz
Create an Nginx virtual host file for Roadiz by adding the following content to roadiz.conf:
nano /etc/nginx/sites-available/roadiz.conf
server {
    listen 80;
    listen [::]:80;

    server_name example.com;
    root /var/www/html/roadiz/;

    index index.php;

    location / {
        try_files $uri $uri/ /index.php$is_args$args;
    }

    location ~ ^/(dev|install|preview|clear_cache)\.php(/|$) {
        fastcgi_pass unix:/var/run/php/php7.3-fpm.sock;
        fastcgi_split_path_info ^(.+\.php)(/.*)$;
        include fastcgi_params;
        fastcgi_param SCRIPT_FILENAME $realpath_root$fastcgi_script_name;
        fastcgi_param DOCUMENT_ROOT $realpath_root;
    }

    location ~ ^/index\.php(/|$) {
        fastcgi_pass unix:/var/run/php/php7.3-fpm.sock;
        fastcgi_split_path_info ^(.+\.php)(/.*)$;
        include fastcgi_params;
        fastcgi_param SCRIPT_FILENAME $realpath_root$fastcgi_script_name;
        fastcgi_param DOCUMENT_ROOT $realpath_root;
        internal;
     }
}
Save and exit the file. Enable the virtual host with:
ln -s /etc/nginx/sites-available/roadiz.conf /etc/nginx/sites-enabled/
Test Nginx for syntax errors with:
nginx -t
Restart Nginx and PHP-FPM to apply the changes:
systemctl restart nginx
systemctl restart php7.4-fpm
Access the Roadiz Dashboard
Open your browser and navigate to http://example.com/install.php. You will be greeted with the installation screen:
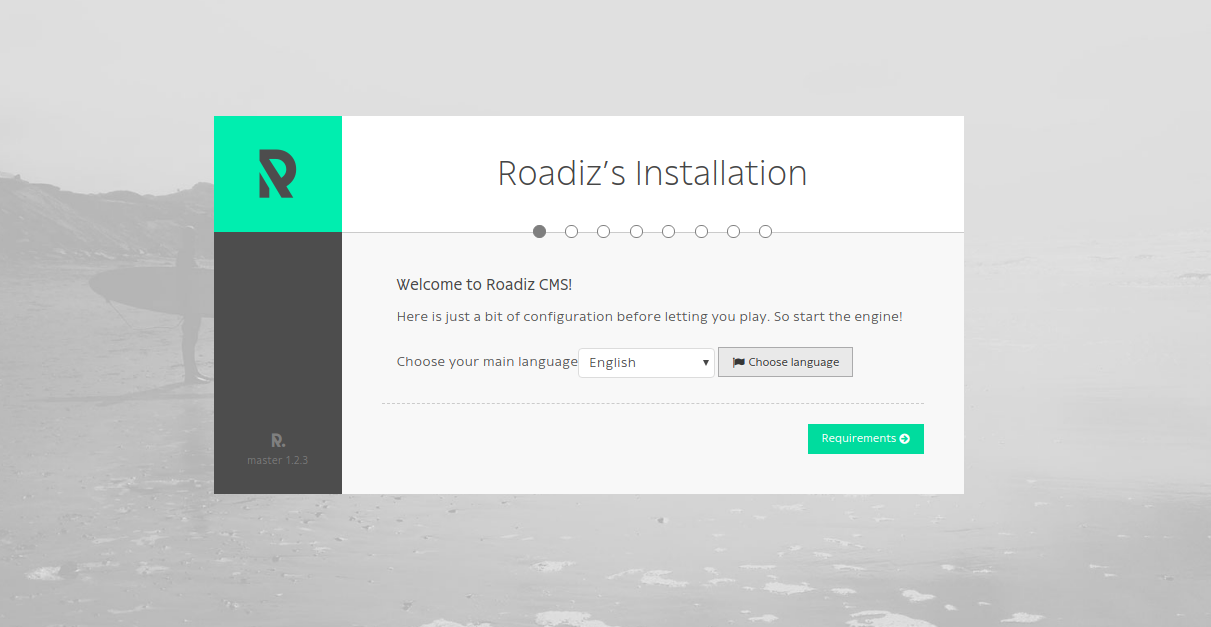
Select your language and click on Requirements. Ensure all necessary extensions are installed:
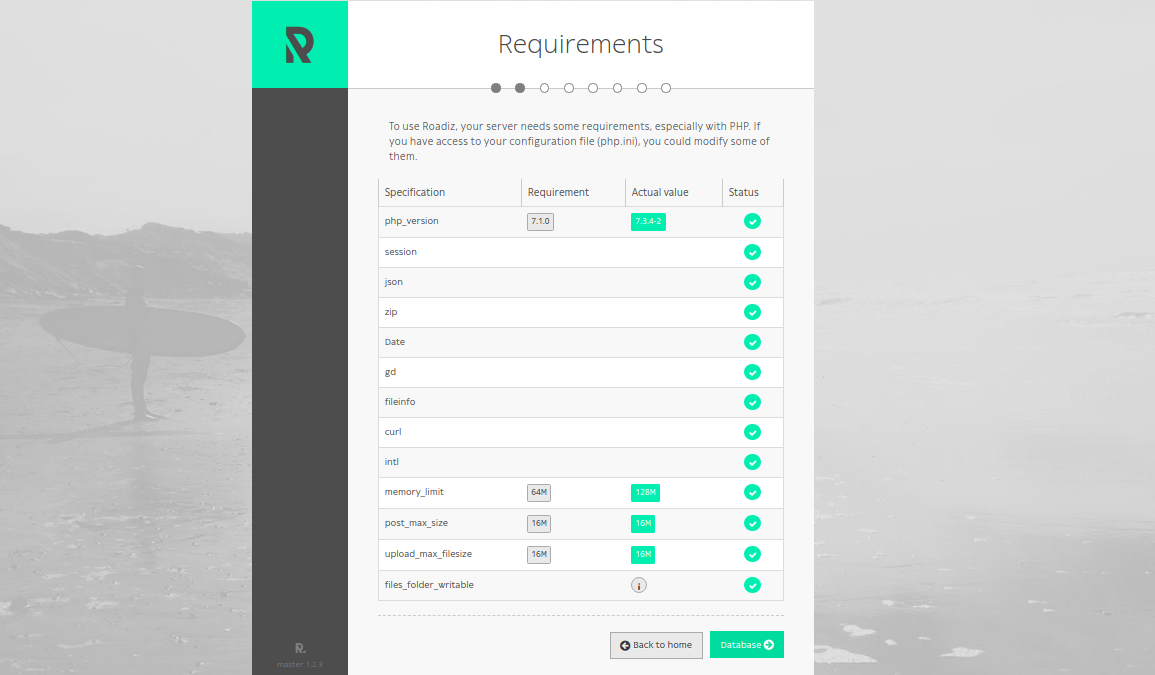
Continue by clicking the Database button and fill in your database details:
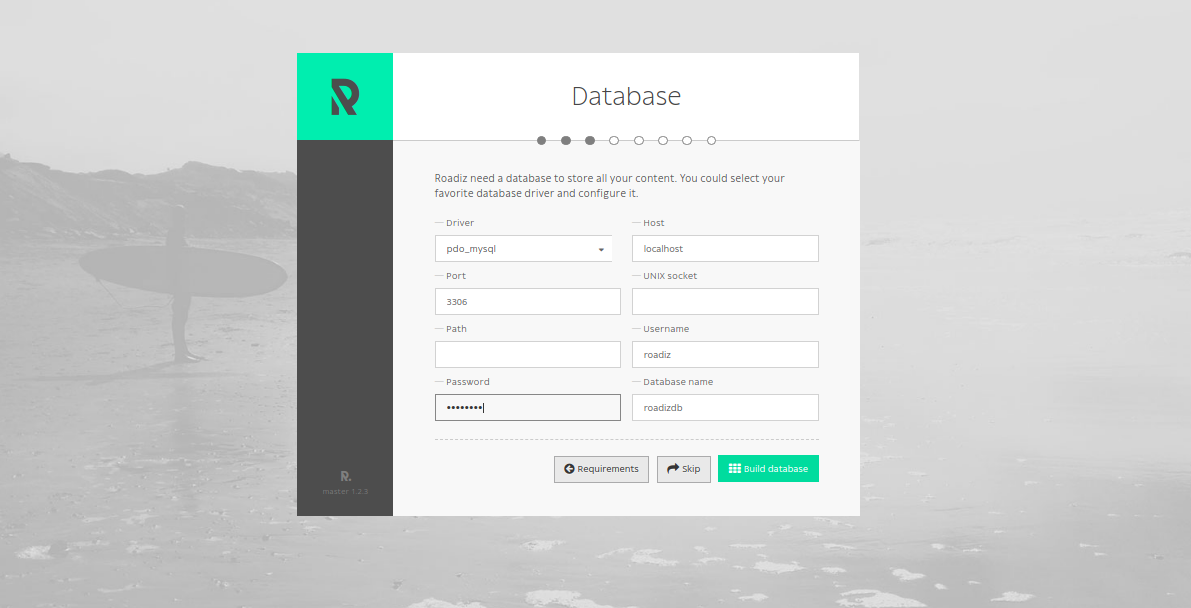
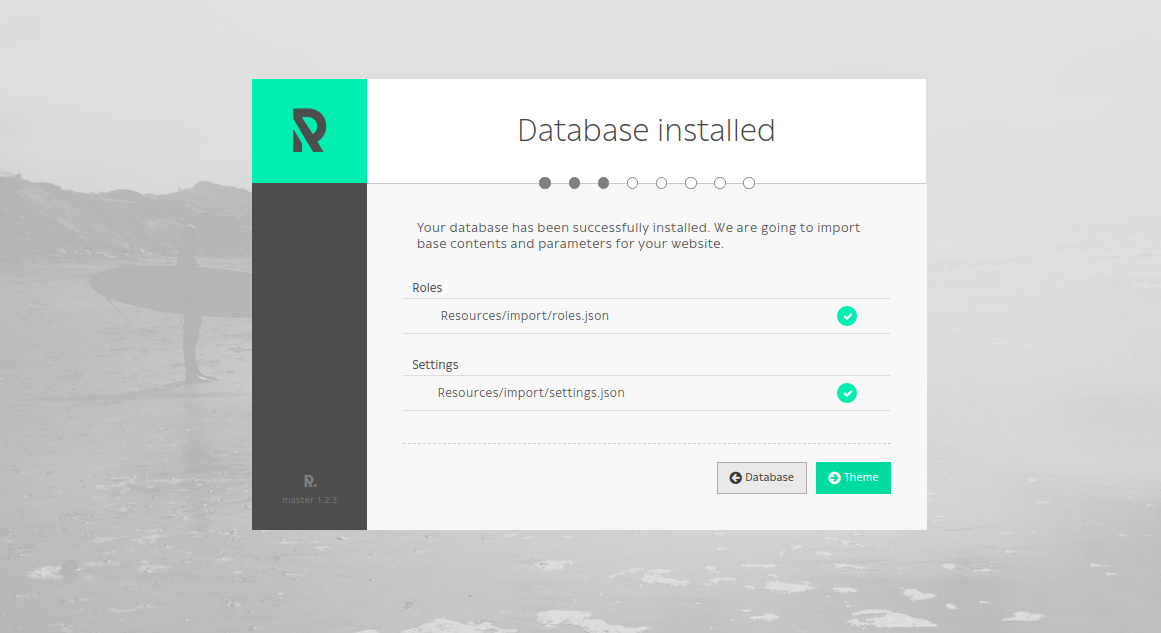
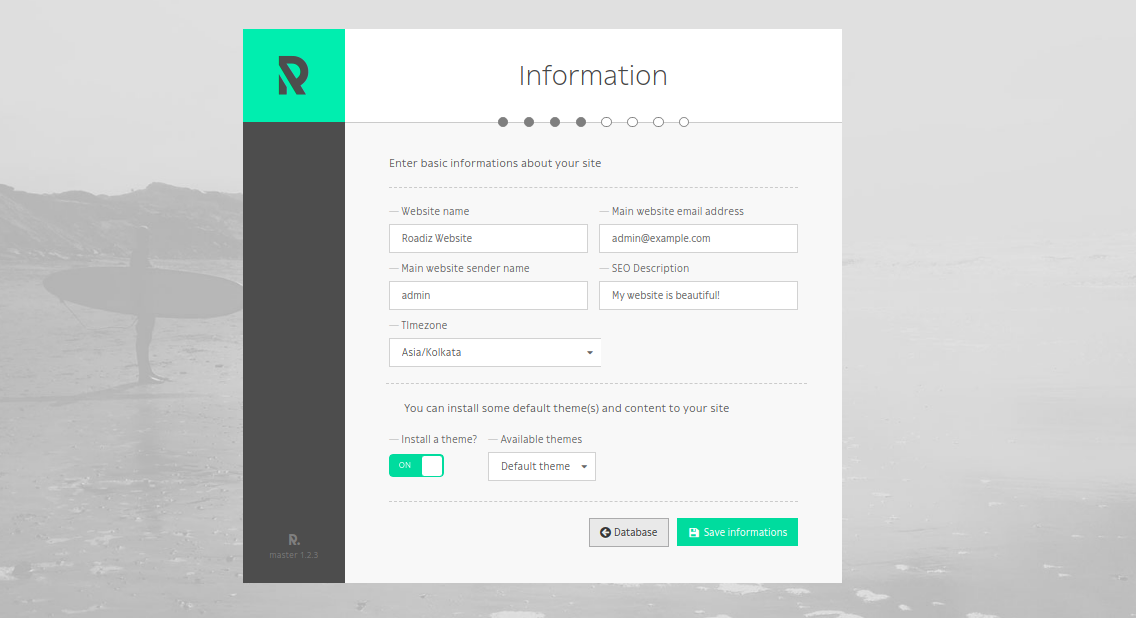
Build your database and proceed to the theme setup by clicking Theme. Set your site name and email address:
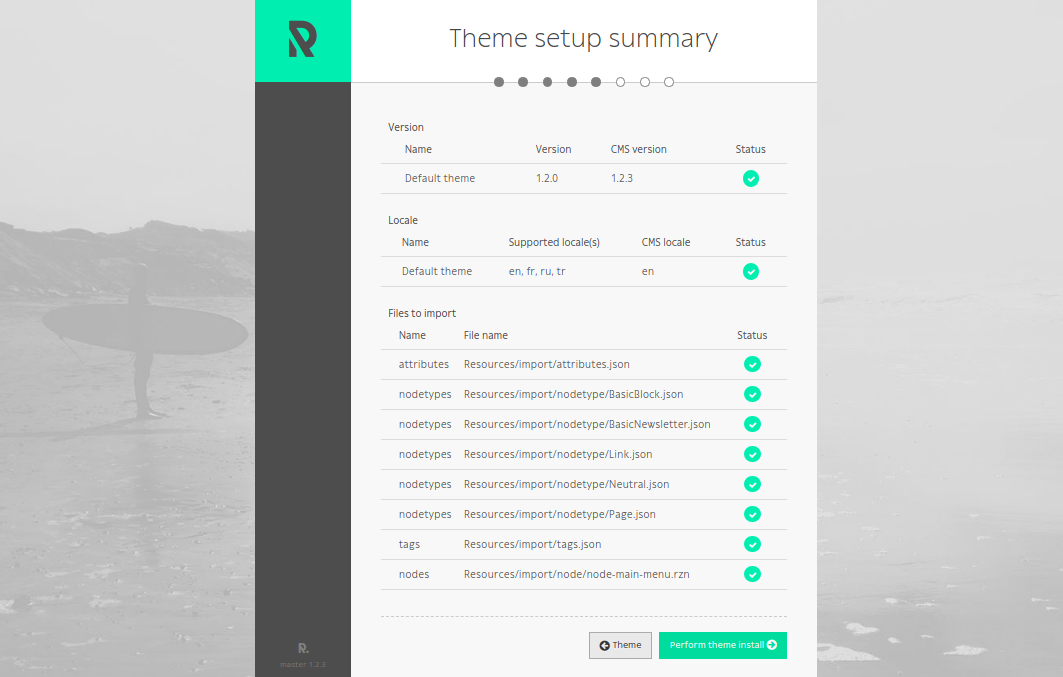
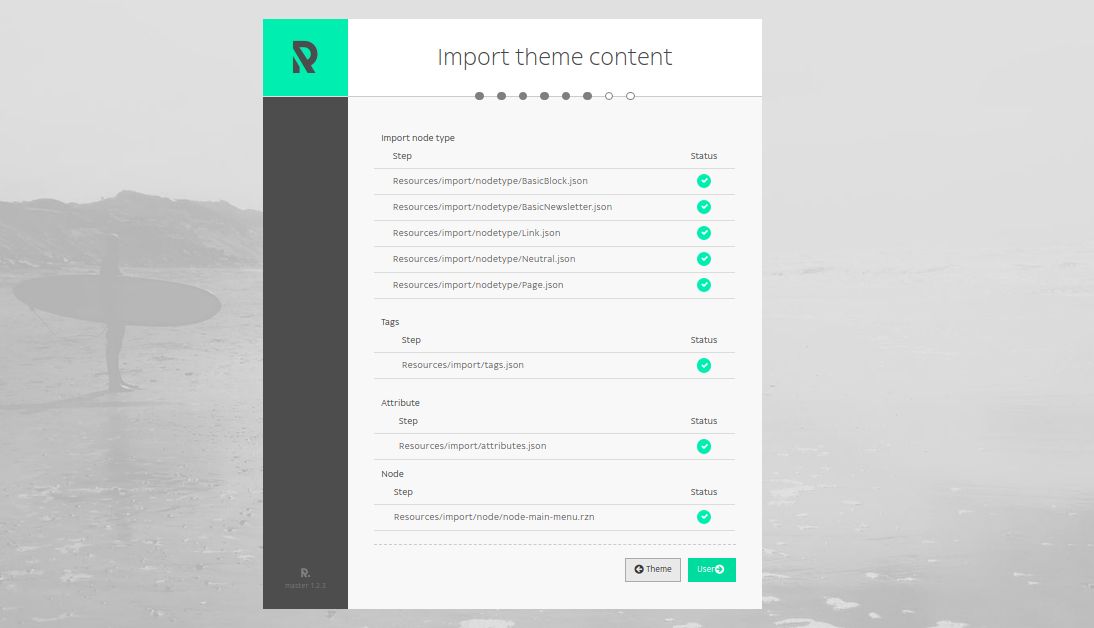
Continue by performing the theme install and creating an admin user:
At the conclusion of the setup, click done and exit the installation interface:
Remove the install.php file to secure your Roadiz installation:
rm -rf /var/www/html/roadiz/install.php
Access your admin interface at http://example.com/rz-admin. Log in to view the Roadiz dashboard:
FAQs
What is the purpose of Roadiz?
Roadiz is a CMS designed to enable designers and developers to create custom data schemas, manage documents, and configure multiple themes to provide a seamless content experience.
Is Roadiz suitable for beginners?
While Roadiz is rich in features and highly customizable, it is primarily targeted toward developers and designers who have some level of technical expertise.
What is the default PHP version used in this tutorial?
The tutorial uses PHP version 7.4. Adjust the PHP commands if you’re using a different version.
How do I secure Roadiz after installation?
To secure your Roadiz installation, make sure to delete the install.php file and ensure proper server security configurations are in place.
What if I encounter issues during the installation?
If you face challenges, consult the Roadiz documentation, seek support from the community forums, or verify each step to ensure all commands and configurations are correct.
