Ruby on Rails (RoR) is a popular open-source web application framework licensed under the MIT License. As a server-side web application framework, it follows the MVC (Model-View-Controller) architecture.
Rails provides default structures for databases, web services, and web pages. Over 3000 developers have contributed to the Rails framework, and it powers many well-known applications such as GitHub, Airbnb, and SoundCloud.
This guide will walk you through the process of installing Ruby on Rails on Ubuntu 18.04 LTS. You’ll learn how to set it up with a PostgreSQL database and create your first Rails project.
Prerequisites
- Ubuntu 18.04 LTS
- Root privileges
Procedure Overview
- Install RVM (Ruby Version Manager)
- Set up Ruby
- Install Node.js
- Configure RubyGem
- Install Ruby on Rails
- Set up PostgreSQL Database for Rails Development
- Create Your First App with Rails and PostgreSQL
Step 1 – Install RVM (Ruby Version Manager)
RVM is a command-line tool that helps manage Ruby installations. It enables you to install and configure multiple Ruby versions on one system. Start by adding the RVM key to your server:
gpg --keyserver hkp://keys.gnupg.net --recv-keys 409B6B1796C275462A1703113804BB82D39DC0E3 \
7D2BAF1CF37B13E2069D6956105BD0E739499BDB
Then, install the stable version of RVM with the following command:
curl -sSL https://get.rvm.io | bash -s stable --ruby
This will automatically install the required packages, along with the latest stable RVM version. After installation, run:
source /usr/local/rvm/scripts/rvm
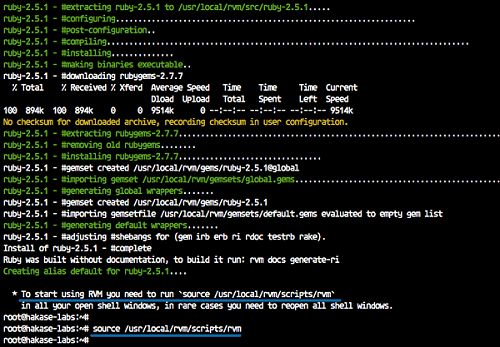
Now, verify your RVM installation:
rvm version
Step 2 – Setup Ruby Latest Version
While the RVM installation process includes installing Ruby, you can manage Ruby versions with RVM. Update RVM to the latest version:
rvm get stable --autolibs=enable
usermod -a -G rvm root
Check available Ruby versions:
rvm list known
Install the latest stable version, Ruby 2.5.1, using:
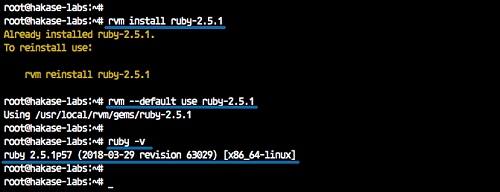
rvm install ruby-2.5.1
Set Ruby 2.5.1 as the default:
rvm --default use ruby-2.5.1
Verify the Ruby installation:
ruby -v
Ruby 2.5.1 should now be the default version.
Step 3 – Install Node.js
Rails operations require a JavaScript runtime, and Node.js is a recommended choice for Ubuntu. Begin by adding the Node.js repository:
curl -sL https://deb.nodesource.com/setup_10.x | sudo -E bash -
Install Node.js and essential packages:
sudo apt install -y nodejs
sudo apt install gcc g++ make
Node.js 10 should now be installed on your system.
Step 4 – Configure RubyGem
RubyGems, a Ruby Package Manager, is included with your Ruby installation. Update it to the latest version:
gem update --system
gem -v
Note: To avoid installing documentation for each package, modify the ‘.gemrc’ file:
echo "gem: --no-document" >> ~/.gemrc
Step 5 – Install Ruby on Rails
We’ll install the stable Ruby on Rails 5.2.0 using RubyGems:
gem install rails -v 5.2.0
After installation, confirm the Rails version:
rails -v
Rails 5.2.0 should now be set up on your system.

Step 6 – Setup PostgreSQL Database for Rails Development
Although Rails defaults to SQLite, we’ll use PostgreSQL in this setup. Start by installing PostgreSQL:
sudo apt install postgresql postgresql-contrib libpq-dev -y
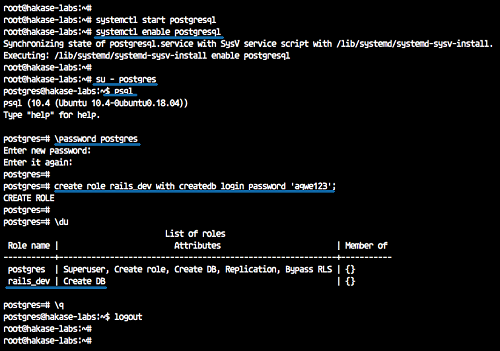
Enable and start the PostgreSQL service:
systemctl start postgresql
systemctl enable postgresql
Configure PostgreSQL by creating a new user ‘rails_dev’ with database creation privileges:
su - postgres
psql
\password postgres
create role rails_dev with createdb login password 'aqwe123';
\du
This completes the PostgreSQL setup for Rails development.
Step 7 – Create Your First App with Rails and PostgreSQL
Use Rails’ command-line interface to bootstrap your first app. Create a new project ‘myapp’ using PostgreSQL:
rails new myapp -d postgresql
Navigate to the ‘myapp’ directory and edit the database configuration file:
cd myapp/
vim config/database.yml
Modify the ‘development’ and ‘test’ sections as follows:
username: rails_dev
password: aqwe123
host: localhost
port: 5432
Set up and migrate the database:
rails db:setup
rails db:migrate
Start the Rails server:
rails s -b 192.168.1.10 -p 8080
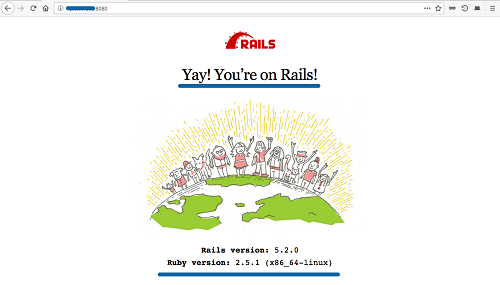
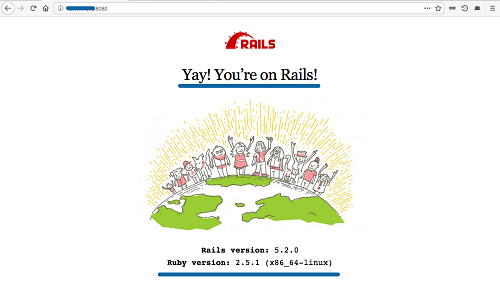
Access your app at http://192.168.1.10:8080/. The default Rails project homepage should appear.
Test a simple CRUD operation:
rails g scaffold Post title:string body:text
rake db:migrate
rails s -b 192.168.1.10 -p 8080
Access the CRUD interface at http://192.168.1.10:8080/posts/.

After creating a post, the application should function correctly.

You have successfully set up Ruby on Rails with a PostgreSQL database on Ubuntu 18.04 LTS.
FAQ
What is RVM and why do I need it?
RVM (Ruby Version Manager) is a command-line tool for managing multiple Ruby environments. It allows you to easily switch between different versions of Ruby, which is crucial when working with projects that require specific versions.
Why do we need Node.js for Rails?
Node.js provides a JavaScript runtime that compiles Rails’ asset pipeline. It’s essential for interactivity features in Rails applications, and it’s recommended to use Node.js on Ubuntu.
What role does PostgreSQL play in a Rails application?
PostgreSQL serves as the database backend for storing and organizing application data. It is a powerful, open-source relational database system that is widely supported by Rails.
Why do we disable gem documentation?
Disabling gem documentation speeds up the installation process for Ruby packages, reducing unnecessary disk usage. You can choose to install documentation manually when needed.
How do I run the Rails server on a different IP or port?
Use the command rails s -b [IP] -p [PORT] to specify the server’s binding IP address and port.
