Spigot is an enhanced version of the Minecraft server software, based on CraftBukkit. It offers improved performance, more configuration options, and additional features while maintaining compatibility with existing plugins and mods.
In this guide, you’ll learn how to set up and install a Spigot Server on an Ubuntu 20.04 server, along with instructions to install plugins.
Prerequisites
- A server running Ubuntu 20.04 with at least 4GB RAM and 2 CPU cores.
- A non-root user with sudo privileges.
- System updates completed.
$ sudo apt update && sudo apt upgrade
- Installation of required packages.
$ sudo apt install wget apt-transport-https gnupg nano screen
Step 1 – Configure Firewall
First, configure the firewall. Ubuntu provides UFW (Uncomplicated Firewall) by default.
Check if the firewall is active:
$ sudo ufw status
Expected output:
Status: inactive
Allow SSH port to prevent disruption when enabling the firewall:
$ sudo ufw allow OpenSSH
Allow port 25565 for Spigot server:
$ sudo ufw allow 25565
Enable the firewall:
$ sudo ufw enable
Command may disrupt existing ssh connections. Proceed with operation (y|n)? y
Firewall is active and enabled on system startup
Verify the firewall status again:
$ sudo ufw status
Output should resemble:
Status: active

To                         Action      From
--                         ------      ----
OpenSSH                    ALLOW       Anywhere
25565                      ALLOW       Anywhere
OpenSSH (v6)               ALLOW       Anywhere (v6)
25565 (v6)                 ALLOW       Anywhere (v6)
Step 2 – Install Java and Git
Java and Git are necessary for the Spigot installer. Ubuntu 20.04 uses OpenJDK 17 as the latest version. Install it with:
$ sudo apt install openjdk-17-jre-headless
Verify the installation:
$ java --version
openjdk 17.0.1 2021-10-19
OpenJDK Runtime Environment (build 17.0.1+12-Ubuntu-120.04)
OpenJDK 64-Bit Server VM (build 17.0.1+12-Ubuntu-120.04, mixed mode, sharing)
Next, install Git:
$ sudo apt install git
Step 3 – Create a Minecraft User
Create a dedicated user for running the server:
$ sudo adduser minecraft
Switch to the newly created user:
$ sudo su - minecraft
Step 4 – Download and Install Spigot
Build Spigot using the BuildTools.jar application. First, switch to the home directory:
minecraft:$ cd ~
Create and access a new directory for BuildTools:
minecraft:$ mkdir buildtools && cd buildtools
Download the BuildTools.jar file:
minecraft:$ wget -O BuildTools.jar https://hub.spigotmc.org/jenkins/job/BuildTools/lastSuccessfulBuild/artifact/target/BuildTools.jar
Build the latest version of Spigot:
minecraft:$ java -jar BuildTools.jar --rev latest
The build may take some time depending on your server resources.
List the generated files:
minecraft:$ ls
apache-maven-3.6.0  BuildData  BuildTools.jar  BuildTools.log.txt  Bukkit  CraftBukkit  Spigot  spigot-1.18.1.jar  work
Create a directory for your Spigot Server and switch to it:
minecraft:$ cd ~ && mkdir server && cd server
Move your Spigot jar file to the new server directory:
minecraft:$ mv ~/buildtools/spigot-1.18.1.jar ~/server/spigot.jar
Step 5 – Start Spigot Server
To start the Spigot server, create a startup script that allows passing Java parameters to optimize the server:
Create and open the Spigot startup script:
minecraft:$ sudo nano spigotstart.sh
Insert the following code:
#!/bin/sh

java -Xms3G -Xmx3G -XX:+UseG1GC -XX:+ParallelRefProcEnabled -XX:MaxGCPauseMillis=200 -XX:+UnlockExperimentalVMOptions -XX:+DisableExplicitGC -XX:+AlwaysPreTouch -XX:G1NewSizePercent=30 -XX:G1MaxNewSizePercent=40 -XX:G1HeapRegionSize=8M -XX:G1ReservePercent=20 -XX:G1HeapWastePercent=5 -XX:G1MixedGCCountTarget=4 -XX:InitiatingHeapOccupancyPercent=15 -XX:G1MixedGCLiveThresholdPercent=90 -XX:G1RSetUpdatingPauseTimePercent=5 -XX:SurvivorRatio=32 -XX:+PerfDisableSharedMem -XX:MaxTenuringThreshold=1 -Dusing.aikars.flags=https://mcflags.emc.gs -Daikars.new.flags=true -jar spigot.jar nogui
The -Xms3G -Xmx3G parameters allocate 4GB RAM to Java heap space, leaving 1GB for the OS. Adjust according to your server’s RAM, e.g., allocate 14GB if you have 16GB total.
Save the file with Ctrl + X, then press Y when prompted.
Make the script executable:
minecraft:$ chmod +x spigotstart.sh
Start the Spigot server:
minecraft:$ ./spigotstart.sh
The server will not immediately start, instead showing:
[ServerMain/INFO]: You need to agree to the EULA in order to run the server. Go to eula.txt for more info.
Edit eula.txt:
minecraft:$ nano eula.txt
Change the eula variable to true:
eula=true
After editing, save the file by pressing Ctrl + X and then Y.
Configure the server to run as a background service before restarting it.
Step 6 – Configure Spigot as a Service
To ensure the server runs seamlessly in the background, create a service to automatically start Spigot during boot:
Exit the minecraft user:
minecraft:$ exit
Create and open a Spigot service file:
$ sudo nano /etc/systemd/system/spigot.service
Insert the following code:
[Unit]
Description=SpigotMC
After=network.target

[Service]
Type=forking
User=minecraft
Group=minecraft
ExecStart=/usr/bin/screen -d -m -S minecraft /home/minecraft/server/spigotstart.sh
ExecStop=/usr/bin/screen -S minecraft -p 0 -X stuff "stop$(printf \\r)"
WorkingDirectory=/home/minecraft/server

[Install]
WantedBy=multi-user.target
Save the file with Ctrl + X and Y.
Reload service configuration:
$ sudo systemctl daemon-reload
Enable the service:
$ sudo systemctl enable spigot
Start the Spigot service:
$ sudo systemctl start spigot
Verify the service status:
$ sudo systemctl status spigot
? spigot.service - SpigotMC
     Loaded: loaded (/etc/systemd/system/spigot.service; disabled; vendor preset: enabled)
     Active: active (running) since [time]
    Process: [ID] ExecStart=/usr/bin/screen -d -m -S minecraft /home/minecraft/server/spigotstart.sh (code=exited)
   Main PID: [ID] (screen)
      Tasks: 25 (limit: [limit])
     Memory: 3.2G
     CGroup: /system.slice/spigot.service
             ??[ID] /usr/bin/SCREEN -d -m -S minecraft /home/minecraft/server/spigotstart.sh
             ??[ID] /bin/sh /home/minecraft/server/spigotstart.sh
             ??[ID] java -Xms3G -Xmx3G [other parameters]
Step 7 – Connect to Minecraft
With the server running, connect to Minecraft. Launch the game:
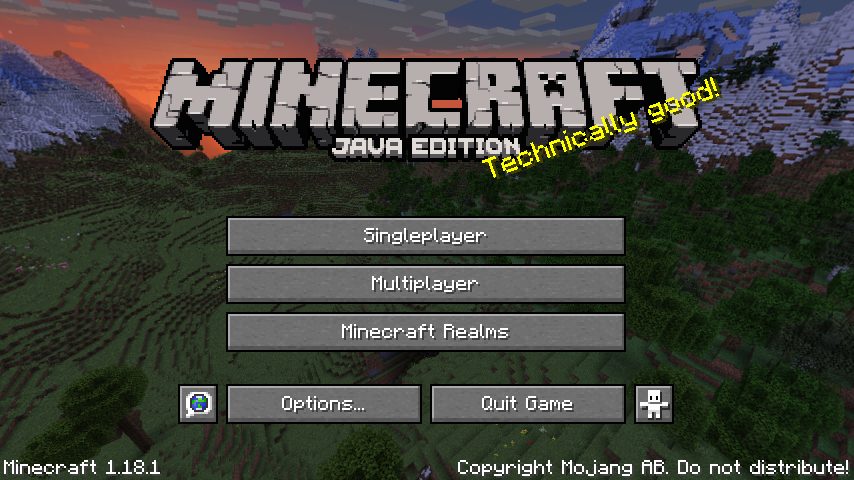
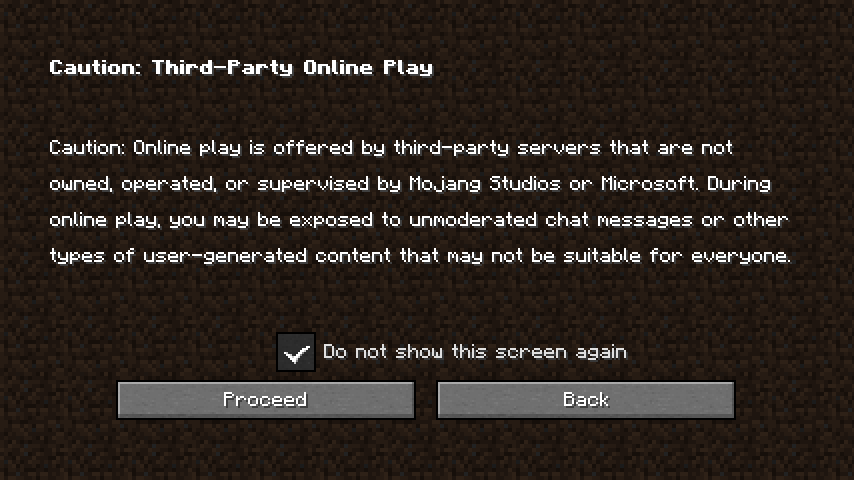
Select Multiplayer, then ignore future warnings by ticking Do not show this screen again:
Click Add Server:
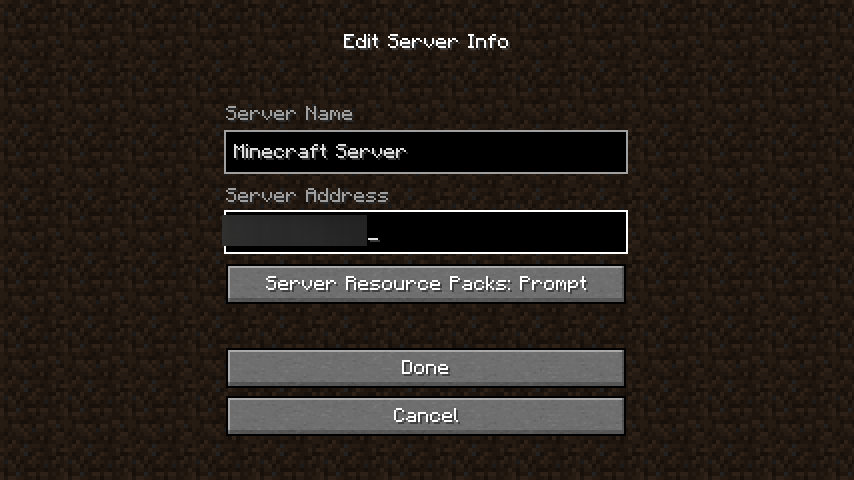
Enter your server’s public IP address and name, then click Done.
Your server will display in the list.
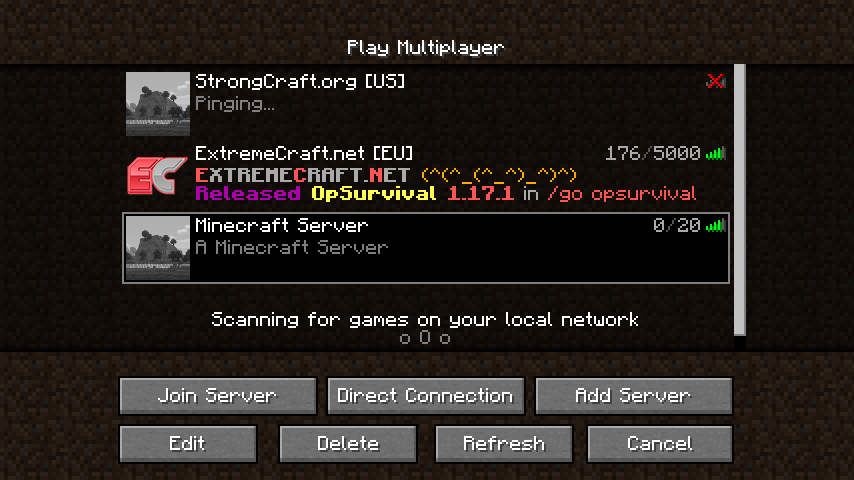
Click your server name and press Join Server to begin. Your game will launch shortly.
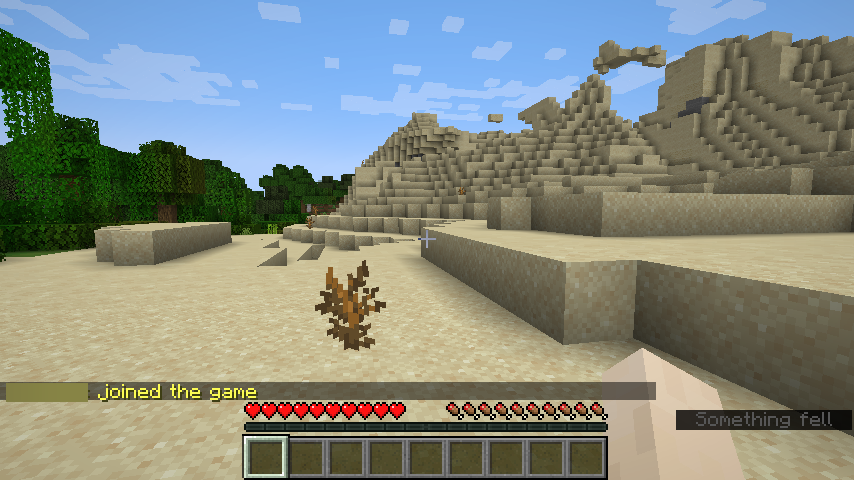
Invite your friends to join your server and enjoy playing together.
Step 8 – Customize Server Properties
Customize your server by editing /home/minecraft/server/server.properties. Key properties include:
- Enable command blocks: Choose
trueorfalse.enable-command-block=false
- Gamemode: Options are survival, creative, adventure, and spectator. Or use integers from 0-3 respectively.
gamemode=survival
- Difficulty: Options are peaceful, easy, normal, and hard. Or use integers from 0-3 respectively.
difficulty=easy
- MOTD: Message Of The Day, displayed on Server list. Supports color, special characters, formatting, and can be up to 59 characters.
motd=A Minecraft Server
- PVP: Enable Player vs Player mode with
trueorfalse.pvp=true
- Server Port: Minecraft server’s listening port, default is 25565.
server-port=25565
If the port is changed, update the firewall to allow traffic.
- For more, visit the Minecraft wiki.
Restart the Spigot server after editing properties:
$ sudo systemctl restart spigot
Step 9 – Install Plugins
Enhanced game features are available from Spigot Resources or Bukkit Plugin pages.
Plugins from Spigot must be downloaded manually. For Bukkit plugins, use the command below:
Download the plugin’s .jar file to /home/minecraft/server/plugins:
$ sudo wget -P /home/minecraft/server/plugins/ --content-disposition <plugin url>
For example, download the WorldEdit plugin with:
$ sudo wget -P /home/minecraft/server/plugins --content-disposition https://dev.bukkit.org/projects/worldedit/files/latest
Reload the plugin by restarting the Spigot server:
$ sudo systemctl restart spigot
Step 10 – Update Spigot
To update Spigot, repeat Step 4 with the latest BuildTools.jar to recreate spigot.jar. Backup existing jars and stop the server first.
Conclusion
This concludes the tutorial on setting up a Spigot Minecraft server on Ubuntu 20.04. Share questions or feedback in the comments below.
FAQ
- Can I run the Spigot server on a different Linux distribution?Yes, Spigot can run on any Linux distribution where you can fulfill its dependencies, like Java and Git. Adjust commands for your package manager if using non-Ubuntu systems.
- How do I back up my Minecraft server?To back up your server, ensure it is stopped, then copy your server’s world and configuration files to a secure location.
- Can I install Spigot alongside other server software?You can run multiple instances of Minecraft servers, including Spigot, as long as they use different ports and directories, but each will require sufficient resources.
