Syncthing is an open-source tool designed to synchronize files across two or more computers over a network using a peer-to-peer architecture. This means your data is exchanged directly between your devices. All data transmitted between devices is encrypted with TLS, ensuring a secure exchange of information. Whenever you create, modify, or delete data on one Syncthing machine, it automatically replicates to other connected devices. Syncthing can be installed on all major operating systems, including Linux, Windows, and Mac OS X.
In this guide, we will walk you through the steps to install and set up a Syncthing server on Ubuntu 20.04.
Prerequisites
- Two servers running Ubuntu 20.04.
- A valid domain name aligned with your server IP.
- Root password configured on both servers.
Getting Started
To begin, update your system packages to their latest versions by executing the following command:
apt-get update -y
Once all packages are updated, you can proceed to the installation process.
Installing Syncthing Server on Both Servers
Syncthing is not included in the default Ubuntu 20.04 repository. Thus, you need to add the Syncthing repository to your system’s APT sources.
First, install the necessary dependencies on both servers with this command:
apt-get install gnupg2 curl apt-transport-https -y
Next, download and add the release key using the following command:
curl -s https://syncthing.net/release-key.txt | apt-key add -
Then, add the Syncthing repository to APT:
echo "deb https://apt.syncthing.net/ syncthing release" > /etc/apt/sources.list.d/syncthing.list
Update the repository and install the Syncthing server with:
apt-get update -y
apt-get install syncthing -y
Upon completion, verify the installed Syncthing version:
syncthing --version
The output should resemble the following:
syncthing v1.18.0 "Fermium Flea" (go1.16.5 linux-amd64) deb@build.syncthing.net 2021-06-21 20:53:50 UTC [noupgrade]
Creating a Systemd Unit File on Both Servers
Now, create a systemd unit file to manage the Syncthing service on both servers. Execute:
nano /etc/systemd/system/syncthing@.service
Add these lines to the file:
[Unit]
Description=Syncthing - Open Source Continuous File Synchronization for %I
Documentation=man:syncthing(1)
After=network.target

[Service]
User=%i
ExecStart=/usr/bin/syncthing -no-browser -gui-address="0.0.0.0:8384" -no-restart -logflags=0
Restart=on-failure
SuccessExitStatus=3 4
RestartForceExitStatus=3 4

[Install]
WantedBy=multi-user.target
After saving and closing the file, reload the systemd daemon to apply the changes:
systemctl daemon-reload
Start the Syncthing service by running:
systemctl start syncthing@root
Verify that Syncthing is running with:
systemctl status syncthing@root
You should see output like this:
? syncthing@root.service - Syncthing - Open Source Continuous File Synchronization for root
     Loaded: loaded (/etc/systemd/system/syncthing@.service; disabled; vendor preset: enabled)
     Active: active (running) since Fri 2021-07-09 04:40:12 UTC; 5s ago
       Docs: man:syncthing(1)
   Main PID: 2878 (syncthing)
      Tasks: 14 (limit: 2353)
     Memory: 44.2M
     CGroup: /system.slice/system-syncthing.slice/syncthing@root.service
             ??2878 /usr/bin/syncthing -no-browser -gui-address=0.0.0.0:8384 -no-restart -logflags=0
             ??2889 /usr/bin/syncthing -no-browser -gui-address=0.0.0.0:8384 -no-restart -logflags=0

Jul 09 04:40:14 node1 syncthing[2878]: [WPOF6] INFO: QUIC listener ([::]:22000) starting
Jul 09 04:40:14 node1 syncthing[2878]: [WPOF6] INFO: Loading HTTPS certificate: open /root/.config/syncthing/https-cert.pem: no such file or d>
Jul 09 04:40:14 node1 syncthing[2878]: [WPOF6] INFO: Creating new HTTPS certificate
Jul 09 04:40:14 node1 syncthing[2878]: [WPOF6] INFO: Completed initial scan of sendreceive folder "Default Folder" (default)
Jul 09 04:40:14 node1 syncthing[2878]: [WPOF6] INFO: GUI and API listening on [::]:8384
Jul 09 04:40:14 node1 syncthing[2878]: [WPOF6] INFO: Access the GUI via the following URL: http://127.0.0.1:8384/
Jul 09 04:40:14 node1 syncthing[2878]: [WPOF6] INFO: My name is "node1"
Jul 09 04:40:14 node1 syncthing[2878]: [WPOF6] WARNING: Syncthing should not run as a privileged or system user. Please consider using a norma>
Jul 09 04:40:14 node1 syncthing[2878]: [WPOF6] INFO: quic://0.0.0.0:22000 detected NAT type: Not behind a NAT
Jul 09 04:40:14 node1 syncthing[2878]: [WPOF6] INFO: quic://0.0.0.0:22000 resolved external address quic://45.58.35.6:22000 (via stun.syncthin>
Verify Syncthing is listening on port 8384 with:
ss -antpl | grep 8384
The expected output is:
LISTEN 0 4096 *:8384 *:* users:(("syncthing",pid=2889,fd=12))
Accessing the Syncthing Web Interface
Open your web browser and access the Syncthing web interface using the URLs http://first-server-ip:8384 and http://second-server-ip:8384.
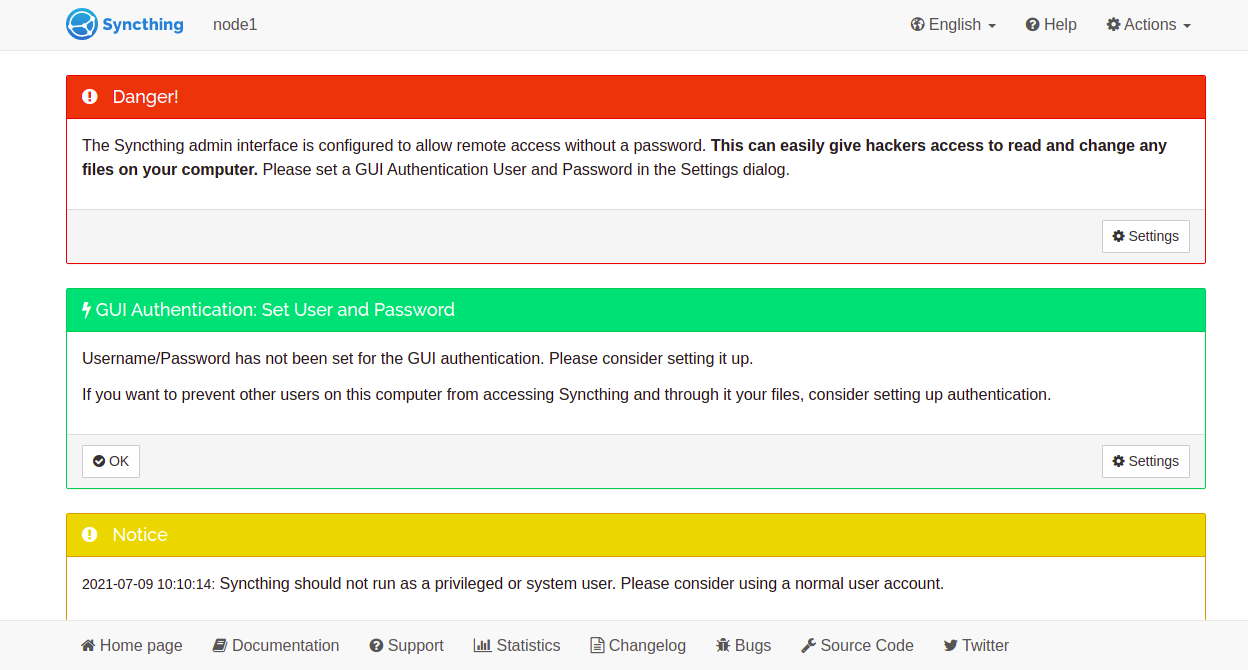
Navigate to Settings to define your admin user and password:
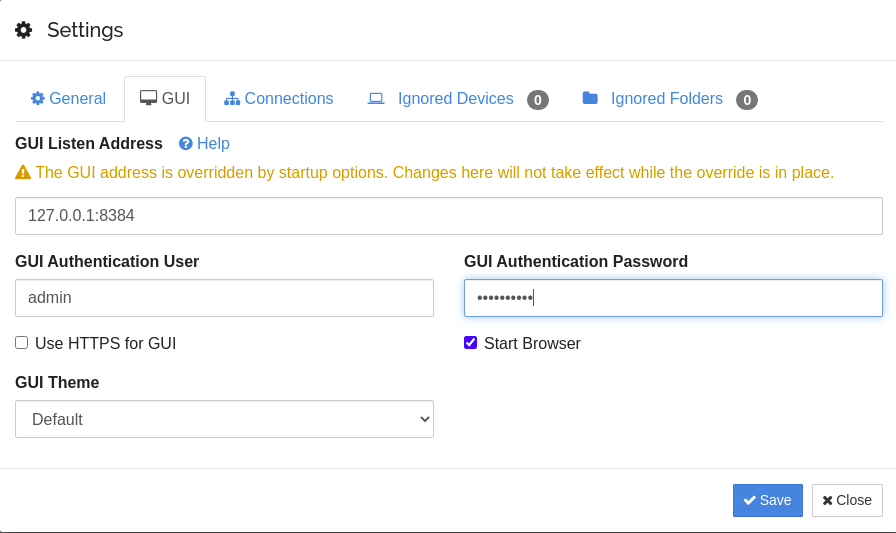
Enter your username and password, then click Save to apply the changes. You will be redirected to the Syncthing login page:
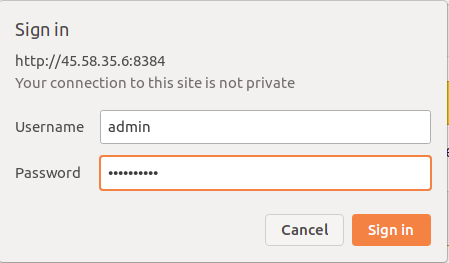
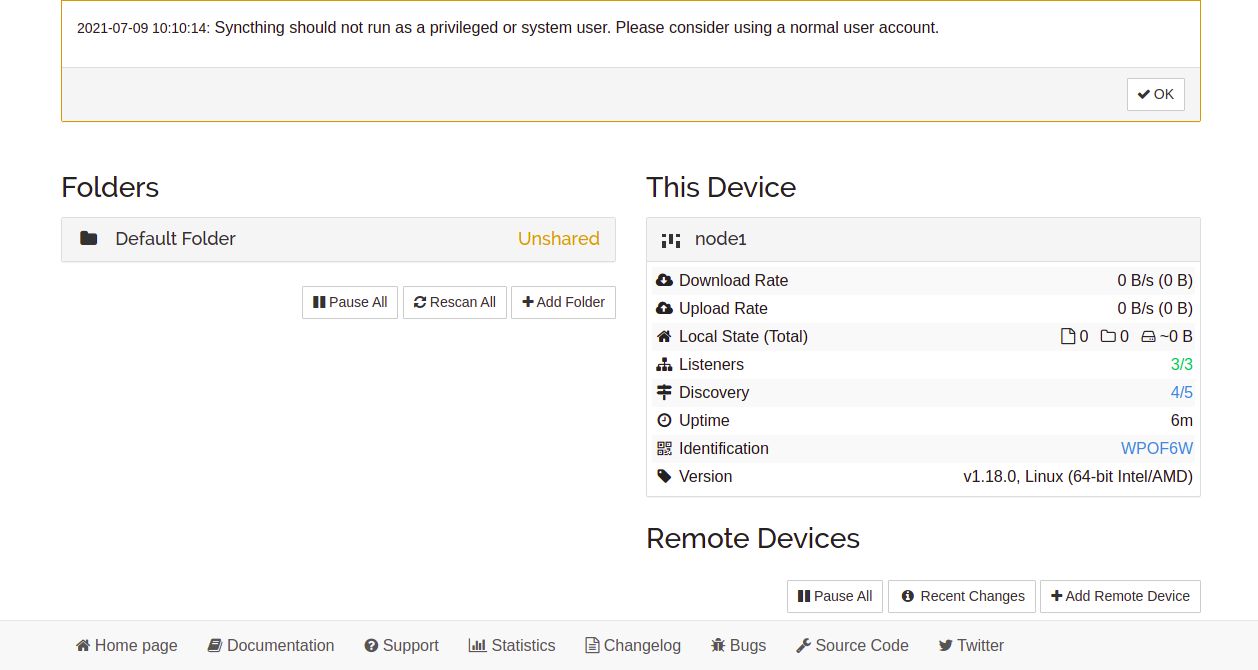
Enter your admin credentials and click Sign in. You should see the following interface:
Adding Remote Devices
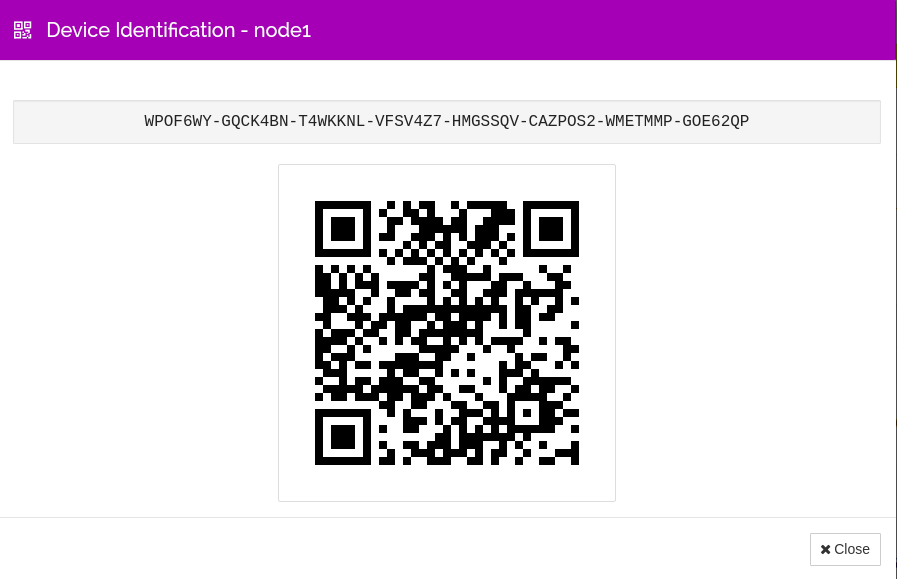
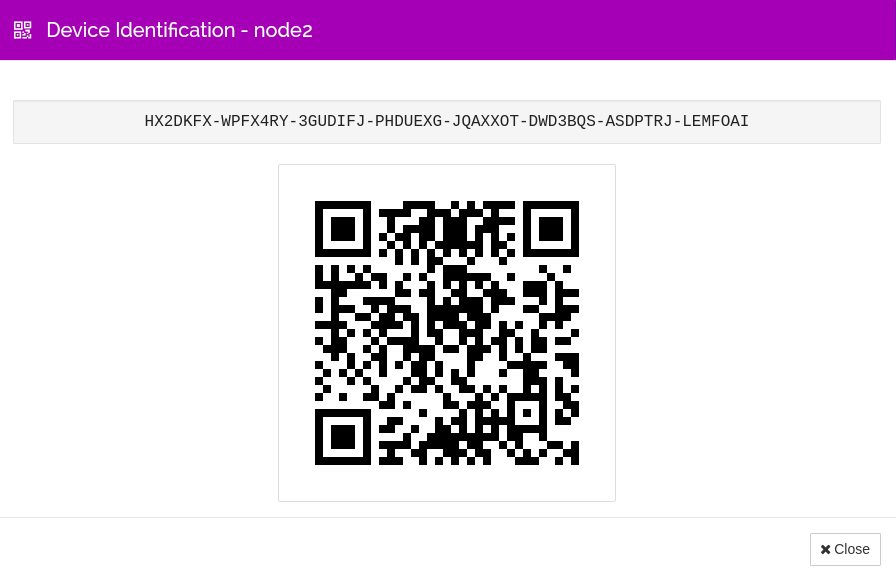
To sync files between servers, add each server’s device ID to the other server. On both servers, navigate to Actions > Show ID. You will see screens like these:
On the first server, click Add Remote Device and enter the second server’s device ID. Click Save:
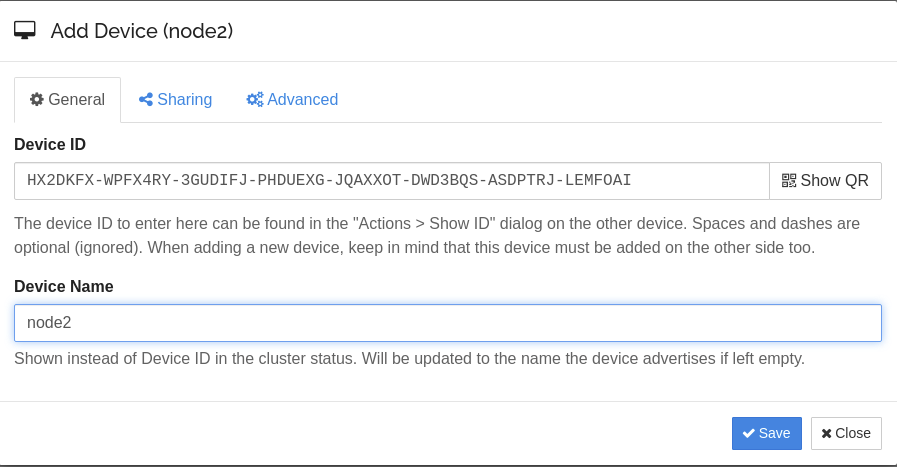
On the second server, click Add Remote Device and enter the first server’s device ID, then click Save:
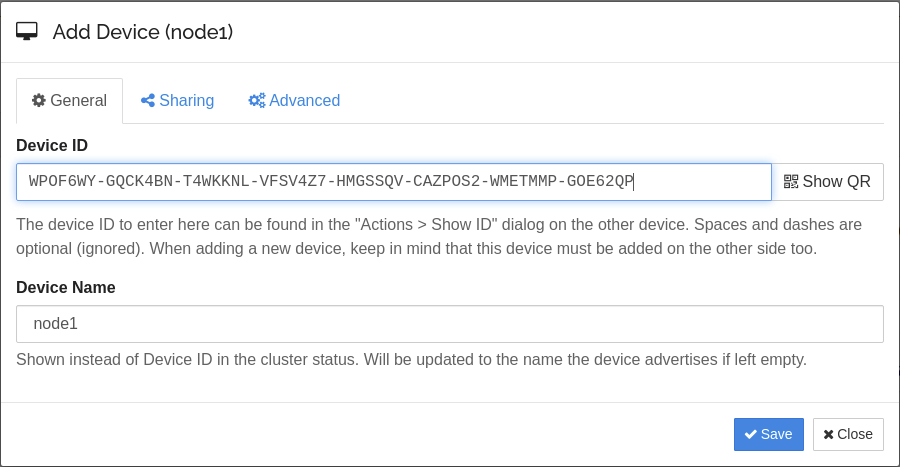
Adding and Sharing Folders
To sync a folder with the second server, add and share the desired folder. Click Add Folder and complete the required information:
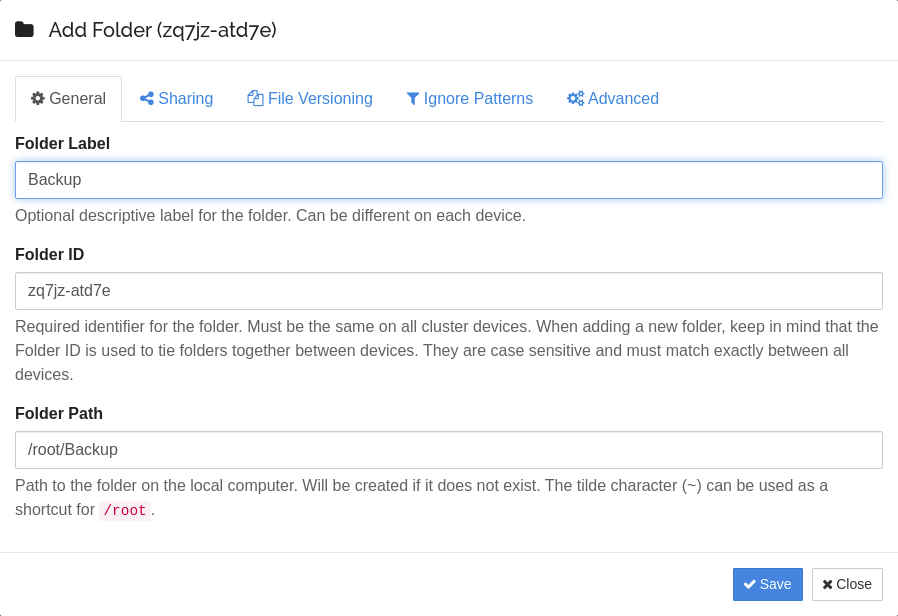
Provide a folder label and path, then access the Sharing tab and select the second server before clicking Save:
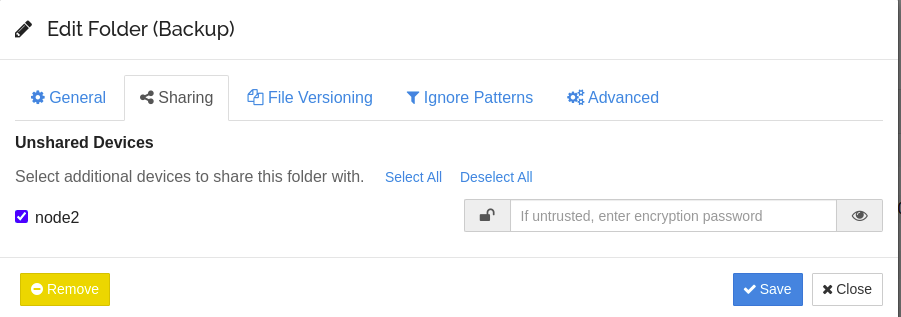
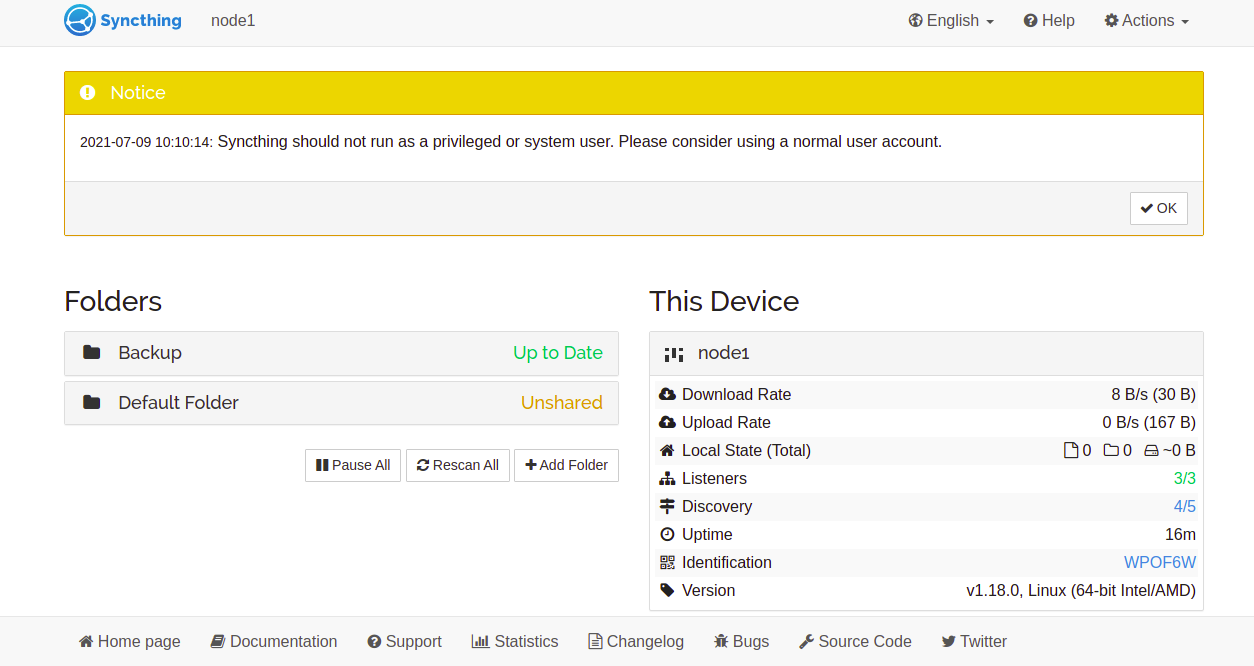
On the second server, click Rescan All to synchronize with the Backup folder:
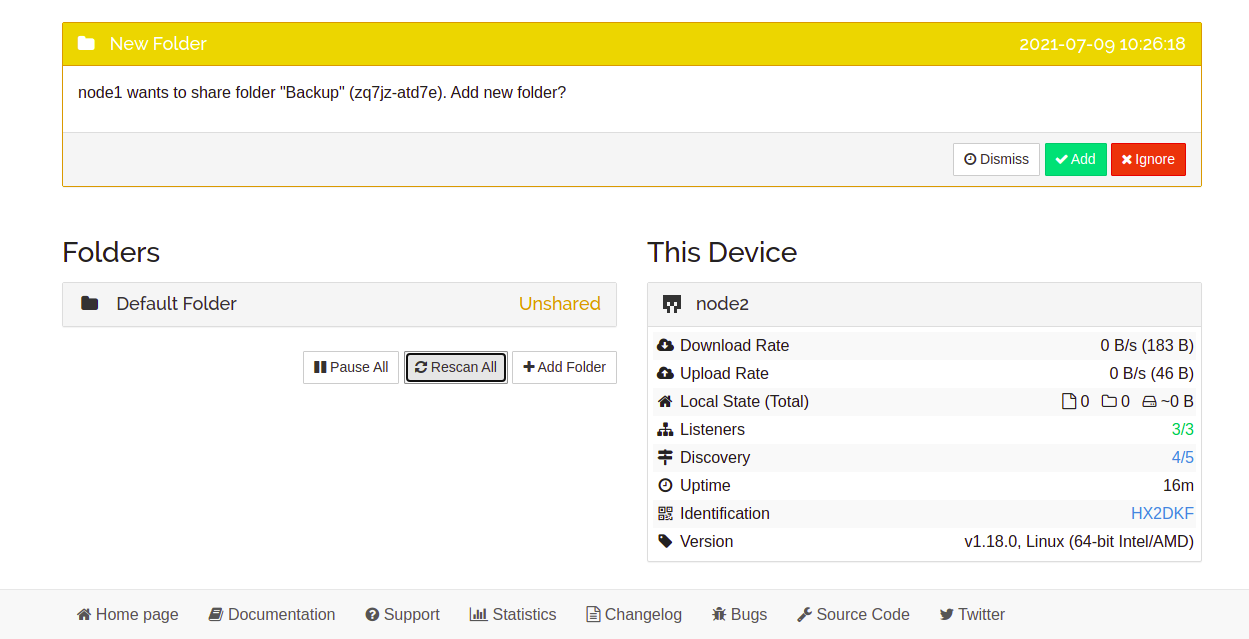
Click Add to officially add the shared folder from the first server:
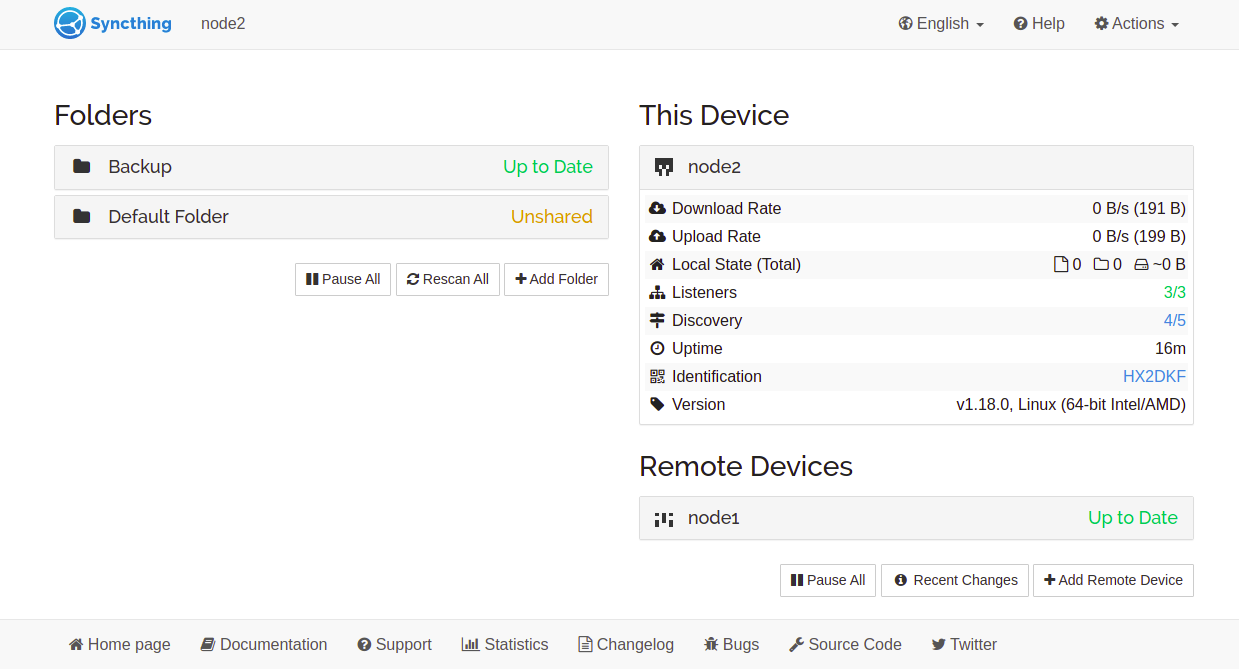
Any changes on the Backup folder in the first server will automatically sync with the second server.
Configuring Nginx as a Reverse Proxy for Syncthing
Set up Nginx as a reverse proxy to access Syncthing via port 80.
Install Nginx with:
apt-get install nginx -y
Create a virtual host configuration file for Nginx:
nano /etc/nginx/conf.d/syncthing.conf
Add the following configuration:
server {
  listen 80;
  server_name syncthing.example.com;

  access_log /var/log/nginx/syncthing.access.log;
  error_log /var/log/nginx/syncthing.error.log;
  location / {
    proxy_pass http://127.0.0.1:8384;
    proxy_set_header X-Real-IP $remote_addr;
    proxy_set_header X-Forwarded-For $proxy_add_x_forwarded_for;
    proxy_set_header X-Forwarded-Proto $scheme;
  }
}
Save the file and test the Nginx configuration with:
nginx -t
The output should confirm that the syntax is okay:
nginx: the configuration file /etc/nginx/nginx.conf syntax is ok
nginx: configuration file /etc/nginx/nginx.conf test is successful
Reload Nginx to apply changes:
systemctl reload nginx
Check Nginx status with:
systemctl status nginx
You should see output like the following:
? nginx.service - A high performance web server and a reverse proxy server
     Loaded: loaded (/lib/systemd/system/nginx.service; enabled; vendor preset: enabled)
     Active: active (running) since Fri 2021-07-09 05:01:36 UTC; 21s ago
       Docs: man:nginx(8)
   Main PID: 3394 (nginx)
      Tasks: 2 (limit: 2353)
     Memory: 6.2M
     CGroup: /system.slice/nginx.service
             ??3394 nginx: master process /usr/sbin/nginx -g daemon on; master_process on;
             ??3395 nginx: worker process

Jul 09 05:01:36 node1 systemd[1]: Starting A high performance web server and a reverse proxy server...
Jul 09 05:01:36 node1 systemd[1]: Started A high performance web server and a reverse proxy server.
You can now access the Syncthing server through the URL http://syncthing.example.com.
Conclusion
Congratulations! You have successfully installed and configured Syncthing on two Ubuntu 20.04 servers and set up synchronization between them. This setup can help streamline your file synchronization needs. We hope this tutorial helps you with server backups and data management.
Frequently Asked Questions (FAQs)
Q: What is Syncthing?
A: Syncthing is an open-source, peer-to-peer file synchronization tool that allows for secure data transfer directly between devices using TLS encryption.
Q: Which operating systems support Syncthing?
A: Syncthing is compatible with Linux, Windows, Mac OS X, and other major operating systems.
Q: Can I use Syncthing to sync files between more than two devices?
A: Yes, Syncthing can be used to synchronize files across multiple devices, provided each device is properly configured and connected.
Q: Is it necessary to use a domain name for Syncthing?
A: While not mandatory, using a domain name makes it easier to access the Syncthing interface and configure settings like a reverse proxy.
Q: How secure is the data transfer using Syncthing?
A: Syncthing uses TLS encryption to secure data during transfer, ensuring privacy and security.
Q: How can I access Syncthing’s web interface?
A: You can access the Syncthing web interface via the device’s IP address and port number (e.g., http://your-server-ip:8384).
Q: Can I configure a reverse proxy for Syncthing?
A: Yes, you can set up a reverse proxy using Nginx or another web server to allow access via port 80 or other configurations.
