Virtual Network Computing (VNC) is a desktop-sharing protocol that allows you to control a computer remotely using the VNC client software. VNC operates on GUI (Graphical User Interface) environments by transmitting mouse movements and keyboard inputs over a network via the Remote Frame Buffer (RFB) protocol.
Typically, VNC is utilized by technicians to manage client desktops or by users needing office desktop access from home. VNC can be secured through VPN networks or SSH tunneling connections.
This guide will teach you how to install a VNC server on Debian 11 Bullseye using TigerVNC packages. Additionally, you will learn how to install various Desktop Environments (DE) such as GNOME, XFCE, or Mate. Finally, we will cover how to connect to your VNC Server over a secure SSH tunnel.
Prerequisites
Before you begin, ensure the following requirements are met:
- A server running Debian 11 Bullseye with at least 1 GB of RAM. If using a modern DE, you will need more RAM. A lightweight DE is recommended for servers with minimal resources.
- A non-root user with root privileges, or the root user can be used.
Installing Desktop Environment
First, you’ll need to install a Desktop Environment (DE) on your system. Linux offers various DE options; choose based on your server’s resources. Lightweight options include XFCE or Mate, while more resource-intensive setups might prefer GNOME.
Here’s how to install DE on Debian 11:
1. Refresh your package index:
sudo apt update
2. Install your preferred DE:
Use the following command for XFCE Desktop:
sudo apt install task-xfce-desktop dbus-x11
For Mate desktop, use:
sudo apt install task-mate-desktop dbus-x11
To install the GNOME desktop:
sudo apt install task-gnome-desktop dbus-x11
With your DE installed, the next step is to create a new user and install TigerVNC packages.
Creating a New Linux User
While you can use the root user for your VNC server, it’s advisable to operate with a non-root user for security reasons. This section outlines how to create a new user and grant them sudo privileges.
1. Create a new user and set a password (example creates a user named ‘johndoe’):
sudo useradd -m -s /bin/bash johndoe
passwd johndoe
The -m option creates a home directory, and ‘-s /bin/bash‘ specifies the shell. Enter and confirm a strong password when prompted.
2. Add the new user to the ‘sudo’ group:
sudo usermod -aG sudo johndoe
3. Log in as the new user and verify sudo privileges:
su - johndoe
sudo su
Enter your password. Your prompt will change to ‘root@hostname‘ if successful.
Installing TigerVNC Server on Debian 11
This section involves installing TigerVNC packages and configuring the VNC Server for a specific user with authentication settings and a default DE.
1. Install TigerVNC packages:
sudo apt install tigervnc-standalone-server tigervnc-common -y
2. Log in as a non-root user and initialize the VNC Server:
su - johndoe
vncserver
3. Set a VNC Server password. Note that it must not exceed 8 characters:
You will require a password to access your desktops.
Password:
Verify:
4. Opt not to set a view-only password by typing ‘n‘:
Would you like to enter a view-only password (y/n)? n
5. After initialization, you will receive an output indicating your VNC server is running. Note the details provided:
New Xtigervnc server 'bullseye64:1 (johndoe)' on port 5901 for display :1.
User xtigervncviewer -SecurityTypes VncAuth -passwd /home/johndoe/.vnc/passwd :1 to connect to the VNC server.

Configuring XFCE as the Default Desktop Environment
Next, you’ll configure the default DE for your VNC server. All VNC server-related settings reside in the ‘~/.vnc‘ directory.
1. Terminate the VNC server’s display using:
vncserver -kill bullseye64:1
Expect output similar to:
Killing Xtigervnc process ID 1635... success!
2. Modify/re-create the ‘xstartup’ file in the ‘~/.vnc’ directory to set up the default DE:
mv ~/.vnc/xstartup ~/.vnc/xstartup.bak
nano ~/.vnc/xstartup
3. Add the following script, replacing ‘startxfce4’ with your preferred DE launcher:
#!/bin/bash
xrdb $HOME/.Xresources
startxfce4 &
Save and exit the file.
4. Make the ‘xstartup’ script executable:
chmod +x ~/.vnc/xstartup
You’ve now configured the default DE for your VNC server.
Adding User to TigerVNC and Start Service
Configure TigerVNC to function properly by adding your user and specifying the display number in ‘/etc/tigervnc/vncserver.users’. Then, start and enable the TigerVNC service.
1. Edit the ‘vncserver.users’ file using an editor:
sudo nano /etc/tigervnc/vncserver.users
Define the display number and user:
:1=johndoe
Save and close the file.
2. Start and enable the TigerVNC service for the display number ‘:1’:
sudo systemctl enable --now tigervncserver@:1.service
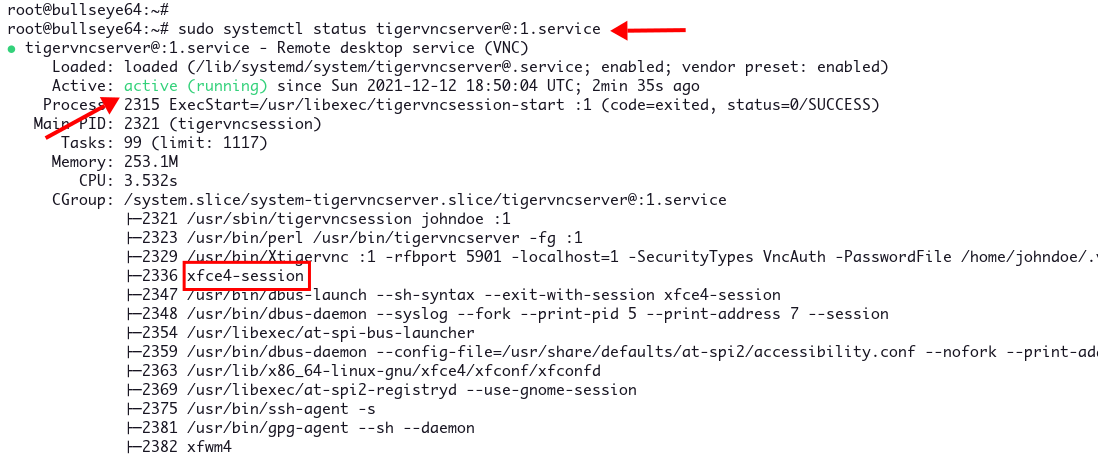
3. Verify the service status:
sudo systemctl status tigervncserver@:1.service
You should see the service is ‘active (running)‘, using the XFCE desktop:

Connecting to VNC Server Securely with SSH Tunneling
Finally, you will connect to your VNC server securely through SSH tunneling.
1. Ensure a VNC Viewer is installed on your local machine. RealVNC Viewer is a good choice for Linux, Windows, and macOS systems.
2. Set up SSH tunneling by running this command on your local computer, replacing ‘username’ and ‘192.168.1.10’ with your VNC server’s details:
ssh -L 5901:127.0.0.1:5901 -N -f -l username 192.168.1.10
- The ‘-L 5901:127.0.0.1:5901’ option establishes a tunnel.
- ‘-N’ prevents the execution of remote commands.
- ‘-f’ sends the process to the background.
- ‘-l username’ specifies your SSH username.
This command tunnels localhost port 5901 to your server on port 5901.
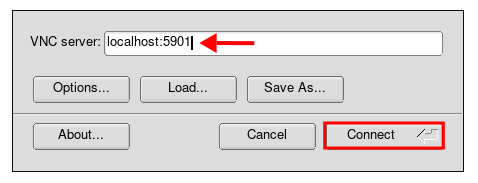
3. Open your VNC viewer and connect to ‘localhost:5901‘. Enter your VNC server password when prompted.

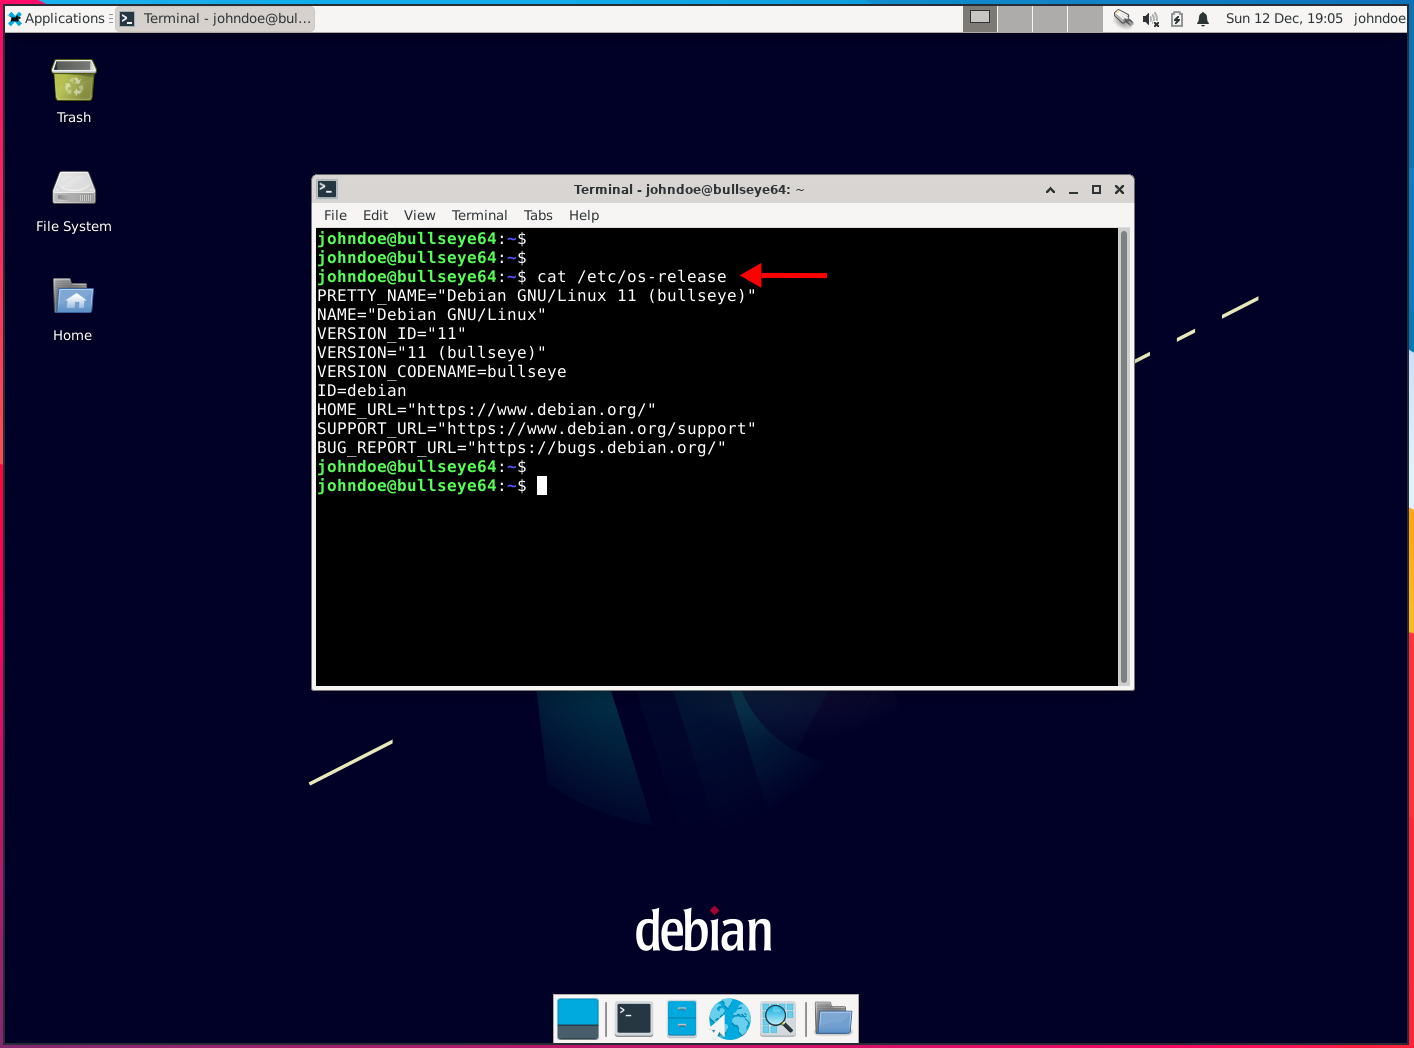
4. Upon connection, you’ll see your VNC server’s desktop, like the XFCE desktop shown below.

By completing these steps, you have successfully connected to the VNC server securely via SSH tunneling.
Conclusion
This tutorial covered installing a VNC server on Debian 11 Bullseye using TigerVNC, along with installing various DEs, setting up a default DE, and configuring TigerVNC as your VNC server application. Lastly, you also learned how to securely connect to your VNC server using SSH tunneling.
Frequently Asked Questions
Can VNC be used over the internet?
Yes, VNC can be used over the internet. For security, it is recommended to secure the connection via VPN or SSH tunneling.
What are the default ports for VNC?
VNC typically uses port 5900, with additional displays incrementing the port number (e.g., display :1 uses port 5901).
Is VNC secure?
VNC by itself isn’t considered a secure protocol. It is suggested to use SSH tunneling or a VPN to securely transmit data.
How can I prevent unauthorized access to my VNC server?
Use strong passwords, configure firewalls to restrict VNC access, and employ SSH tunneling. Disabling unused displays and updating your VNC software regularly can also increase security.
Can multiple users connect to the same VNC server?
Yes, multiple users can connect, but each user should have a unique display number configured in the VNC server setup.
