Virtual Network Computing (VNC) is a desktop sharing protocol that allows remote control of a computer using VNC client software, operating on GUI (Graphical User Interface) environments. It transmits mouse movements and keyboard inputs over the network through the Remote Frame Buffer (RFB) protocol.
VNC is widely used by technicians to control client desktops or for accessing office desktops from home. It can be securely configured through a VPN or SSH tunneling connection.
In this tutorial, you will learn how to install and configure VNC Server on Ubuntu Server 22.04, including securing the connection with SSH tunneling.
Prerequisites
- Ubuntu Server version 22.04
- A non-root user with root privileges
Installing Desktop Environment
To begin, install the Desktop Environment (DE) on your server. Several lightweight DEs such as XFCE and MATE are suitable for server environments due to resource limitations.
In this guide, XFCE will be used as the default Desktop Environment, although other options like Gnome are also explained. XFCE is a lightweight DE requiring less than 600MB of disk space, suitable for machines with low memory/RAM, such as 4GB of RAM.
Update your Ubuntu repositories with:
sudo apt update
Install the XFCE desktop using:
sudo apt install xfce4 xfce4-goodies
To use a different DE like Gnome, execute:
sudo apt install ubuntu-desktop-minimal
Tasksel is another method for installing DEs:
sudo apt install tasksel
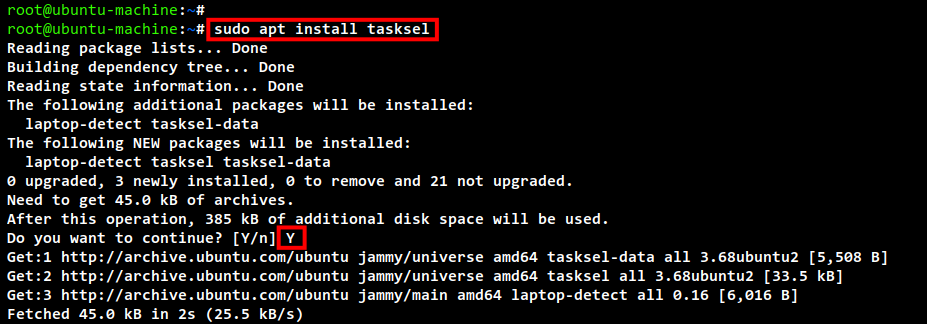
Launch tasksel to select and install the desired DE:
sudo tasksel
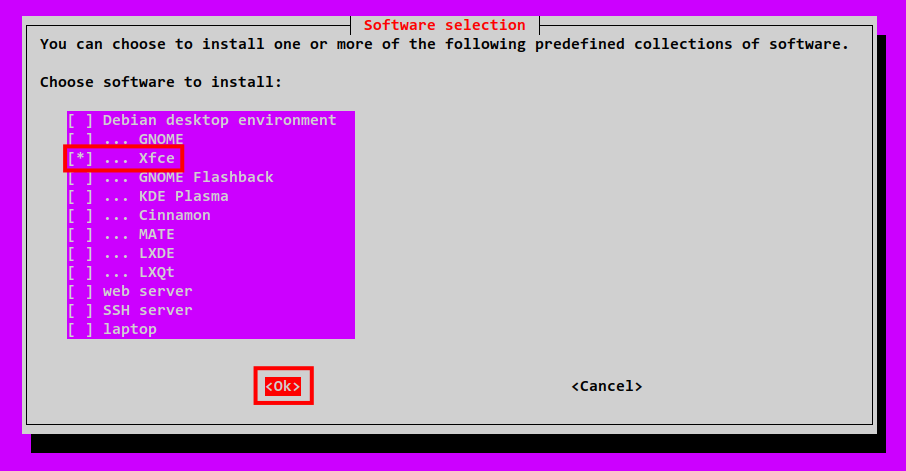
Setting Up a New User
After installing the DE, create a new user for running the VNC Server. Avoid using the root user for this purpose.
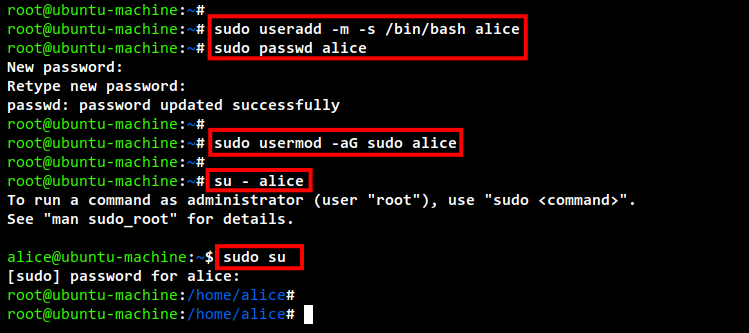
Create a non-root user, ‘alice’, and grant it sudo privileges:
sudo useradd -m -s /bin/bash alice
sudo passwd alice
sudo usermod -aG sudo alice
Log in as ‘alice’ and verify sudo privileges:
su - alice
sudo su
Installing TigerVNC Server
Proceed to install VNC Server packages using TigerVNC, which is compatible with most Linux distributions.
sudo apt install tigervnc-standalone-server tigervnc-common tigervnc-tools

Initializing VNC Server
Configure the VNC server using TigerVNC under the user ‘alice’ with XFCE as the DE:
Login as ‘alice’ and initialize the server:
su - alice
vncserver
Configure the following:
- Password configuration: Set a password (maximum 8 characters) for VNC Server login.
- View-only password: Opt for ‘n’ if view-only permission is not needed.
You’re now running a VNC Server at display :1 on port 5901.

Stop the server with:
vncserver -kill :1
Create and configure the startup script:
nano ~/.vnc/xstartup
#!/bin/sh
# Start up the standard system desktop
unset SESSION_MANAGER
unset DBUS_SESSION_BUS_ADDRESS
/usr/bin/startxfce4
[ -x /etc/vnc/xstartup ] && exec /etc/vnc/xstartup
[ -r $HOME/.Xresources ] && xrdb $HOME/.Xresources
x-window-manager &
Make it executable:
chmod +x ~/.vnc/xstartup
Adding New User to TigerVNC Server
Edit the configuration file to include the VNC user:
sudo nano /etc/tigervnc/vncserver.users
:1=alice
Start and enable the VNC Server service for display :1:
sudo systemctl start tigervncserver@:1.service
sudo systemctl enable tigervncserver@:1.service
Verify the service status:
sudo systemctl status tigervncserver@:1.service
Resolve errors by checking log files in the ~/.vnc directory.

Connecting to VNC Server Securely with SSH Tunnel
To verify the installation, connect to the VNC Server securely using SSH tunneling. First, ensure a VNC client is installed on your local machine, like RealVNC for Windows/macOS or TigerVNC Viewer for Linux.
Run the SSH command to create the tunnel:
ssh -L 5901:127.0.0.1:5901 -N -f -l alice 192.168.10.15

Connect to your VNC Server using your VNC Client application with the address “localhost:5901”:
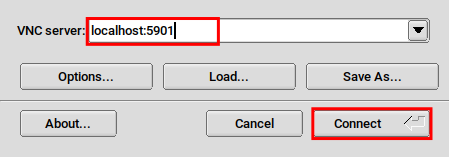
Enter your VNC Server password and proceed. Ignore security warnings as the connection is securely tunneled:

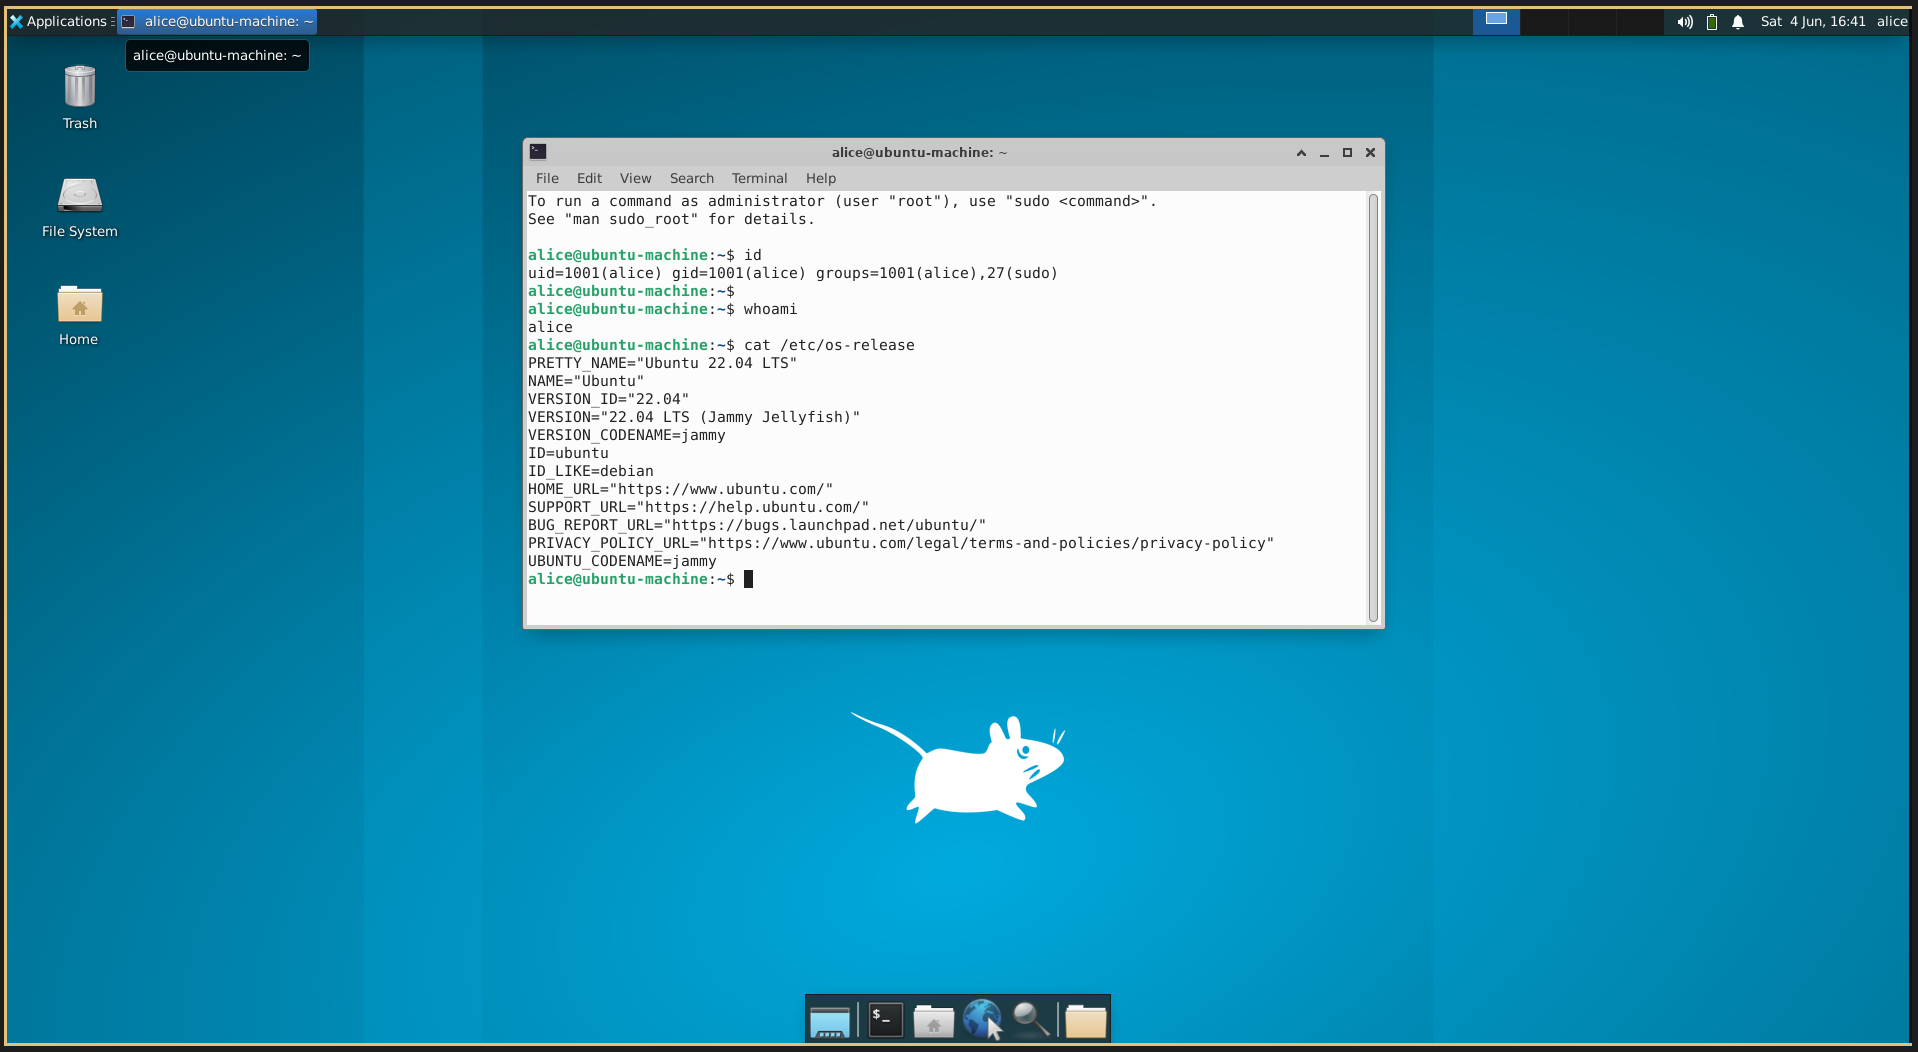
Upon successful connection, access your VNC Server with XFCE Desktop:
Conclusion
Congratulations! You’ve successfully installed and configured VNC Server on Ubuntu 22.04 with XFCE as the default Desktop Environment. You now know how to set up different DEs and securely connect to your VNC Server through SSH tunneling.
Frequently Asked Questions (FAQ)
1. Can I use other desktop environments besides XFCE?
Yes, you can install other desktop environments such as Gnome using the sudo apt install ubuntu-desktop-minimal command, or select from options available via tasksel.
2. Is it safe to use VNC over the internet?
VNC can be secure if used with SSH tunneling or a VPN to encrypt the connection, as it prevents unauthorized access.
3. How do I troubleshoot a failed VNC Server start?
Check the logs in the ~/.vnc directory for any error messages. Ensuring your startup script is executable can also resolve issues.
4. Why is my VNC password limited to 8 characters?
TigerVNC enforces an 8-character limit for passwords to align with certain security protocols. Choose a strong, memorable password within this limit.
5. How can I add more VNC users?
Edit the /etc/tigervnc/vncserver.users file to add more users by specifying different displays, similar to how ‘alice’ was configured.
