WordPress CMS (Content Management System) is a widely used open-source platform that enables users to create, manage, and publish digital content, primarily for websites and blogs. Initially released in 2003, WordPress has grown to become the world’s most popular CMS, powering over 40% of all websites on the internet. It offers a user-friendly interface that allows individuals with little to no coding experience to build and maintain professional-quality websites. WordPress is highly customizable, with thousands of themes and plugins available to extend its functionality, catering to a wide range of needs from simple blogs to complex e-commerce sites. Its strong community support, regular updates, and extensive documentation make it a reliable and versatile choice for both beginners and experienced developers.
Docker is an open-source platform designed to automate the deployment, scaling, and management of applications within lightweight, portable containers. Introduced in 2013, Docker revolutionized software development by providing a consistent environment for applications to run regardless of where they are deployed, be it on a developer’s local machine,
on-premises data centers, or in the cloud. Containers bundle an application with all its dependencies, libraries, and configuration files, ensuring consistent performance across different environments. This containerization simplifies the development workflow, enhances collaboration, and increases efficiency by allowing developers to create, share, and run applications seamlessly. Docker’s ecosystem includes tools and services for container orchestration, such as Docker Swarm and Kubernetes, which facilitate
the management of large-scale container deployments, making it a cornerstone technology in modern DevOps practices.
This guide will walk you through the process of installing WordPress using Docker and Docker Compose. Docker simplifies the installation by providing a consistent setup that can be deployed across multiple servers. In addition, we will also install phpMyAdmin for database management and an Nginx proxy server to serve the website via SSL.
Prerequisites
- A Linux server with a non-root user having sudo privileges. This tutorial uses Ubuntu 24.04.
- A fully qualified domain name (FQDN) pointing to your server. This guide uses
example.comfor the WordPress site and
phpmyadmin.example.comfor the phpMyAdmin website. - Ensure your server is updated:
$ sudo apt update
- Install essential utility packages:
$ sudo apt install wget curl nano software-properties-common dirmngr apt-transport-https gnupg gnupg2 ca-certificates lsb-release ubuntu-keyring unzip -y
Step 1 – Configure Firewall
Configure the firewall using UFW, which is available by default in Ubuntu:
Check firewall status:
$ sudo ufw status
Expected output:
Status: inactive
Allow SSH, HTTP, and HTTPS ports:
$ sudo ufw allow OpenSSH
$ sudo ufw allow http
$ sudo ufw allow https
Enable the firewall:
$ sudo ufw enable
Status check after enabling:
$ sudo ufw status
Step 2 – Install Docker and Docker Compose
To install the latest Docker version on Ubuntu 22.04:
Import Docker’s GPG key:
$ curl -fsSL https://download.docker.com/linux/ubuntu/gpg | sudo gpg --dearmor -o /etc/apt/keyrings/docker.gpg
Create a Docker repository file:
$ echo \
  "deb [arch=$(dpkg --print-architecture) signed-by=/etc/apt/keyrings/docker.gpg] https://download.docker.com/linux/ubuntu \
  $(lsb_release -cs) stable" | sudo tee /etc/apt/sources.list.d/docker.list > /dev/null
Update the repository list and install Docker:
$ sudo apt update
$ sudo apt install docker-ce docker-ce-cli containerd.io docker-compose-plugin
Verify Docker is running:
$ sudo systemctl status docker
Add your user to the Docker group to avoid sudo usage:
$ sudo usermod -aG docker $(whoami)
Log out and back in or use:
$ su - ${USER}
Confirm Docker group membership:
$ groups
Step 3 – Create Docker Compose File for WordPress
We’ll install WordPress in the /opt directory, but feel free to use /var, /home, or another suitable path:
cd /opt
Create and navigate to a WordPress configuration directory:
$ mkdir wordpress
$ cd wordpress
Create and edit the Docker Compose file:
$ nano docker-compose.yml
Paste the following configuration in the file:
services:
  wp:
    image: wordpress:latest
    container_name: wordpress-app
    restart: unless-stopped
    expose:
      - 8080
    volumes:
      - ./config/php.conf.ini:/usr/local/etc/php/conf.d/conf.ini
      - ./wp-app:/var/www/html
    environment:
      WORDPRESS_DB_HOST: db
      WORDPRESS_DB_NAME: "${DB_NAME}"
      WORDPRESS_DB_USER: "${DB_USER_NAME}"
      WORDPRESS_DB_PASSWORD: "${DB_USER_PASSWORD}"
      VIRTUAL_HOST: example.com
      LETSENCRYPT_HOST: example.com
    depends_on:
      - db
    links:
      - db

  wpcli:
    image: wordpress:cli
    container_name: wpcli_app
    volumes:
      - ./config/php.conf.ini:/usr/local/etc/php/conf.d/conf.ini
      - ./wp-app:/var/www/html
    environment:
      WORDPRESS_DB_HOST: db
      WORDPRESS_DB_NAME: "${DB_NAME}"
      WORDPRESS_DB_USER: "${DB_USER_NAME}"
      WORDPRESS_DB_PASSWORD: "${DB_USER_PASSWORD}"
    depends_on:
      - db
      - wp

  pma:
    image: phpmyadmin/phpmyadmin
    container_name: pma
    restart: unless-stopped
    environment:
      PMA_HOST: db
      PMA_PORT: 3306
      MYSQL_ROOT_PASSWORD: "${DB_ROOT_PASSWORD}"
      UPLOAD_LIMIT: 50M
      VIRTUAL_HOST: phpmyadmin.example.com
      LETSENCRYPT_HOST: phpmyadmin.example.com
    expose:
      - 8081
    links:
      - db:db

  db:
    image: mysql:latest
    container_name: wordpressdb
    restart: unless-stopped
    command: [
        '--default_authentication_plugin=mysql_native_password',
        '--character-set-server=utf8mb4',
        '--collation-server=utf8mb4_unicode_ci'
    ]
    volumes:
      - ./wp-data:/docker-entrypoint-initdb.d
      - db_data:/var/lib/mysql
    environment:
      MYSQL_DATABASE: "${DB_NAME}"
      MYSQL_ROOT_PASSWORD: "${DB_ROOT_PASSWORD}"
      MYSQL_USER: "${DB_USER_NAME}"
      MYSQL_PASSWORD: "${DB_USER_PASSWORD}"

volumes:
  db_data:
Save the file with Ctrl + X, then Y to confirm.
The configuration pulls WordPress, WP-CLI, phpMyAdmin, and MySQL images, setting them up with necessary environment variables and volumes. It’s tailored for SSL and uses Nginx for serving requests. For further customization options, check the WordPress DockerHub page.
Create the environment variables file:
$ nano .env
Insert the following configuration:
DB_NAME=wordpress
DB_USER_NAME=username
DB_USER_PASSWORD=userpassword
DB_ROOT_PASSWORD=password
Save the file with Ctrl + X, then Y to confirm. Customize the credentials as needed.
Prepare a custom PHP configuration:
$ mkdir config
$ nano config/php.conf.ini
Add this configuration:
file_uploads = On
memory_limit = 500M
upload_max_filesize = 30M
post_max_size = 30M
max_execution_time = 600
Save and close the file.
Step 4 – Update Docker Compose For Nginx
Set up Nginx for WordPress and phpMyAdmin:
Create configuration directories:
$ mkdir nginx
$ mkdir nginx/vhost
Create the Nginx configuration file for WordPress:
$ nano nginx/vhost/wordpress.example.com
Insert the configuration:
server_tokens off;
client_max_body_size 30m;
Save and repeat for phpMyAdmin:
$ nano nginx/vhost/phpmyadmin.example.com
Insert:
server_tokens off;
client_max_body_size 50m;
Open the Docker Compose file:
$ nano docker-compose.yml
Add Nginx service configuration:
  nginx:
    container_name: nginx
    image: nginxproxy/nginx-proxy
    restart: unless-stopped
    ports:
        - 80:80
        - 443:443
    volumes:
        - /var/run/docker.sock:/tmp/docker.sock:ro
        - ./nginx/html:/usr/share/nginx/html
        - ./nginx/certs:/etc/nginx/certs
        - ./nginx/vhost:/etc/nginx/vhost.d
    logging:
        options:
            max-size: "10m"
            max-file: "3"
Save the file.
Step 5 – Update Docker Compose for SSL
Edit the Docker Compose file for SSL setup:
$ nano docker-compose.yml
Add the Acme Companion service:
  acme-companion:
    container_name: acme-companion
    image: nginxproxy/acme-companion
    restart: unless-stopped
    volumes_from:
        - nginx
    volumes:
        - /var/run/docker.sock:/var/run/docker.sock
        - ./nginx/acme:/etc/acme.sh
    environment:
        DEFAULT_EMAIL: certbot@example.com
Save your changes.
Step 6 – Start and Install WordPress
Launch the Docker containers:
$ docker compose up -d
Verify their status:
$ docker ps
Visit https://example.com to start WordPress installation.
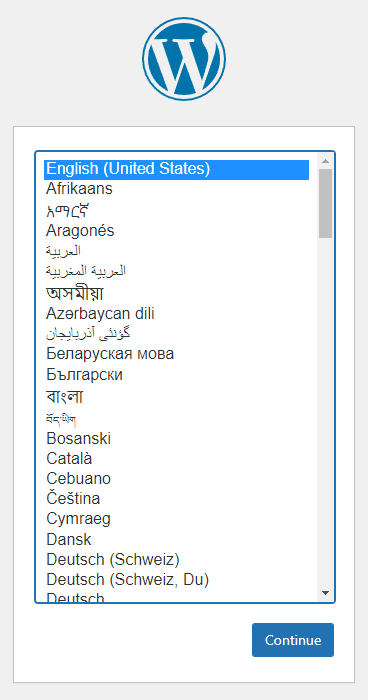
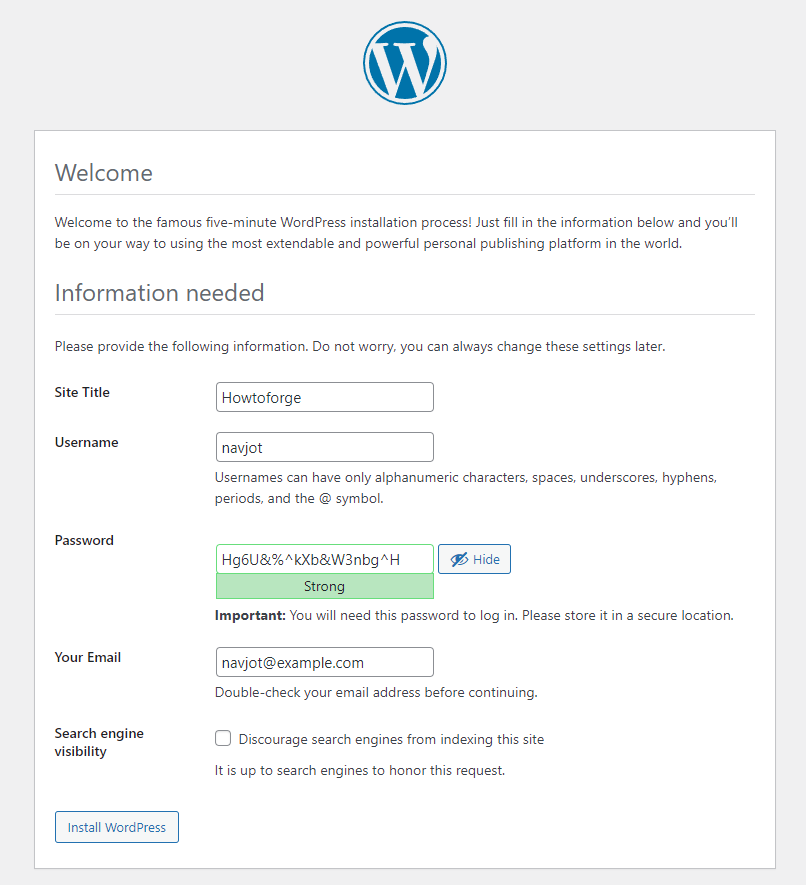
Select your language and continue to enter site details. Complete the WordPress installation.
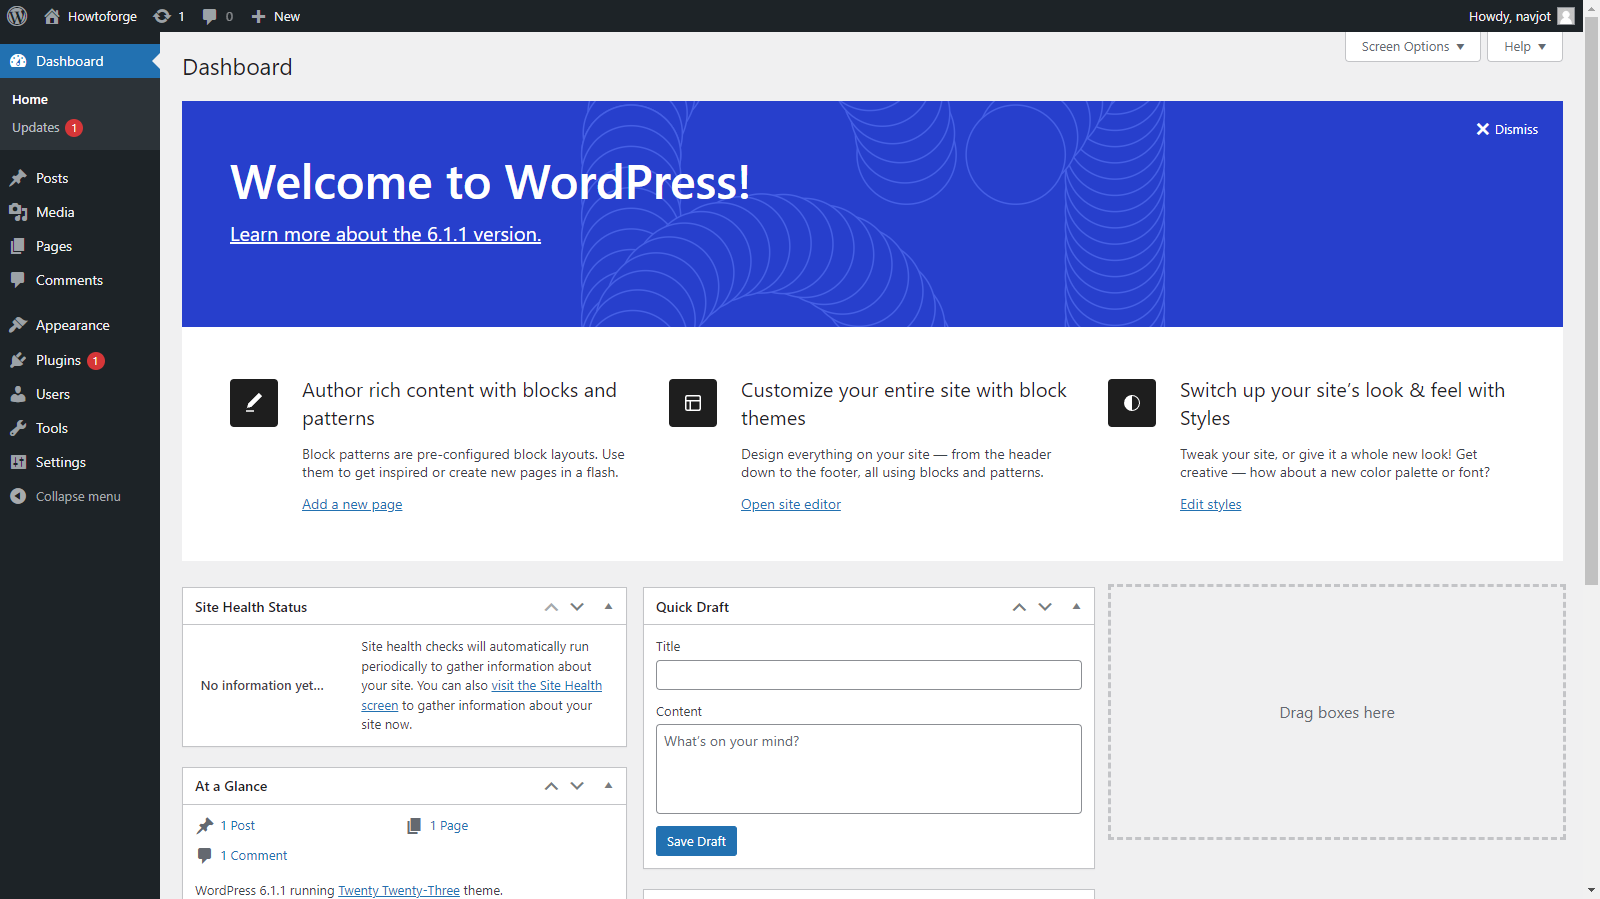
Log in and access the WordPress dashboard.
Step 7 – Access PhpMyAdmin
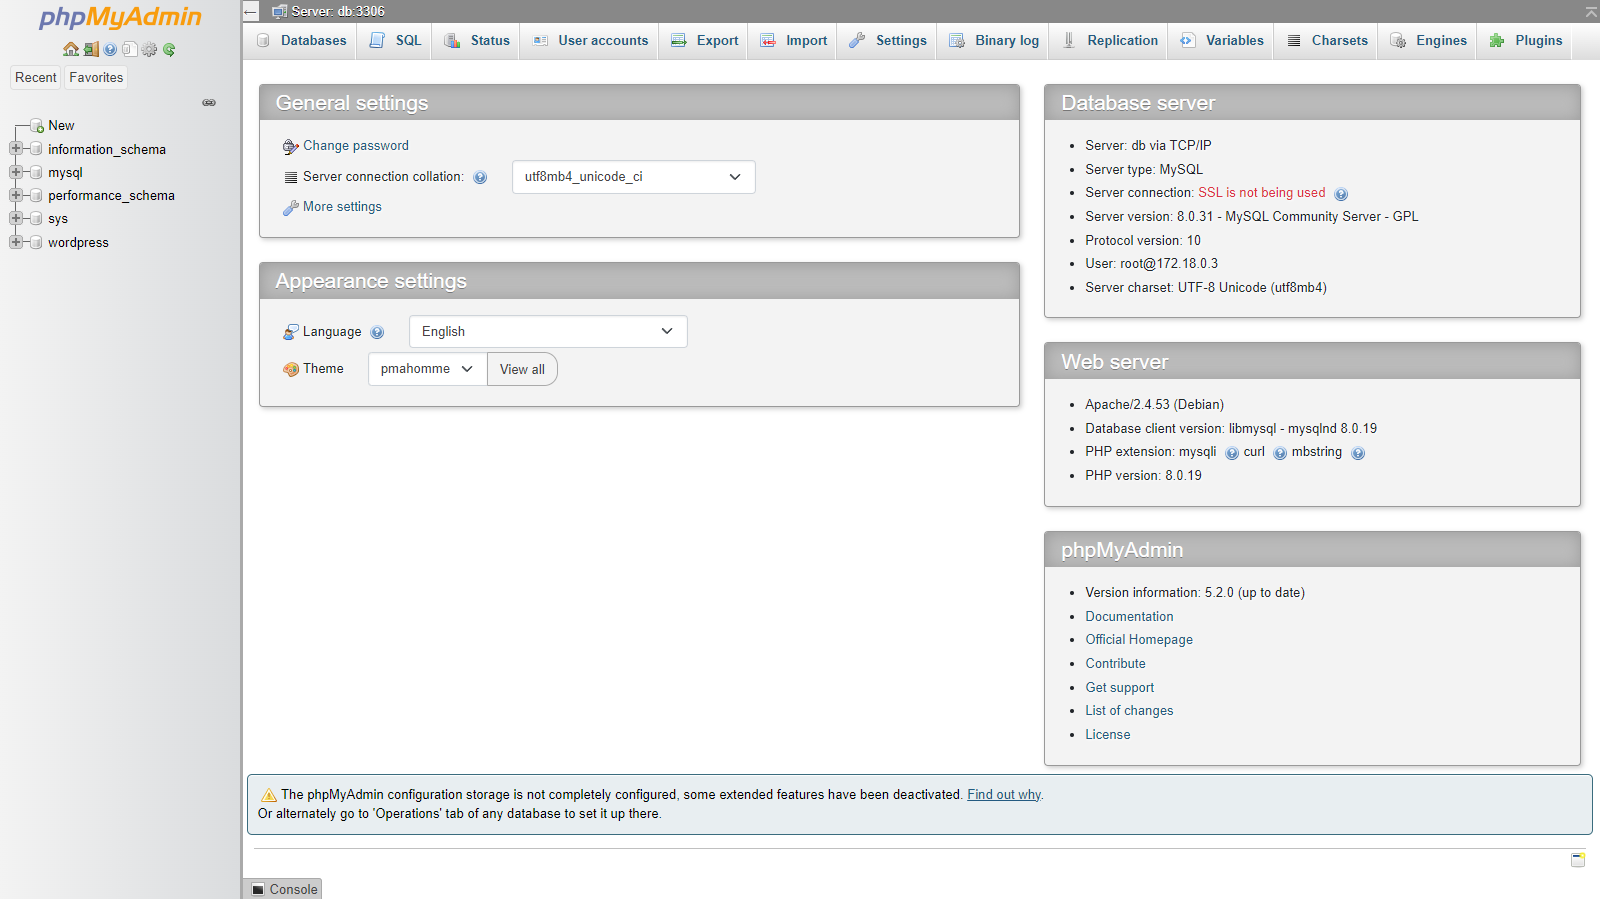
Access PhpMyAdmin at https://phpmyadmin.example.com.
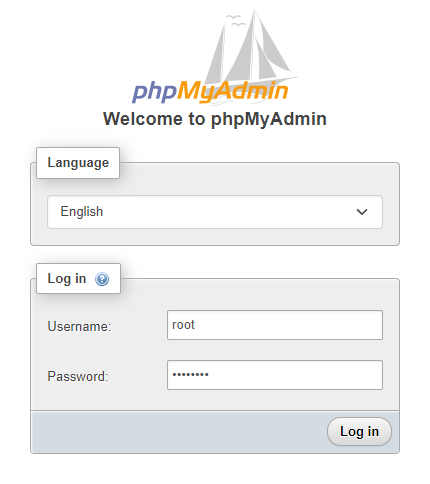
Login with root credentials to manage databases.
Step 8 – Access WP-CLI
Check WP-CLI version:
$ docker compose run --rm wpcli cli version
Create an alias for WP-CLI:
$ alias wp="docker compose -f ~/wordpress/docker-compose.yml run --rm wpcli"
Use the alias:
$ wp cli version
Make alias permanent by editing ~/.bashrc:
$ nano ~/.bashrc
Add at the end:
# Custom aliases
alias wp="docker compose -f ~/wordpress/docker-compose.yml run --rm wpcli"
Save and source the file:
$ source ~/.bashrc
Step 9 – Backup WordPress
Navigate to the WordPress directory:
$ cd ~/wordpress
Backup the database:
$ docker compose exec db sh -c "exec mysqldump wordpress -uroot -p" | sudo tee wp-data/data_`date +%d-%m-%Y"_"%H_%M_%S`.sql > /dev/null
List backups:
$ ls -al wp-data
Restore using SQL file or command:
$ docker compose exec db sh -c "exec mysql -uroot -p" < wp-data/data_11-01-2023_10_14_40.sql
Create a daily cron job for backup:
$ sudo nano /etc/cron.daily/wpbackup.sh
Add this script:
#!/bin/bash
docker compose exec db sh -c "exec mysqldump wordpress -uroot -p" | tee wp-data/data_`date +%d-%m-%Y"_"%H_%M_%S`.sql > /dev/null
Make it executable:
$ sudo chmod +x /etc/cron.daily/wpbackup.sh
Step 10 – Upgrade WordPress
Before upgrading, back up the database. Then:
$ cd ~/wordpress
Stop containers:
$ docker compose down --remove-orphans
Pull latest images:
$ docker compose pull
Restart them:
$ docker compose up -d
Conclusion
This concludes our tutorial on installing WordPress using Docker Compose, phpMyAdmin, and WP-CLI. If you have any questions, feel free to post them in the comments below.
Frequently Asked Questions (FAQ)
- Q: Why use Docker for WordPress installation?A: Docker simplifies deployment with consistent environments, making it easy to scale and replicate the setup across multiple servers.
- Q: How do I customize the WordPress environment?A: You can customize by modifying the Docker Compose file and associated configurations. Refer to the WordPress DockerHub page for additional options.
- Q: Is phpMyAdmin mandatory for managing WordPress databases?A: While helpful, phpMyAdmin is not mandatory. You can manage your database directly using MySQL commands in the Docker container.
- Q: How can I ensure my site is secure?A: Use SSL through Let’s Encrypt as shown, regularly update containers, monitor for vulnerabilities, and use security plugins within WordPress.
