RabbitMQ is a highly popular, free, and open-source message broker that supports a range of messaging protocols such as AMQP, STOMP, MQTT, HTTP, and WebSockets. Featuring compliance with JMS 1.1, it suits a broad spectrum of development scenarios across different deployment sizes.
By acting as an intermediary between applications, RabbitMQ enables reliable asynchronous communication, providing temporary storage between applications to safeguard against data loss.
In this comprehensive tutorial, you will learn how to install and set up a RabbitMQ server across multiple Ubuntu 22.04 machines. Additionally, you’ll discover how to create an administrative user for RabbitMQ and set up classic queue mirroring using the HA policy.
Prerequisites
- Three Ubuntu 22.04 servers, referred to as rabbitmq1, rabbitmq2, and rabbitmq3
- A non-root user with sudo/root privileges
Preparing Machines
To begin, update your system repositories and configure the /etc/hosts file on each server to ensure connectivity via hostnames.
sudo apt update
Edit the /etc/hosts file:
sudo nano /etc/hosts
Include your IP addresses and hostnames:
192.168.5.21    rabbitmq1
192.168.5.22    rabbitmq2
192.168.5.23    rabbitmq3
Save your modifications and exit. With your servers prepped, proceed to install RabbitMQ and establish the cluster.
Installing RabbitMQ Server
Now that your Ubuntu machines are ready, install RabbitMQ using Ubuntu’s package repository:

sudo apt install rabbitmq-server
Confirm installation when prompted. After completion, verify and enable the RabbitMQ service:
sudo systemctl is-enabled rabbitmq-server
sudo systemctl status rabbitmq-server
Check the output to ensure RabbitMQ is running and enabled:

Proceed to enable the rabbitmq_management plugin:
Enabling RabbitMQ Management Plugin
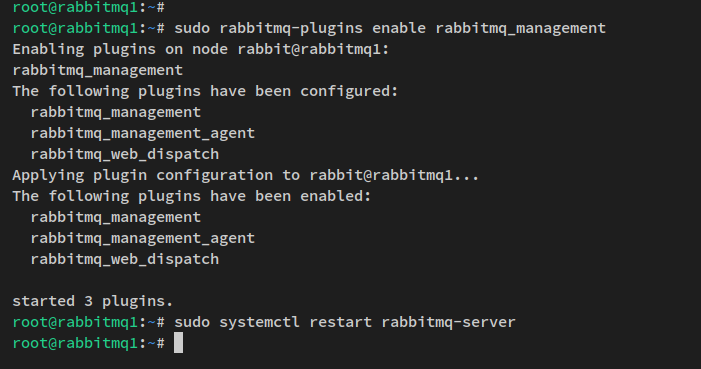
The management plugin facilitates the administration and monitoring of RabbitMQ nodes and clusters through a web interface. Enable it using:
sudo rabbitmq-plugins enable rabbitmq_management
Restart RabbitMQ to activate your changes:
sudo systemctl restart rabbitmq-server
Ensure the management interface port is open:
ss -plnt
Verify that port 15672 is active and open:

Setting up UFW Firewall
Configure the UFW firewall to secure your RabbitMQ setup:
sudo ufw allow OpenSSH
sudo ufw enable
Enable necessary TCP ports:
sudo ufw allow 15672/tcp
sudo ufw allow 5672/tcp
sudo ufw allow 4369/tcp
sudo ufw allow 25672/tcp
sudo ufw reload
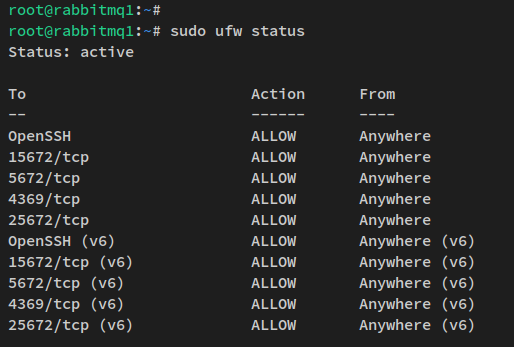
Confirm that required ports are added:
sudo ufw status
Setting up RabbitMQ Cluster
Now configure the RabbitMQ cluster. Copy the .erlang.cookie file from rabbitmq1 to rabbitmq2 and rabbitmq3:
scp /var/lib/rabbitmq/.erlang.cookie root@192.168.5.22:/var/lib/rabbitmq/
scp /var/lib/rabbitmq/.erlang.cookie root@192.168.5.23:/var/lib/rabbitmq/

Restart and stop the RabbitMQ service on both secondary nodes, then join them to the cluster:
sudo rabbitmqctl join_cluster rabbit@rabbitmq1

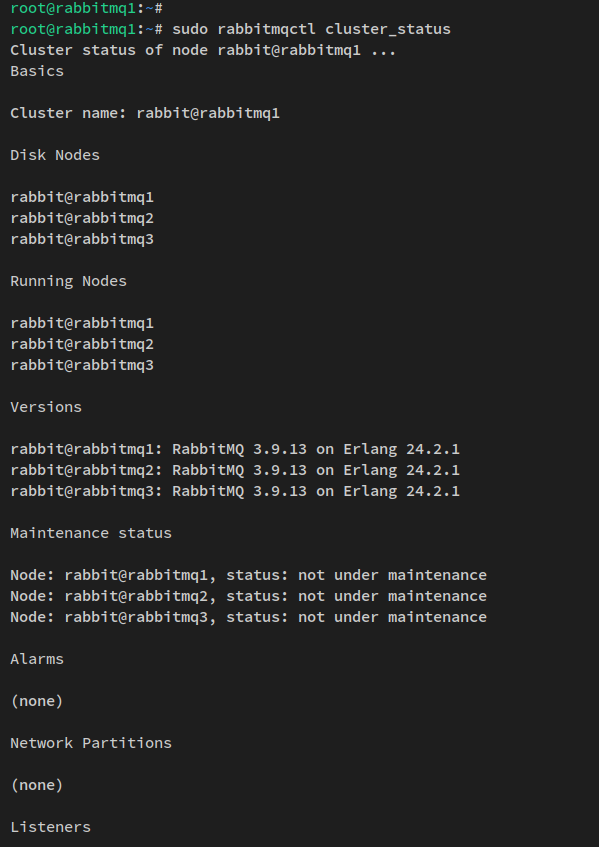
Verify the cluster status from rabbitmq1:
sudo rabbitmqctl cluster_status
Setting up RabbitMQ Administrator
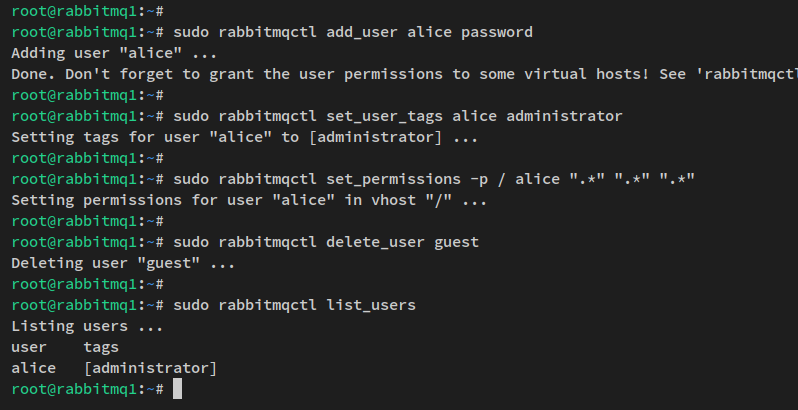
Create an administration user:
sudo rabbitmqctl add_user alice password
Grant administrator privileges and set permissions:
sudo rabbitmqctl set_user_tags alice administrator
sudo rabbitmqctl set_permissions -p / alice ".*" ".*" ".*"
Remove the default guest user:
sudo rabbitmqctl delete_user guest
Check the setup user list ensuring ‘alice’ is present:
sudo rabbitmqctl list_users
Setting up Classic Queue Mirroring
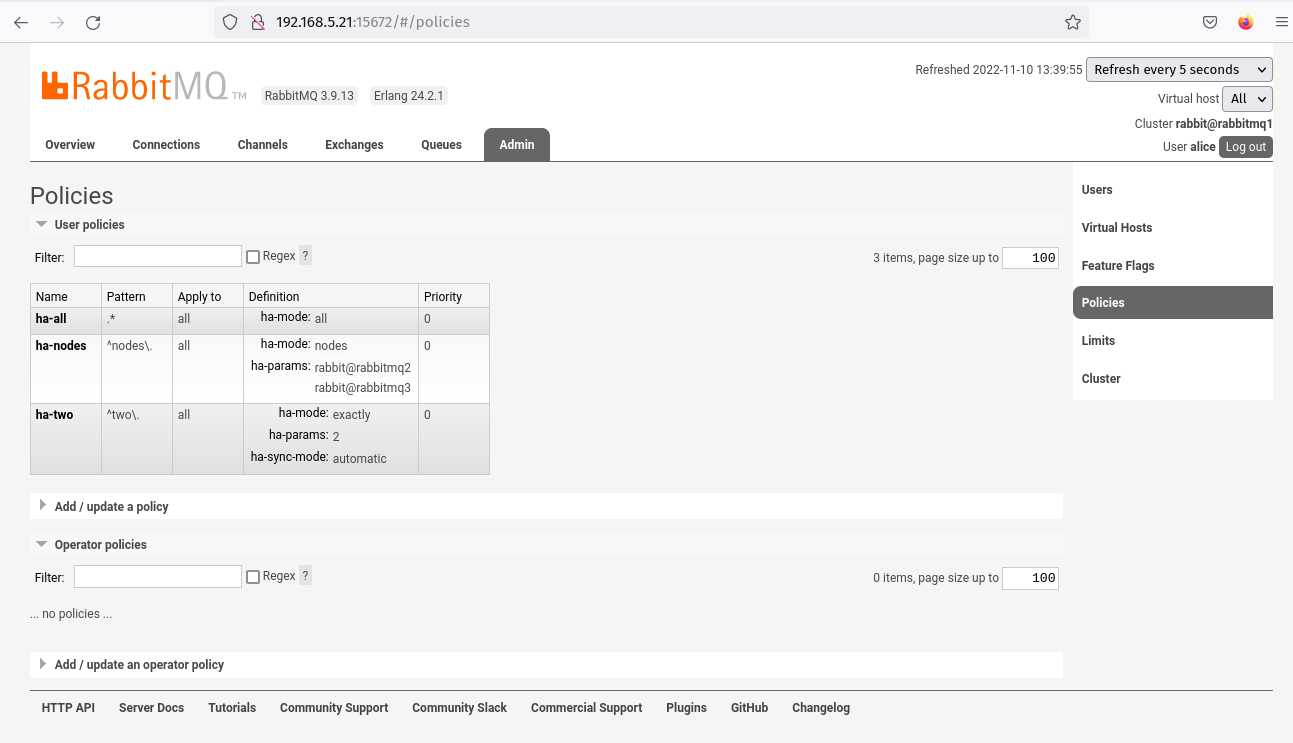
Create RabbitMQ policies for queue mirroring:
sudo rabbitmqctl set_policy ha-all ".*" '{"ha-mode":"all"}'
sudo rabbitmqctl set_policy ha-two "^two\." '{"ha-mode":"exactly","ha-params":2,"ha-sync-mode":"automatic"}'
sudo rabbitmqctl set_policy ha-nodes "^nodes\." '{"ha-mode":"nodes","ha-params":["rabbit@rabbitmq2", "rabbit@rabbitmq3"]}'
Check available policies:
sudo rabbitmqctl list_policies

Accessing RabbitMQ Cluster via Management Plugin
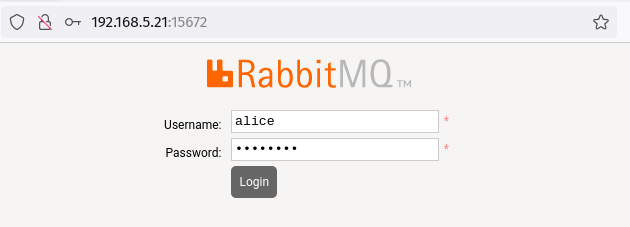
Access the management interface by navigating to http://[server_ip]:15672. Log in with your admin user credentials:
Navigate to the Admin tab and verify your policies:
Conclusion
You’ve successfully installed RabbitMQ and set up a robust cluster across three Ubuntu servers, configured firewall settings, created an admin user, and established queue mirroring using policies. You are now prepared to employ RabbitMQ as a message broker.
FAQs
- What is RabbitMQ best used for?
- RabbitMQ is useful for facilitating communication between distributed applications in a scalable manner by transmitting messages and ensuring data integrity.
- Can RabbitMQ be deployed on platforms other than Ubuntu?
- Yes, RabbitMQ is compatible with many operating systems including Windows, CentOS, and other Linux distributions.
- Why is my RabbitMQ management UI not accessible?
- Ensure that port 15672 is open on your firewall and the management plugin is enabled on the RabbitMQ server.
- How can I secure RabbitMQ further?
- Consider using TLS for ensuring encrypted connections and AMQP authentication mechanisms for enhancing security.
