If you’re in search of a dependable client-to-site VPN solution, an IKEv2 EAP solution through strongSwan could be your ideal choice over other options like OpenVPN or Wireguard. This setup is exceptionally beneficial if you’re frequently on the go and need a hassle-free VPN that doesn’t require downloading a client or managing a key. strongSwan is a versatile open-source, cross-platform IPSec-based VPN that supports authentication through X.509 certificates or secure IKEv2 EAP user authentication.
In this detailed guide, you will learn how to configure an IKEv2 IPSec VPN employing strongSwan with EAP-MSCHAPv2 authentication, utilizing Let’s Encrypt SSL certificates on a Rocky Linux 9 server. We will also cover how to establish connections using various client systems, including Windows, macOS, Linux, Android, and iOS.
Prerequisites
- A server powered by Rocky Linux 9. Adjust your server specifications based on the expected number of users.
- A non-root user equipped with sudo privileges.
- A fully qualified domain name (FQDN) such as
vpn.example.com. - Ensure all system packages are up-to-date:
$ sudo dnf update
- Install necessary packages (some may be pre-installed):
$ sudo dnf install wget curl nano unzip yum-utils -y
Step 1 – Configure Networking and Firewall
Activate IP packet forwarding in kernel options:
$ echo "net.ipv4.ip_forward=1" | sudo tee /etc/sysctl.conf
$ sudo sysctl -p
Integrate the IPSec service into the Firewalld firewall:
$ sudo firewall-cmd --permanent --add-service=ipsec
Enable HTTP and HTTPS ports:
$ sudo firewall-cmd --permanent --add-service=http
$ sudo firewall-cmd --permanent --add-service=https
Allow NAT packet forwarding, known as IP masquerading:
$ sudo firewall-cmd --permanent --add-masquerade
Reload the firewall to apply all changes:
$ sudo firewall-cmd --reload
Step 2 – Install SSL
Install Certbot to generate SSL certificates. This requires Snapd, which calls for the EPEL repository:
$ sudo dnf install -y epel-release
Proceed to install Snapd:
$ sudo dnf install -y snapd
Activate and start the Snapd service:
$ sudo systemctl enable snapd --now
Install the Snap core package and ensure an updated Snapd version:
$ sudo snap install core && sudo snap refresh core
Create essential links for Snapd:
$ sudo ln -s /var/lib/snapd/snap /snap
$ echo 'export PATH=$PATH:/var/lib/snapd/snap/bin' | sudo tee -a /etc/profile.d/snapd.sh
Install Certbot using Snap:
$ sudo snap install --classic certbot
Set a symbolic link for the Certbot command:
$ sudo ln -s /snap/bin/certbot /usr/bin/certbot
Check the Certbot installation:
$ certbot --version
certbot 2.3.0
Generate an SSL Certificate:
$ sudo certbot --key-type rsa certonly --standalone --agree-tos --no-eff-email --preferred-challenges http -m name@example.com -d vpn.example.com
The certificate will be saved in /etc/letsencrypt/live/vpn.example.com.
Conduct a dry run to verify SSL renewal:
$ sudo certbot renew --dry-run
If no errors appear, your certificate is set for automatic renewal.
Step 3 – Install strongSwan
Ensure you have the EPEL repository, then install strongSwan:
$ sudo dnf install strongswan
Establish symlinks for certificate configurations:
$ sudo ln -s /etc/letsencrypt/live/vpn.example.com/fullchain.pem /etc/strongswan/swanctl/x509
$ sudo ln -s /etc/letsencrypt/live/vpn.example.com/privkey.pem /etc/strongswan/swanctl/private
$ sudo ln -s /etc/letsencrypt/live/vpn.example.com/chain.pem /etc/strongswan/swanctl/x509ca
Create and edit the strongSwan configuration file:
$ sudo nano /etc/strongswan/swanctl/conf.d/my_vpn.conf
Insert the following contents:
connections {
    ikev2-eap-mschapv2 {
        version = 2
        proposals = aes256-sha256-modp4096,aes256-sha256-modp2048,aes256gcm16-sha256-modp1024
        rekey_time = 0s
        pools = pool-ipv4
        fragmentation = yes
        dpd_delay = 30s
        send_cert=always
        unique = never
        local {
            id = vpn.example.com
            certs = fullchain.pem
        }
        remote {
            auth = eap-mschapv2
            eap_id = %any
        }
        children {
            ikev2-eap-mschapv2 {
                local_ts = 0.0.0.0/0
                rekey_time = 0s
                dpd_action = clear
                esp_proposals = aes256-sha256-sha1
            }
        }
    }
}

pools {
    pool-ipv4 {
        addrs = 10.1.1.0/24
        dns = 1.1.1.1, 8.8.8.8
    }
}

secrets {
    eap-User1 {
        id = username1
        secret = "password1"
    }
}
Save the file by pressing Ctrl + X and confirm with Y.
For IPv4 and IPv6 tunneling, modify the following values:
local_ts = 0.0.0.0/0,::/0
...
addrs = 10.1.1.0/24,2a00:1450:400c:c05::/112
dns = 8.8.8.8,2001:4860:4860::8888
Disable the OpenSSL plugin to prevent authentication failures on Rocky Linux 9:
$ sudo sed -i "s/load = yes/load = no/" /etc/strongswan/strongswan.d/charon/openssl.conf
Enable and start the strongSwan service:
$ sudo systemctl enable strongswan
$ sudo systemctl start strongswan
Step 4 – Connecting via Windows
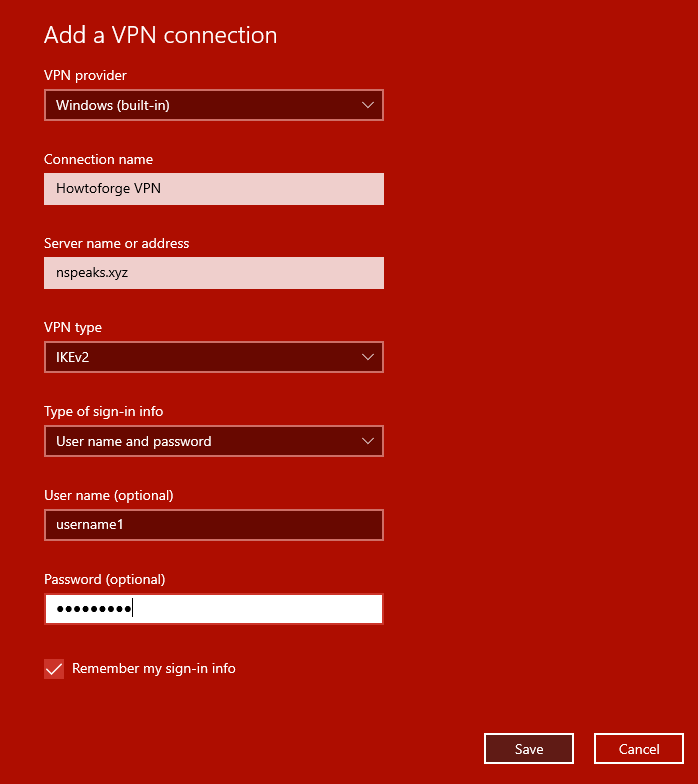
Navigate to Settings > Network and Internet > VPN. Click Add a VPN connection.
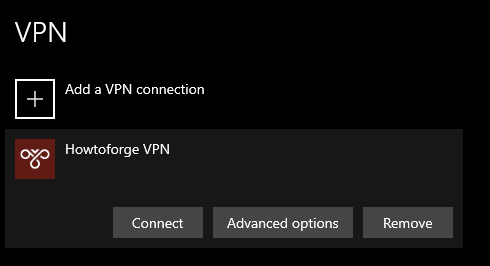
After saving, select your VPN and click Connect.
Step 5 – Connecting via macOS
Access System Preferences > Network, then click the plus (+) to add a service.
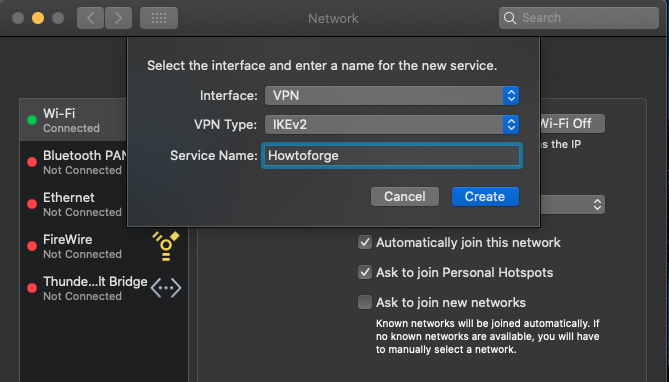
Set VPN as the Interface, IKEv2 as the VPN Type, name your service, and proceed by clicking Create.
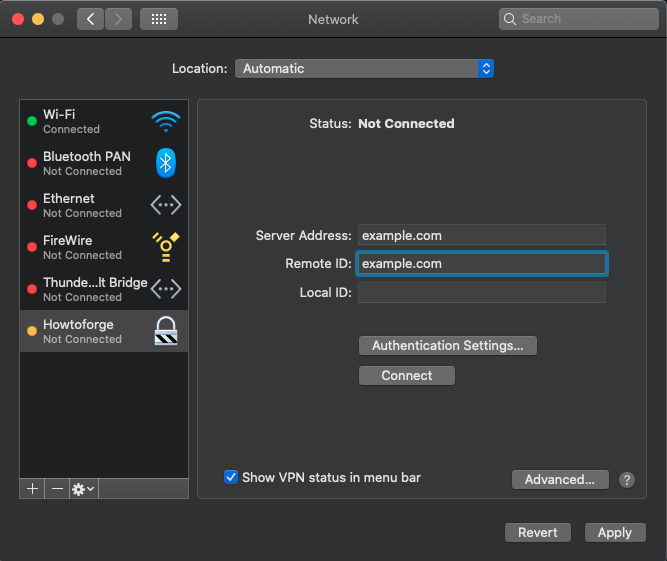
Enter the server address as both the Server Address and Remote ID without populating Local ID. Adjust authentication settings and apply changes.
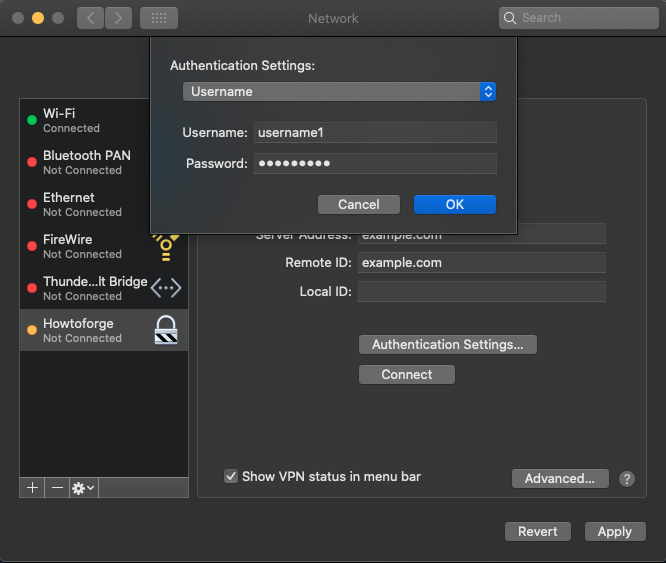
Connect using the newly created VPN settings and a convenient menu bar shortcut will be generated for future use.
![]()
Step 6 – Connecting via Android
Go to Android Settings > Network and Internet > VPN. Click the plus (+) to add a new VPN profile.
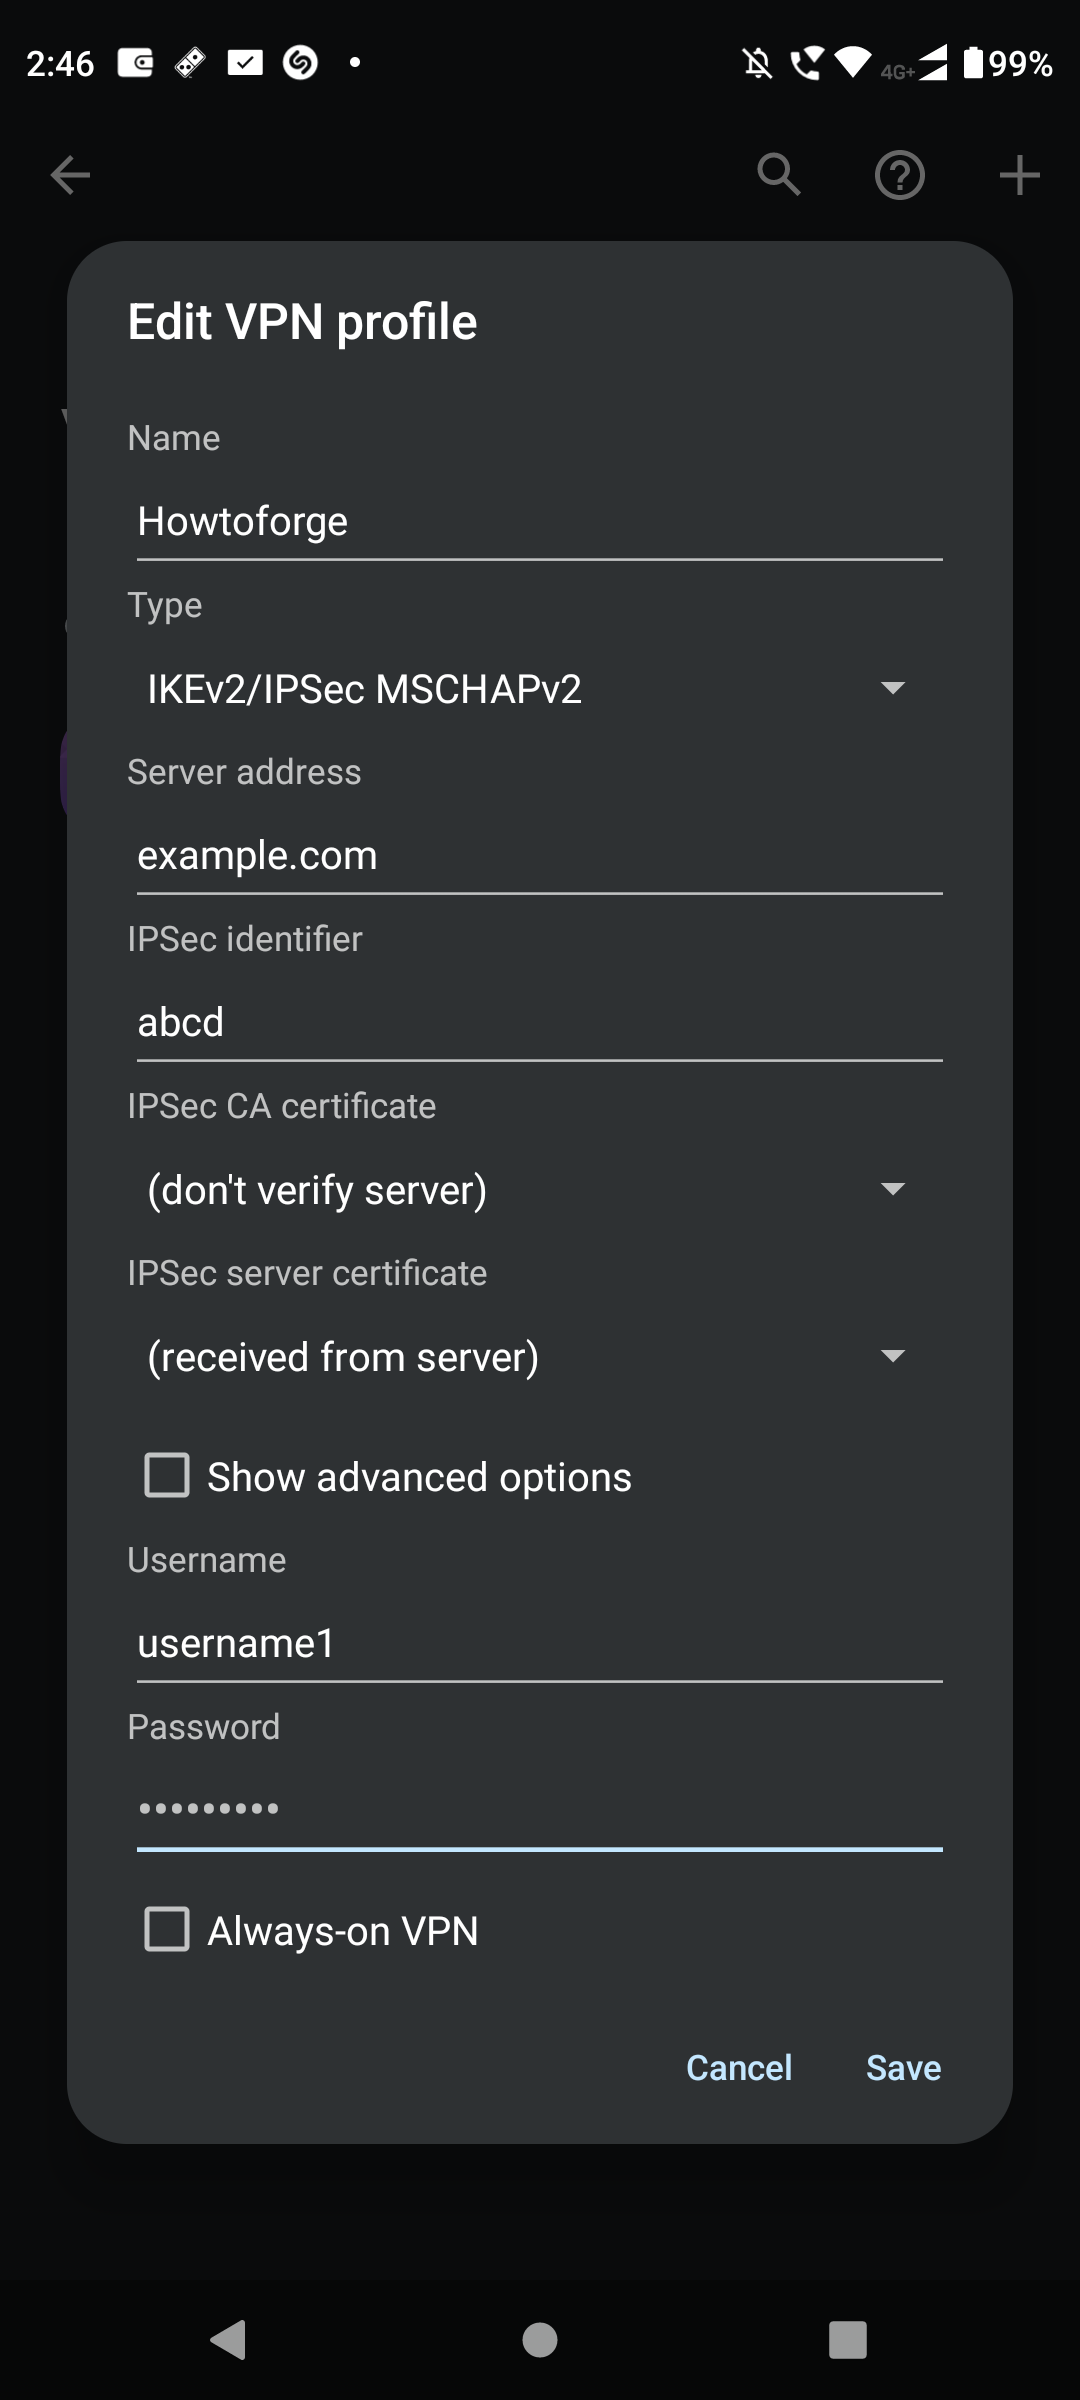
Assign a name to your connection, select IKEv2/IPSec MSCHAPv2, and input the relevant credentials. Tap Save, then select your VPN to connect.
Step 7 – Connecting via iOS
Access iOS Settings > General > VPN. Add a configuration and choose IKEv2.
Provide a descriptive name, set your domain as Server and Remote ID, and include authentication details. Save and activate the VPN connection.
Conclusion
You’ve successfully configured an IKEv2 VPN server with strongSwan on Rocky Linux 9, utilizing Let’s Encrypt SSL certificates. With a variety of clients now able to connect, any queries or comments can be directed below.
FAQs
- Why use IKEv2 over OpenVPN or Wireguard?
IKEv2 offers mobility and reconnection advantages, making it preferable for mobile users who frequently switch networks. - What is EAP-MSCHAPv2?
EAP-MSCHAPv2 is an authentication protocol used in VPNs. It’s built on Microsoft’s implementation of the Challenge-Handshake Authentication Protocol (CHAP). - How do renewals for Let’s Encrypt certificates work?
Certbot automates this process. As demonstrated, running `certbot renew` enables you to test if the configuration will renew certificates properly. - Is it possible to tunnel IPv6 traffic with this setup?
Yes, by configuring an IPv6 address pool within your strongSwan setup, you can support both IPv4 and IPv6 traffic tunneling. - Can I add more users to this VPN configuration?
Certainly, multiple users can be configured by adding their details in the strongSwan configuration file under the `secrets` section.
