Riak is a robust distributed NoSQL database known for its high availability, fault tolerance, operational simplicity, and scalability. Written in Erlang, Riak is a part of the ‘Basho’ product suite, which includes Riak KV (Key-value), Riak TS (optimized for IoT/Time Series), and Riak CS (Riak Cloud Storage).
This tutorial will guide you through installing and configuring the Riak KV NoSQL database on a CentOS 7 server, where we will set up a Riak KV cluster with three CentOS servers.
Prerequisites
- Three CentOS 7 Servers with the following IPs:
- riak01: 10.1.1.10
- riak02: 10.1.1.11
- riak03: 10.1.1.12
- Root privileges on all servers
Overview
- Install Riak KV on CentOS 7
- Configure Riak KV
- Set up a Riak KV Cluster
- Testing the Cluster
Step 1 – Install Riak KV on CentOS 7
We begin by installing Riak KV on all three CentOS servers. Execute the following commands on each server.
Add the package cloud repository by running:
curl -s https://packagecloud.io/install/repositories/basho/riak/script.rpm.sh | sudo bash
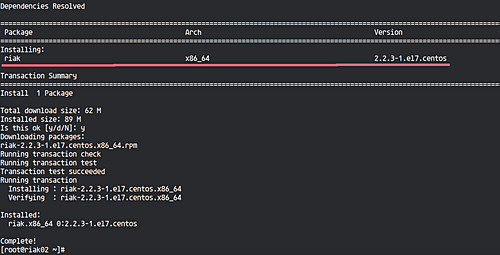
Next, install the Riak KV package using yum:
sudo yum install riak-2.2.3-1.el7.centos.x86_64
Allow the installation process to complete.
Step 2 – Basic Riak KV Configuration
We will configure the Riak KV settings for our cluster. Adjust the open files limit first by editing /etc/security/limits.conf:
vim /etc/security/limits.conf
Append the following lines:
riak soft nofile 65536
riak hard nofile 200000
Change into the /etc/riak directory and edit the riak.conf file:
cd /etc/riak/
vim riak.conf
Modify the default nodename to match your server’s IP:
nodename = riak@10.1.1.10
Uncomment and set the following configuration:
erlang.schedulers.force_wakeup_interval = 500
erlang.schedulers.compaction_of_load = false
ring_size = 64
listener.http.internal = 10.1.1.10:8098
listener.protobuf.internal = 10.1.11.10:8087
Save and exit the file, then test and start the Riak service:
riak chkconfig
riak start
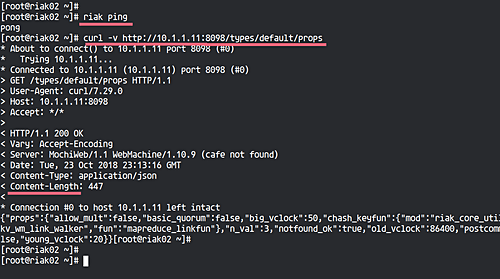
Ensure your riak service is functioning properly:
riak ping
curl -v http://10.1.1.10:8098/types/default/props
The expected output for the riak ping command is ‘pong’, and for the curl command, an HTTP status code ‘200’.
Note: Ensure these configurations are applied on all server nodes.
Step 3 – Set Up Riak KV Cluster
Join the ‘riak02’ and ‘riak03’ nodes to the cluster centered on ‘riak01’.
For the Second Node
Execute the following command on ‘riak02’:
riak-admin cluster join riak@10.1.1.10

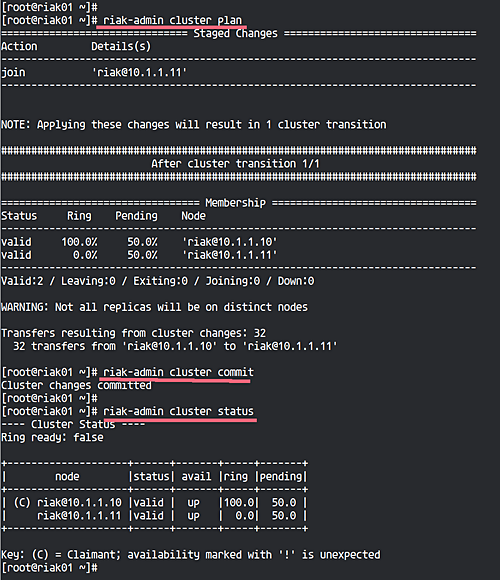
Back on ‘riak01’, run the following:
riak-admin cluster plan
riak-admin cluster commit
Verify ‘riak02’ is part of the cluster:
riak-admin cluster status
For the Third Node
On ‘riak03’, execute:
riak-admin cluster join riak@10.1.1.10

Back on ‘riak01’, use the following commands:
riak-admin cluster plan
riak-admin cluster commit
Confirm that ‘riak02’ and ‘riak03’ are successfully added by running:
riak-admin cluster status
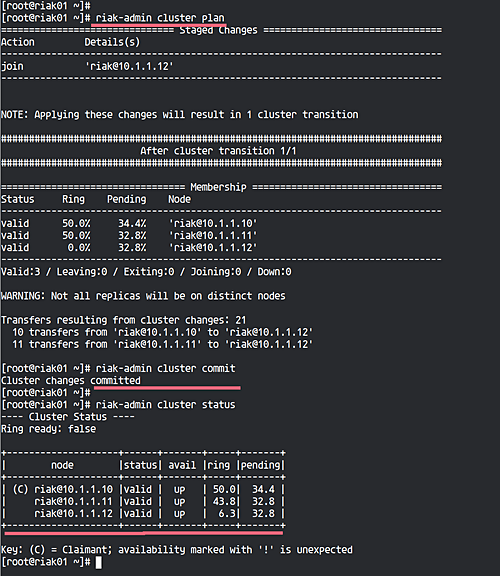
Step 4 – Testing the Cluster
Let’s test our Riak KV cluster by uploading and accessing a data image across all nodes to verify data replication.
On ‘riak01’, download an image with wget:
cd ~/
wget https://vignette.wikia.nocookie.net/nichijou/images/a/a0/113407.jpg -O hakase.jpg
Upload the image to the Riak KV cluster with curl:
curl -XPUT http://10.1.1.10:8098/riak/images/hakase.jpg -H "Content-type: image/jpg" --data-binary @hakase.jpg

Verify the image on other nodes:
For ‘riak02’:
http://10.1.1.11:8098/riak/images/hakase.jpg

For ‘riak03’:
http://10.1.1.12:8098/riak/images/hakase.jpg

To delete the image, execute:
curl -XDELETE 'http://10.1.1.10:8098/riak/images/hakase.jpg'
Congratulations! The Riak KV Cluster installation and configuration on CentOS 7 is now complete.
Reference
FAQ
Q: Can Riak KV be installed on versions of CentOS other than 7?
A: The instructions provided are specifically for CentOS 7, but Riak KV can potentially be installed on other versions or distributions with adjustments to the package management and dependencies.
Q: How can I scale up the Riak KV cluster?
A: To scale up, you can simply add more nodes following the same clustering steps. Ensure each node is properly configured and joined to the cluster.
Q: What should I do if I encounter any errors during installation?
A: Check the logs for error information, verify that all dependencies are installed, and ensure that all configurations are correctly set up according to the tutorial.
