Drupal is a robust, open-source, and scalable content management system (CMS) that’s perfect for individuals looking to create and manage various types of websites. Written in PHP and utilizing MySQL/MariaDB for data storage, Drupal offers a vast array of features that can be extended with thousands of add-ons. It supports numerous web servers, such as Apache, Nginx, IIS, and Lighttpd, and databases including MySQL, MariaDB, MongoDB, SQLite, PostgreSQL, and MS SQL Server. With its intuitive and user-friendly web interface, Drupal enables you to design websites effortlessly, without any coding expertise.
This guide details the process of installing Drupal 8 on a CentOS 8 server and securing it with a free SSL certificate from Let’s Encrypt.
Requirements
- A server running CentOS 8.
- A valid domain name pointed to your server IP.
- A root password configured on the server.
Install Nginx, MariaDB, and PHP
Initially, you need to set up a LEMP stack on your server by running the following command:
dnf install nginx mariadb-server php php-fpm php-cli php-mbstring php-gd php-xml php-curl php-mysqlnd php-pdo php-json php-opcache -y
Start Nginx, MariaDB, and php-fpm services and enable them to automatically start on boot with these commands:
systemctl start nginx
 systemctl start php-fpm
 systemctl start mariadb
 systemctl enable nginx
 systemctl enable php-fpm
 systemctl enable mariadb
Configure Database
By default, MariaDB is not secure, therefore, it must be secured using the following command:
mysql_secure_installation
Proceed through the prompts as indicated below:
Enter current password for root (enter for none):
 Set root password? [Y/n] Y
 New password:
 Re-enter new password:
 Remove anonymous users? [Y/n] Y
 Disallow root login remotely? [Y/n] Y
 Remove test database and access to it? [Y/n] Y
 Reload privilege tables now? [Y/n] Y
After securing MariaDB, log in to its shell with the following command:
mysql -u root -p
Enter your root password, then set up a database and user for Drupal as follows:
MariaDB [(none)]> CREATE DATABASE drupaldb CHARACTER SET utf8mb4 COLLATE utf8mb4_general_ci;
 MariaDB [(none)]> CREATE USER drupal@localhost IDENTIFIED BY "password";
Grant all privileges to the drupaldb database with this command:
MariaDB [(none)]> GRANT ALL ON drupaldb.* TO drupal@localhost IDENTIFIED BY "password";
Finally, flush privileges and exit the MariaDB shell:
MariaDB [(none)]> FLUSH PRIVILEGES;
 MariaDB [(none)]> EXIT;
Download and Install Drupal
Download the latest version of Drupal from their official website using this command:
wget https://ftp.drupal.org/files/projects/drupal-8.7.10.tar.gz
Extract the download file and move it to the Nginx web root directory as shown:
tar -xvzf drupal-8.7.10.tar.gz
 mv drupal-8.7.10 /var/www/html/drupal
Create directories for site files and configure default settings:
mkdir /var/www/html/drupal/sites/default/files
 cp /var/www/html/drupal/sites/default/default.settings.php /var/www/html/drupal/sites/default/settings.php
Then, adjust the directory ownership to ensure Nginx has the necessary permissions:
chown -R nginx:nginx /var/www/html/drupal/
Configure Nginx for Drupal
First, create a php-fpm configuration file specific to Drupal:
nano /etc/php-fpm.d/drupal.conf
Insert the following configuration:
[drupal]
    user = nginx
    group = nginx
    listen.owner = nginx
    listen.group = nginx
    listen = /run/php-fpm/drupal.sock
    pm = ondemand
    pm.max_children =  50
    pm.process_idle_timeout = 10s
    pm.max_requests = 500
    chdir = /
After saving and closing the file, proceed to create an Nginx virtual host configuration:
nano /etc/nginx/conf.d/drupal.conf
Add these lines to configure the server appropriately:
server {
        listen 80;
        server_name example.com;
        root /var/www/html/drupal;
        access_log /var/log/nginx/example.com.access.log;
        error_log /var/log/nginx/example.com.error.log;
        location = /favicon.ico { log_not_found off; access_log off; }
        location = /robots.txt { allow all; log_not_found off; access_log off; }
        location ~ \..*/.*\.php$ { return 403; }
        location ~ ^/sites/.*/private/ { return 403; }
        location ~ ^/sites/[^/]+/files/.*\.php$ { deny all; }
        location ~ (^|/)\. { return 403; }
        location / { try_files $uri /index.php?$query_string; }
        location @rewrite { rewrite ^/(.*)$ /index.php?q=$1; }
        location ~ /vendor/.*\.php$ { deny all; return 404; }
        location ~ '\.php$|^/update.php' {
            fastcgi_split_path_info ^(.+?\.php)(|/.*)$;
            include fastcgi_params;
            fastcgi_param HTTP_PROXY "";
            fastcgi_param SCRIPT_FILENAME $document_root$fastcgi_script_name;
            fastcgi_param PATH_INFO $fastcgi_path_info;
            fastcgi_param QUERY_STRING $query_string;
            fastcgi_intercept_errors on;
            fastcgi_pass unix:/run/php-fpm/drupal.sock;
        }
        location ~ ^/sites/.*/files/styles/ { try_files $uri @rewrite; }
        location ~ ^(/[a-z\-]+)?/system/files/ { try_files $uri /index.php?$query_string; }
        location ~* \.(js|css|png|jpg|jpeg|gif|ico|svg)$ { try_files $uri @rewrite; expires max; log_not_found off; }
    }
Save, close the file, and restart both php-fpm and Nginx services to apply the changes:
systemctl restart php-fpm
 systemctl restart nginx
Configure SELinux and Firewall
With SELinux enabled on CentOS 8, it’s necessary to configure it to work with Drupal effectively.
Allow Drupal to write to necessary directories with:
semanage fcontext -a -t httpd_sys_rw_content_t "/var/www/html/drupal(/.*)?"
 semanage fcontext -a -t httpd_sys_rw_content_t '/var/www/html/drupal/sites/default/settings.php'
 semanage fcontext -a -t httpd_sys_rw_content_t '/var/www/html/drupal/sites/default/files'
 restorecon -Rv /var/www/html/drupal
 restorecon -v /var/www/html/drupal/sites/default/settings.php
 restorecon -Rv /var/www/html/drupal/sites/default/files
Enable outbound emails with:
setsebool -P httpd_can_sendmail on
Open necessary firewall ports for HTTP and HTTPS traffic:
firewall-cmd --permanent --add-service=http
 firewall-cmd --permanent --add-service=https
 firewall-cmd --reload
Secure Drupal with Let’s Encrypt SSL
Make sure your new Drupal installation is protected by acquiring an SSL certificate from Let’s Encrypt.
Download certbot and set proper permissions:
wget https://dl.eff.org/certbot-auto
mv certbot-auto /usr/local/bin/certbot-auto
chown root /usr/local/bin/certbot-auto
chmod 0755 /usr/local/bin/certbot-auto
Acquire and set up the SSL certificate using:
certbot-auto --nginx -d example.com
The setup will prompt for email input and agreement to terms of service. Follow the prompts accordingly to completion.
Saving debug log to /var/log/letsencrypt/letsencrypt.log
    Plugins selected: Authenticator nginx, Installer nginx
    Enter email address (used for urgent renewal and security notices): [your-email]
    ...
    Please choose whether or not to redirect HTTP traffic to HTTPS, removing HTTP access.
    1: No redirect - Make no further changes to the webserver configuration.
    2: Redirect - Make all requests redirect to secure HTTPS access.
    Select the appropriate number [1-2] then [enter] (press 'c' to cancel): 2
Finalize the process by redirecting all traffic on port 80 to secure SSL access. Upon successful setup, you will receive confirmation in your terminal.
Access your Drupal Website
Launch your web browser and visit https://example.com. You’ll be greeted with the Drupal setup interface, depicted as follows:
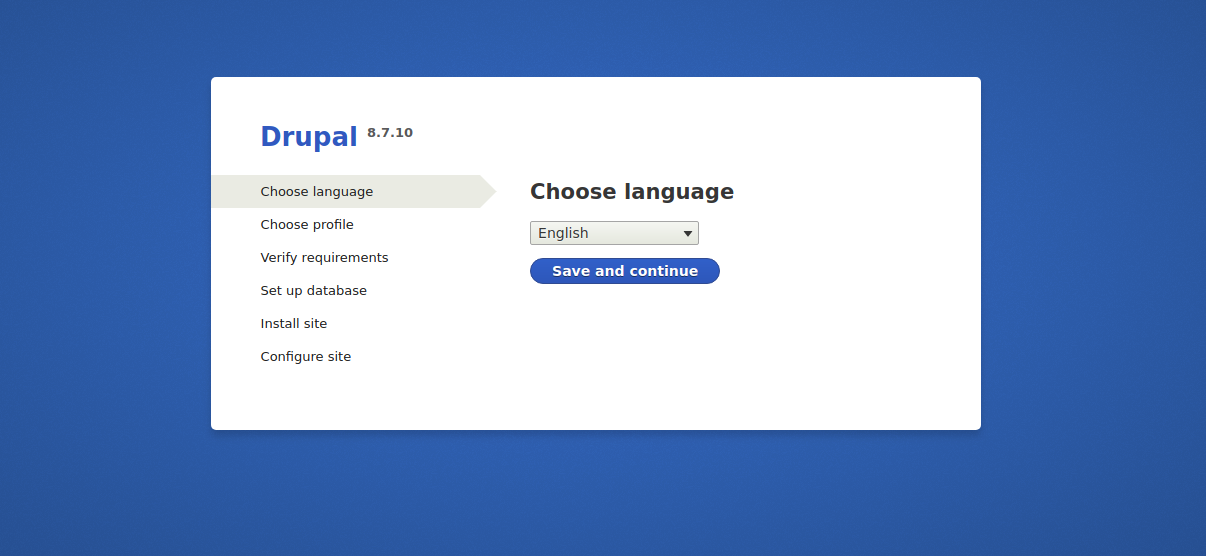
Select your preferred language and click Save and continue to advance. Follow the on-screen instructions, making choices as necessary:
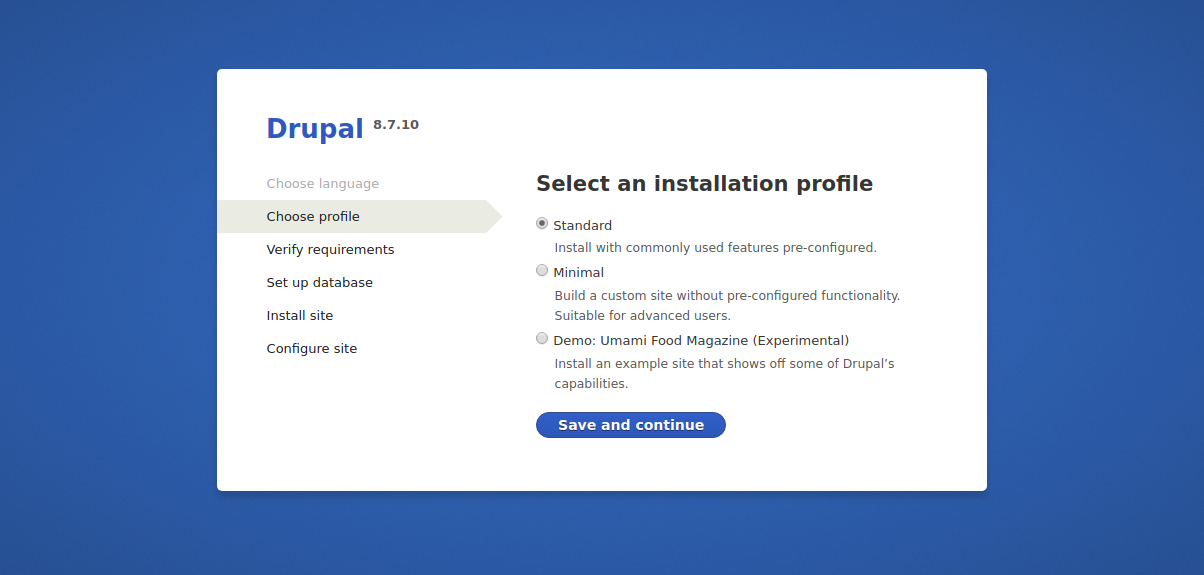
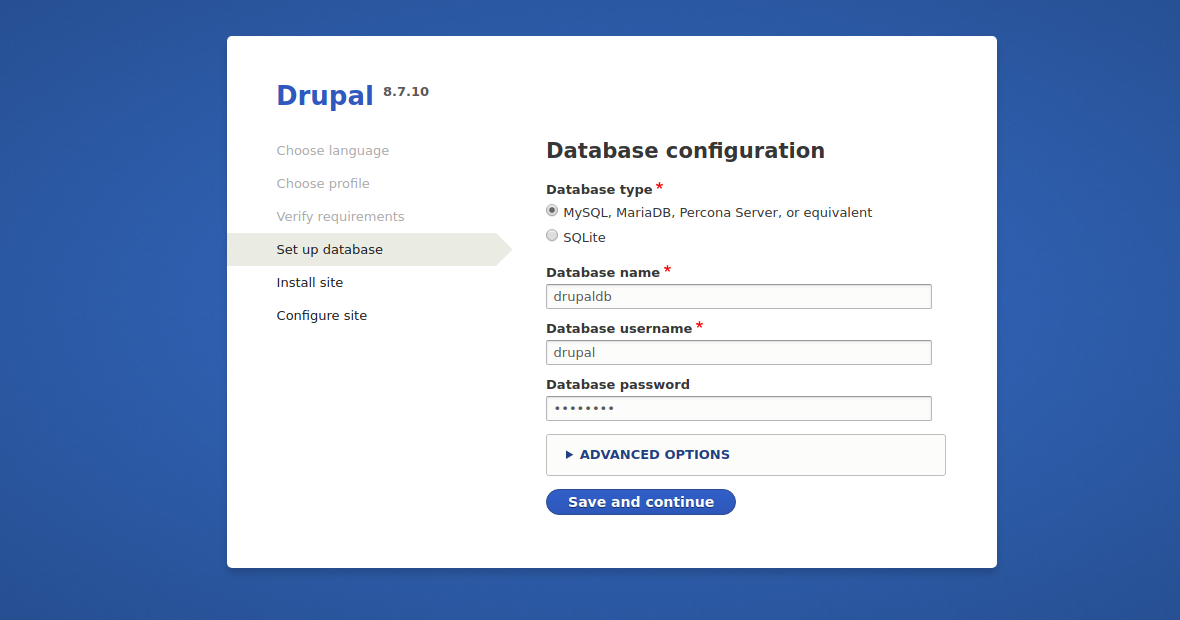
Pick your preferred installation profile, then set up the database using previously created credentials:
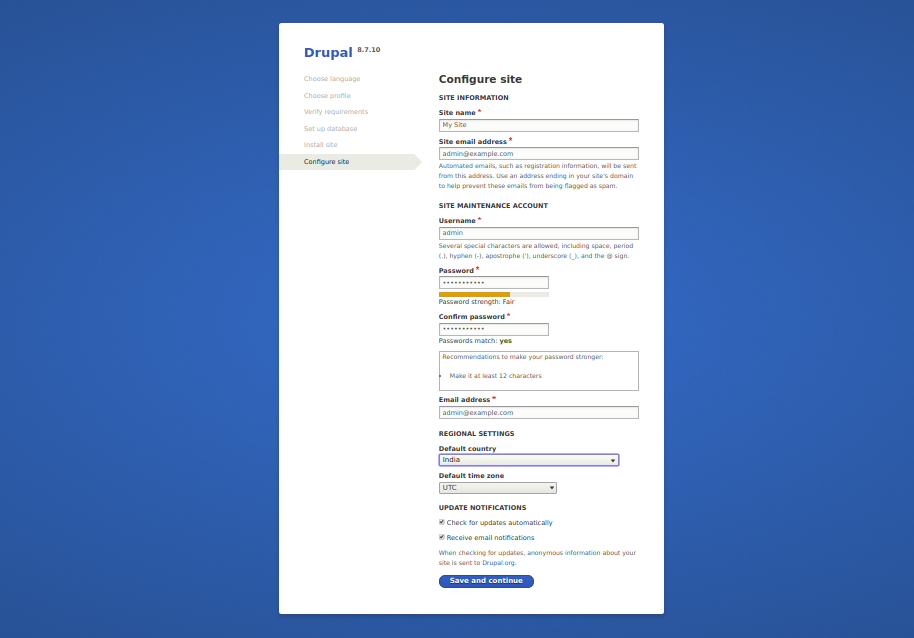
Finish the setup by providing site and admin credentials:
After completing initial configuration, you’ll reach your Drupal admin dashboard:
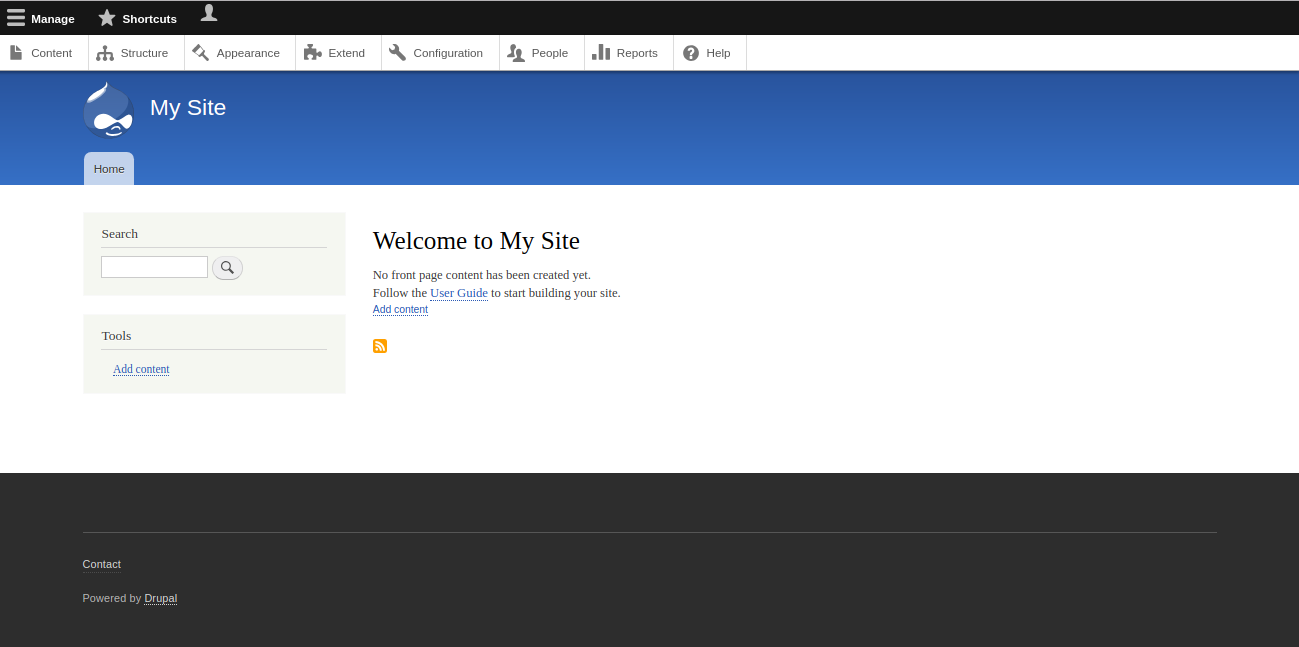
Congratulations! You have successfully installed and secured Drupal on your CentOS 8 server.
FAQs
Do I need to install all listed PHP extensions?
Yes, the listed PHP extensions are essential for Drupal to function correctly, enabling various features and functionalities.
Can I use a database other than MariaDB?
Yes, Drupal supports multiple databases, including PostgreSQL, SQLite, and other standard databases. You may need to adjust configuration settings to switch databases.
Is it mandatory to use Let’s Encrypt SSL?
While using Let’s Encrypt simplifies acquiring SSL certificates at no cost, you can also use other certificate authorities if preferred.
What if my site does not load after SSL configuration?
Ensure Nginx is properly configured with the correct server name and SSL certificate paths. Also, verify that the firewall permits HTTPS traffic.
How do I update my Drupal installation?
Drupal updates are managed through the admin interface, where you can download and install updates via the Update Manager module. Alternatively, update manually by downloading the latest version and replacing core files.
