GitLab is a powerful, free, and open-source DevOps tool that integrates multiple functionalities for software development, security, and operations into one application. Renowned for offering unlimited repositories and unlimited collaborators, GitLab is commonly utilized for hosting Git repositories alongside features such as issue tracking. Comparable to Github and Bitbucket, GitLab enables individuals and teams to share code efficiently with others globally.
GitLab is offered in four major editions:
- GitLab Community Edition – Free, open-source, and self-hosted.
- GitLab Enterprise Edition – Self-hosted with paid, additional features.
- GitLab.com – Free and SaaS-based.
- GitLab.io – A private GitLab instance managed by GitLab Inc.
This guide will walk you through the installation of GitLab CE on Alma Linux 8.
Prerequisites
- A server running Alma Linux 8.
- A valid domain name configured with your server’s IP address.
- A root password set on the server.
Add the GitLab CE Repository
The GitLab package is not included in the default Alma Linux repository. Therefore, it is essential to add the official GitLab repository to your system. Execute the following command to download and add the GitLab repository:
curl https://packages.gitlab.com/install/repositories/gitlab/gitlab-ce/script.rpm.sh | bash
You will receive an output resembling the following:
Complete!
    Generating yum cache for gitlab_gitlab-ce...
    Importing GPG key 0x51312F3F:
    Userid     : "GitLab B.V. (package repository signing key) <packages@gitlab.com>"
    Fingerprint: F640 3F65 44A3 8863 DAA0 B6E0 3F01 618A 5131 2F3F
    From       : https://packages.gitlab.com/gitlab/gitlab-ce/gpgkey
    Importing GPG key 0xF27EAB47:
    Userid     : "GitLab, Inc. <support@gitlab.com>"
    Fingerprint: DBEF 8977 4DDB 9EB3 7D9F C3A0 3CFC F9BA F27E AB47
    From       : https://packages.gitlab.com/gitlab/gitlab-ce/gpgkey/gitlab-gitlab-ce-3D645A26AB9FBD22.pub.gpg
    Generating yum cache for gitlab_gitlab-ce-source...

    The repository is setup! You can now install packages.
To confirm the installation of the repository, utilize the command below:
cat /etc/yum.repos.d/gitlab_gitlab-ce.repo
The command will return the following output:
[gitlab_gitlab-ce]
    name=gitlab_gitlab-ce
    baseurl=https://packages.gitlab.com/gitlab/gitlab-ce/el/8/$basearch
    repo_gpgcheck=1
    gpgcheck=1
    enabled=1
    gpgkey=https://packages.gitlab.com/gitlab/gitlab-ce/gpgkey
           https://packages.gitlab.com/gitlab/gitlab-ce/gpgkey/gitlab-gitlab-ce-3D645A26AB9FBD22.pub.gpg
    sslverify=1
    sslcacert=/etc/pki/tls/certs/ca-bundle.crt
    metadata_expire=300

    [gitlab_gitlab-ce-source]
    name=gitlab_gitlab-ce-source
    baseurl=https://packages.gitlab.com/gitlab/gitlab-ce/el/8/SRPMS
    repo_gpgcheck=1
    gpgcheck=1
    enabled=1
    gpgkey=https://packages.gitlab.com/gitlab/gitlab-ce/gpgkey
           https://packages.gitlab.com/gitlab/gitlab-ce/gpgkey/gitlab-gitlab-ce-3D645A26AB9FBD22.pub.gpg
    sslverify=1
    sslcacert=/etc/pki/tls/certs/ca-bundle.crt
    metadata_expire=300
To list the GitLab repositories, execute the following command:
dnf repolist
The expected output will be:
repo id                                                               repo name
    appstream                                                             Rocky Linux 8 - AppStream
    baseos                                                                Rocky Linux 8 - BaseOS
    extras                                                                Rocky Linux 8 - Extras
    gitlab_gitlab-ce                                                      gitlab_gitlab-ce
    gitlab_gitlab-ce-source                                               gitlab_gitlab-ce-source
Install GitLab CE on Alma Linux 8
Having successfully created the GitLab repository on your system, you can now install GitLab CE using the following command:
dnf install gitlab-ce -y
Upon completing the installation, you will see an output similar to:
It looks like GitLab has not been configured yet; skipping the upgrade script.

           *.                  *.
          ***                 ***
         *****               *****
        .******             *******
        ********            ********
       ,,,,,,,,,***********,,,,,,,,,
      ,,,,,,,,,,,*********,,,,,,,,,,,
      .,,,,,,,,,,,*******,,,,,,,,,,,,
          ,,,,,,,,,*****,,,,,,,,,.
             ,,,,,,,****,,,,,,
                .,,,***,,,,
                    ,*,.


         _______ __  __          __
        / ____(_) /_/ /   ____ _/ /_
       / / __/ / __/ /   / __ `/ __ \
      / /_/ / / /_/ /___/ /_/ / /_/ /
      \____/_/\__/_____/\__,_/_.___/


    Please configure a URL for your GitLab instance by setting `external_url`
    Thank you for installing GitLab!
    GitLab was unable to detect a valid hostname for your instance.
    configuration in /etc/gitlab/gitlab.rb file.
    Then, you can start your GitLab instance by running the following command:
      sudo gitlab-ctl reconfigure

    For a comprehensive list of configuration options please see the Omnibus GitLab readme
    https://gitlab.com/gitlab-org/omnibus-gitlab/blob/master/README.md

    Help us improve the installation experience, let us know how we did with a 1 minute survey:
    https://gitlab.fra1.qualtrics.com/jfe/form/SV_6kVqZANThUQ1bZb?installation=omnibus&release=14-8


      Verifying        : gitlab-ce-14.8.2-ce.0.el8.x86_64                       1/1

    Installed:
      gitlab-ce-14.8.2-ce.0.el8.x86_64

    Complete!
Configure GitLab CE
Next, define your domain name in the GitLab configuration file. Open the file with:
nano /etc/gitlab/gitlab.rb
Modify this line with your domain name:
external_url 'http://gitlab.example.com'
Save, close the file, and proceed to reconfigure GitLab with:
gitlab-ctl reconfigure
After reconfiguration, you will notice output along these lines:
Notes:
    Default admin account has been configured with following details:
    Username: root
    Password: You didn't opt-in to print initial root password to STDOUT.
    Password stored to /etc/gitlab/initial_root_password. This file will be cleaned up in first reconfigure run after 24 hours.

    NOTE: Because these credentials might be present in your log files in plain text, it is highly recommended to reset the password following https://docs.gitlab.com/ee/security/reset_user_password.html#reset-your-root-password.

    gitlab Reconfigured!
Check the GitLab CE status using:
gitlab-ctl status
The resulting output will be:
run: gitaly: (pid 26684) 69s; run: log: (pid 25075) 351s
    run: gitlab-exporter: (pid 26617) 73s; run: log: (pid 25555) 207s
    run: gitlab-kas: (pid 26585) 75s; run: log: (pid 25339) 334s
    run: gitlab-workhorse: (pid 26595) 74s; run: log: (pid 25472) 229s
    run: grafana: (pid 26665) 70s; run: log: (pid 26315) 110s
    run: logrotate: (pid 25000) 364s; run: log: (pid 25008) 363s
    run: nginx: (pid 25488) 226s; run: log: (pid 25499) 222s
    run: node-exporter: (pid 26603) 74s; run: log: (pid 25541) 213s
    run: postgres-exporter: (pid 26659) 70s; run: log: (pid 25891) 168s
    run: postgresql: (pid 25207) 341s; run: log: (pid 25218) 340s
    run: prometheus: (pid 26631) 72s; run: log: (pid 25629) 194s
    run: puma: (pid 25406) 249s; run: log: (pid 25417) 246s
    run: redis: (pid 25039) 358s; run: log: (pid 25047) 357s
    run: redis-exporter: (pid 26620) 73s; run: log: (pid 25575) 201s
    run: sidekiq: (pid 25423) 243s; run: log: (pid 25435) 239s
To stop GitLab, use:
gitlab-ctl stop
To start GitLab again, use:
gitlab-ctl start
Configure Firewall
Allow HTTP service through the firewall using:
firewall-cmd --permanent --add-service=http
Reload the firewall to apply changes:
systemctl reload firewalld
Access GitLab CE
Retrieve the GitLab root password with:
cat /etc/gitlab/initial_root_password
You’ll see an output similar to:
# WARNING: This value is valid only under the following conditions
    #          1. If provided manually (either via `GITLAB_ROOT_PASSWORD` environment variable or via `gitlab_rails['initial_root_password']` setting in `gitlab.rb`, it was supplied before the database was seeded for the first time (usually, the first reconfigure run).
    #          2. The password hasn't been manually changed, either via the UI or via command line.
    #
    #          If the password shown here doesn't work, reset the admin password as detailed here: https://docs.gitlab.com/ee/security/reset_user_password.html#reset-your-root-password.

    Password: XIlQ4/J7oQ49ZdNuGZto3f5vEJGHZJSTRSIuYL9z0/k=

    # NOTE: This file will be automatically deleted in the first reconfigure after 24 hours.
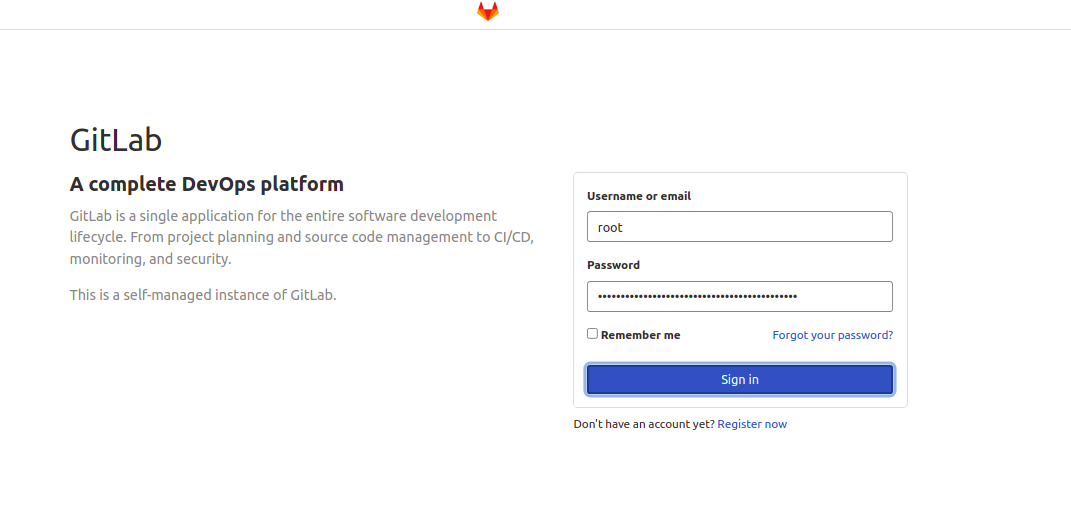
Navigate to the GitLab web interface through http://gitlab.example.com. You’ll be directed to the login page:

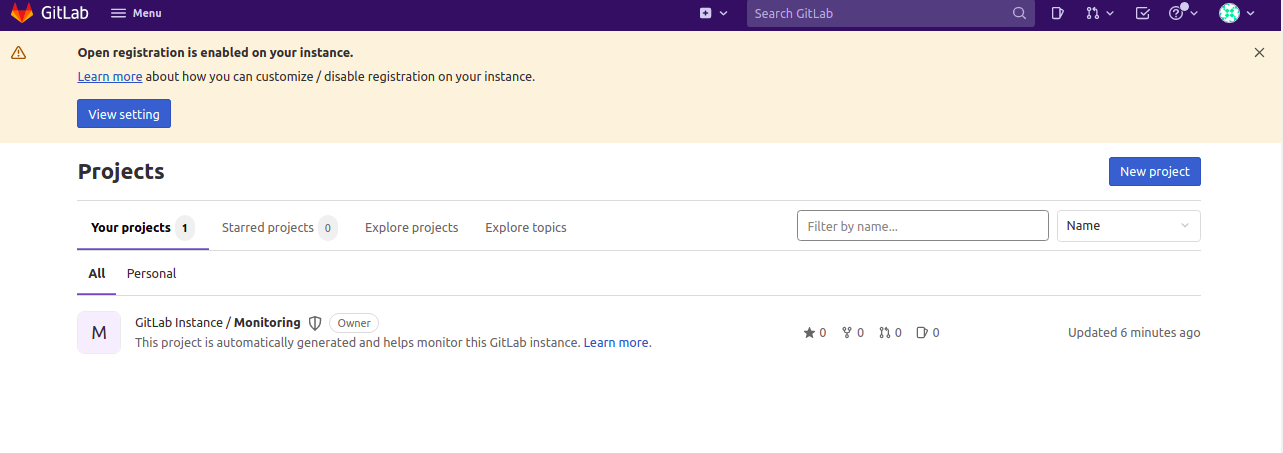
Enter your root username and password, then click Sign in. You should see the following GitLab interface:

Configure GitLab Backup
GitLab includes an option to back up your instance. Create a backup by running:
gitlab-rake gitlab:backup:create
After the backup completes, you will see:
2022-03-11 11:13:11 +0000 -- done
    2022-03-11 11:13:11 +0000 -- Dumping uploads ...
    2022-03-11 11:13:11 +0000 -- done
    2022-03-11 11:13:11 +0000 -- Dumping builds ...
    2022-03-11 11:13:11 +0000 -- done
    2022-03-11 11:13:11 +0000 -- Dumping artifacts ...
    2022-03-11 11:13:11 +0000 -- done
    2022-03-11 11:13:11 +0000 -- Dumping pages ...
    2022-03-11 11:13:11 +0000 -- done
    2022-03-11 11:13:11 +0000 -- Dumping lfs objects ...
    2022-03-11 11:13:11 +0000 -- done
    2022-03-11 11:13:11 +0000 -- Dumping terraform states ...
    2022-03-11 11:13:11 +0000 -- done
    2022-03-11 11:13:11 +0000 -- Dumping container registry images ...
    2022-03-11 11:13:11 +0000 -- [DISABLED]
    2022-03-11 11:13:11 +0000 -- Dumping packages ...
    2022-03-11 11:13:11 +0000 -- done
    Creating backup archive: 1646997191_2022_03_11_14.8.2_gitlab_backup.tar ...
    Uploading backup archive to remote storage  ... skipped
    Deleting tmp directories ... done
By default, backups are stored at /var/opt/gitlab/backups. You can modify this path in the configuration file /etc/gitlab/gitlab.rb.
Ensure the backup is generated by checking with:
ls /var/opt/gitlab/backups
The output will be:
1646997191_2022_03_11_14.8.2_gitlab_backup.tar
Reset GitLab Root Password
If you’ve forgotten the GitLab admin password, reset it using:
gitlab-rake "gitlab:password:reset"
You will be prompted to set a new password as shown:
Enter username: root
    Enter password:
    Confirm password:
    Password successfully updated for user with username root.
Conclusion
Congratulations, you’ve successfully installed and configured GitLab CE on Alma Linux 8! You are now ready to begin using GitLab in your development activities. If you have any questions or need further assistance, feel free to ask.
FAQs
What is GitLab CE?
GitLab Community Edition (CE) is a free, open-source, self-hosted version of GitLab, which provides powerful DevOps capabilities in one application.
Can I run GitLab on Alma Linux?
Yes, you can run GitLab on Alma Linux by following the installation steps outlined in this guide.
How do I change the default backup location for GitLab?
To change the default backup location, modify the configuration in the /etc/gitlab/gitlab.rb file to specify your desired path.
How can I reset the GitLab admin password?
If the admin password is forgotten, reset it by executing the gitlab-rake “gitlab:password:reset” command and following the prompts.
Do I need to configure a firewall for GitLab?
Yes, it is recommended to configure your system’s firewall to allow access to HTTP services necessary for GitLab functionality.
