ISPConfig is a versatile Hosting Control Panel designed to host websites, manage FTP and SSH access, provide email services, and operate a DNS server. This control panel supports Debian, CentOS, and Ubuntu operating systems. In a separate guide, we have already covered the steps to add a website in ISPConfig. In this guide, we will walk through the steps to add an email domain and account in ISPConfig, configure spam filtering, and provide the necessary login details for email clients such as Thunderbird or Outlook.
Prerequisites
To follow this guide, ensure the following prerequisites are met:
- ISPConfig must be installed on your server, or you must have an admin, client, or reseller login to a server with ISPConfig. If ISPConfig is not installed, refer to the ISPConfig installation guide.
- Ensure a domain points its DNS MX record to your server. For this guide, “example.com” is used as a reference. Replace it with your domain name wherever applicable.
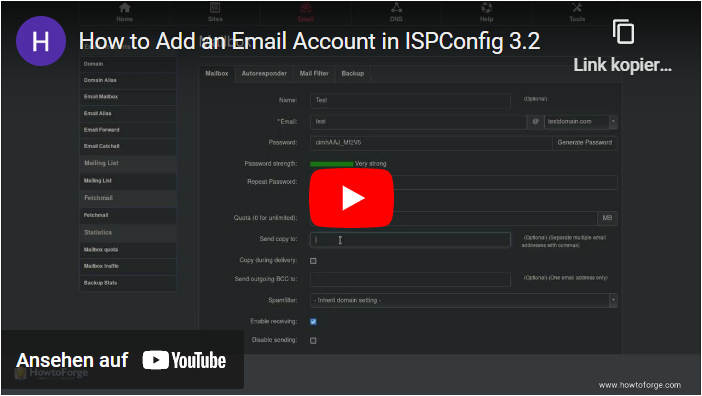
Video Tutorial
A video tutorial of this guide is available on YouTube. Watch it here: https://www.youtube.com/watch?v=1IdDZ62-1PE.
Adding an Email Domain in ISPConfig
To add an email domain, log into ISPConfig and access the email module by selecting ‘Email’ from the top menu.

Click on the green “Add new Domain” button:
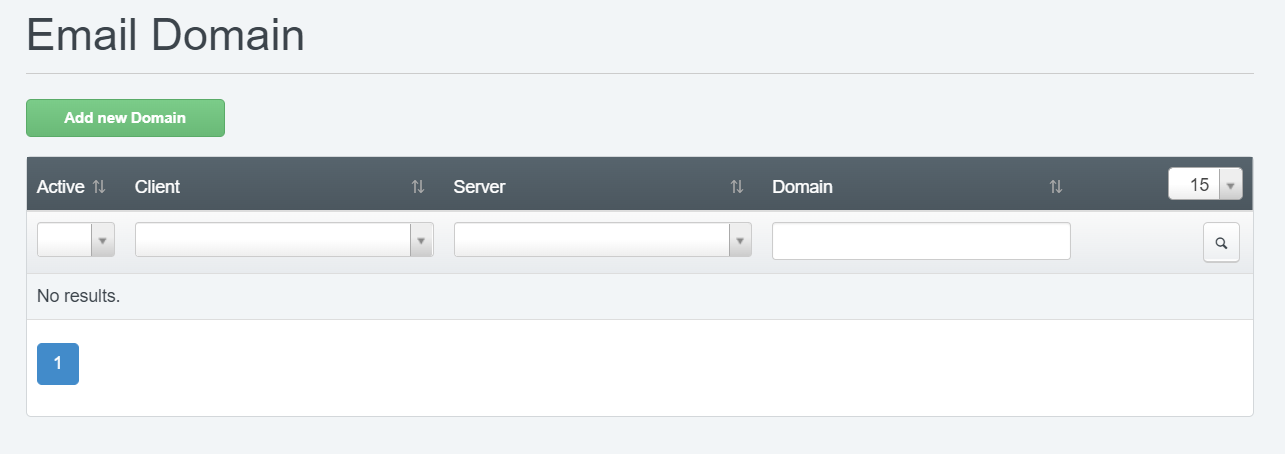
This will open the “Email Domain” form:
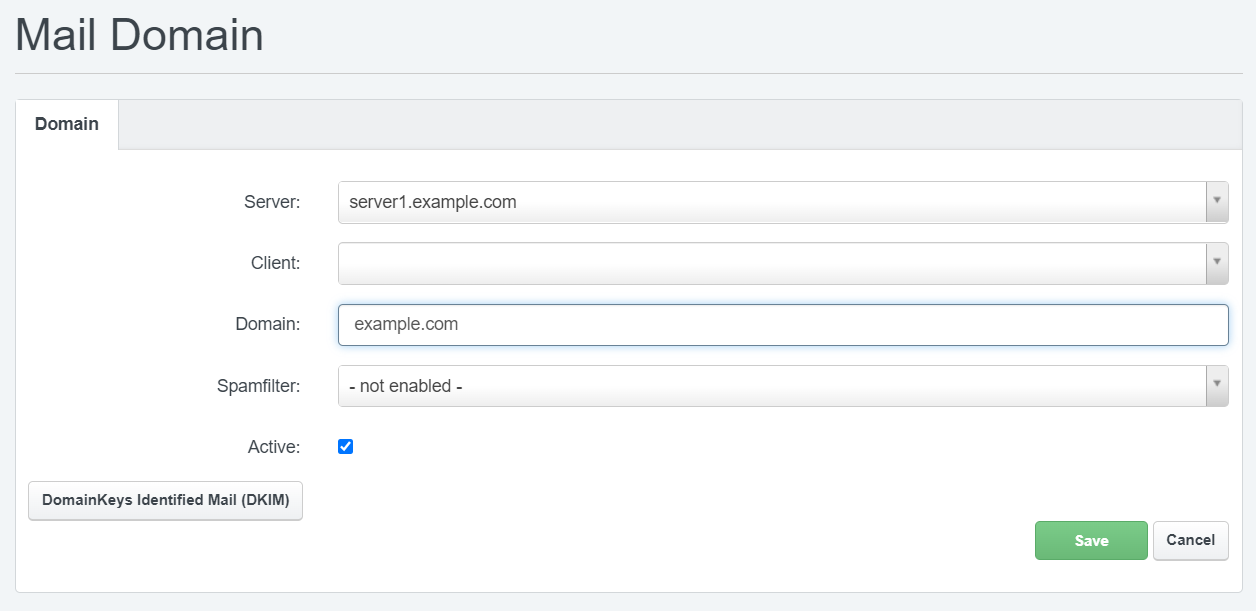
The essential field here is the “Domain” field, where you specify the domain name for email receipt.
Explanation of email fields:
- Server: Select the email server for the domain. This field is visible to administrators only.
- Client: Optionally select a client, visible to administrators and resellers.
- Domain: Enter the email domain name.
- Spamfilter: Choose a domain-wide spam filtering level.
- Active: This must be checked to receive emails.
Click the green save button to add the email domain. Optionally, configure DKIM signing by clicking the DomainKeys Identified Mail (DKIM) button. Configuring DKIM adds a layer of authentication for outgoing emails.
DKIM Email Signing (Optional)
Activating DKIM involves creating a DKIM key and publishing the public part as a DNS DKIM record. The DKIM key includes both private and public parts used for signing and verifying emails.
Within the email domain details, click the DomainKeys Identified Mail (DKIM) button:

Here, configure the DKIM settings:
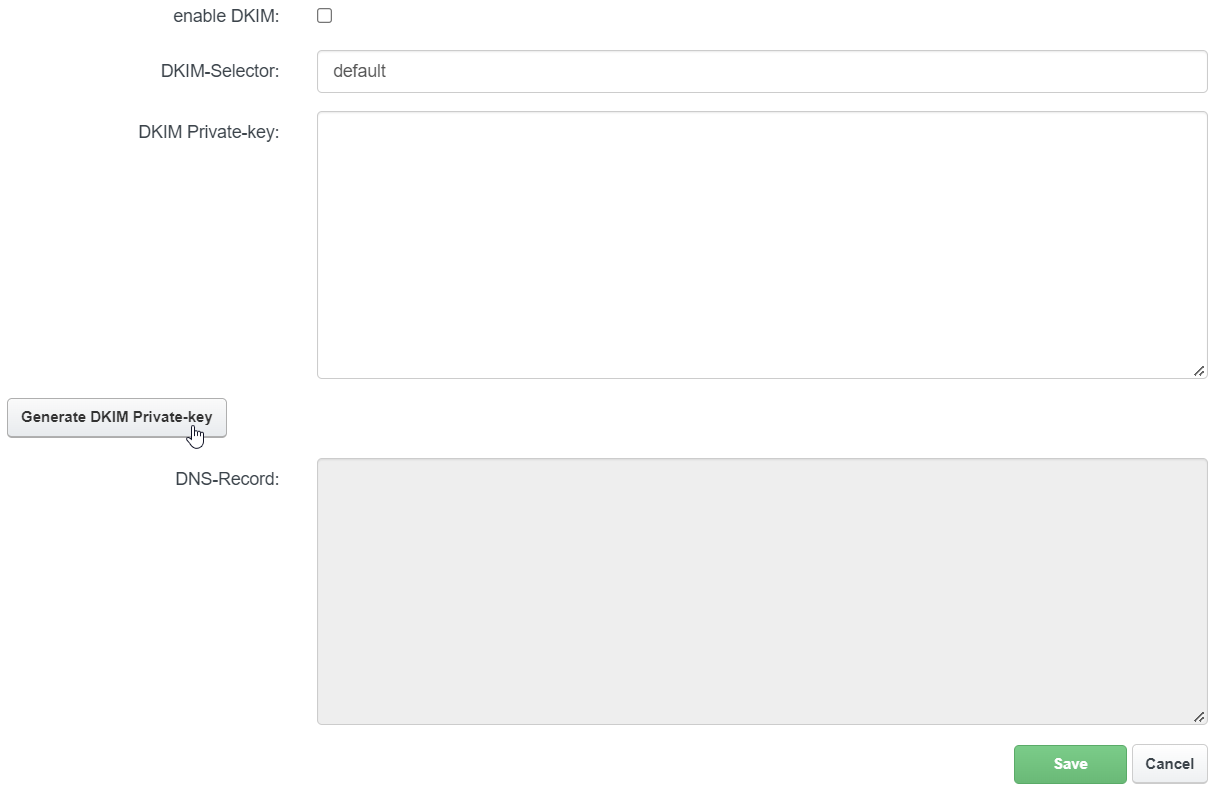
Click Generate DKIM Private-key to create a new key pair:
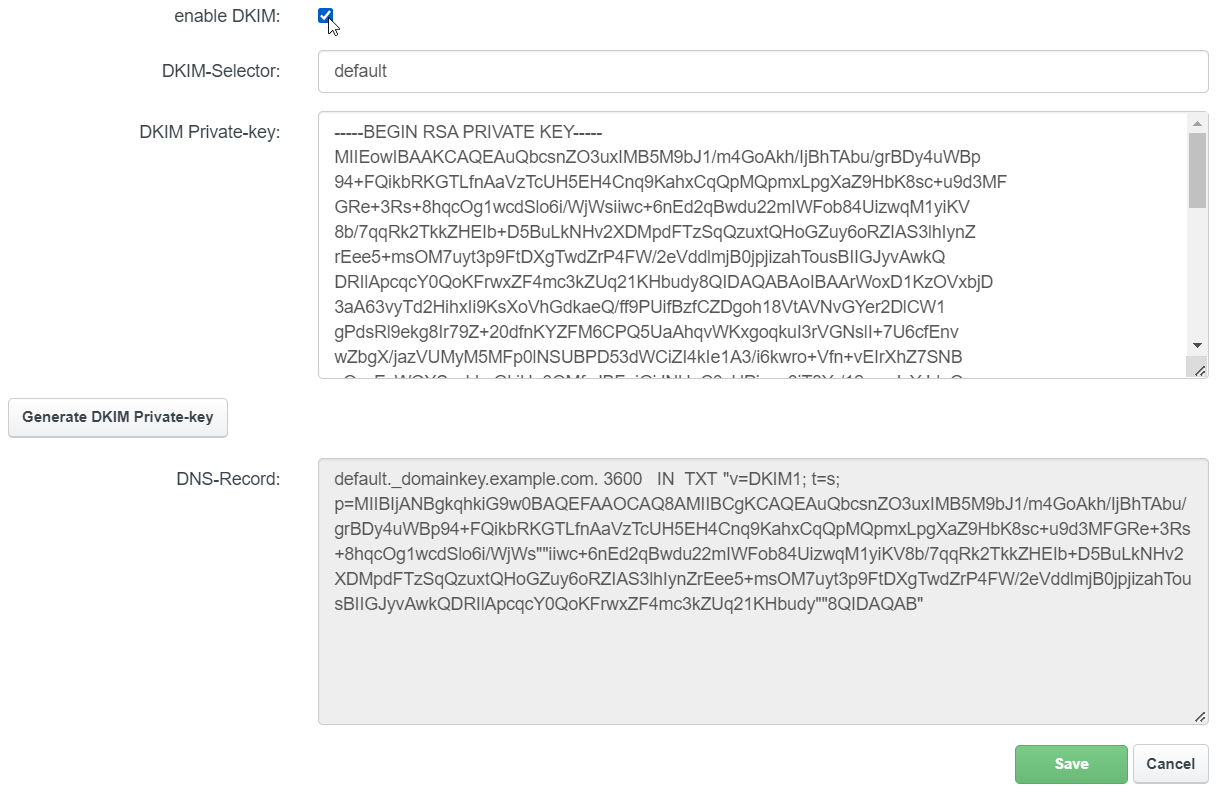
Enable the Enable DKIM checkbox and save. If your ISPConfig server operates as your DNS server, the DKIM key will integrate automatically. For external DNS services, add the key manually to your DNS zone.
Creating a Mailbox in ISPConfig
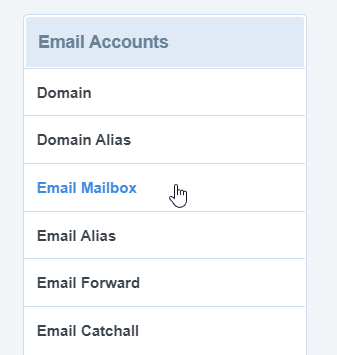
To create a mailbox, click on Email Mailbox in the left menu:
When the list of email mailboxes appears, click the green Add new mailbox button:
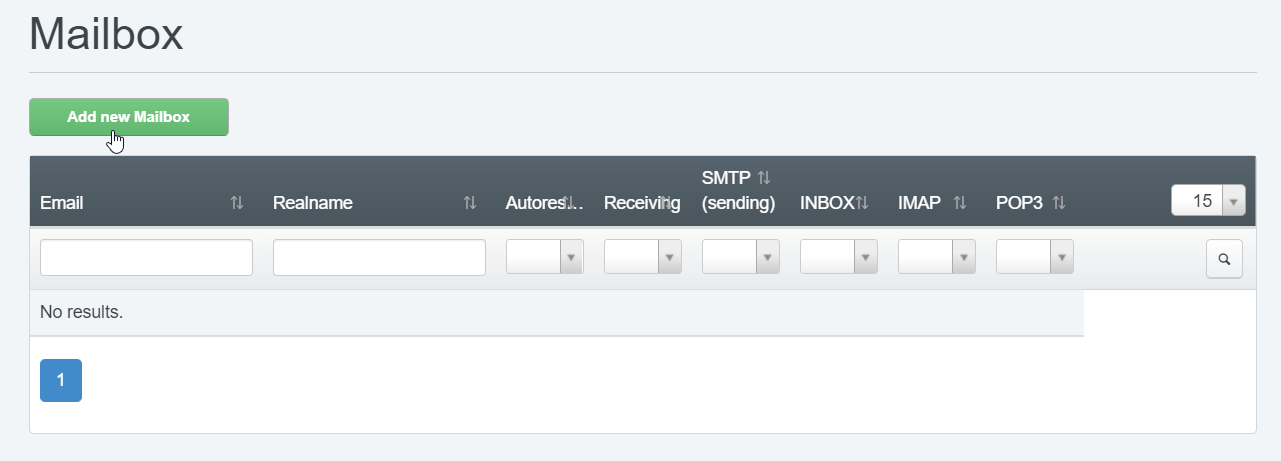
This opens the “Mailbox Details” page:
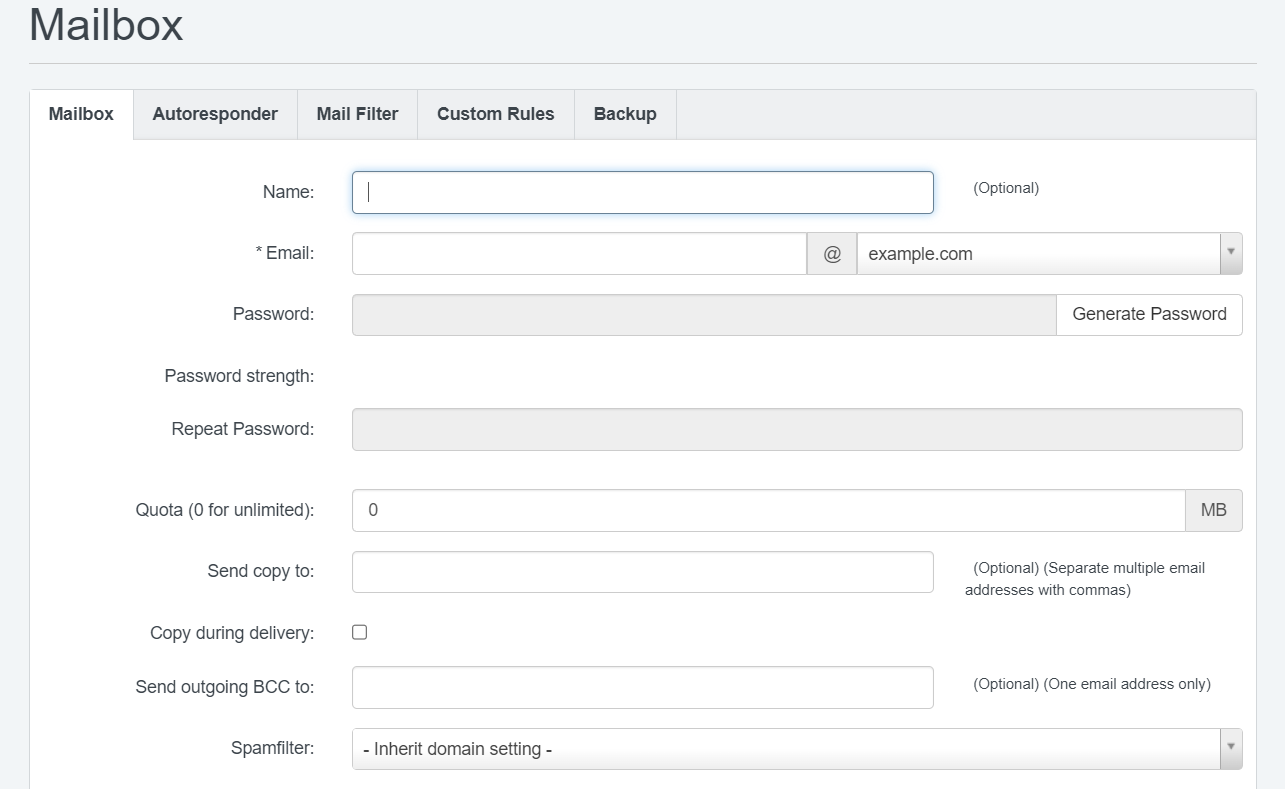
Fill out three essential fields to create a mailbox:
Email: Enter the local part (e.g., ‘john’) and choose the domain.
Password: Enter and repeat the password. All other fields are optional.
Click the green save button. The creation process may take up to a minute, and completion is indicated by the absence of a red dot in the upper menu of the ISPConfig GUI.
Configuring an Email Client
To access your newly created email account, use an email client that supports SMTP and either POP3 or IMAP. Suitable clients include Thunderbird, Outlook, Apple Mail, or a mobile email app.
Email Login Details
- Username: Use the complete email address (e.g., “john@example.com”).
- Password: Use the password set during mailbox creation.
- Server name: Typically the server’s hostname, such as “server.somecompany.tld”. Do not use a subdomain of the email domain to avoid SSL errors.
- Sending (SMTP): Use SMTP (preferably with TLS).
- Receiving (IMAP/POP3): Choose between POP3 (removes emails from the server) or IMAP (keeps emails on the server). Prefer the encrypted versions: POP3S and IMAPS.
Frequently Asked Questions (FAQ)
Can I use this guide for any operating system supported by ISPConfig?
Yes, the steps in this guide can be applied to Debian, CentOS, and Ubuntu as ISPConfig supports these systems.
How can I verify if the DKIM configuration is correct?
After setting up DKIM, you can verify it by sending an email to a service that checks email headers for DKIM signatures or by using command-line tools.
What should I do if I encounter an SSL error?
If you’re seeing SSL errors, ensure you’re using the correct server hostname as indicated in your ISPConfig setup (e.g., “server.somecompany.tld”). Confirm that your SSL certificate covers the domain being used.
Is it necessary to set up spam filtering?
Configuring spam filtering is optional but recommended to prevent unwanted emails. You can adjust these settings based on preference.
What does enabling greylisting do?
Greylisting reduces spam by temporarily rejecting all emails on their first delivery attempt. Authentic senders will try again after a delay, which helps differentiate between legitimate emails and spam.
